
The characters have finally escaped from the maze and returned to complete the mission they originally started-they must infiltrate the tower of King Ovar and end his evil reign. Will the characters discover the secrets of the missing queen and the wizard Zayene's influence? Or will they perish in dragon fire?

The Hidden Oasis-Temple of Thoth brings the characters to a hidden temple of Thoth, god of knowledge, magic, and travel, where they are confronted with a force of invading extra-dimensional locust creatures and the chance to get their hands on an ancient artifact. What band of heroes could resist the challenge?

In the frontier stronghold of Purdey’s Rest, rumors of mysterious lost ruins lead a group of young adventurers into the wilderness — and the forgotten dungeons of a legendary dark mage. Facing off against evil bandits, foul undead, and ravenous monsters, the characters seek the rewards of wealth and fame. But before they can claim either, they must survive all the deadly threats of Hazakor’s lost halls. The Hidden Halls of Hazakor is a starter adventure for fifth edition fantasy roleplaying, written with a special focus on young, beginning Gamemasters of ages twelve and up. In a friendly and straightforward fashion, this adventure explores some of the ways a good fantasy RPG dungeon crawl can be put together. It offers advice on how to just let things happen during a game session, and how to not be overwhelmed by all the directions in which an adventure can go. It talks about how to bring nonplayer characters to life, how to have fun running monsters, and how to challenge the other players and their characters alike. The Hidden Halls of Hazakor is for any player who’s ready to sit in the GM’s chair for the first time — and who is ready to learn some of the tricks and techniques that help all GMs run great games. The PDF download also includes untagged maps for Purdey's Rest and the Hidden Halls of Hazakor dungeon, making it easy to run the adventure in a virtual tabletop setup. These maps are missing the number key and any features that should initially be known only to the GM (including traps and secret doors). The publisher's website offers free pregenerated characters for the adventure, but they are not included in the adventure. The website also has a free GM Guide as well. Insane Angel Studios
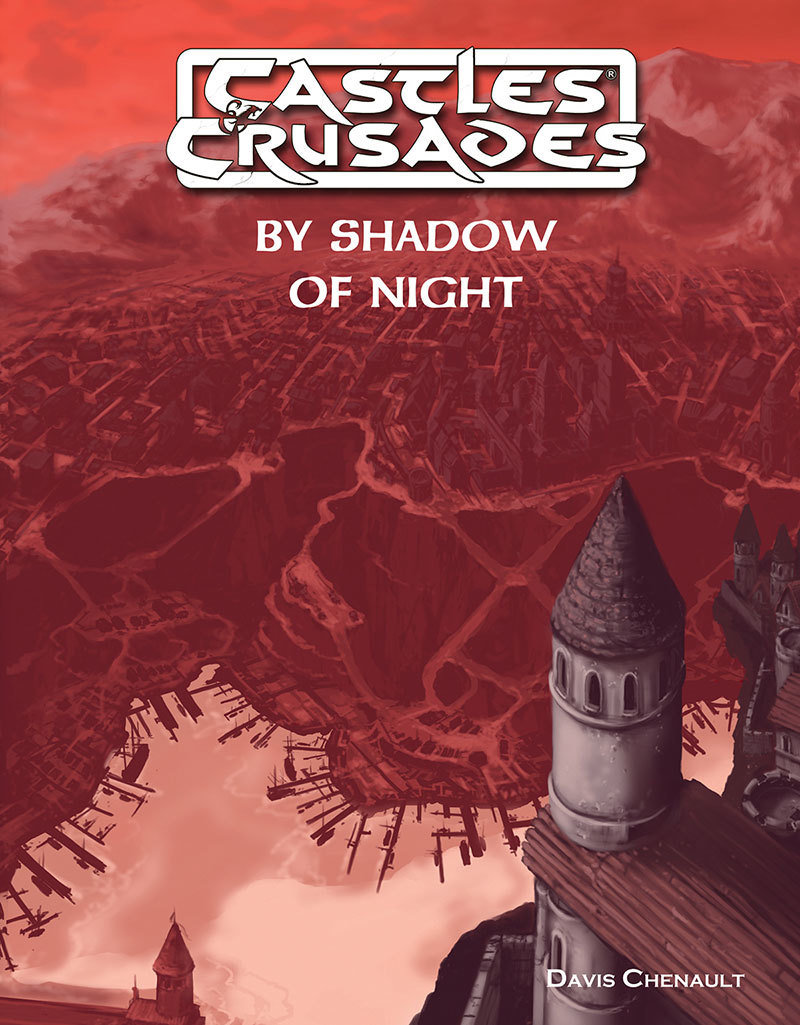
The City of Bergholt lies upon the southern shores of the Interzae. Her crumbling walls and ancient cobbled streets are little more than a backwater, controlled by powerful merchants and thieves. In these darkened streets and twisted alleys people claw their way to the top through violence and guile. In Bergholt, the fear lingers in every shadow. In By Shadow of Night you’ll find a complete detailed description of Bergholt, a rich cast of NPCs who all have their own plots and plans, over 20 encounter areas, including a small dungeon and a large fold-out map of the city. All this setting material comes to life in the dark and deadly adventure, also included within, that is By Shadow of Night. By Shadow of Night picks up after the Death in the Treklant series, available from Troll Lord Games, though it can be a stand-alone adventure if desired.

An elder warlock from the goblinoid swamp village of Urzin has been kidnapped by soldiers of the Dwendallion Empire. Now the machinations of an evil imperial inquisitor might unleash an evil that could threaten the garrison at Fort Venture and the goblinoids of Urzin alike.

God of Ore is a 3rd-level adventure that takes the characters from the quiet, mountainside town of Miners’ Refuge into the heart of the Stoneheart Mountains in pursuit of a failed pilgrimage to discover a phony religious relic deep inside legendary Mithral Mountain. The dark, twisting tunnels that bore into the fabled mountain soon reveal that some mysteries are not what they first appear to be.

The Legend of the Black Monastery Two centuries have passed since the terrible events associated with the hideous cult known as the Black Brotherhood. Only scholars and story-tellers remember now how the kingdom was nearly laid to waste and the Black Monastery rose to grandeur and fell into haunted ruins. The Brothers first appeared as an order of benevolent priests and humble monks in black robes who followed a creed of kindness to the poor and service to the kingdom. Their rules called for humility and self denial. Other religious orders had no quarrel with their theology or their behavior. Their ranks grew as many commoners and nobles were drawn to the order by its good reputation. The first headquarters for the order was a campsite, located in a forest near the edge of the realm. The Brothers said that their poverty and dedication to service allowed them no resources for more grand accommodations. Members of the Black Brotherhood built chapels in caves or constructed small temples on common land near villages. They said that these rustic shrines allowed them to be near the people they served. Services held by the Brothers at these locations attracted large numbers of common people, who supported the Black Brotherhood with alms. Within 50 years of their first appearance, the Black Brotherhood had a number of larger temples and abbeys around the kingdom. Wealthy patrons endowed them with lands and buildings in order to buy favor and further the work of the Brothers. The lands they gained were slowly expanded as the order’s influence grew. Many merchants willed part of their fortunes to the Black Brotherhood, allowing the order to expand their work even further. The Brothers became bankers, loaning money and becoming partners in trade throughout the kingdom. Within 200 years of their founding, the order was wealthy and influential, with chapters throughout the kingdom and spreading into nearby realms. With their order well-established, the Black Brotherhood received royal permission to build a grand monastery in the hill country north of the kingdom’s center. Their abbot, a cousin of the king, asked for the royal grant of a specific hilltop called the Hill of Mornay. This hill was already crowned by ancient ruins that the monks proposed to clear away. Because it was land not wanted for agriculture, the king was happy to grant the request. He even donated money to build the monastery and encouraged others to contribute. With funds from around the realm, the Brothers completed their new monastery within a decade. It was a grand, sprawling edifice built of black stone and called the Black Monastery. From the very beginning, there were some who said that the Black Brotherhood was not what it seemed. There were always hints of corruption and moral lapses among the Brothers, but no more than any other religious order. There were some who told stories of greed, gluttony and depravity among the monks, but these tales did not weaken the order’s reputation during their early years. All of that changed with the construction of the Black Monastery. Within two decades of the Black Monastery’s completion, locals began to speak of troubling events there. Sometimes, Brothers made strange demands. They began to cheat farmers of their crops. They loaned money at ruinous rates, taking the property of anyone who could not pay. They pressured or even threatened wealthy patrons, extorting money in larger and larger amounts. Everywhere, the Black Brotherhood grew stronger, prouder and more aggressive. And there was more… People began to disappear. The farmers who worked the monastery lands reported that some people who went out at night, or who went off by themselves, did not return. It started with individuals…people without influential families…but soon the terror and loss spread to even to noble households. Some said that the people who disappeared had been taken into the Black Monastery, and the place slowly gained an evil reputation. Tenant farmers began moving away from the region, seeking safety at the loss of their fields. Slowly, even the king began to sense that the night was full of new terrors. Across the kingdom, reports began to come in telling of hauntings and the depredations of monsters. Flocks of dead birds fell from clear skies, onto villages and city streets. Fish died by thousands in their streams. Citizens reported stillborn babies and monstrous births. Crops failed. Fields were full of stunted plants. Crimes of all types grew common as incidents of madness spread everywhere. Word spread that the center of these dark portents was the Black Monastery, where many said the brothers practiced necromancy and human sacrifice. It was feared that the Black Brotherhood no longer worshipped gods of light and had turned to the service of the Dark God. These terrors came to a head when the Black Brotherhood dared to threaten the king himself. Realizing his peril, the king moved to dispossess and disband the Black Brother hood. He ordered their shrines, abbeys and lands seized. He had Brothers arrested for real and imagined crimes. He also ordered investigations into the Black Monastery and the order’s highest ranking members. The Black Brotherhood did not go quietly. Conflict between the order and the crown broke into violence when the Brothers incited their followers to riot across the kingdom. There were disturbances everywhere, including several attempts to assassinate the king by blades and by dark sorcery. It became clear to everyone that the Black Brotherhood was far more than just another religious order. Once knives were drawn, the conflict grew into open war between the crown and the Brothers. The Black Brotherhood had exceeded their grasp. Their followers were crushed in the streets by mounted knights. Brothers were rounded up and arrested. Many of them were executed. Armed supporters of the Black Brotherhood, backed by arcane and divine magic, were defeated and slaughtered. The Brothers were driven back to their final hilltop fortress – the Black Monastery. They were besieged by the king’s army, trapped and waiting for the king’s forces to break in and end the war. The final assault on the Black Monastery ended in victory and disaster. The king’s army took the hilltop, driving the last of the black-robed monks into the monastery itself. The soldiers were met by more than just men. There were monsters and fiends defending the monastery. There was a terrible slaughter on both sides. In many places the dead rose up to fight again. The battle continued from afternoon into night, lit by flames and magical energy. The Black Monastery was never actually taken. The king’s forces drove the last of their foul enemies back inside the monastery gates. Battering rams and war machines were hauled up the hill to crush their way inside. But before the king’s men could take the final stronghold, the Black Brotherhood immolated themselves in magical fire. Green flames roared up from the monastery, engulfing many of the king’s men as well. As survivors watched, the Black Monastery burned away, stones, gates, towers and all. There was a lurid green flare that lit the countryside. There was a scream of torment from a thousand human voices. There was a roar of falling masonry and splitting wood. Smoke and dust obscured the hilltop. The Black Monastery collapsed in upon itself and disappeared. Only ashes drifted down where the great structure had stood. All that was left of the Black Monastery was its foundations and debris-choked dungeons cut into the stones beneath. The war was over. The Black Brotherhood was destroyed. But the Black Monastery was not gone forever. Over nearly two centuries since its destruction, the Black Monastery has returned from time to time to haunt the Hill of Mornay. Impossible as it seems, there have been at least five incidents in which witnesses have reported finding the Hill of Mornay once again crowned with black walls and slate-roofed towers. In every case, the manifestation of this revenant of the Black Monastery has been accompanied by widespread reports of madness, crime and social unrest in the kingdom. Sometimes, the monastery has appeared only for a night. The last two times, the monastery reappeared atop the hill for as long as three months…each appearance longer than the first. There are tales of adventurers daring to enter the Black Monastery. Some went to look for treasure. Others went to battle whatever evil still lived inside. There are stories of lucky and brave explorers who have survived the horrors, returning with riches from the fabled hordes of the Black Brotherhood. It is enough to drive men mad with greed – enough to lure more each time to dare to enter the Black Monastery.

The last of his line, Baron Paytro NeMoren has left his dark secret sealed for decades in the family's underground vault. Now, years after his death, a group of stalwart heroes has gathered according to the baron's final wishes. At last, the seal will be broken and the secrets of the vault revealed. Can all sins be forgiven? The adventure is designed to kick-off a campaign, as it provides for an interesting way to get the party together. Instead of meeting at a tavern or being recruited by the local militia, each party member starts with a key to the NeMoren's vault, a key that was handed down by a friend or given as a gift for some good deed peformed in the past. The executor of the estate has gathered together all of the key-holders so that they could claim the contents of the vault. The vault can only be opened with all of the keys in unison. The vault is protected by a number of minor traps and tricks, but it also became the final resting place for the Baron's ex-lover, Lisette, and her brothers--all three of whom had attempted to blackmail the Baron. They were buried alive and are now undead. To complicate matters, a young umber hulk made its way to the vault, leaving some crude tunnels that were later exploited by hobgoblins coming from another surface entrance. The party will need to deal with the hobgoblins, the undead, the traps, and possibly the young umber hulk. There is a side-plot of poisoned groundwater in the nearby town that the party can also resolve by clearing out the undead and properly disposing of the putrid corpses leaking into the groundwater from the vault. Produced by Fiery Dragon Productions
:strip_icc()/pic2633965.jpg)
During the Last War, the ancients deployed their war-skiff assault units from elevator platforms that now dot a sector of the wasteland like a ravaged forest of rusted steel stumps. Most of the platforms are buried by the shifting sands or stand as shattered reminders of a war that was once meaningful, but one of these decaying steel stumps still remains partially energized, layered with tunnels below ground, and powered by a unique extra-dimensional reactor core beneath the surface of the planet.

The Amulet of a Demon Prince In a few days, the rising blood moon will reveal the resting-place of the soul amulet of a forgotten demon prince. A dark lord seeks the amulet, and if he finds it ultimate power is within his grasp. Someone must stop him and his diabolical scheme before evil is unleashed! But for the heroes to beat the dark lord to his prize, they must travel through time and conquer demonic foes! A Battle Throughout Time Chaos Rising is a classic dungeon exploration adventure by Jim Collura, it details an ancient and abandoned dwarven citadel where the demon's amulet is hidden and provides unique encounters allowing the players to travel back in time to shape the very future itself! Chaos Rising supports monsters found in the Tome of Horrors. Also available for S&W and 5e.

An adventure in Hyperborea designed for from four to six characters of 7th through 9th level Your party finds itself in the employ of Ragnarr the Sea-Wolf, a jarl of New Vinland and a reaver of old. His daughter, a shield-maiden named Gunnhildr, has been abducted by a brute called Björn Blackbeard. During a desperate search, the Sea-Wolf crossed sails with a former rival, and from the blood-flecked lips of a dying foe, he learnt the location of Blackbeard’s stronghold. Now, deep in the misty fjords of Brigand’s Bay, where cutthroats, pirates, and freebooters thrive, you have been charged with liberating the Sea-Wolf’s daughter. The Sea-Wolf's Daughter takes players into an action-packed realm of adventure: the mythical world of Hyperborea, a sword-and-sorcery campaign setting inspired by the fantastic fiction of Robert E. Howard, H.P. Lovecraft, Clark Ashton Smith, and others. This adventure is designed for Astonishing Swordsmen & Sorcerers of Hyperborea™ (AS&SH™), a role-playing game descended from the original 1974 fantasy wargame and miniatures campaign rules as conceived by E. Gary Gygax and Dave Arneson. Therefore, AS&SH is compatible with most traditional fantasy role-playing games (c. 1974 to 1999) and their modern simulacra, such as OSRIC™ and Swords & Wizardry™.

Ages ago, a religious order known as the Druun practiced rituals from inside sacred oak groves, ceremonial pools, and stone henges. In time, the Church of Law and Order suppressed the Druunic teachings, and the ancient holy sites were lost, forgotten, or converted to other uses. One such former site is located in the capital city of Dolmvay in the center of a small neighborhood known as Whiteoak Square. This neighborhood has recently been experiencing a strange phenomenon: At night, small dancing lights have been seen floating throughout the neighborhood. The residents were afraid of this sorcery at first, however, the lights seem to exude a feeling of peace and contentment, and the locals have grown used to them. How it Started: A few weeks ago, a butcher named Walton Brand was clearing out his cellar when he stumbled upon a secret underground passage that led to an ancient Druun hall. This hall was filled with lost relics, arcane lore, and forgotten treasures of the Druun. Walton told his friends, Loomis the Baker and the chandler Stefan of Walsbury, and the three men began sneaking away from their wives at night to dress in Druun finery and pretend to be men of wealth. A harlot named Red Kirsten was hired to attend them as they drank, feasted, and cavorted in the sacred hall. Unbeknownst to the revelers, the Druun hall still retained some of its magical powers and their merriment awakened the ancient guardian spirits of the grove. These creatures, known as faerlings, are the lights that have been seen dancing throughout the neighborhood. The faerlings were given life by the revelers' glee, and they project that joy and happiness onto the other residents of the neighborhood. This glee, however, is about to turn to horror. . . Oak Grove Whispers is a Labyrinth Lord™ adventure designed for 3-6 characters of 1st-3rd levels (about 10 levels total). The adventure is broken up into three chapters that take place in a small neighborhood located in the capital city of Dolmvay (the Labyrinth Lord is free to substitute any medium- to large-sized city from his own campaign world). Oak Grove Whispers involves a mixture of roleplaying, investigation, and dungeon crawling, so a diverse range of classes is recommended. As the adventure is set in a civilized city, the characters must also be careful their interaction with NPCs does not land them on the wrong side of the law. Published by Small Niche Games
:strip_icc()/pic530586.jpg)
A scenario for a party of 4th-7th level adventurers You've earned quite a reputation as fearless adventurers, the sort who take on anything. But what happens when you come face-to-face with the challenge that bested the greatest adventurer in the whole Kingdom? Can you succeed where Feyr-Panniras failed? Can you find what has turned his friends against the Kingdom? And, more than anything, can you survive against the power of the New Gods?
Irtep’s Dish is an adventure for characters from 6th to 8th level. This adventure requires the skills of a rogue or some other expert at traps, a cleric or character that can heal allies and offer beneficial bonuses to the team, a wizard or other master of the arcane arts, and a fighter to take care of “the heavy lifting.”

Thief's Challenge is primarily a mystery, a story thick with finger-pointing and double-crosses. It takes a thief to catch a thief in this ONE-ON-ONE™ adventure for one player and the DUNGEON MASTER™. A low- to mid-level character will need sharp wits to bag the Gullwing Bandit! TSR 9420

In the eastern desert stands the ancient tomb of Solomon III. Like all tombs, it is full of magical treasure and crawling with deadly creatures. But unlike other tombs, this one is screaming. Years ago, soldiers and wizards went in to silence the screams, and they succeeded, but they never returned. Now Solomon’s tomb is once again screaming out across the dunes, and no one knows why. Solomon’s treasure is still down there, but then, so is whatever is screaming. ADVENTURE TYPE: Small Linear Dungeon DESIGN NOTES: This adventure is intended for characters levels 5 to 7. It includes a desert wilderness area, an oasis, the tomb exterior, the tomb interior, and a cave system below the tomb to explore. Each area contains various NPCs, new monsters, old traps, shiny treasures, and strange magical items. There are many opportunities for (deadly) combat, and a few of them may be inescapable, but it is possible for players to have complex interactions and to experience very different consequences, depending on their choices. INCLUDES: Story hooks, dialogue prompts, creature stat blocks, dungeon overview map, and full-sized battle maps of each dungeon room that can be printed and used right on the table. KEYWORDS: Tomb, ghuul, ghoul, skeleton, ooze, demon, devil, thief, wizard, desert, sabercat, oasis, spider, viper
Ra’s Evil Grin challenges adventurers of at least 11th level who are seeking a powerful magic item—the globe of Arden. If a different item suits your campaign better, another appropriate powerful item can be substituted as the final objective. This dungeon culminates in a battle with Dendorandra, a lesser marilith known as a dark daughter. As a lead-in to this adventure, the GM may use a map from another treasure hoard showing the location of the globe (detailed more fully in “The Legend of the Globe of Arden,” below) or a priestly tome describing Arden, the long-dead avatar of Ra, and the wondrous powers of an unknown artifact called the globe of Arden. Such a tome might mention that the globe emits rays as intense as those of the sun, destroying all they touch. In any event, characters should need to consult with sages and oracles to determine the location and history of the globe and dungeon. A sage could also provide a map to the dungeon’s location, referenced in the “The Legend of the Globe of Arden,” below. We set the dungeon on a small, remote island far across the sea, but you can relocate it to suit your campaign. This dungeon provides numerous puzzles, a few traps, and only two monsters. Those monsters, though few in number, should challenge and threaten even the most combat-hardened party—particularly after the party encounters all the vicious creatures that inhabit the Island of the Globe.

Restore an Abandoned Temple Enter the catacombs near the desecrated Temple of Muir, Goddess of Paladins, and search for the lost tomb of Abysthor. Will your party be able to cleanse the evil that now inhabits these once-sacred halls, and recover the Stone of Tircople? Can your characters survive the traps of an undead sorcerer? Will your players discover the chamber of Living Rock and the secret power it holds? Adventure awaits! Gold and Glory! A fantasy adventure published for the D20 system, The Tomb of Abysthor is the first module in Necromancer Games Dungeon series and can be played as a stand-alone story or in conjunction with The Crucible of Freya and the forthcoming city supplement Bards Gate. What secrets lie hidden in the tomb of Abysthor?
Brambletoe Hall has ever been deep, warm and filled with mirth. Here, the good mayor Willie Brambletoe has long presided over a board of warm mutton, fresh apples, berries, peaches and the like, as well as wondrous breads, warm butter and cool drink. Mayor Willie invites all, inviting may various and sundry folks to sit and eat with him, or to gather about his great hall and make merry, pass the time and exchange news of distant happenings in exotic lands. But something has changed in that noble Halfling's Halls and a Shadow of Evil has taken up abode there. Not many days past, in those deep hours before the dawn, the sounds of merriment changed to cries of despair. A haunting came to the Good man's home and left an air filled with the noise of terror and a foul odor of unrepentant evil. Abandoned now, a shadow has hung over the hall ever since. Foul play or murder, none knew. But the Shadow of Fear has spread, stalking the environs of Newbriar. And the locals now say Newbriar has come at last to know the shallow welcome of the other world. In fear, the folk of Newbriar have called for aid, sending riders forth to find courageous heroes willing to rid the town and its sufferages of the terror of the Shadows of the Halfling Hall.
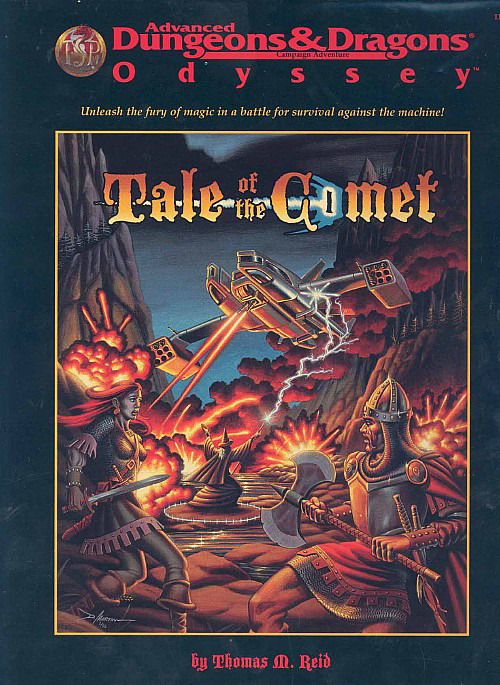
Strange lights in the sky, prophecies of doom, and a threat unlike any other draw the heroes to Aston Point. In this small frontier town, the fate of the world will be decided. If the heroes and their strange new allies defeat the invaders, they must then pass through a portal to another battleground, a metal city on a far-distant world, where aliens fight desperately against death machines that threaten to overwhelm all organic life. So trade in your sword for a blaster rifle, your sling stones for a few high-explosive grenades, and see what happens when you mix magic with high technology. This box contains A 32-page book, The Cast and Props, describing new, high-tech equipment, detailing the battleground of the Rael-Overseer war, and explaining how to mix fantasy and science under the AD&D game system. Two 64-page books, The Tale Begins and Crossing Over, presenting the grand adventure that is the Tale of the Comet. Eight sheets of charts, maps, art, and statistics for the players and the DM. Two posters, one a double-sided map of the regions where the action takes place and the other an illustration of all the technological terrors the heroes will have to face in the course of the adventure. TSR 1143, From 1997