
Bring a party of adventurers to a bustling city, where mysteries and dangers lurk around every turn. Just when you think you have the answers, a whole set of new questions arise. No matter which leads you follow, you will find yourselves... "At the Heart of Corruption" - one-shot murder mystery and fantasy horror adventure.

A dark and grievous peril has befallen the peaceful free-village of Peppermint as the forces of undeath raised by Senerith Wildblossom, ravage the land. An eon ago he was a proud elven healer of great renown in Duskwood Dell, that has been reduced to a mere husk of his former self, becoming a manifestation of pure evil, intent on wreaking havoc and mayhem to all the living – a Zombie Lord. The players are called to assist Peppermint village and investigate the nearby woodcutting hamlet of Snakewood. The hamlet has been destroyed by the despicable zombie lord, and his forces are now underway to attacking Peppermint too! The players will have to travel to Snakewood hamlet as well as what used to be Duskwood Dell, and then make a mad rush against time while also carrying an injured Halfling, to warn and defend the unsuspecting villagers.

About: This encounter was cooked up in the Write your First Encounter workshop by the Storytelling Collective. It CAN be slid in as a side quest in any urban or sub-urban context, or be adapted to add confusion to any rescue mission you are presently running. Synopsis: Through the doorway a young woman shackled to the wall matching the description of Helena can be seen. Though disheveled and looking to be in great discomfort, her beauty is remarkable. But on closer inspection, there are other people here — three identical Helenas! Noble woman Elize Cleron has hired the party to infiltrate the catacombs under the Schaefer Estate and free her twin sister Helena. Helena is being held captive by the Schaefer family, trade rivals rumored to have ties to the underworld. Elize has been unable to free her sister herself because of her identical appearance. Rather than pay an unrealistic ransom, Elize has provided the party with what they need to break her out. This encounter is intended for 3rd level characters.
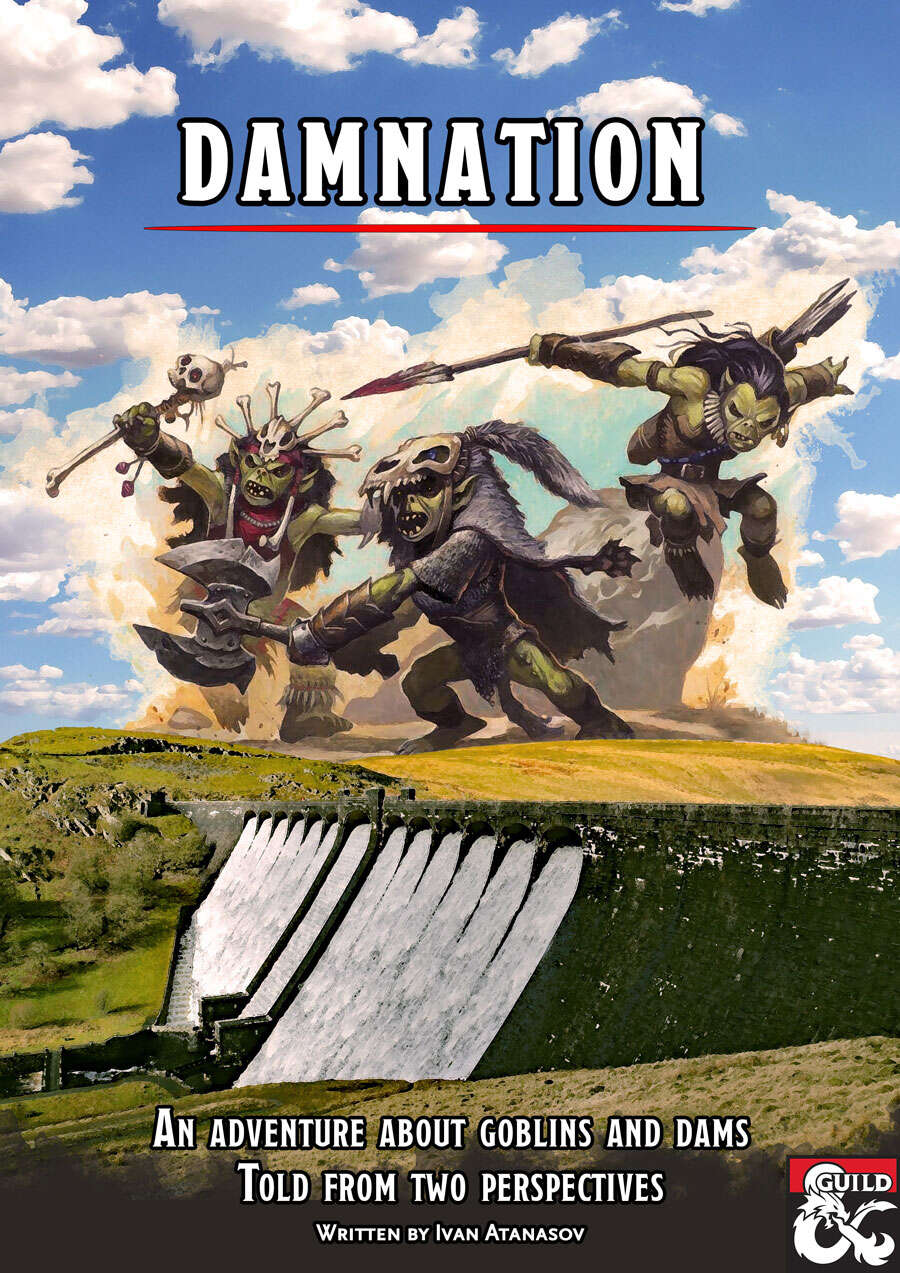
Twenty years ago, the humans built a dam and flooded Gormelin Valley. They drove the Cinderborn goblins away from their land. But now the Cinderborn are back and they want vengeance. The dam must fall and the human towns must drown! Damnation is a set of two parallel adventures that cover the same events, locations and characters. In The Heroes' Tale, the players control a traditional heroic party. They get to attend a wine festival, save a town from a flood, dive to the bottom of a lake, choose between retaliation and negotiation, and face a demon atop the dam as he attempts to demolish it. The Goblins' Tale tells the other side of the story, allowing players to take control of a party of goblins. As the Cinderborn, they must deal with human spies, sneak into a wizard's tower, trigger a catastrophic flood, choose between peace and vengeance, face their own demonic leader, or aid him in breaking the dam. Also included: maps and goblin pregens!

"As you approach, the miners themselves appear from their hidey-holes around the ruined camp. They are haggard and hollow-eyed, barely able to lift the picks and shovels they've clearly been using as weapons. They are unwashed, muddy and stinking - they look little different to the undead that they have been fighting. Shrouded in damp blankets and shivering, they stare at you silently, even disbelievingly. There is only one left among them who appears to have a little iron left in his spine. He tightens his grip on his pick and steps forward. 'Are you here to help?'" Some doors should never be opened... A group of miners uncover a dark secret and find themselves fighting for their lives as the dead walk again. Can the party rescue the survivors and stop an ancient evil before it spreads across the land? Doorway to Darkness is a 3-5 hour adventure for characters of 2nd-3rd level. It features roleplaying, traps and horrifying combat encounters...

A gnomish settlement is plagued by inexplicable earthquakes, the wrath of an Earth Elemental. Can the heroes save the gnomes? Do the greedy gnomes deserve to be saved? "Valanche's Eye" was inspired by a desire to write an adventure which blurs the line of who the bad guy actually is, or indeed whether or not there's a really tangible villain. It takes the "patron hires adventurers to clear dungeon" trope and twists it – the patron turns out to be a pretty rotten bastard, and the monsters in the dungeon are just trying to live their lives. It starts when gnome gem-miners strike the mother lode of emeralds and sapphires, only to find themselves run off their claim. First they accidentally broke through to the Elemental Planes of Earth and Fire, and mephits burst out to annoy them. When they were just about done dealing with the mephits, they disturbed an earth elemental who just wants to be left alone, and emeralds are its favorite snack. The mine boss hires the adventurers to come kill all the elementals. But should they?

It's a horrible time to have a curse! Each wielding a powerful item to a family legacy, your players are a group of young adventurers who barely survive an attack on their order of vampire-hunters by agents of Dracula. After escaping, they discover Dracula has placed a curse upon the land which makes restful sleep difficult outside of hallowed areas. Dracula, "alive" on another plane but dead on this one, must be resurrected so they can kill him, end the curse, and avenge their dead. To accomplish this goal, the player characters must journey through forest, marsh, hill, and underground paths to retrieve relics of Dracula's last life from keeps and fortresses overrun by monsters and the undead. If they can resurrect him, he will be weak and easy to kill... but the adventurers aren't the only ones who want Dracula on the Material Plane, and Dracula is not the only vampire in the world. Gameplay overview This adventure takes the players from 2nd through 9th or 10th level on a milestone basis as they choose where to travel in what order to retrieve what they need. Starting at a happy gathering at the Belmonte Order, which the characters are hereditary members of, the campaign kicks off with a bang as the group retrieves their chosen legacy items, salvages what other gear they can in a race against time and a growing number of foes, and then escapes to begin their quest. In addition to the six main "dungeons," there are two optional regional lairs, traveling vampires, and many foes along the way. Most of the towns in the area have managed to survive, providing points of light at which the party may stop, long rest safely, acquire supplies, and socialize. Travel is hazardous! 5e classes are balanced for resource management across a 5-8 encounter adventuring day. The campaign is designed to have a semi-variable flow of encounters as the party traels around the area. Encounters grow progressively more difficult as time passes and the party spends more time within a region. These are not random encounters rolled on a table, but encounters designed to be unique to each area's geography, combat terrain, and mix of foes. As the party spends more time in a region or revisits it, the encounter difficulty increases. Dracula's curse requires a Constitution saving throw to successfully long rest outside of Hallowed areas (towns). The difficulty scales up over time, forcing the party to balance speed and safety as they try to accomplish their goals without pushing beyond the limits of what they can handle. The game concept, general map layout, and some enemy distributions are loosely inspired by Castlevania II for the NES, one of the forerunners of the "Metroidvania" genre. Dracula's Curse is indeed a game in which the forests are dark and full of monsters, and every night is a horrible one to have a curse. Includes 15 Legacy items, from weapons like whips and swords to a shield, a belt, or a decanter of holy water 60+ enemy statblocks 8 unique dungeons with unique layouts & challenges 5 inhabited towns with multiple named NPCs 100+ travel encounters (expect to use 30-50%) The module is printer-friendly with no artwork and straightforward grid maps for location-based encounters which require one.

Peren, a guildless Devkarin collector of obscure relics has gone missing. The elf of shadow is in deep debt to the Orzhov as well as to the Rakdos performer, Ophyira. To discover Peren’s fate the party must descend into the Undercity of District Four, within the territory of the Golgari Swarm. Continuing the story which began with Off to a Weird Start, and picking up where The Palace of Pain’s Pleasures left off, this adventure is designed to be part of an ongoing campaign. For Dungeon Masters who wish to incorporate The Felicity Triskelion independently from the ongoing story, 10 Adventure Hooks (one for each guild) are included, giving The Felicity Triskelion flexibility for one-shot play or for inclusion in your own campaign!

Provost Nigel Faurious’s continued planar research has uncovered a reference to a sapphire amulet and a map with general directions to the entrance of the Shining Valley deep within the Graywall Mountains. He believes that the Valley is an Irian manifest zone, capable of charging the sapphire and granting unknown healing properties. The Provost has already acquired the sapphire and contracted Lhara, a female shifter within the Clifftop Adventurers’ Guild, to put forth a writ calling for adventurers to follow the map he uncovered and discover if the amulet’s properties are authentic. Unbeknownst to the Provost, a flight of harpies known as the Haunting Song is already living within the Shining Valley after escaping an attack on their lives by two other flights. The characters will have to convince these current inhabitants that they mean no harm. The harpies have already learned the healing properties of the valley and have been raising a new generation without any outside interference, but due to the party’s recent expedition, an oncoming war party has been spotted and the harpies now demand they assist in defending their home.

Old Olga and Young Yvonne is a four- to six-hour adventure for 1st-4th level characters, designed for Dungeons & Dragons 5th Edition, with a village theme, hags and witches, an abducted child to save, some horror, and mysteries to solve! Willow Creek, a remote farming village, is in trouble: livestock is going missing and reappears gutted in the woods, crops fail and fields blight - and now the bastard child of young Yvonne has gone missing as well. What no one in the village knows: Yvonne is a budding witch secretly feuding with Old Olga, an evil hag in the woods - who now demands a human sacrifice from Yvonne in return for her child. Who can sort out this mess, bring back the innocent child, prevent a murder, and return peace and quiet to Willow Creek? This adventure can also be used as a mini-campaign sandbox. With the branching and inter-connecting scenes, locations, and NPCs it provides, combined with the guidance on how to run a "village adventure", the material provided here on more than 60 pages can easily cover up to eight hours of playtime. Included with this adventure are: + an original custom creature, the young witch + 12 original fleshed out NPCs, including personality traits and roleplaying tips + a toolset for creating villager NPCs quickly + 7 hand-drawn maps of important locations + 4 alternative story rewards (depending on how the adventure resolves)

The Hungering Maze A Dungeon Crawl Adventure for Characters Level 5-7 Beneath the silver-rich mining town of Silberflut, a labyrinth lies waiting for those brave (or foolish) enough to enter. Twisting tunnels, shifting walls, and an ever-present sense of doom make The Hungering Maze a deathtrap for any adventurer. Dark magic has corrupted the once natural cave system, turning it into a place where madness takes root and lost souls are consumed by despair. This adventure is designed for four characters of levels 5-7 and will challenge their wit, resolve, and resourcefulness. As they explore the ever-shifting maze, they will encounter cursed creatures, dangerous traps, and dark secrets buried in the maze’s twisted corridors. Adventure Highlights: Maze Shifting Mechanics: A dynamic dungeon that shifts during exploration and combat, challenging players to stay sharp. Unique Monsters: Face off against terrifying new monsters like the Treasure Maw and Lonely Revenant. Multiple Adventure Hooks: Choose between three compelling story hooks to lead your party into the depths of the maze. Strategic Dungeon: Give your players opportunities to manipulate the maze and gain advantages over its traps and denizens. Rich Storytelling: Uncover the tragic fate of those who entered before, and seek a powerful artifact that could be both a blessing and a curse. Do your players have what it takes to escape The Hungering Maze, or will they, too, become part of its dark history?

Characters are ready to make their mark as adventurers and travel to the City of Splendors to begin their careers. Their first job in Waterdeep promises to be a memorable one: a mermaid has hired them to rescue a kidnapped bard and bring justice to the witch who stole her voice.

As winter releases its grip on the region surrounding the town of Phlan, secrets are revealed within Glumpen Swamp. Strange landscapes and sigils have been found beneath the mud, and the wildlife around the swamp has become greatly agitated. At times a spectral figure can be seen in the distance, only to disappear upon approach. Can you discover what is happening in the muck and gloom?
A one-shot adventure of dark fantasy, tragedy, and horror... - 4-6 hour adventure for 3rd - 5th level characters. - 24 pages of an elegant, easy to read PDF. - 4 custom handouts that pair with the adventure. - 2 custom monsters. - 10+ trinkets and magic items for handing out to your players. - 6 gorgeous free battle maps that can be found here: https://www.dmsguild.com/product/434359/Map-Pack-01--The-Sorrows-of-Southsward-Keep

*THIS IS A D&D NEXT/5E PLAYTEST ADVENTURE* Imani, a Turmishan wizard and former adventurer, seeks the aid of heroes to infiltrate Dretchroyaster’s lair and recover the Diamond Staff of Chomylla—the key to powerful magic and wisdom locked away for thousands of years. In addition to his own sagely interest in the lore of lost Uvaeren, Imani recognizes the dangers of such powerful magic falling into evil hands. The dracolich has secured the staff in his lair’s cen- tral chamber, using ancient wards of protection that can be bypassed only by four artifact-idols once belong- ing to a cult of Bhaal. Each group of adventurers enters the dungeon through a different section of the dun- geon—a forgotten temple of Bhaal, a vast underground lake, a troglodyte village, or Dretchroyaster’s vaults. Dretchroyaster’s lair is no simple set of caverns and ancient ruins. It sits atop a source of great power and energy, which the dracolich and his Cult of the Dragon allies hope to use to unlock the secrets of the staff. Only by undertaking a unified assault against Dretchroyas- ter’s lair can the adventurers hope to recover the Diamond Staff and survive the dracolich’s fury. The adventurers must make their way through the lair and recover the Bhaalite idols that will help unlock the Diamond Staff, all the while dealing with the lair’s creatures and avoiding the dracolich as he pur- sues intruders. Entering the Chamber of the Diamond Staff, the heroes must overcome its magical wards and claim the staff before being slain by the dracolich and his servants.

A Level 3 Adventure of Cheese, Chaos, and Theatrical Villainy by Infinite Initiative They mocked him. They laughed at his flat notes. Now… they shall taste the encore. The cheese goblins are back—and this time, they’re organized. After a botched tavern attack interrupts a bard’s performance, the players are swept into a tale of sabotage, dairy-fueled traps, and one goblin-warlord with a flair for the dramatic. Beneath a ruined manor, General Gruyère is preparing his final act—and the party has front-row seats to the madness. Inside the Adventure: A non-linear dungeon full of gooey hazards, goblin antics, and show-stopping setpieces The Floor is Fondue – cross a molten cheese basin or get scorched! Magical traps, secret passages, and oddball puzzles A final boss fight on a goblin stage… with Gruyère mid-monologue Includes new stat blocks and a magical item: Gruyère’s Quill of Cruel Prose This is a chaotic, flavorful one-shot designed to be silly, dangerous, and delightfully theatrical. Part of the Thirsty Tiger Tales series by Infinite Initiative.

𝐍𝐨𝐰 𝐰𝐢𝐭𝐡 𝐚𝐧 𝐢𝐥𝐥𝐮𝐬𝐭𝐫𝐚𝐭𝐢𝐨𝐧 𝐛𝐲 𝐂𝐇𝐑𝐈𝐒 𝐇𝐎𝐋𝐌𝐄𝐒 𝐚𝐧𝐝 𝐚 𝐏𝐑𝐈𝐍𝐓𝐄𝐑-𝐅𝐑𝐈𝐄𝐍𝐃𝐋𝐘 𝐃𝐔𝐍𝐆𝐄𝐎𝐍 𝐌𝐀𝐏! 𝐓𝐇𝐄 𝐑𝐔𝐈𝐍𝐄𝐃 𝐓𝐎𝐖𝐄𝐑 𝐎𝐅 𝐙𝐄𝐍𝐎𝐏𝐔𝐒 is a fifth edition (5E) conversion of the ground-breaking introductory adventure for Dungeons & Dragons that served as a DM aid in the first 𝐃&𝐃 𝐁𝐚𝐬𝐢𝐜 𝐒𝐞𝐭, released by TSR in 1977. This set included a 48-page rulebook covering the first three levels of play, and was skillfully edited by 𝐃𝐫. 𝐉. 𝐄𝐫𝐢𝐜 𝐇𝐨𝐥𝐦𝐞𝐬 from the original 1974 D&D rules written by 𝐆𝐚𝐫𝐲 𝐆𝐲𝐠𝐚𝐱 and 𝐃𝐚𝐯𝐞 𝐀𝐫𝐧𝐞𝐬𝐨𝐧. Holmes advanced the "Sample Dungeon" concept by writing a new thematic dungeon with a strong backstory, creating an adventure that has remained a fan favorite over the decades. Officially, its only title is "Sample Dungeon" but colloquially it goes by various names based on Zenopus, the doomed wizard who built the dungeon under his tower. An adventure for 1st to 2nd level characters; four pregenerated characters are included. Also includes ideas for using it as an adventure site in 𝐆𝐡𝐨𝐬𝐭𝐬 𝐨𝐟 𝐒𝐚𝐥𝐭𝐦𝐚𝐫𝐬𝐡. 𝐍𝐎𝐓𝐄: Using this conversion requires a copy of the original dungeon found in the (1977) Basic D&D rulebook. However, Wizards of the Coast has provided a free pdf of this dungeon since 2008 on their website, see the first page of the pdf for the link. 𝐂𝐎𝐍𝐓𝐄𝐍𝐓𝐒: Introduction, page 2 The Setting, page 3 About the Dungeon, page 4 Dungeon Master's Map, page 5 Areas of the Dungeon, pages 6-13 Appendix A: Further Reading, page 13 Appendix B: Dungeon Factions, page 14 Appendix C: Portown Rumors, pages 15-17 Appendix D: Use with Ghosts of Saltmarsh, pages 18-19 Appendix E: Pre-generated 1st level characters, page 20 𝐈𝐧𝐜𝐥𝐮𝐝𝐞𝐬 𝐭𝐡𝐞 𝐟𝐨𝐥𝐥𝐨𝐰𝐢𝐧𝐠 𝐧𝐞𝐰 𝐦𝐨𝐧𝐬𝐭𝐞𝐫𝐬, 𝐍𝐏𝐂𝐬, 𝐚𝐧𝐝 𝐌𝐚𝐠𝐢𝐜 𝐈𝐭𝐞𝐦𝐬 𝐟𝐨𝐫 𝟓𝐄: Cleaning Cube, Veteran Smuggler, Thaumaturgist, Monstrous Sand Crab, Lemunda, Monstrous Rat, Brazen Head of Zenopus, Verminslayer Longsword, Lesser Wand of Petrification, Scroll of Stone to Flesh The Ruined Tower of Zenopus was featured as part of the "D&D Classics" column in Issue #32 of Dragon+ magazine! Go to 𝐝𝐫𝐚𝐠𝐨𝐧𝐦𝐚𝐠.𝐜𝐨𝐦 or find the link on the Wikipeda page for Dragon magazine. 𝐂𝐑𝐄𝐃𝐈𝐓𝐒: Original Dungeon: J. Eric Holmes Conversion, Added Content & Cartography: Zach Howard Content Review & Editing: Scott McKinley Interior Art: Chris Holmes (“Octopus Attack”, page 9) Cover Art: “Italian Coast Scene with Ruined Tower” by Thomas Cole, 1838. Open Access Image from the National Gallery of Art at images.nga.gov Format: Derived from the “Adventure Template for Open Office/LibreOffice” by Dale Robbins on DMs Guild Dungeon Maps drawn using the application Gridmapper by Alex Schroeder
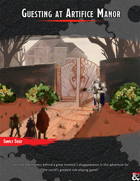
A genius inventor - Anthony Karstark, founder of the "Karstark Inventions", has recently reached a new level of reclusiveness, when he stopped showing up at his company events. A concerned friend and employee, Holly Amberfell, hires an adventuring party, to figure out what happened to him. As adventurers enter and explore the quarantined manor of the great inventor, they have to deal with his mechanic inventions, figure out minor mysteries of past and present, and finally - face Anthony himself, changed by a strange disease into a Slaad-spawn. Guesting at Artifice Manor is an 8-10 hours long mystery and exploration adventure, that should roughly take two playing sessions (or can be squished into one - suggestions on how to do it are inside the book!). It is optimized for 4 to 5 characters of 8-10 levels. This adventure can be used to kick-off a campaign, exploring the origins and history of Slaads.

The Great Trial is a 5e adventure for characters starting at 7th-level and ending at 10th-level. It's a dungeon consisting in the 3 levels, where the first level is the lowermost one and the last is the uppermost one: First level is composed by mean traps, puzzles and combat; Second level is a labyrinth with a construct Minotaur - the Minotal - and an iron wyvern, brand new creatures; The last and uppermost level is actually a jungle-like demi-place filled with dinosaurs in an open world format. Aenor Gleenwith, a powerful elf wizard, wants to make history alongisde Acererak for his Tomb of Horror and Halaster for his Undermountain. So he created his own dungeon. To test its efficiency, he captures adventurers and puts them in the lowermost level, where they need to work together to survive and leave the dangerous place. At the end, Aenor himself greets the group offering them apologies for the harm caused, to fix all damage caused and also rewarding them for the forced help. This module can be run in any setting, campaign, or as a one-shot. It should take around 10 to 14 hours to complete it since it contains 3 Chapters.

In Flight of the Magpies your party is employed by a famous band of sky mercenaries to do a simple job: find out which airship will be transporting a mysterious prisoner. Simple jobs turn into crazy adventures in Eberron though, and this module is no different. Will the party rise (or fly?) to the challenge? Flight of the Magpies is an adventure for a group of players at level 3 that can be played early in an Eberron campaign to start things off with a bang. It was originally devised as a one-shot and can still be played as one, while also being a fun introduction to this game for new players. It will take 3 to 5 hours to complete as a single session, or it can be split in two shorter ones. This adventure is appropriate for beginners as well as experienced players, and contains enough information on the World of Eberron that you don't have to do any "homework" to play it. Statblocks for all the custom enemies you may fight in this adventure are also provided, so that you can start playing without having to own any other book.