
From the log of the Leaping Dolphin: "110th Day: The gale nae stops for twa days. My ship is driven before it and the magus is as helpless as a wee babe. Akito names the winds tai-fun in his heathen tongue...." Drawn by the lure of aventure and riches, a crew of seamen sails valiantly into uncharted seas. In the squalid dens of the port districts, tales hint at a land of untold riches across the waves. But getting there is only the beginning. Across the waters lie Kozakura, a land of mystery and danger. There you will discover new cultures, strange values, secret powers, and fabulous terrors. For Kozakura is a land of Oriental Adventures. Swords of the Daimyo is the first module designed for use with the AD&D Oriental Adventures rule book. Swords of the Daimyo includes descriptions and maps of the island of Kozakura, detailed information and maps of Miyami Province of Kozakura, and a series of adventures to introduce old and new player characters to the intrigue of the Orient. This adventure book set contains three adventures: Over the Waves We Will Go Riders of the Black Temple Lord of the Black Temple TSR 9164

Caverns of the Dorgel Mountains is/was the finale in Filbar series. It features Lexicon Meridius the Ancient Red Dragon and scourge of the Dwarf Lords (F4 & F5). This large adventure represents how I look at the difficulty of taking on the deadliest dragon of the Prime Material plane. Will your party return to the Halls of the Dwarf Lords to help aid them one more time?

A desperate ghost, a plea for help, and a forgotten crypt filled with peril and plunder. This is a tale of past conflicts, where blood magic has left a foul and dire aftermath, and time is of the essence. Maps and illustrations help guide you through rugged wilderness to re-discover a tomb lost to all but its denizens - creatures enslaved by an unholy item or awakened by its looming threat. Published by Roan Studio

Constant attacks have been carried out in the forest region near Holyrock. The small town of Taveiro Village was raided by a group of Goblins that are plundering the agricultural region near the city. There is suspicion that there is a lair of these beings near the village, but so far, no one has been able to find the place. The mayor of the city is hiring adventurers to discover and eliminate this band of Goblins. It offers a big reward, in addition to allowing the booty found with these beings to own the heroes. Are you ready for the challenge? ” Goblins Lair is a “One Shot” style adventure, one that you can play in an afternoon or fit into your larger campaign. This adventure is designed for up to 4 players from level 1 to 3. We recommend using the basic BX books or the old D&D books. Have Fun! Published by Voxelhouse

Kobolds. To some, that name means “a tiny creature that dies easily”. To others, that name invokes fear and dread of a relentless, diabolical nightmare. This adventure introduces you to the latter. If your party is unlucky enough to enter the kobold-infested mountain, they will wish they hadn’t after triggering traps around every corner. And if that doesn’t discourage them, the red dragon surely will.

The player characters investigate recent kidnappings. The trail leads to a slaver operating from Underdark passages below the city. Also available at https://adventureaweek.com/product-category/rise-of-the-drow-ce/

A sinister demon Fledgling trying to become a mighty Nabassu lures the adventuring party to a dungeon with a cruel history. The dark walls of the dungeon holds more terrors than just scary monsters and deadly traps. Will the adventurers figure out that they are nothing more than the next meal before reaching the waiting demon of the dungeon?

Your sleek cloudskate skims across the Skysea. It is midnight. All day long, the glass sea soaked up the scorching desert sunlight. Now, that heat lifts your ship a few inches off the glass and fills its sails. The only sound you hear is the soft swish of the diamond-edged rudder as it cuts a path across the Skysea. One thousand years ago, the wizard Martek knew that you would come to find his Sphere of Power. Now, one of his glowing Star Gems shows you the way. The starlight, reflected in the glass beneath you, flickers peacefully. Suddenly, the Skysea before you bursts up into a thousand shards of splintered glass, showering into the moonlight! A horrible creature is silhouetted against the moon. You strain against the rudder to keep your ship upright. Too late! Your cloudskate tips onto one runner, and then tumbles over, skidding to a stop on the glass. As your companions struggle to right the ship, you turn and face the monster. You must hold the creature back to give them time. Without the ship, none of you can get off the glass before the sun rises in the morning. Martek's prophecy spoke of heroes, tests, and dangers. Are you the heroes? What are the tests? What dangers and riches lie ahead? This adventure can be played by itself, or as the third and final part of the Desert of Desolation series. For character levels 7-9. TSR 9054
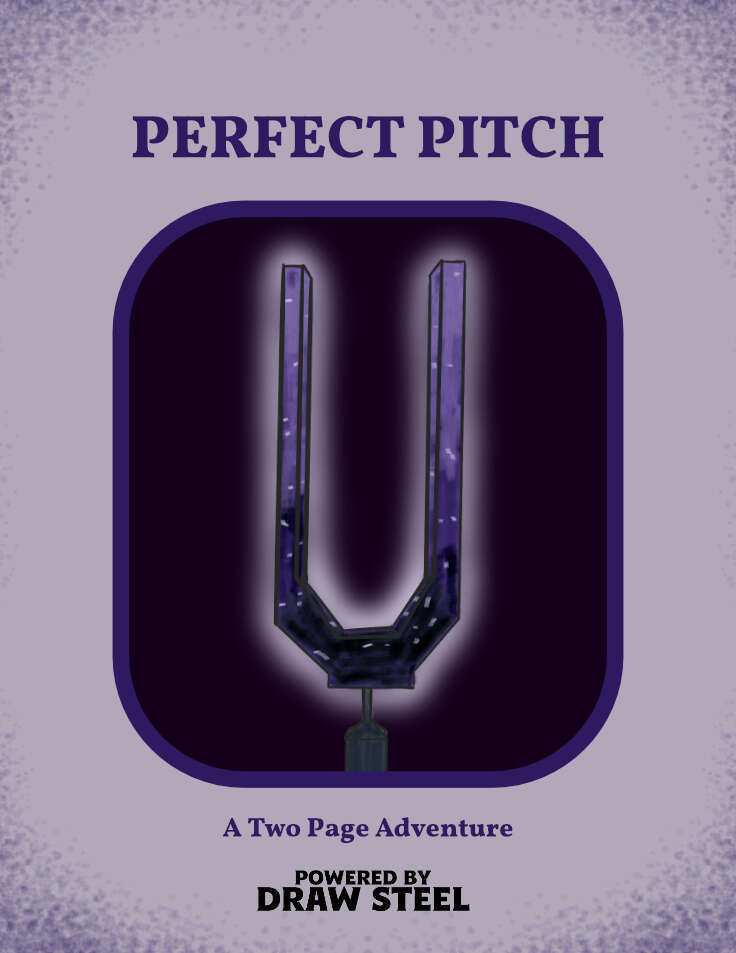
There is something wrong with music. Something fundamental. The notes themselves are drifting apart. What was once beautiful is slowly turning into noise. Perfect pitch is a one shot adventure powered by Draw Steel. Your heroes will venture into the tuning fork keeping all of music in harmony. Inside they will fight infectious worms gnawing away at the heart of music. Do your heroes have what it takes to save harmony across the realm? This adventure includes: - An easy to run two-page one shot - Every stat block you need included
Invasion of Veluna - Level 1 Demons have invaded Veluna, laying waste to Verbobonc and small towns! Survive the siege, and track down their origins. This adventure has inspiration from The Village of Hommlet. Infiltration of Dorakka - Level 2 Rumors of Demonic Invasions have the characters traveling across the lands of Iuz, surviving in the war torn wastelands to reach the Rift and back to infiltrate the capital of the fiendish Empire. This adventure has inspiration from The City of Skulls, with a special optional twist. Scant Rebellion - Level 3 Rumors of demonic forces across the Flanaess are forcing the hand of the Scarlet Brotherhood. Aid or covertly work against the Brotherhood to eliminate or save the Free Onwall Army of Rebellion and create a temporary peace. Assassination - Level 4 The Free Onnwall Army of Rebellion has been weakened. The Scarlet Brotherhood mean to end its threat with the permanent removal of a key leader and funder of the army. Beneath the Gnarled Root - Level 3 Mad demonic cultists wandering listlessly across the Gnarley have been ranting and raving of a secret asylum hidden beneath the gnarled root. Find the dungeon, and learn what secrets it may hold. Quarry of Elemental Chaos - Level 4 The demonic forces near the Gnarley have constructed a massive quarry to tap into the elemental chaos, using its power to locate a magical artifact for a greater evil. Dive into this massive dungeon and end the insanity in an adventure inspired by the Temple of Elemental Evil. Irongate Heist - Level 3 Azure Masks have tracked an important magical relic to be in the possession of a traveling author who has just come home to Irongate to celebrate his newest book launch. During the party, enter his home and steal the artifact while forces work against you. The Bright Desert - Level 4 Rary the Traitor has partnered with the demons to gain information on the Lost Pyramid of Kesh. Within is the legendary Scorpion Crown that would hand the fiends an army of tlincalli. You must race across the desert to reach the pyramid before Rary's forces in this adventure based on Rary the Traitor and Desert of Desolation. Bastion on the Borderlands - Level 5 The bravery of the characters has seen them rewarded with a bastion in Keoland abandoned by the Knights of the Watch due to political pressure. The characters may take a moment to breath, place roots down, or bring order to the nearby chaotic caverns in this adventure inspired by Keep on the Borderlands. The Neverending War - Level 6 Transported to and trapped within the neverending war in the lost city of Rauxes, the characters are tasked with ending the curse upon the city to escape this D&D roguelike adventure. Jungles of Hepmonaland - Level 7 The mirror of gates, an artifact to easily bring groups of people across the planes, has been split. The first piece has been discovered to be deep within the Jungles of Hepmonaland in this adventure inspired by Needle. Across the North - Level 8 Rumors of artifacts in a hidden vault in the northern Flanaess have circulated for decades, but with the keys now showing up, and demons circling, this rumor could be a key to stopping this invasion in this adventure inspired by Five Shall Be One. City of the Lizardking - Level 9 The Silent Ones have maintained a close relationship with a band of Lizardfolk in the Hool Marsh. Their recent silence, following a discovery of another piece of the Mirror of Gates could only mean one thing... They need to be saved in an adventure inspired by Tomb of the Lizardking. Lair of the Kraken - Level 10 The Ladies of Crede had discovered yet another shard of the Mirror of Gates, having it transported to Oakenisle when the shipment was attacked by a kraken. Now the characters must go on a very deep sea adventure to take back what is theirs. The Demonic Rainbow Dungeon - Level 11 Unbeknownst to most, beneath the Free City of Greyhawk is a massive dungeon constructed by a variety of creatures to funnel power for Demogorgon to maintain his charade of an alliance with the Queen of Chaos. Put an end to his scheming in this adventure inspired by Castle Greyhawk. Comes Sail Away - Level 12 The characters partner with the Scarlet Brotherhood to traverse the sea of worlds and enter the City of Glass in the Elemental Plane of Water, trying to gain the Ax of Severance before the Queen of Chaos. This adventure was inspired by The Vortex of Madness and Other Planar Perils. Fly Away With Me- Level 12 Dropped into the middle of Aaqa in the attempt to stop the Queen of Chaos' plan, the characters must naviagte politics and the infinite skies to reach the Ax of Severance before the demons. Through the Fire and the Flames - Level 12 Inspired by Secrets of the Lamp, this is a political-intrigue quest, with characters forced to navigate the politics of the City of Brass, getting a new sultan in power to gain the Ax of Severance before the demons under the Queen of Chaos can seize upon the chaos they wrought. Underground - Level 12 The characters must navigate the shifting labyrinths of the Elemental Plane of Earth to pull off a heist and find the Motherlode before the demons! Portal of the Drow- Level 13 The time has come to enter the Abyss. The nearest - permanent - portal is inside the drow city of Erelhei-Cinlu and is guarded by the son of Demogorgon. As a result, only one action is reasonable: besiege the great city in this adventure inspired by Vault of the Drow. Invasion of the Abyss - Level 14 Upon finding themselves in the Abyss, the characters arrive in the uppermost layer of the Abyss, trudging through 13 layers to reach the home of the Queen of Chaos in this adventure inspired by the Demonweb Pits.
:strip_icc()/pic529222.jpg)
The Black Tower is an adventure designed for use with either the Rolemaster books Arms Law, Claw Law, Spell Law and Character Law; or the Advanced D&D Players Handbook, DMG and Monster Manual 1. Rolemaster parties should consist of 5 to 8 characters, level 1-3. AD&D parties should consist of 5 to 8 characters, level 1-4. The main part of this adventure is written in a form which makes it partially independent of the games system chosen. The details of NPC's, creatures and specific magic items are presented at the end of this episode. This is the first part of the Black Tower adventure, though the tower itself does not appear in this issue. This scenario introduces the characters to the area, and to some of its inhabitants. Characters playing this episode should have both the equipment, and a reason, to enter the tower in the next issue. Magical weapons given in the adventure will have two plusses, one for the twenty-sided dice based ADED system, and one for the percentile dice based ROLEMASTER system. eg. +1/+5 meansa +1 AD&D weaponora +5 ROLEMASTER weapon. This will also apply to magical armour and shields. The ROLEMASTER weapons will be superior, not magical, except where specifically stated.

You have been sent to watch over the destruction of an ancient artifact by your liege, but arrive to find the temple sacked and the item missing. You and the other abassadors must take the famed Pick of Zander across the Kamula Wastelands. There you must track down the agents of evil and, if possible, destroy the artifact...time to earn your hero status!

The small town of Boldon, and its surrounding villages are afraid. Dozens of people are missing, some speculate lost to some nefarious purpose. A broken drunkard tells fantastic tales of an evil temple and the horrible things within. The rare few who know the legends and history of the region are beginning to think the dark times have returned; not seen since the fall of the first age of man. People are beginning to feel the icy fingers of fear closing in. The party becomes aware of these events, and is inspired to investigate. This leads them to a broken man who tells them a story of a lost temple. Has it been rediscovered by men seduced by its forgotten evil? The drunkard’s tale leads to others who might help the party discover more before they face The Lost Temple of Forgotten Evil. Published by Fat Goblin Games

The PCs are hired to escort a merchant boat to Rygar, a new settlement that has sprung up on the banks of a tributary of the Neverwinter River deep in the Neverwinter Woods. The mud of Rygar is much desired by potters for its physical attributes, but it is also desired for a mating ritual by a tribe of lizardfolk. What happens when the lizardfolk show up to roll in the mud? This product now contains Part I: Into the Mud, and Pat II: Out of the Mud. It includes new monsters, a new settlement with brief descriptions of many of the townspeople and buildings, maps, new feats, and new weapons.

A great threat lopes toward a small city at the edge of a wasteland. One of the leviathans of the wasteland, a gigantic malevolent creature known locally as a “walker,” appears to be on a course directly through the city. The PCs are called to heroism by the city’s council, who have learned that the walker is being directed by a foul darakhul who has gained control of the creature and directs it from atop its shoulders! Scouts have discovered a portal used by the ghoul to teleport atop the walker. With a hastily scrawled map, the party must navigate the wild hills to locate the magical doorway. In this epic and deadly adventure, the party must navigate wild hills, locate a teleportation portal, and slay the Darakhul and his minions on teetering platforms built atop the shoulders of the walker.
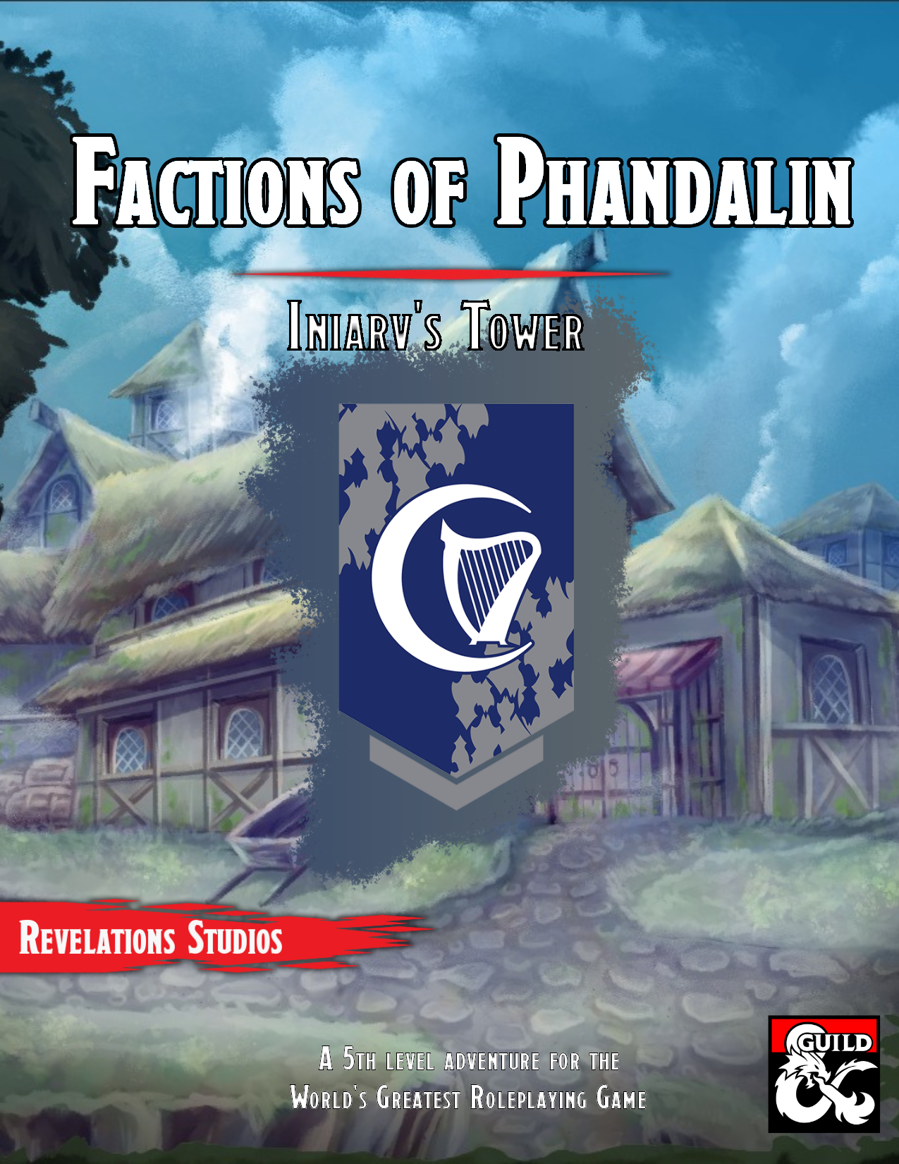
This book goes over the various rules around the faction of the Harpers in Phandalin and the Forgotten Realms, making it easy for any new or veteran DMs to integrate it more into the core stories being told, and making the faction feel more useful for the players that choose to join. The adventure sees the characters on a mission to Iniarv's Tower, sent to search for the artifact, Bowgentle's Spellbook, and rescue the fellow Harper member, Brodven.

The characters, members of the Clifftop Adventurers’ Guild, have been tasked with acquiring the Chains of Mur’taal, an artifact tied to Thelanis, by their guild handler, Lhara. This artifact is the latest in a series that Provost Nigel Faurious has commissioned the Clifftop guild to retrieve for him. The adventure starts when the characters arrive in Rhukaan Draal via Orien caravan. They’re given a chance to explore a small portion of the city before they head to a local bar to meet their contact provided by Lhara. Accompanied by a local guide, they make their way to the Seawall Mountains, where they’ll have to follow clues and their intuition to find the Valley of the Hero, which conceals the artifact that they’ve been hired to obtain. In order to earn the artifact, characters must first pass three tests laid before them by the Story: The Test of Courage, the Challenge of Wisdom, and the Trial of Honor. Once they finish the tests and collect the artifact, the party heads back toward Rhukaan Draal. But there are Marguul forces in the area, and they don’t intend to let the heroes escape with a priceless piece of their folklore…
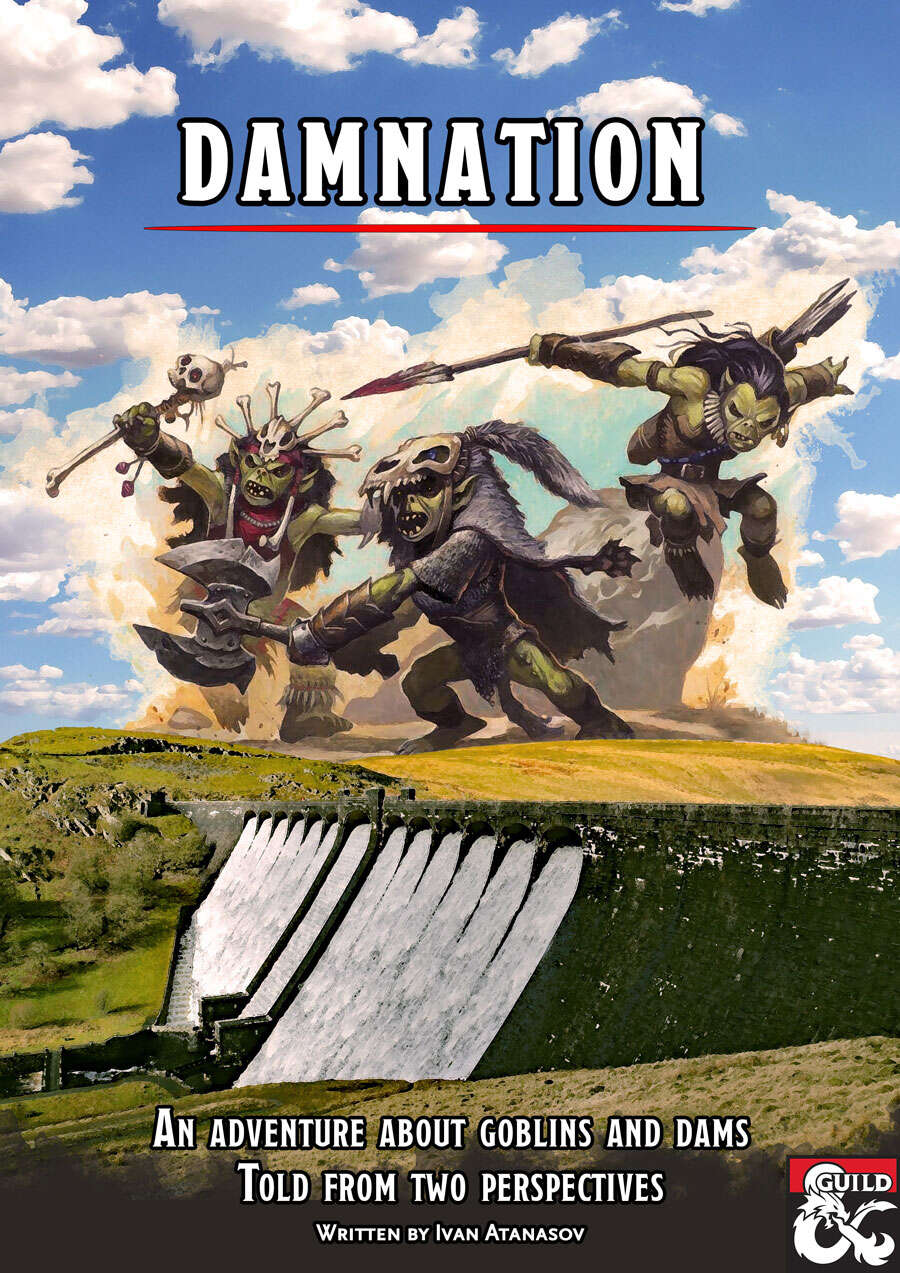
Twenty years ago, the humans built a dam and flooded Gormelin Valley. They drove the Cinderborn goblins away from their land. But now the Cinderborn are back and they want vengeance. The dam must fall and the human towns must drown! Damnation is a set of two parallel adventures that cover the same events, locations and characters. In The Heroes' Tale, the players control a traditional heroic party. They get to attend a wine festival, save a town from a flood, dive to the bottom of a lake, choose between retaliation and negotiation, and face a demon atop the dam as he attempts to demolish it. The Goblins' Tale tells the other side of the story, allowing players to take control of a party of goblins. As the Cinderborn, they must deal with human spies, sneak into a wizard's tower, trigger a catastrophic flood, choose between peace and vengeance, face their own demonic leader, or aid him in breaking the dam. Also included: maps and goblin pregens!

"Gnolls have captured the heroes! After stripping the characters of all equipment except their armor and clothing, the gnolls drag them to an expansive briar maze known as the Twisted Thickets and set them loose. Then, armed to the teeth, the gnolls hunt down their prey. The characters must survive the hunt and outwit their pursuers. Stripped of your armor and weapons, you are cast into the Twisted Thicket and hunted like rabbits. If you want revenge, you must first survive Yeenoghu's evil Hunters. After dealing with the gnoll hunters, the heroes can try to reclaim their lost equipment and exact revenge on the tribe, which lairs in the caves beneath Dead Gnoll’s Eye Socket." Pgs. 2-14

The night mist hangs low around von Helter Manor. A man and woman share a tender moment on their balcony after the best night of their lives—a flash of red as they fall. Blood begins pooling around them, staining the earth crimson. A mysterious figure grins in the darkness. The Red Lady has taken her next victim. Pgs. 75-81