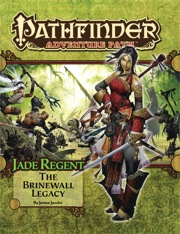
The town of Sandpoint, Varisia, Inner Sea Region has put out a bounty on the nearby tribe of Licktoad Goblins in retribution for the goblins raiding traders and travelers near the quiet town. The party takes up the bounty and ventures into the swamp; eventually finding the goblin village in ruins and it's inhabitants scared in it's burned huts. The party finds out; either through investigation of the ruins or the goblins themselves; that a group of skeletons with eastern arms and armor had ransacked the village and took a stash of fireworks that the goblins stole from an old shipwreck. The party then makes it to this cave and finds it empty except for a half dozen skeletons. Further in past the skeletons is their leader, a skeletal samurai who fights the party in an attempt to defend his treasure. The treasure turns out to be a letter that reveals that secrets of the Kaijitsu family; the same family their good friend Ameiko who runs the Rusty Dragon inn belongs to; that lies in wait in the abandoned town of Brinewall to the northern boarder of Varisia. Ameiko along with several other important NPCs with a caravan north. It's recommended that GMs create encounters for the caravan trip north as it's essentially 3 weeks of travel with nothing in it. It's also recommended that GMs completely ignore caravan rules; they're not flushed out and they're not fun to run. The party and the caravan reaches the abandoned town of Brinewall where their friend Ameiko becomes possessed and is thrown into a coma; where the other NPCs agree to take care of her while the party explores the town and castle. The castle is a three floor behemoth of a dungeon populated by Dire Corbies, Troglodytes, and various other monsters all under the leadership of Kikonu, an Yamabushi Tengu Oni. The goal of exploring Brinewall Castle is to find the two keys to the vault; one of which is on the Yamabushi Tengu while the other is on a Half-Fiend Decapus that lives in the basement of Brinewall. Once the PCs enter the vault they find the Amatatsu Seal; one of the seals that cement authority to one of the ruling houses in Minkai of Tian Xia; as well as several visions that show that Ameiko Kaijitsu is the rightful heir to be ruler of Minkai and that they'll need to travel north to do so. Such ends the first book of six.
Crops wilt, leaves wither on the trees, and animals must leave the once-fertile Downs valley or die. All who dwell there must abandon their homes or perish-- unless your party can lift the curse TSR 9084

The Sea Witch is a short adventure for four 10th-level characters. The difficulty of the adventure can be adjusted by changing the level of main antagonist (Black Molly, the sea hag pirate) or by altering the number of her ogre servants. To tailor the encounter to groups of different levels, refer to table 4-1 in Chapter 4 of the DUNGEON MASTER’S GUIDE. The adventure is set off a lightly populated coastline known as Misty Bay, but adapts easily to any coastal region in existing campaigns. The sea hag known as Black Molly is a notorious pirate who has plagued the coastal cities for the better part of a decade. A successful Knowledge (local) check (DC 15) will reveal that Molly and her ogre crew have a filthy reputation as merciless killers who delight not only in plundering vessels for their riches, but also in destroying the ships themselves and sending all hands to the bottom of the sea. Now the villain and her followers have seized control of the Old Lighthouse of Misty Bay located off a lightly populated coastline. For generations the lighthouse beacon has protected the fishermen of this region, warning them of the dangerous rocks that lurk just below the level of the high tides. Recently, the hag has put out the beacon, darkening the lighthouse; misery and destruction are sure to follow as ships start to blunder into the rocks. Blackmail is apparently Black Molly’s aim in this venture: She conveyed a message to the nearest shore community, the fishing village of Poisson, demanding the princely sum of 50,000 gp. Until she receives this ransom, she intends to hold the lighthouse and its beacon hostage. The fate of the human keepers who tend the lighthouse is unknown to the seaside communities at this time, but they fear the worst. The Sea Witch is ostensibly a rescue mission: The PCs are pitted against the evil of Black Molly and the brawn of her savage ogre crew. It is the heroes’ task to retake the lighthouse and, if possible, free its captives from the clutches of their jailer. What neither the PCs nor the shore communities yet realize is that while she 1would be pleased to have the gold, Black Molly is in fact after bigger treasure. Molly has no intention of giving up the lighthouse — at least, not until she finds what her master sent her here for. Lying on the sea floor practically at the base of the rock on which the lighthouse sits is the wreck of the war galley Flying Cloud, which according to popular legend was captained by a cleric who wore around his neck an amulet of the planes. Black Molly wants this prize, but so far she hasn’t been able to find it. She’s scoured the wreck without finding any sign of the magic item. Now she’s trying to determine where to search next, for the item might well be somewhere near the wreck. If she can’t find it, she’ll start torturing her captives to find out if they have any useful knowledge about the amulet.
The Rise of the Runelords Adventure Path continues! A sudden string of brutal killings terrorizes the town of Sandpoint, and the killer's mark bears a familiar shape. Investigation leads to the Lost Coast's most notorious haunted mansion, a dilapidated ruin that has become the lair of a monstrous murderer. Yet this killer is but one of many, a member of a group of fanatic cutthroats calling themselves the Skinsaw Men. To defeat the cult, the PCs must travel to the bustling city of Magnimar to unravel the sinister source of these murders before they become the Skinsaw Men's next victims!

To arms! To arms! The battle lines are drawn as desert men and inhuman tribes wait poised to strike on the fertile and rich lands of the east. The call has gone out through the civilized lands. The armies have been raised to match the invading foes from the west. Nobles and peasants have joined swords to greet the foes. But Fate or Chance has decreed another role for a small few. No glorious banners will wave on their march. No squadrons of knights will charge at their word. Instead, they will fight the war with stealth, secrecy, and cunning. The risks they will take are great, but the fates of both armies lie with them. It begins one night for your party far from the fighting. Suddenly you are entrusted with the most dangerous mission of the war. Can you cross the Sind Desert, occupied now by enemy armies, to find the Great Pass? Can you find the one known only as The Master? What will you do if you find him? So begins your adventure in The Master of the Desert Nomads, the first module of a two-part adventure that can be concluded in the exciting Temple of Death or played entirely on its own. Can your party do what must be done? TSR 9068

What is the Lost Lands? The Lost Lands is the home campaign world of Necromancer Game's and Frog God Game's own Bill Webb. This campaign has been continuously running since 1977. Many of the adventures published by Necromancer Games and Frog God Games are directly inspired by this campaign. They have evolved over the decades, and more material continues to flow from it as the dice keep rolling. Sages and wizards of legend speak of the Lost Lands—many of the players who have lived and died in Bill's campaign over the years now have a place in history (in the books). Frac Cher the dwarf, Flail the Great, Bannor the Paladin, Speigle the Mage, and Helman the Halfling are well known to the fans of Bill's work. This is the game world, and these are the adventures in which the players of these famous characters lived and died. Hundreds of players over the past 35 years have experienced the thrills and terrors of this world. The Sword of Air is the centerpiece of the Lost Lands. Currently, this epic tome consists of several parts: 1. The Hel’s Temple Dungeon—kind of like Tomb of Horrors on crack. This six-level, trap-and-puzzle infested dungeon formed the basis of Bill's game through his high school and college years. Clark Peterson’s very own Bannor the Paladin spent several real life months in the place, and, sadly, finished the objective. This is where the fragments of the fabled Sword of Air can be found…perhaps. 2. The Wilderness of the Lost Lands extending to the humanoid-infested Deepfells Mountains and providing detail about the nearby Wizard’s Wall. This so-called “wall” was raised by the archmages Margon and Alycthron harnessing the Spirit of the Stoneheart Mountains to raise the land itself, creating a massive escarpment to block invaders from the Haunted Steppes. These archmages are actual player characters from the early 1980s who live on in the legends of the Lost Lands. Over 70 unique encounter areas are detailed, and each one is a mini-adventure in itself. New wilderness areas may be added based on bonus goals described below! 3. The Ruined City of Tsen. Legend has it the city was destroyed by a falling meteor. This place forms an aboveground dungeon area the size of a city, with over 100 detailed encounter areas. It’s a very dark place…even at noon. 4. The Wizard’s Feud—This campaign-style adventure pits the players in a long-running series of intrigues and battles between two archmages. Which side will they take? Their actions all play into the overall quest, and could well determine which side wins. Law and Chaos are not always what they seem, and if the wrong decisions are made, the entire ordeal could fail. Remember, one of the wizards WANTS Tsathogga to win. 5. New monsters, new demons, new spells, and new rules for various aspects of play. 6. The Tower of Bells. This dungeon is the result of the workshop Bill ran at PaizoCon 2013, where the participants assisted him in building an old-school dungeon. Visit the tower and discover the secrets of the “artist” within. Beware: those entering may never come out!

The Alchemist's Eyrie takes the characters into a fortified dwarven tower, where they are sent to recover some needed items. When they arrive, they discover the tower has been captured recently by a warband of renegade lycanthrope dwarves. Between the interlopers and the remaining traps set by the late owner, the characters may find themselves in deep, despite the lack of head clearance.
"More than five hundred years ago, clans of dwarves and gnomes made an agreement known as the Phandelver’s Pact, by which they would share a rich mine in a wondrous cavern known as Wave Echo Cave. In addition to its mineral wealth, the mine contained great magical power. Human spellcasters allied themselves with the dwarves and gnomes to channel and bind that energy into a great forge (called the Forge of Spells), where magic items could be crafted. Times were good, and the nearby human town of Phandalin (pronounced fan-duh-lin) prospered as well. But then disaster struck when orcs swept through the North and laid waste to all in their path. A powerful force of orcs reinforced by evil mercenary wizards attacked wave echo cave to seize its riches and magic treasures. Human wizards fought alongside their dwarf and gnome allies to defend the Forge of Spells, and the ensuing spell battle destroyed much of the cavern. Few survived the cave-ins and tremors, and the location of Wave Echo Cave was lost. For centuries, rumours of buried riches have attracted treasure seekers and opportunists to the area around Phandalin, but no one has ever succeeded in locating the lost mine. In recent years, people have resettled the area. Phandalin is now a rough-and-tumble frontier town. More important, the Rockseeker brothers - a trio of dwarves - have discovered the entrance to Wave Echo Cave, and they intend to reopen the mines. Unfortunately for the Rockseekers, they are not the only ones interested in Wave Echo Cave. A mysterious villain known as the Black Spider controls a network of bandit gangs and goblin tribes in the area, and his agents have followed the Rockseekers to their prize. Now the Black Spider wants Wave Echo Cave for himself, and he is taking steps to make sure no one else knows where it is." Extra Info from AL.com users: by @marcellarius. "There are a variety of locations in this adventure: the town of Phandalin, a gang hideout, a ruined keep in the forest, a destroyed village, and Wave Echo Cave (a dungeon crawl). The adventure is written in a sandbox style and relies on the players to choose their path. Phandalin offers several side-quests which could serve as hooks for continuing adventures. The premade characters have ties in their backgrounds to NPCs and locations. If you're not using these you'll need to consider other ways to introduce key NPCs."

A storm of unparalleled fury has been ravaging the peaks of the Earthspur Mountains for a tenday, and the Monastery of the Yellow Rose sits in its eye for now. Some monks have fled the monastery to the safety of Mulmaster and beseech you to convince their more obstinate brothers to retreat to the city before the eye of the storm shifts, and the monestary is in terrible danger. Can you brave the elements and convince the monks to escape?

With the Heart of Light secured, the adventurers now pursue the Ebon Stone, hidden in a remote keep. Part 2 of 2. Part 1 titled The Heart of Light. Pgs. 43-52
More than a millennium has passed since the "machine mage" Karamoss's failed siege of Absalom, and for years the Pathfinder Society has used upper reaches of his subterranean siege tower as a training ground for initiates. During a routine drill, the once-dormant dungeon springs to life, and it will take all the PCs' resourcefulness and skill to make it out alive.

This is an adventure for four 6th to 7th level PC's that may be completed in a single session. The Untamed are a street gang in a busy city. A recent change in leadership has transformed the members from pickpockets and second-story thieves into kidnappers for an inter-dimensional aberration named Xlrieh'oc. Their hideout is now a strange and wicked factory, capable of extracting the firm essence from a person; the process leaves the victim partly ethereal and their form no longer casts a shadow. Although most victims die during the procedure, those who survive are conscripted into the gang. The extracted essence is crated and shipped to the aberration's home plane through a breach between worlds in the hideout's backroom.

Death Is in the Cards The remnants of the Ebon Fold are cutting a deadly path through the Falkovian countryside, draining travelers of their life force and leaving withered corpses in their wake. Hot on their trail you come across the sole survivor of one of these deadly attacks, a young vistani man with an extraordinary skill for fortune-telling. His tarokka deck helps close the gap between you and the assassins. Together you follow the trail through Darkon, the dark domain of the lich lord Azalin, to the city of Nartok. With an Unholy Alliance... Something very strange is happening in Nortok. The killers enter the Temple of the Eternal Order and don't come out. It seems that the state of religion of Darkon is giving succor to these assassins. To make matters more confusing, the Kargat, the domain's secret police, has put aside its feud with the Eternal Order and has a large contingent staying at the temple as well. These three organizations working together bodes ill for the residents of Nartok. ... And Schemes Within Infernal Schemes Great amounts of life energy are being collected for some foul purpose, although no one seems to know what exactly it is. The tarokka cards provide only mysterious glimpses of the future - a future in which a powerful evil sweeps the land and Death walks the world. Can you discover the truth of what is happening in the temple in time to avert the disaster predicted by the cards? Death Ascendant is a full-length adventure that can be run as a stand-alone scenario or as the second part in the Grim Harvest series. It contains a 64-page adventure booklet plus a full-color poster map detailing the Temple of the Eternal Order. TSR 9526

There is no particular overarching story here, just a prospect gate keep dungeon you can drop into your own sandbox and run as you see fit. This adventure is formatted to both 1E & 5E gaming rules.

Devastated in a war with a nearby wizards' school, the Fighters' Academy has since been surrounded by a foul and dank swamp - the Gloomfens. Since the climatctic battle between the wizards and fighters, the tower has decayed. The spirit of the head of the academy haunts the building, eternally plotting his revenge on the wizards who killed him. his loyal sutdents remain faithful to him even in death. Other foul undead have made their home in the rotting, spacious academy. From their lair, they make forays into farmsteads near the swamp in search of victims to feed their unspeakable appetites. The Problem of these terrible attacks by the savage undead will not stop until the evil that has found a home at the tower is burned from the face of the land forever. Will your party heed the call and help the town of Melinir? Will they be able to clear the former Academy of its undead? Towers of Evil is the second in a three part adventure, The Haunted Tower. Or, it can be ran as a stand alone adventure. The choice is up to you. Part of TSR 1081 The Haunted Tower
A monster amonkst us... The monastery of Montelegro was once a major center of academia, but it fell out of favor when its library burned to the ground some 20 years ago. (The fire is rumored to have been started by the candle of a monk who fell asleep while reading.) Without books to attract scholars and patrons, the order of monks that run the monastery has dwindled. Now the monastery is a mere shell, its once-thriving halls empty. Only 21 monks remain. The order that runs Montelegro supports a number of scribes dedicated to copying and illuminating books of all kinds. The most talented of these illuminators was Brother Abel of Corbone, a young monk fresh out of the university. A few days prior to the adventure, Brother Abel witnessed a miraculous sight. While walking about on the outskirts of the monastery, he beheld a vision of his god. The vision instructed him to build a well upon the spot where he stood. If Abel did this, the god promised prosperity would return to Montelegro. Unfortunately Brother Abel was unable to fulfill his god's vision and appears to have taken his own life.... Or was there Murder in the Monastery? Pgs. 8-17 & 55

For years, the knights of Mendev have held back the evil locked inside the Worldwound, a vast, demon-tainted landscape. Every few years, they anoint a new protector, a sacred guardian charged with pitting his will against the teeming hordes bent on devouring the very souls of the living. This year, something has gone horribly wrong, and now a bloodthirsty demonic army has overrun the ancient fortress, and threatens to pour into the surrounding countryside.

"A Triangle in Shadows" is an umbral vampire lair suitable for a party of four 15th-level characters. Magic weapons are highly advised. This adventure can be completed in one session. The City Fallen into Shadow is the domain of the fiendish umbral vampires, and they are rarely found outside it. But one named Caragorn has fled the city after coming between the lovers Philadon and Zenobia. Philadon and Caragor, however, are secretly meeting at Caragorn's tower behind Zenobia's back. Zenobia suspects them of collusion, and is seeking out the two male umbral vampires to get revenge.

With the docks of Distant Turtle City behind them, the challenge of the city's castle still lies ahead. Ancient dwarven samurai were lords of the mighty estate, but now it has fallen to darkness. What secrets and horrors might be found there are disheartening enough, but with a city of the shadow dead at their backs, the adventurers have little choice but to put an end to Molo's corruptions once and for all. Come join the battle against legendary tortoise oni, stealthy gaint mantises, corrupted beasts, undead half-dwarven guards, and even a rumored shadow dragon! This adventure is formatted to both 1E & 5E gaming rules. Also available in PDF.
"Orcs have returned to the once quiet border province of Blackmarch. The Bleak Tower and its meager garrison are all that stand against the tide. Their only hope lies in a ragtag band of adventurers willing to venture into the perilous maw of Ironwood Gorge..." "Ironwood Gorge is a fantasy role-playing adventure for 4-8 characters of levels 2-5, designed for older editions of the world's most popular fantasy role-playing game and its clones such as Labyrinth Lord and OSRIC. The material is also easily adaptable to any other class and level based fantasy role-playing game. Ironwood Gorge serves as part two in the Blackmarch sequence of adventures, but is built to function just as well as a one-off adventure, a drop-in-a-hex location for sandbox games, or as a kick start to a new campaign. The module includes keyed maps detailing both the Bleak Tower: a living, breathing refuge for adventurers; and Ironwood Gorge: a cave complex with over 100 keyed areas of traps, monsters and mayhem. The module is illustrated throughout with original artwork and includes appendices detailing new monsters, magic items, and spells. Whether you are looking for an out-sized adventure to usher the hardiest characters to the intermediate levels, or a fully-realized location to plunder for maps and ideas, Ironwood Gorge is a treasure from the old-school of gaming..." An alternative to B2 - Keep on the Borderlands