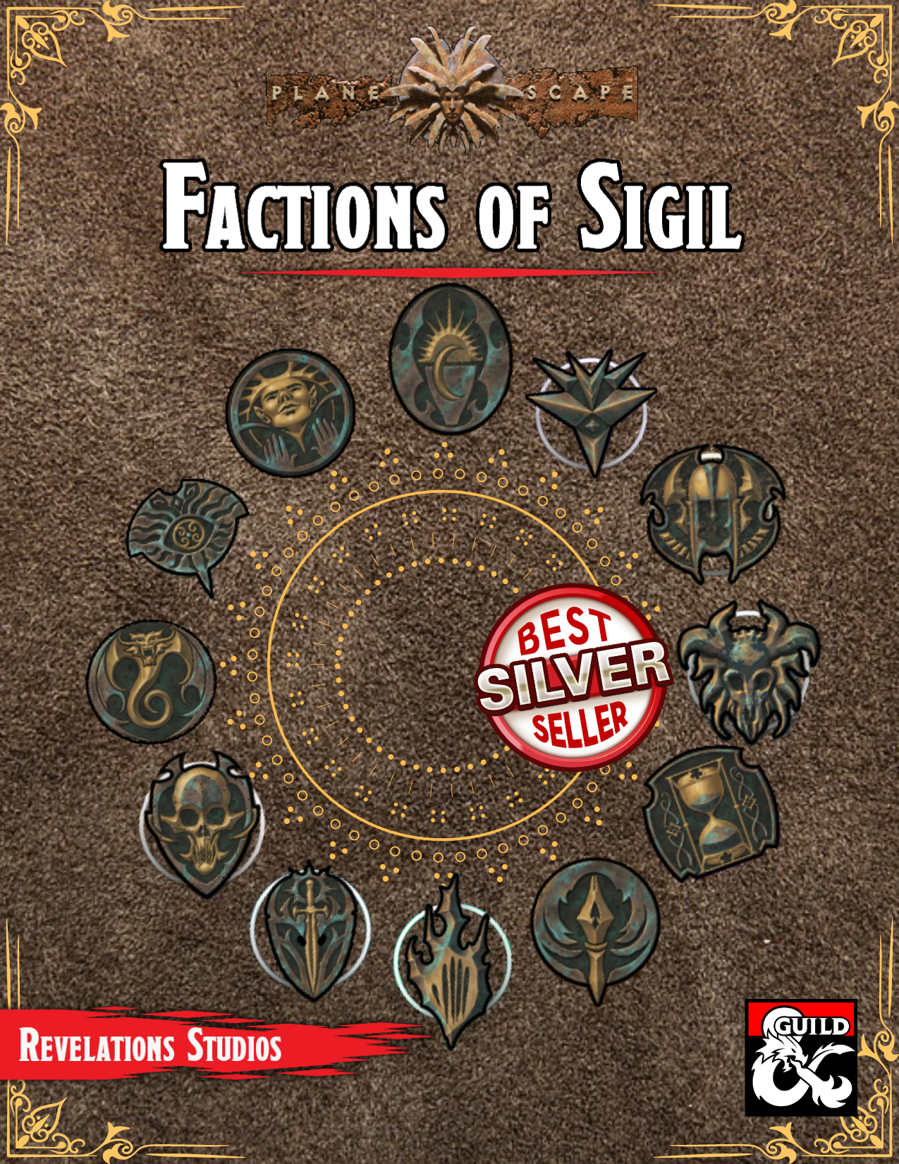
We get it. Factions are an integral part of D&D, but it's not always clear how to use them in your campaigns. Luckily, Factions of Sigil has you covered for each of the twelve main factions found across Sigil and the Outlands! This supplement goes over the various rules and lore around the primary factions found in Sigil and the Outlands, making it easy for any new or veteran DMs to integrate the factions more into the core stories being told, and making them feel more useful for the players that choose to join. In this adventure, the Mind's Eye of Sigil requests the characters travel to a secretive dome created by former member Skaldon, and follow his path to enlightenment.

The last of his line, Baron Paytro NeMoren has left his dark secret sealed for decades in the family's underground vault. Now, years after his death, a group of stalwart heroes has gathered according to the baron's final wishes. At last, the seal will be broken and the secrets of the vault revealed. Can all sins be forgiven? The adventure is designed to kick-off a campaign, as it provides for an interesting way to get the party together. Instead of meeting at a tavern or being recruited by the local militia, each party member starts with a key to the NeMoren's vault, a key that was handed down by a friend or given as a gift for some good deed peformed in the past. The executor of the estate has gathered together all of the key-holders so that they could claim the contents of the vault. The vault can only be opened with all of the keys in unison. The vault is protected by a number of minor traps and tricks, but it also became the final resting place for the Baron's ex-lover, Lisette, and her brothers--all three of whom had attempted to blackmail the Baron. They were buried alive and are now undead. To complicate matters, a young umber hulk made its way to the vault, leaving some crude tunnels that were later exploited by hobgoblins coming from another surface entrance. The party will need to deal with the hobgoblins, the undead, the traps, and possibly the young umber hulk. There is a side-plot of poisoned groundwater in the nearby town that the party can also resolve by clearing out the undead and properly disposing of the putrid corpses leaking into the groundwater from the vault. Produced by Fiery Dragon Productions

Crippled, wingless, old and a thousand times more dangerous. Surely, a crippled dragon is less dangerous than a healthy one. Pgs. 35-45

A fiend lurks among the Black Blade goblins. A shapeshifting barghest fashioned by the General of Gehenna to exact revenge on all goblin-kind. It’s aim: to kill as many goblin leaders as possible… A masked goblin approaches the party asking for help. Two tribe leaders are dead. But a rival for chief has control of the crime scene. Will the party discover the barghest among the goblin ranks? Can they stop this imposter before it strikes again? Adventure Overview The adventure’s story is spread over 4 parts and takes approximately 4 hours to play. The adventure begins with a Call to Action scene. Part 1: Goblin Politics. Krill sends his emissaries to implore help from any strong intermediary. The party is asked to investigate the murder of Thrawn in Dringly’s lair. This is Story Objective A. Part 2: The Opposition. Gain entry into Dringly’s lair and investigate the murder of Thrawn. Gather enough evidence to find the killer. This is Story Objective B. Part 3: To The Lair! Now that the players have determined the barghest (Yeep) is to blame, they need to get to Krill’s lair quickly as he is in imminent danger. This is Story Objective C. Part 4: The Barghest.When the players arrive at the lair, they need to get to Krill and expose and defeat the barghest. This is Story Objective D. Adventure Background A barghest named Yeep has begun its onslaught of attacks against the Black Blade goblins. Starting with Chief Gnar, then his second in command Thrawn, the barghest is moving methodically down the line of command. Krill is now chief. But he has some problems: Two leaders of the Black Blades are dead. Who killed them and why? Is he next? Dringly, the next in command, has decided to take his lair for himself, declaring himself Chief of the Black Blades. Who are the Black Blades? The Black Blades are a tribe of goblins in the local area. They are known for dipping their blades in a dark black substance. It is rumored these blades are poisonous. The Black Blades regularly attack passersby on the road to rob them. The Black Blades have two lairs, one run by a chief who leads the whole tribe, and another overseen by a boss lieutenant. The Black Blades have a well-established pecking order which is how Krill stands to become chief. The next in line is Dringly, who has also declared himself chief and wants Krill dead. Krill suspects that there is something suspicious about two leaders being killed within a day of each other, but he has already burned Gnar’s body without any investigation. He needs to investigate the body of Thrawn, but it is in Dringly’s lair. Krill wishes to avoid direct confrontation with Dringly at the present for three reasons: 1) Any violence would only kill his own tribe members and further divide the lairs. 2) He believes there is still hope for negotiation to reunite the Black Blades. 3) He believes that if he were to attempt negotiations himself, Dringly would kill him. This adventure features: Two maps. Ready for your favorite Virtual Tabletop. A full color pdf. A black and white pdf. One custom monster, a reprint of barghest, all others available in the Monster Manual. Four hours of entertainment involving: roll playing a goblin bard, investigating a murder scene, tracking down a barghest before it strikes again. Applicable to any setting.

Precis Intermedia brings back this follow-up to the first known commercially-published adventure (Palace of the Vampire Queen) for the original Roleplaying Game (First Edition/OD&D/0E). Originally released in 1977 by Wee Warriors, The Dwarven Glory provides 8* map sections that can be arranged as desired and containing pre-factored creatures and treasures (in other words, this is essentially a geomorphic stocked dungeon). While hit points are provided for the creatures, the First Edition RPG or an OSR equivalent (B/X recommended) is required for actual rules and their descriptions. At one time, the community of Dwarven Glory was a thriving and wealthy one. The community became easy prey for Mortoc and his Ten Orc Tribes. Although the Orcs conquered Dwarven Glory, they could not completely destroy it. There were parts of the caverns they did not even penetrate. Now the caverns echo in the misty gloom, offering refuge to the forgotten and promise to the adventurer. This piece of gaming history is a must for collectors and old school gamers. With the original on the extremely rare list, this classic reprint of The Dwarven Glory has been remastered for a clean print, and is readily available at a low cost. * The original printing included only 7 map sections, designated Sections B through H. The mythical Section A has been added as a bonus. Wee Warriors and The Dwarven Glory are trademarks of Precis Intermedia. All rights reserved.

For centuries, the volcano now called Mount Zulgar was the battlefield of a conflict between red dragons and frost giants. The final battle saw the extinction of the dragons and only a handful of living giants. The dwarves of the Frostblood clan used this opportunity to drive out the giants and take the mountain as their own for its rich deposits of gold. 100 have passed, and now the volcano bubbles to life once more, bringing with it all manner of fiery creatures. Miners have been killed, and implike monsters assault the citizens of the mountain. The master of the goldsmith's guild has called upon your party to snuff out the Fire in the Frostblood Mine. Fire in the Frostblood Mine is a 4-5 hour adventure for 4 3rd-level characters. It can be used as either a one-shot or as part of an ongoing campaign. This module includes a single-session adventure to introduce your players to the strange creatures of the inner planes, maps of the two levels of Frostblood Mine, and a unique sentient magic item.

Warchief Grog Bloodloaf has sounded the horn of war. Elf scum have stolen orc lands and the tasty halfling herds. For generations the Maggotsmasher Clan has watched and waited from the icy caves of the frozen mountains but that wait is over. Warchief Bloodloaf needs only the totem of leadership, the Dragon Crown of Durge Maggotsmasher, to unite the clans and begin his war. Five misfits have answered the call to brave the Caves of Throllorat and return with the crown. With a little luck, these five maggots will kill a few of the beasts within Throllorat before dying, making it easier for real warriors to complete the quest. The Misfit Maggot Five is a comdedic adventure where five rejects from the Maggotsmasher Clan are called upon to retrieve the famed Dragon Crown of Durge Maggotsmasher from the dreaded caves of Throllorat. Each of the characters are fully developed with their own unique personality that will give any Dungeons and Dragons group hours of laughs! The Misfit Maggot Five is a 5th edition comedy adventure for 2nd level monstrous humanoid characters. Published by The Pickled Dragon Press

"...the Ultimate Campaign Adventure..." A sinister force, long thought destroyed, stirs from the black hole that spawned it. Like an ebony darkness it prowls the land and safety is but an illusion, for it watches from every shadow and ponders possibilities. What began years ago with the introduction of the players to the quiet village of Hommlet and the amazing lands of Greyhawk, at last is complete. Here is the long awaited campaign adventure featuring the ruins of the Temple of Elemental Evil! Evil broods and grows beneath those blasted stones. This is your chance to drive it back and scatter its forces again. This product includes the village of Hommlet, the filthy shire of Nulb, and reveals the ruins of the Temple of Elemental Evil and the labyrinths that lie beneath, a warren of darkness. And beyond these ruins, even more is revealed. For the first time this product provides a complete campaign adventure which will take beginning characters from 1st all the way to 8th level and possibly beyond! Hours of adventure await you! TSR 9147

A Wall Beyond Fury is a companion adventure made to go along with the events unfolding in the Folio #13 (AT3 Playing Down the Dawn). It contains the information needed to run a side adventure that will help characters in their fight against House Vash. The blood fued with the Vash is almost at an end, but the abduction of a former ally and a last cog in the Vash machine must be taken care of. Now, the heroes must enter the Ebon Swamp in search of answers and revenge if they hope to finally put an end to all that has befallen them since they first entered the great city of Taux. This adventure is formatted to both 1E & 5E gaming rules.

In this scenario, the adventurers pass through magical portals into a series of interlinked chambers. The characters are encouraged by a young scholarly mage to voyage into the Sea of Pastures, to explore a mysterious island connected with a number of recent shipwrecks and disappearances. The island is grassy and windblasted, but eventually the characters discover a stone door leading into a subterranean complex. There, they discover 18 rooms linked by secret passages and magical portals. Most of these rooms have been ransacked by a variety of other survivors, human and monstrous. These survivors are likewise trapped within the labyrinth and are either eking out a miserable existence there or else desperately searching for a means of escape. Also within the building are a number of extraplanar creatures, collectively known as gingwatzim, who can shift between various forms: an energy form (glowing ball of light), an inanimate form (usually a magical weapon), and an animate form (an animal or monster). Eventually the characters may find the exit, and are once again deposited on the dreary islands to await rescue. TSR 9110

The village of Sacrabad is a wretched place. Dark rumors abound concerning its steward, “His Lordship” Nim Sheog, who rules the place through terror and cruelty. Merchants who have passed through Sacrabad tell tale of how chaos thrives while the good folk wallow in misery. Nim’s guard are no more than a well-paid gang of thugs, hired to enforce his relentless and often bizarre laws and what’s worse, they seem to be in league with a nearby band of goblins, The Yellow Fang, who are often left to terrorize the villagers without reprisal. It is rumored that Nim keeps the rightful and lawful lord of Sacrabad locked away in the dungeons of the keep, the ominous Black Tower. An imposing structure that once afforded the village protection, the Black Tower has become a symbol of tyranny. But there is hope on the horizon. Hope in the form of a secret society who conspire to rescue the rightful lord and overthrow Nim and his guard. Can our heroes champion the cause? Tyranny of the Black Tower is a short (single session) adventure module. It is a classic “rescue operation” complete with a strong villain and espionage intrigue. It is an ideal one-shot adventure with room for expansion into an ongoing campaign. Bonus side-trek hooks and a bonus dungeon are included as a means to build up low-level parties. This module is setting-generic and can be dropped just about anywhere in the multiverse. Published by Verisimilitude Society Press

*** WARNING: this adventure contains strong scenes and descriptions which may not suit all kinds of public. It's heavy on horror, suspense, gore and sadism. The entire adventure available in the Full Preview, so that you can self-assess the content and buy in confidence. *** The main theme of the adventure is horror, using suspense elements as well as gore and sick scenes to shock your players. The adventure is divided in 2 parts: the first part involves a mad vampire spawn who tortures as a hobby, full of scary stuff like you see in horror movies. The second part involves a lesser demon lord stuck in a kind of inverted world (Stranger Things/Silent Hill style) which has a dread passion for a very disturbing and wicked art. There are tips on how to set the mood and make your players actually tense or even scary.

A dungeon of tricky puzzles, ancient magical secrets, and more than a few lingering mysteries, designed to be played as a standalone adventure and not incorporated into another campaign. Six adventurers descend into the Temple of Mysteries to find a mystical artifact called the Strand of Tears. Seems straightforward enough, except that some of the party may not be who they say they are. In fact, none of the party may be who they say they are. Not only that, but they might not be who they don't say they are, either! Worst of all, they're trapped in the ruins of an underground temple specifically designed to keep people from proceeding unless they're proficient in puzzle-solving...and there may be doppelgangers on the loose.

A ruined monument to folly and ego, the Shadowed Keep stands atop an isolated bluff deep in a mist-wreathed forest. Sacked by marauding goblins decades ago the place was thought abandoned, but shadows now creep among the forest's great boles and footprints have appeared on the single, overgrown track leading to the keep. Travellers have begun to disappear with alarming regularity from the nearby road and the local folk fear some slumbering evil has claimed the ruin as its own. Dare you brave the terrors of the Shadowed Keep to crush that which lurks within or will darkness shroud the surrounding lands? Designed to be easily inserted into a GM's home campaign, Shadowed Keep on the Borderlands is an excellent starting locale to test the mettle of neophyte adventurers. Shadowed Keep on the Borderlands is designed for the medium advancement track. 1st-level PCs completing all the challenges of the place can expect to reach 3rd-level by the time they have exhausted all the keep has to offer.
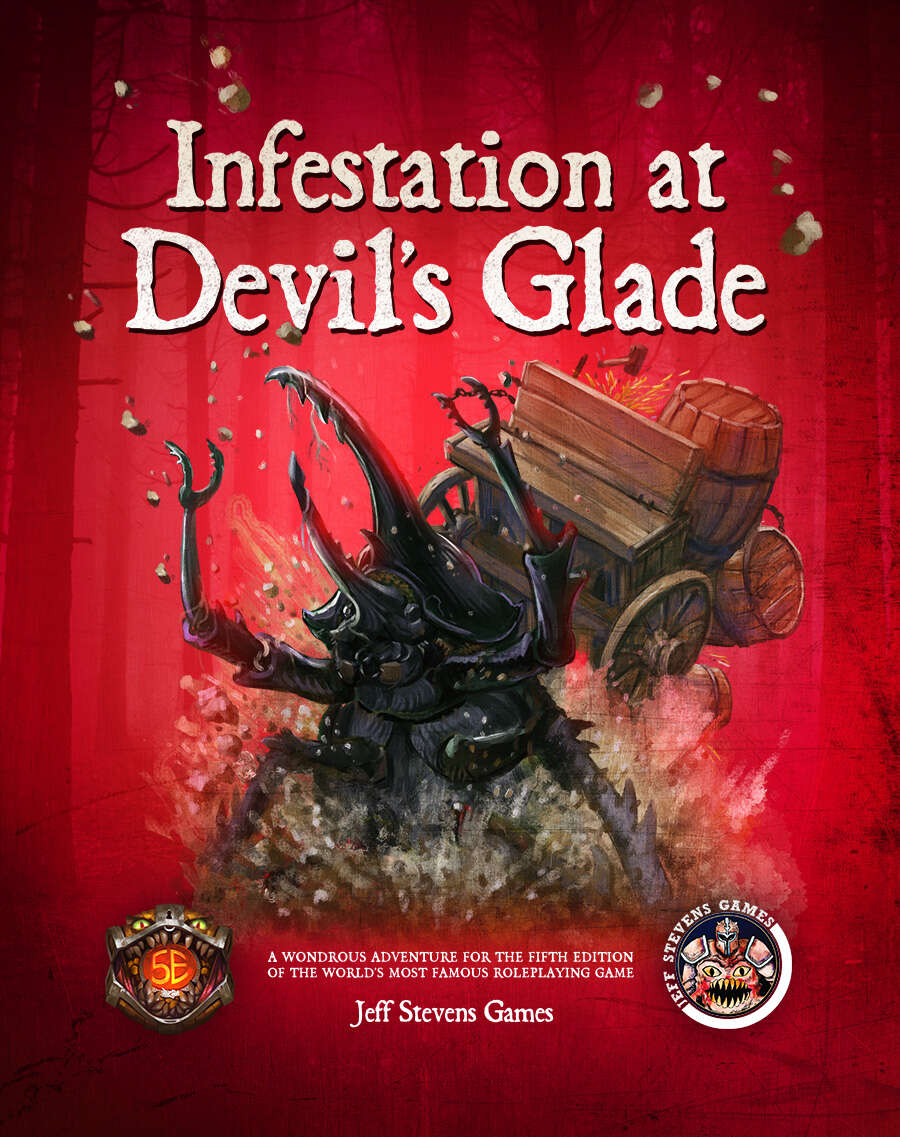
The town of Devil's Glade is under attack! Swarming insects have driven the residents out of their homes and businesses, and giant insects patrol the town square. Who or what has brought these creepy-crawlies to Devil's Glade? What's their motive? Are your heroes brave enough to put an end to the infestation? Infestation at Devil's Glade is a 2- to 4-hour adventure designed for four to five characters of 1st to 4th level, and is optimized for 2nd level characters. Scaling Suggestions are included, allowing you to play this adventure with characters of 5th to 6th level. Infestation at Devil's Glade isn't just a short adventure. We provide you with a location to which your heroes can return, or even use as a home base. The Supplement Includes: Adventure. The main adventure focuses on the heroes cleaning the town of the infesting insects and the villains who brought them. Beginning at The Fork (a tavern where many of the residents have made camp), the characters learn about the infestation of Devil's Glade, and are hired to look into the matter. NPCs. The adventure is filled with fun and engaging NPCs. During the characters' time at The Fork, they have the opportunity to talk with NPCs, help them, and learn more about the infestation. After the heroes return Devil's Glade to normal, the merchants and residents return, giving your characters unique shops to explore and quests to complete. Cursed Mask. The crux of the problem - a cursed mask that slowly transforms the attuned creature into a giant, insect monstrosity, and gives them power over insects. To end the infestation, the adventurers must confront the partially transformed person wearing the mask. Shops & Services. Devil's Glade contains shops and services the characters can explore, including therapeutic mud baths, a diner specializing in eggs, a trinket shop, a candle maker, and a dentist. Side Quests. We provide several side quests for before and after the main adventure, allowing you to increase the main adventure's run-time, and provide you with material for after the main adventure. Maps. The adventure contains maps for the main locations and major side quests. Each map is hand-drawn by Jean Lorber. Art. NO AI! The book is filled with fantastic, original artwork by Matt Morrow Art. Also Included: Map Files. Both grid and non-grid maps are included and available to download. Special VTT Tokens and Assets. Several custom tokens and art assets are included for VTT play.

East of Beregost, nestled in the outskirts of the Wood of Sharp Teeth, Durlag’s Tower has intrigued and yet stymied adventurers for decades. Stuffed full of mechanical traps and arcane wards, and rumored to be inhabited by fiends, very few have managed to extract any REAL treasure from the former home of Durlag Trollkiller. However, a powerful item in the ancient fight against the giants is said to be housed there, and the cloud giant Baron Rajiram has committed significant resources toward recovering it. After a pleasant tea in her garden, Seer calls upon you to beat him there and put a stop to his efforts! Sequel to Durlag's Tower.

"The Hive" is a spawn of Arbeyach lair, also featuring giant termites and termite swarms, for five 6th-level characters. This adventure can be finished in one session. Several mounds in the Forsaken Hills are the dens of voracious termites that have added flesh to their diet to supplement dwindling wood supplies. At night, swarms of termites hunt and devour prey. They swarm over victims in wooden carts and wagons, and bring the dismantled wood back to their mounds. Three spawn of Arbeyach, searching for a location to summon Ia'Affrat, Arbeyach's herald, discovered a mound filled with particularity nasty termites and used their vermin empathy to gain acceptance. They dug out a cavern beneath the mound, and now use the termites to protect themselves and gather food while they complete a difficult ritual involving dozens of sacrifices. The final sacrifice is prepared and the spawn are finishing their ritual when the party arrives.

Centuries ago, the glitterdoom came to the dwarves of Steelhand Clan! This divine curse transformed the dwarves into hellish forms with an insatiable greed for gold. Now, a chance encounter breaks open long-sealed gates to unleash the glitterdoom again. Can your adventurers delve into the forgotten halls to confront the subterranean menace? Work together to clear the abandoned mine of it's undead hosts and retrieve what gold and treasures you can.

Chaos reigns outside Roslof Keep, and the spread of the violet corruption runs deep within Mithelvarn's Dungeon. Now, the Company of the Ivory Scimitar must not only face the challenges of the Roslof delve, but will also find the dangers of the Kelmalin Wildlands must be overcome as well if they are ever to get to the bottom of the deadly plague that ravages the land. Time is running out, and only those brave enough will be able to face the horrors of the Glade of the Burning Dead and the dark recesses of The Hill. This adventure is formatted to both 1E & 5E gaming rules. Also available in PDF.

The end of the road. A lonely fort stands on the banks of a mighty river. It is here the hardy bands of adventurers gather to plan their conquests of The Hill, the hulking mass that looms over this tiny settlement. The Hill is filled with monsters, they say, and an evil witch makes her home there. Still, no visitor to The Hill has ever returned to prove the rumors are true or false. The thrill of discovery is too great to pass up, and only the river stands in the way. The adventurer's boat is waiting! This module is designed for use with the D&D Basic Rules. A trip through the wilderness begins a unique challenge for the novice player and Dungeon Master. TSR 9078