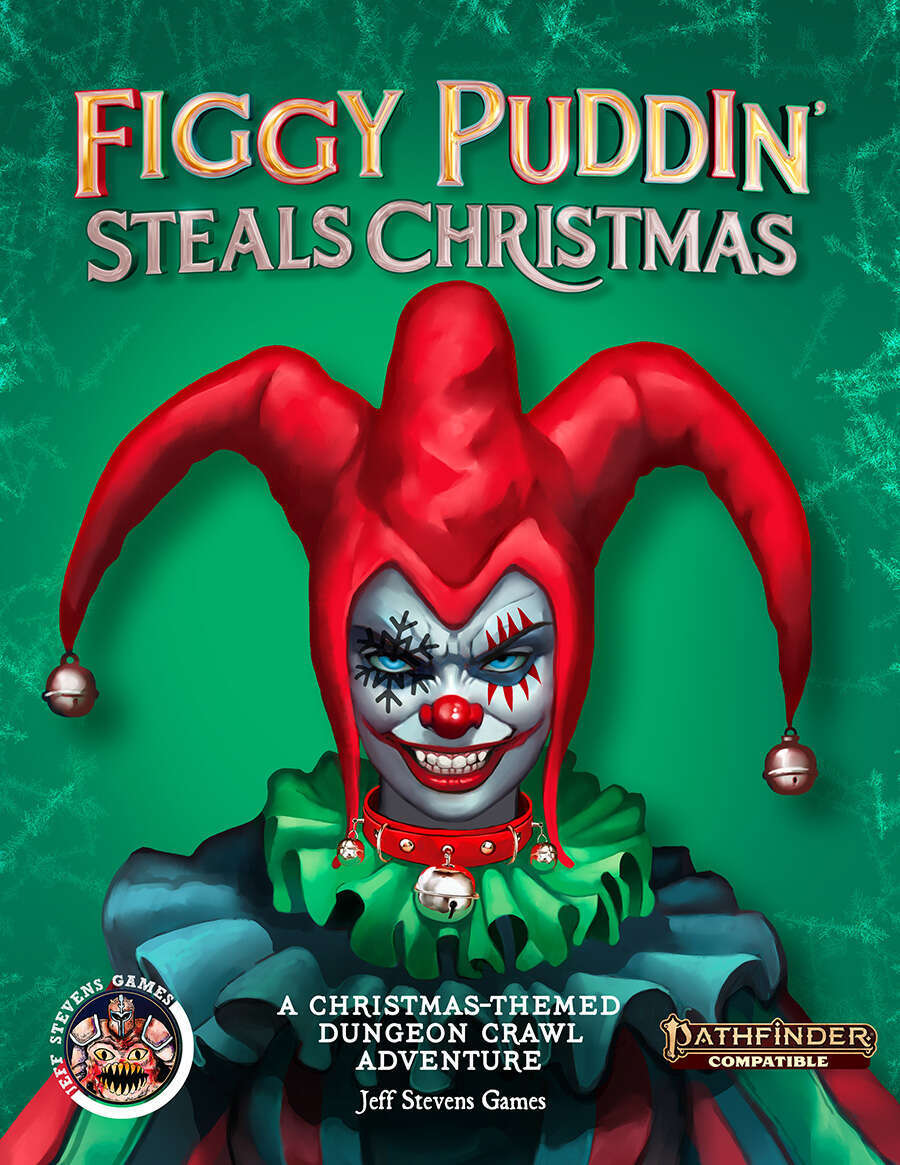
Figgy Puddin' Steals Christmas is a short adventure for three to six characters, and optimized for 2nd level characters. We also include Scaling Suggestions, allowing you to run this adventure for lower- or higher-level characters. We anticipate a run-time of 2- to 4-hours. There's a bit of roleplay in this adventure, which may extend the playtime. Adventure Background A traveling jester known as Figgy Puddin’ and her Coal Smudge Gang have stolen Christmas presents and now hold them for ransom. While safe and secure in her lair, she awaits either a payment of an outrageous ransom, or a crew of heroes to claim the presents after they navigate her not-so-festive lair. What's the Adventure? After you introduce the hook, the adventure occurs in Figgy Puddin's lair - a refurbished kobold bunker consisting of eight rooms. As the characters explore the linear dungeon, they encounter new creatures, complete challenges, and are tested about their Christmas knowledge. However, the final confrontation with the naughty Figgy Puddin' could make for a very Unhappy and Unmerry Christmas for our heroes, the children of Thistleton, and their parents. Who Is Figgy Puddin’? Figgy Puddin’ was once a happy jester who loved Christmas. For years she traveled the realm, bringing fun and festive cheer to villages and children while preparing the way for Santa. However, times have become tough, and entertainment doesn’t always pay as well as one would like. As Figgy prepares for retirement, she’s learned she doesn’t have enough gold to last. During this time, she’s also decided that Santa doesn’t know who she is, let alone appreciate the work she puts in every year. Using her savings, extortion, blackmail, and other nefarious means, she’s convinced several mechanical geniuses and arcane specialists to help her refurbish her underground bunker with wondrous effects, creatures, and tests. To fund her retirement, she’s taken extreme measures to make some quick gold — holding Christmas presents for ransom.

A 1st-level dungeon crawl for Shadowdark RPG where the characters delve into a ruined citadel hunting for legendary treasures while avoiding the wrath of the infamous scarlet minotaur! Inside the citadel are secrets about the downfall of the warrior-cultists who once ruled it, three legendary weapons they wielded, and several factions of intelligent creatures to turn into allies or enemies. This adventure is part of the free, digital Shadowdark RPG Quickstart Set, which comes with two 68-page booklets (Player and Game Master guides), 8 pre-made characters with gorgeous art, and a form-fillable character sheet. Shadowdark RPG is what classic, old-school fantasy gaming would look like after being redesigned with 50 years of innovation. It's the world's greatest roleplaying game in a whole new light! Download the free Quickstart set here: https://www.thearcanelibrary.com/pages/shadowdark
The Red Bastion - the prison of a dwarf ghost princess... A 15-room dungeon for levels 2-3.
A sequel to the Lost Mine of Phandelver adventure for 5th and 6th level characters. An ancient forgotten evil threatens the Sword Coast once again! Our party of intrepid adventurers returns to Phandalin and Wave Echo Cave for what is at first glance a rescue and exploration mission. Prospectors for the Rockseeker mining concern have disappeared deep inside the flooded caverns that give the cave its name. The peril extends much deeper than mere lost explorers though, as the party stumbles upon an ancient, long-forgotten struggle between good and evil. Inexplicable cultists hide in ambush at every turn. A risky raft ride through treacherous underground waterways leads to an ominous discovery. Ancient ruins tell a story of the terrors of the night and a noble alliance sworn to fight them. A search for a powerful weapon of light leads the party on a mind-blowing, sky-high ascent into the unknown. Then, a whirlwind of danger: A rumbling volcano. Legions of undead. A desperate battle for the survival of the region. This adventure was designed as part of “The Next Adventure” Design Jam at the DMs Guild. It works best for a party that has just completed the Lost Mine of Phandelver adventure, but it can easily be inserted into any campaign. It is designed for a party of four to six 5th or 6th level characters and, based on playtesting, will take an average of about 3 sessions to complete.

Bugbear Fight Pit is a mini-adventure with a single main encounter that follow the Bugbear Jeeshank tricking the players into a trap with the challenge of single combat to stop his activities. If the players fall for it, they will be faced with a large number of ranged attacks, and additional clever tactics and use of the terrain. Pgs. 15-17

The Pyramid of Amra is a challenging adventure designed for characters of at least 12th level. Due to the nature and numbers of undead enemies (vampires), having a cleric on hand with the ability to cast raise dead and greater restoration is advisable. The PCs should be rounded out with a wizard or sorcerer and a pair of front-line fighters. In this adventure, the PCs travel to the Pyramid of Amra and the ancient Monastery of Night, where they face one of the most dangerous of opponents they are likely to meet, C’nosretep the Champion of Set.

The Sword and Crown is an event unrivaled in Anuirean politics. Every five years, rulers come from across the land to renew friendships, cement alliances, and provoke their enemies with poisoned words and sharpened swords. Wheels turn within wheels, and plots abound. It's politics as usual in Anuire. Except this conclave is different. Not only is it taking place in your kingdom, but before the festivities can even commence, someone wages an attack on Prince Avan and kidnaps his daughter. And to whom do the regents turn to rescue the princess? The hosts, of course! The PCs must win their way past dangerous bandits and treacherous elves to discover a path through darkest caverns, where the slightest misstep mean death. And only then does the real threat become apparent! This adventure contains a 64-page book crammed with details about the setting, the situation, and the major characters, plus a full-color mapsheet. It is designed for use with the BIRTHRIGHT boxed set. TSR 3102

The fabled mines of Dhol Kuldhir once showered the Dalelands, Cormyr, and points beyond with precious gems and expertly crafted jewels. Operating from a hidden complex in the Thunder Peaks, their exquisite craftsmanship was said to rival that of even Thunderholme. Almost as quickly as it rose to prominence it vanished, along with all of the dwarven miners, crafters, and untold riches. Some speculate that the mine ran dry, and the inhabitants abandoned it for a more plentiful location. Others believe that they probably fell victim to one of the many goblin tribes plaguing the area. The truth, however, is much more grave. Centuries later, the nearby town of Keen is beset upon by unlikely thieves, the local innkeeper charges a small band of unlikely allies to investigate the string of burglaries. What they uncover leads them to the long-lost dwarven mine. In the darkness, they will have to brave insidious traps, cunning monsters, and the dreaded new lord of Dhol Kuldhir.
Freeport is a fantasy “free city” you can place in a fantastic setting. Its basic premise is a pirate city gone legit… at least on the surface. In truth, the pirate tradition is alive and well in Freeport, but camouflaged by a veneer of respectability. These days the city’s pirates are privateers, legalized pirates Freeport loans out to the highest bidder. You’ll learn more in the short history of the city that follows. This should help give you a taste of the flavor of Freeport before the adventure begins and the given background is all you need to run this adventure. It is an ideal starting place for a new campaign as the player characters find themselves stranded in Freeport after a deal goes sour. A seemingly simple job plunges them into the strange underside of the city, where they uncover secrets worth dying for. Death in Freeport is the first from the Freeport trilogy, together with Terror in Freeport and Madness in Freeport. Synopsis: Death in Freeport drops the player characters into the midst of political and magical intrigue, as the hidden Brotherhood of the Yellow Sign manipulates events to bring its dread god to the world. Freeport is still a bustling center of trade, but evil currents run beneath the surface. There are secrets here, and questions unanswered. The characters will undoubtedly learn there is more here than they expect in a simple seaport. The question is, will that knowledge kill them? As the adventure begins, the player characters (PCs) have just come to Freeport on a merchant ship. While on the docks, the PCs are attacked by a press gang, who mistake them for easy marks. The press gang is handily beaten off; since they are unused to real resistance. A bookish young man named Brother Egil then approaches the PCs. He says that he’s been looking for a group that can take of itself, and that he has a job for them if they are interested: finding a missing librarian. The missing man, Lucius, disappeared two days previously, and Egil is eager to find him. Egil gives the PCs some background on Lucius and his strange behavior. The PCs are then free to investigate: They are likely to visit Lucius’s home, the temple to the God of Knowledge, and an orc pirate ship. This should form a picture of Lucius as a man searching for his own past—who found something he wasn’t counting on. Following a trail of clues, the PCs learn about the Brotherhood of the Yellow Sign. With a little luck, the PCs can trail the cultists back to their hideout, penetrate the lair, and discover secret tunnels underneath it. Deep underground they find degenerate serpent people, and eventually Lucius himself. The librarian has been tortured badly and will die without aid. The PCs also have to deal with the leader of the cult, a man they may recognize from the temple. When the cult priest is slain, they are in for an even bigger surprise. He was not human at all, but a serpent man in disguise. What this means for Freeport only the gods can say.

The Last Point is a prison and outpost of the Corrive Empire, a realm ruled by a cruel green dragon named Lady Corrive. The Corrivians are well known for their hatred of magic users, and their extensive slave trade industry. A forest realm with coasts on three sides and mountains running through the center, Corrive is rich with a variety of resources. However, the rocky northern coast is out of the way of their navy and relies heavily on hired ships to help transport various goods including prisoners and slaves to isolated outposts, training centers, and slave colonies. The northwest coast of Corrive is rocky and many parts of it are elevated, making it isolated from much of the mainland. The Last Point is a recycling center where captives meant for death row who are either deemed “not important enough” to execute publicly or “too disgraceful” to execute publicly are sent to be tortured and then killed. The place seems to operate on sort of a “well, we have too many so some have to go now” policy. The Last Point has no official deadlines for killing.

"And they bade their slaves, 'Build unto us tombs to rival the palaces of the gods, for there shall we live or lives and sleep our deaths in splendor.' And the people of Maru-Qet wore their fingers down, broke their backs, burst their hearts to obey. Indeed they raised up great tombs to rival the palaces of the gods. And their masters were well pleased, for it was as gods they saw themselves." The brown dragon Urum-Shar lurks in a strange tomb, plotting schemes only a wyrm of incredible power could understand. Expanding on content from Draconomicon: Chromatic Dragons, this adventure takes the heroes into Urum-Shar’s dark and trap-filled lair, where they will eventually face the powerful dragon herself. The dungeon heavily employs the use of traps, with fewer monsters. The upper tomb consists of a great puzzle of twelve rooms, and the lower tomb contains the dreaded Urum-Shar, an ancient brown dragon and heir to the lost draconic empire of Maru-Qet. The dungeon has special protections against scrying and other divinations, as well as teleportation. Pgs. 55-90
This is a short adventure than can be completed in a single session, for 4-5 players of 1st level. The old church at the edge of town has long been abandoned, but a week ago several robed figures arrived in town and have taken up residence in the old church. Since then, the townsfolk claim to have seen a strange mist around the building, and several folks have gone missing. Little do they know, these cultists have awoken a long dead necromancer, who seeks to bind a dark power to its will.

An Adventure for Odysseys & Overlords Standing on a lonely, bare mound in the bottom of a dell full of swirling fog, a castle from the time of the Schism crumbles, forgotten. Inside, treasures—and terror—await. A writ of salvage has been posted in Chandra's Haven: 500 gold coins to the brave adventurers who find Misthollow Castle and secure it for Salamon Castos, a wealthy merchant. Castos claims to be the scion of the noble family which ruled Misthollow and built the castle generations ago. Castos grudgingly agrees to allow the characters to keep whatever they find in securing the castle, though he insists on right of first refusal on anything of value. The Odysseys & Overlords Player’s Guide is available at https://www.drivethrurpg.com/product/275042/Odysseys--Overlords-Players-Guide The Odysseys & Overlords Game Master's Guide is available at https://www.drivethrurpg.com/product/275040/Odysseys--Overlords-Game-Masters-Guide

Lost Tombs, Volume 2 The lich Lyzandred: a madman, an undead archmage, a survivor of the twin cataclysms that destroyed tow great empires. His name invokes fear in the hears of the smallest children, the bravest warriors, and the wisest sages. Like a malicious cat, the lich toys with all who stumble into his maze, tormenting them with strange puzzles and obscure riddles, monsters and demons, weird traps and dangerous magics. All who enter the crypt of Lyzandred find themselves scarred with his rune, proof of their visit -- and their folly. But there is a method to the madness of Lyzandred, a purpose to his twisted games. If you're lucky, you might even live to learn about it. The Lost Tombs series begins with Star Cairns (Volume 1) and concludes with The Doomgrinder (Volume 3). Each adventure is playable separately, or they can be linked to form an epic-length story. TSR 9580
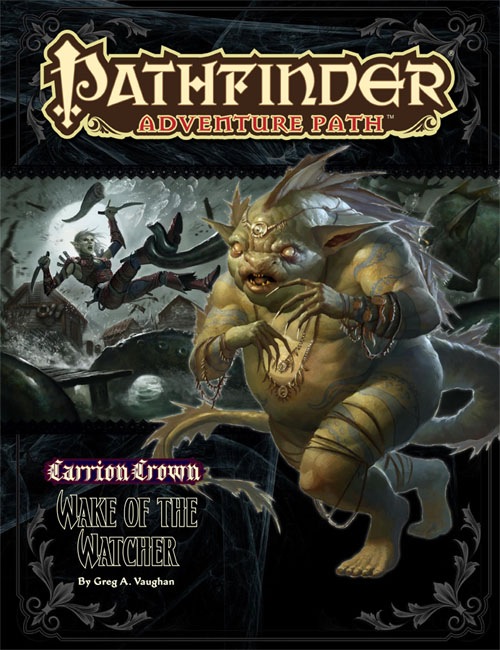
Part 4 of the Carrion Crown Adventure Path brings the heroes to the small fishing village of Illmarsh. The party is searching for a dark rider of the necromantic Whispering Way cult and will discover the strange practices of the deeply religious inhabitants of Illmarsh. Rumors of madness, strange disappearances and human sacrifices to things best left unnamed lead them to investigate the town church and its history. They'll find a desperate people, caught in a war between beings from beneath the seas and invaders from the darkest corners of the cosmos. Can the heroes save Illmarsh from its tradition of terror? It is worth noting that this story is heavily inspired by The Shadow over Innsmouth by H.P. Lovecraft and the role playing game Call of Cthulhu. If you're planning on going through the whole adventure path of Carrion Crown, the module Carrion Hill could easily be fit between book 3 and 4, as the party will travel directly through the area where this one shot adventure takes place. This book includes: - “Wake of the Watcher,” a Pathfinder RPG adventure for 9th-level characters, by Greg A. Vaughan - Blasphemous secrets of the foul faiths known collectively as the Old Cults and sanity-shattering gods such as Azathoth, Nyarlathotep, and Cthulhu, by James Jacobs - A giant bestiary filled with eight classic monsters inspired by the writing of H. P. Lovecraft and the tales of the Cthulhu Mythos, by James Jacobs and Greg A. Vaughan - Laurel Cylphra’s discovery that the dead aren’t the only dangers in Ardis in a new entry into the Pathfinder’s Journal, by F. Wesley Schneider.

With your fame building in the Great Plains of Dorack you have received word of an abandoned temple that has been showing signs of life. Years ago the followers of the old deity Sobek built a temple to honor him. The cult died out after a successful raid by Plainsmen who looted the complex after killing off the monks who inhabited it. A few days after the temple sacking the chieftain responsible for the attack fell ill and died of a mysterious disease. As it was believed a curse befell the warlord, the area was abandoned and considered taboo. Lately strange lights have been seen near the old temple and a giant stone alligator has been spotted in the area. The Plainsmen cannot go to the area as the old taboo is still in place and have asked your party to investigate.

Abridged description from DriveThruRPG.com: From award-winning RPG podcaster John Grana comes a new supplement for the Pathfinder RPG: a sprawling goblin warren and the tribe that inhabits it, fleshed out in full detail and turned into a campaign setting for goblin player characters. Within Bloodmoon Goblins is all the information a gamemaster needs to bring a goblin campaign, full of action and intrigue, to life.

In the eastern desert stands the ancient tomb of Solomon III. Like all tombs, it is full of magical treasure and crawling with deadly creatures. But unlike other tombs, this one is screaming. Years ago, soldiers and wizards went in to silence the screams, and they succeeded, but they never returned. Now Solomon’s tomb is once again screaming out across the dunes, and no one knows why. Solomon’s treasure is still down there, but then, so is whatever is screaming. ADVENTURE TYPE: Small Linear Dungeon DESIGN NOTES: This adventure is intended for characters levels 5 to 7. It includes a desert wilderness area, an oasis, the tomb exterior, the tomb interior, and a cave system below the tomb to explore. Each area contains various NPCs, new monsters, old traps, shiny treasures, and strange magical items. There are many opportunities for (deadly) combat, and a few of them may be inescapable, but it is possible for players to have complex interactions and to experience very different consequences, depending on their choices. INCLUDES: Story hooks, dialogue prompts, creature stat blocks, dungeon overview map, and full-sized battle maps of each dungeon room that can be printed and used right on the table. KEYWORDS: Tomb, ghuul, ghoul, skeleton, ooze, demon, devil, thief, wizard, desert, sabercat, oasis, spider, viper
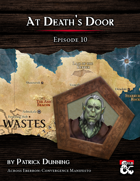
At Death’s Door is a dungeon crawl that takes place almost entirely in the upper chambers of the Lair of the Keeper. This lair belongs to an ancient dracolich that perhaps styles themselves after the legends of the Keeper, or perhaps even inspired them. Stormhome. The player characters are called to the home city of House Lyrandar to meet with Guild Handler Lhara regarding their quest for an artifact tethered to Dolurrh, the Realm of the Dead. The Descent. Traveling by airship over the horrors of the Demon Wastes, the party descends into a vast canyon to find the Lair of the Keeper. After agreeing on a pickup point, the party skydives into the hellish landscape and hides to avoid the notice of a would-be god, then explores the surrounding area. The Lair of the Keeper. The bulk of the adventure takes place in the upper chambers of a dracolich’s lair in a manifest zone tied to Dolurrh, the Realm of the Dead. Surviving the horrors of this place is the main challenge of the adventure. The Ghaash’kala. There is one last challenge standing between the players and their escape to the airship. The orc tribes called the Ghaash’kala consider it their holy duty to protect the rest of the world from the horrors of the Demon Wastes. They will attempt to stop anything from escaping the Wastes, unfortunately including our heroes.

Riddled with veins of precious ore and gem, the Earthspur Mountains to the west have long been a valuable resource for anyone able to mine them. One such mine has gone silent and the only thing more concerning than its long overdue shipment is the fate of the members of the Soldiery sent to discover what has happened to the mine’s workers. Though the mine lay in a region of the Mountains once claimed by a clan of reclusive dwarves, the Ludwakazar clan wouldn’t be so bold as to violate their long-standing peace with Mulmaster. Or would they?