
Seductive vampires, hungry werewolves, sinister drug dealers, trouble in the sewers, and an undead beholder? Just another day in Waterdeep! The first adventure in the Vampires of Waterdeep Campaign Arc. Pgs. 62-77

A dungeon of tricky puzzles, ancient magical secrets, and more than a few lingering mysteries, designed to be played as a standalone adventure and not incorporated into another campaign. Six adventurers descend into the Temple of Mysteries to find a mystical artifact called the Strand of Tears. Seems straightforward enough, except that some of the party may not be who they say they are. In fact, none of the party may be who they say they are. Not only that, but they might not be who they don't say they are, either! Worst of all, they're trapped in the ruins of an underground temple specifically designed to keep people from proceeding unless they're proficient in puzzle-solving...and there may be doppelgangers on the loose.

A handful of would-be adventurers gathers to explore an ancient tomb, eager to trade their discoveries for a ticket to a better life. What they find within presages the advent of the Age of Worms, an era of darkness, decay, and writhing doom. "The Whispering Cairn" is the first installment of the Age of Worms Adventure Path, a complete campaign consisting of 12 adventures, several "Backdrop" articles to help Dungeon masters run the series, and a handful of poster maps of key locations. For additional aid in running this campaign, check out Dragon's monthly "Worm Food" articles, a series that provides additional materials to help players survive this campaign. Pgs. 14-47
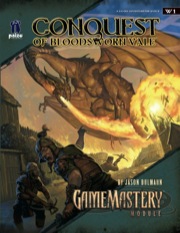
Fallow and abandoned for years, Bloodsworn Vale has long been a dangerous wood separating two kingdoms. A recent call-to-arms asks adventurers from around the world to establish a trade route through this dark and forboding forest.

The brilliant (if somewhat eccentric) detective Viktor Saint-Demain has put more criminal masterminds behind bars than any three other inqusitives. But when the master sleuth fails to get the recogintion he deserves, he sets out to prove to Sharn that they can’t live without him. Pgs. 16-34
The insurgent agent Adan, a spy in Alvedara, came across plans for an upcoming assault on Bodrun, the largest remaining dwarven clanhold in the South. Though the dwarves were unknown to him, this Sarcosan rebel decided that he must do his best to get word to these allies in the mountains. He stole the plans and abandoned his cover identity, fleeing east along the Eren and hoping to find succor in the Forest of the Sahi before his trek into the Kaladruns. He didn’t make it that far. A legate spyhunter was on his tail within hours of his departure, and with his stronger mount and divinatory magic, was sure to run him to ground on the Horse Plains of Erenhead. Adan hoped to throw off the scent of his tracker in the town of Malima, where he had contacts and might be able to wait out the legate in a safehouse. Unfortunately, the situation in Malima had worsened since Adan had last been there, and it had become a place of exile for Alvedarans with the plague. It was a question of choosing the lesser of two evils: plague and possible death in Malima, or torture, betrayal, and certain death at the hands of the legate. Adan chose to hide in Malima, but contracted the plague while hiding from his pursuers. Though unable to contact the outside world, Adan sent his familiar, a raven, eastward in the hopes that it would reach a dwarven settlement that could send agents to aid him. The raven made it to the Hagaran Observatory in the Forest of the Sahi, where the PCs have been assisting the sages of the observatory. Midnight Runner Up - Gen Con 2005

This module is designed for characters who have made their way through the Freeport Trilogy. Characters new to Freeport are at disadvantadge, however. Hell in Freeport sends the characters to the depths of the Hell as pawns of an undead duke. When they discover the truth of their mission, they must race against a sinister clock to save two cities. Act 1 kicks off with a battle against a cornugon on the Freeport docks. The characters are hailed as heroes for defeating the fiend, and are summoned to the Church of Retribution to help in the battle against Hell. Tee old inquisitor who greets them is actually Jalie Squarefoot, an infernal lich who took this form to search for the perfect cat's-paw. Squarefoot wants to take the souls of Freetown, a city in Hell, but must first get around a contract poin: he can't take the city until the Tyre tower clock-now stopped- strikes midnight. He sends the party to Devil's Cry, an inslan off the coast of Freeport, with instructions to close the gate to Hell hidden inside. In truth, he knows the party will be transported straight to the Third Circle when they try. Inside Devil's Cry the party finds the remnants of a great battle fought between an invading devil's army and the Church of Retribution, and battle their way past undead defenders until they reach the gate itself and unwittingly trigger it. Act 2 begins with the party in a twin of the complex they explored in Devil's Cry, but now they are deep in Hell. They fight their way back to the cavern entrance, only to find that they are not on the Prime anymore. When they voyage back their homeport, they instead find themselves in Freetown, a city of scaped slaves in a dark mirror image of Freeport. Once in Freetown, they make the acquaintance of the city's mayor Wycleffe-a servant of Jalie Squarefoot-who persuades them to go on a quest to Tyre to restart the tower clock. They travel the Styx to the Eight Circle and fight their way into a long-buried vity, and then into the tower clock itself. They restart the clock and begin the trip home, but are waylaid by devils and taken prisioner. Act 3 opens with the party naked and in chains in the infernal prison called the Forge. They learn that Jalie Squarefoot and Wycleffe have duped them, and that the supposed rebels of Freetown are actually its protectors. The characters must escape or win their freedom in the gladiator pits before the tower clock they restarted destroys both Freetown and their home city of Freeport. They battle back to Freetown, taking revenge on their captors in the process, and capture the city from Wycleffe with the help of the rebels. Finally it falls to the PCs to enter the tower clock and stop it and Jalie Squarefoot before the fiend's plan can come to fruition. After being tricked and manipulated throughout the adventure, the party finally has their revenge on the duke and his minions.
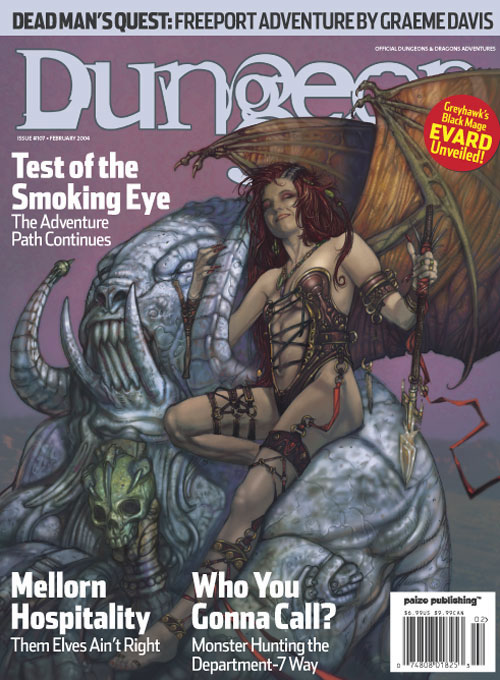
The Cagewrights continue their manipulations of the city of Cauldron, making the PCs their latest pawns in a gambit that leads all the way to the Abyss. The heroes must complete the test of a deposed demon lord to ensure the safety of Cauldron and all its citizens. The 5th adventure in The Shackled City Adventure Path. Pgs. 38-71
An adventure for the Midnight campaign setting from Fantasy Flight Games. The adventurers make contact with the Baden's Bluff underground to investigate a pair of recent murders. This adventure emphasizes information gathering and deduction, rather than combat.

A powerful artifact lies deep in the vaults of a House Kundarak bank. Can the PCs steal it without getting captured in the process? "You'd be mad to even try it. Assuming you could get inside the compound, somehow avoid the guards and traps, and open one of the best vaults in Khorvaire, you'd still need to get back out. And then, even if you succeeded, the dwarves would still hun you down!" Tergil, commissioned salesman of exotic pre-owned goods. Bank heist adventure with lots of guards. Pgs. 16-29

What begins as a simple expedition to explore an ancient jungle temple sends adventurers headlong into a search for the Dragon's Eye, an artifact created ages ago by demons in order to gain power over dragons. But where exactly is this mysterious artifact, and why do the Cloudreavers and the Emerald Claw think the adventurers already have it? Only Lady Vol knows the truth. Her deadly cat-and-mouse game leads the characters from the wilderness of Q'barra to the wild coasts of the Lhazaar Principalities and the soaring peaks of Argonnessen. There, at last, they can learn the secret of the Dragon's Eye and foil the lich queen's plans... if they survive!
The wizard Allustan requests the party's company on a trip to Blackwall Keep, a militia outpost on the border of a treacherous swamp. But what of the green worms and unkillable zombies plaguing the region, and what fell secret is locked in the keep's forlorn basement? "Encounter at Blackwall Keep" is the third installment of the Age of Worms Adventure Path, a complete campaign consisting of 12 adventures, several "Backdrop" articles to help Dungeon masters run the series, and a handful of poster maps of key locations. For additional aid in running this campaign, check out Dragon's monthly "Worm Food" articles, a series that provides additional materials to help players survive this campaign. Check out issue #335 of Dragon for three sample cohorts that they might want to take on. Pgs. 16-40

Dragotha's phylactery lies hidden somewhere in the ruined city of Kongen-Thulnir, a ruin now inhabited by tribes of giants and besieged by an army of dragons desperate to claim the phylactery for their undead master. "Kings of the Rift" is the tenth installment of the Age of Worms Adventure Path, a complete campaign consisting of 12 adventures, several "Backdrop" articles to help Dungeon masters run the series, and a handful of poster maps of key locations. For additional aid in running this campaign, check out Dragon's monthly "Worm Food" articles, a series that provides additional materials to help players survive this campaign. Issue #342 of Dragon presents several magical items that the PCs can construct using Item Creation feats that fit into the mythos of the Age of Worms Campaign. Pgs. 52-86

"Wherein the local clergy makes the terrible mistake of not hiring enough assassins for the job." Synopsis: The heroes have just returned from the abyss (Occipitus) and reestablish themselves in Cauldron, when they are assaulted by a group of professional assassins. After they repel the attack, they trace back the lead to the temple of Wee Jas, where they find plenty of opposition from the second in command, Ike Iverson. After dispatching of the cleric and securing of a (spare) soul cage, the group finds evidence of a place important to the cagewrights' cause - an ancient underground complex named Karran Kurral. Mounting an expedition to that place, they find more evidence towards the horrific destiny on schedule for Cauldron. However, they gain access to the Soul Pillars after defeating a dracolich, that they can use to gather plenty of intelligence on the cagewrights' plans. Pgs. 12-51
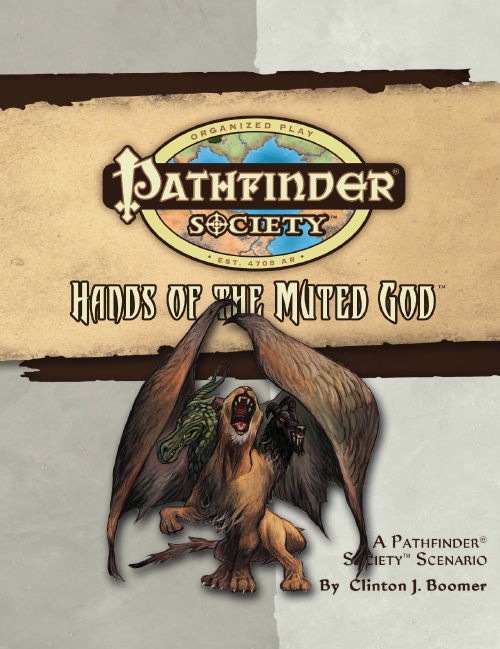
When the man who would be the Muted God wordlessly stepped beyond the gates of the Starstone's Cathedral, his thousand and one faithful ringing the Ascendant Court watched with the silent contemplation that is their highest sacrament. When he failed to emerge, many of his penitents abandoned their vows but a small sect remained loyal and worshipful. You and your fellow Pathfinders are sent into the mountains north of Absalom to follow the path of a doomed party and uncover the secrets of the Muted God. His loyal band of followers, called the Hand, will stop at nothing to keep you away from their shrine—even forming an alliance with some of Golarion's most evil denizens.

The coastal village of Caer Garrion has mysteriously depopulated, and the only survivior, a lone prisoner in the local jail, has gone mad. What does this village's sinister fate portend for the Moonshae Isles?

This adventure can be used as stand-alone or continuing the arc started by Death in Freeport. Terror in Freeport leads the PCs deeper into the intrigue they began to glimpse in Death in Freeport. The investigation takes them from the corridors of power to the bowels of the underworld, with terrifying insights into who really controls the city. They discover that the Brotherhood of the Yellow Sign has its claws in the town's power elite, but thanks to some clever camouflage by Sea Lord Drac. they may not find out just whom the serpents control until it's too late. As the adventure begins, the PCs are contacted once more by a very nervous Brother Egil. He tells them that while staying with Lucius one evening, he awoke to find a burglar in the roomstealing a scroll. Egil is certain that the Brotherhood have penetrated further into Freeport than anyone imagines. He wants the PCs to investigate Milos's other ties to the city and find out what's being done about the temple of the Unspeakable One. The PCs search the cultist's lodgings and discover it has been carefully gone over, and several possibly incriminating books are missing. But the burglars overlooked one thing: a Tome with a diagram of the Lighthouse of Drac sketched onto the back page, marked with the letter V. Upon leaving Milos's lodgings, the PCs come upon a gang of orcs beating up a hapless messenger. They lend a hand, only to discover they've been tricked - the messenger makes off with Milos's book! A chase through the back streets leads them to the boarded-up building the y discovered in Death What they find isn't encouraging. There is a guard posted out front, courtesy of "V"- -Verlaine. head of the Captains' Council. Meanwhile, down below, the cultists continue to have the run of the caverns-— in fact, they have been shipping their unholy relics to Verlaine's own home!

A long, perilous ocean journey behind them, the crew of the Sea Wyvern finds itself shipwrecked on the Isle of Dread. Their destination lies well over 150 miles to the south, miles heavy with the threat of the island's terrible inhabitants. Yet the unknown enemies are far more sinister, for more than just dinosaurs hunt the vast jungles. Before long, a cunning fiend picks up their trail, and its duplicitous master demands their sacrifice. "Here There Be Monsters" is the fourth chapter of the Savage Tide Adventure Path, a complete campaign consisting of 12 adventures appearing in Dungeon. For additional aid in running this campaign, check out Dragon's monthly "Savage Tidings" articles, a series that helps players and DMs prepare for and expand upon the campaign. Issue #352 of Dragon explores the Isle of Dread in detail, providing a complete ecology of the island and the writing of Larissa Vanderboren. This article can be used as a player handout to represent the journals the group recovered from the Vanderboren family vault in the first adventure in the Campaign. Shipwrecked on the Isle of Dread! Faced with a dangerous journey, the PCs must escort a ragged band of castaways through monster-infested wildlands in order to reach the safety promised by the colony of Farshore on the isle’s southern tip. Pgs. 32-60

The Cagewrights are defeated. The Tree of Shackled Sould is no more. Lord Vhalantru has been exposed and put down for the menace he truly was. The town of Cauldron has been saved from volcanic apocalypse. The heroes of Cauldron have earned their place in history, and more than deserve a time of rest, yet fate is not so kind. For the true menace behind the curtain still lives. As long as Adimarchus, the demon prince of madness, continues to dream his haunted dreams and writhe away the years in torment in the fiendish asylum of Skullrot, Cauldron can never be truly safe. "Asylum" concludes the Shackled City Adventure Path that began with "Life's Bazaar" (Dungeon #97) and continued with "Flood Season" (Dungeon #98), "Zenith Trajectory" (Dungeon #102), "The Demonskar Legacy" (Dungeon #104), "Test of the Smoking Eye" (Dungeon #107), "Secrets of the Soul Pillar" (Dungeon #109), "Lords of Oblivion" (Dungeon #111), "Foundation of Flame" (Dungeon #113), "Thirteen Cages" (Dungeon #114), and "Strike on Shatterhorn" (Dungeon #115). Pgs. 40-65

Not all evil spawns in ancient ruins or on fiendish planes. Sometimes, all corruption needs to take root is a jealous memory, cultivated bitterness, and a lonely place to bloom. An elusive killer is leaving a trail of noble blood across the city. When the PCs are recruited to protect an influential spinster, they discover that more is afoot at Dromdal House than anyone suspects. In fact, they may be the ones who need protection, from their aging ward. Pgs. 18-28