
After the first expedition to locate an ancient tomb was prematurely ended by monsters, the Search and Locate Treasure Consortium is doubling down. Camp established, they are looking for adventurers to make their dreams come true, but the leader of the Consortium is hiding something. Will the characters be able to avoid the Man Slayer tribe that destroyed the first expedition, help Larazmu settle his internal struggles, and locate the tomb that they have been searching for without getting into Moor Trouble?

Into the Drachensgrab Mountains! Hot on the trail of the marauding slavers, you and your fellow adventurers plunge deep into hostile hills. Spurred on by your past success, you now seek the heart of the slaver conspiracy. But hurry! Your must move quickly before the slavers recover from your previous forays and attack! This module was originally used for the official Advanced Dungeons & Dragons Tournament at Gen Con XIII and is the third of four in a series of related tournament modules. This module contains a challenging scenario, the tournament scoring system, plus nine pre-rolled, playtested tournament characters. Also included are large scale referee's maps, notes, and background information. A3 is a complete adventure in itself, but it is also a companion to A1 (Slave Pits of the Undercity), A2 (Secret of the Slavers' Stockade), and A4 (In the Dungeons of the Slave Lords). TSR 9041

The valley of Haven was a peaceful land. Its crops were abundant, its citizens prosperous. Elves, Dwarves, Halflings, and Humans lived together in harmony. Hidden away in the heart of the Thunder Mountains, Haven was a safe place to live. The rivers were sweet and pure; the weather was pleasant and warm. Something terrible has come to pass in Haven - terrified refugees speak of a fabulous ruby uncovered in the mountains and a catastrophe that befell the palace. Whatever the cause, Haven now lies in chaos. Raiding bands of orcs, goblins, and hobgoblins terrorize the countryside. The disaster happened so suddenly that the citizens are confused and helpless. Without their leaders, who are trapped in the palace, they have no courage to fight back. The situation has become desperate. TSR 9044

The end of the road. A lonely fort stands on the banks of a mighty river. It is here the hardy bands of adventurers gather to plan their conquests of The Hill, the hulking mass that looms over this tiny settlement. The Hill is filled with monsters, they say, and an evil witch makes her home there. Still, no visitor to The Hill has ever returned to prove the rumors are true or false. The thrill of discovery is too great to pass up, and only the river stands in the way. The adventurer's boat is waiting! This module is designed for use with the D&D Basic Rules. A trip through the wilderness begins a unique challenge for the novice player and Dungeon Master. TSR 9078

Atop a distant mountain peak, a monstrous entity plots dark deeds. The final chapter of the Seeds of Sehan campaign arc. "To a mind that is still, the whole universe surrenders." Chuang-Tzu. Pgs. 30-47

This quest is for a party looking to resurrect a character whose corpse is missing body parts necessary for survival. Lower-level resurrection spells don’t work on a creature that is missing a head, heart, or other vital organ. To resurrect the body, the characters turn to Vaprak, patron deity of trolls, and attempt to earn the god’s assistance. However, a band of frost giant hunters intend to destroy Vaprak's temple along with everyone inside it. Includes a quest-related NPC that a player can control if they're waiting for their character to be resurrected.

The PCs must infiltrate a city ruled by monsters to search for the spymaster that holds the key to saving a besiged nation. Pgs. 26-50

The PCs begin in the port city of Luskan, where they're hired on by a caravaning merchant to perform guard duty for the long, dangerous journey over the Spine of the World Mountains. If the heroes do well, they reach the small town of Targos, where they hear rumors of a dead mage's lost tower out on the tundra. In order to find it, the PCs must overcome numerous obstacles but may find allies in the peoples of the Ten-Towns region, including a barbarian prince, a sly halfling, and a unique ranger. Not all is as it seems, though, nor can all smiling faces be trusted. Can the PCs separate the truth from the lies, locate the Accursed Tower, determine all its secrets, and survive?

Are you ready for some HACK 'N' SLASH action? Do you yearn to unveil the hidden mysteries of the DWARVES? Are you thirsty for some UNEXPECTED encounters? The long lost Dwarven Kindgom of Gleodemar holds a relic of the past, Svarogs's Anvil, a magical artifact that can boost weapon production. The Heroes are sent to reclaim it, but the ancient fort is not empty and the new denizens have settled for good and do not seem keen on sharing any treasures. Will the Heroes manage to overtake them in a direct (and bloody) confrontation, or will the try to slip through the shadows to reach their goal? Maybe they will be captured and the "cavalry" will have to save them? In this adventure anything goes and it takes only one mistake to unravel the Heroes' careful plans and make them prisoners of the Keep. In this slightly challenging 5e hack 'n' slash adventure for 4th level PCs you will find: - a detailed story behind the Dwarven Kingdom of Gleodemar - a powerful dwarven artifact - a back-up NPC party, in case the heroes require a "deus ex machina" intervention - an optional ethical dilemma, to spice things up - both DM and player-safe maps - 3 boss monsters that can be used as future antagonists - non-stop action and suspense until the last minute of this 3-act mad rash and if all of that still does not sound fun, there's ALSO a race against time before the curtain falls. Download away! (and don't forget to share your feedback, we'd love to hear it!)
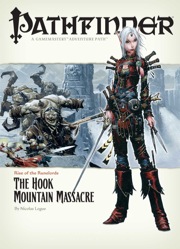
Them Ogres Ain't Right... The Rise of the Runelords Adventure Path continues! The notorious Hook Mountain ogres, known for their violent and savage ways, have slaughtered the soldiers of Fort Rannick. The few surviving rangers need heroes to help them retake this key fortification before the ogres use it as a staging ground for further assaults on the region. Yet why have the ogres chosen now to launch this sudden attack? What sinister force grows in the surrounding wilderness, and what ties to the mysterious Sihedron Rune do the ogres of Hook Mountain hide? Are the rumors of an army of giants massing for war true?
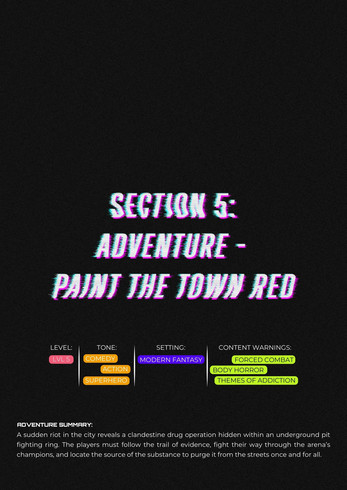
A sudden riot in the city reveals a clandestine drug operation hidden within an underground pit fighting ring. The players must follow the trail of evidence, fight their way through the arena’s champions, and locate the source of the substance to purge it from the streets once and for all.

Rumors of faceless demonic creatures have been steadily rising in the Hillsfar region, and it is said that far below the surface of Faerun, nestled in the bowels of the Underdark, ancient terrors are stirring. The imperiled drow of Szith Morcane have extended an intriguing offer, but can the drow be trusted, and for how long? An eight-hour adventure for 11th-16th level characters.

Indomitable it stood for centuries, a symbol of order in a world of chaos. Bastion of the pass through the Kamph Mountains, the very stones of the Keep of Adlerweg were the stuff of legends. What evil power had strength enough to take it? How were its defenses swept aside? Fell creatures now attend the battlements that overlook the only pass between Berghof and the sea. This is not a pretty problem to be solved by the militia of the local villages. These and more may be needed to withstand the mayhem stirred up by the fall of the keep. Indeed, if the Keep is not retaken, and retaken soon, the Hold of the Sea Princes itself may not be secure. Now is the time for heroic action. Aided by the Sentinel, former protector of the legendary Guardians of Adlerweg, have you the courage and the determination to rid the keep of its sinister occupants? UK3: "The Gauntlet" (1984), by Graeme Morris, is the third UK-series adventure and the second half of the two-part Adlerweg series. It was run as the final round of the GamesFair 1983 AD&D Open (and won by a RuneQuest fan!). It was then published in 1984. TSR 9111

The Sea Witch is a short adventure for four 10th-level characters. The difficulty of the adventure can be adjusted by changing the level of main antagonist (Black Molly, the sea hag pirate) or by altering the number of her ogre servants. To tailor the encounter to groups of different levels, refer to table 4-1 in Chapter 4 of the DUNGEON MASTER’S GUIDE. The adventure is set off a lightly populated coastline known as Misty Bay, but adapts easily to any coastal region in existing campaigns. The sea hag known as Black Molly is a notorious pirate who has plagued the coastal cities for the better part of a decade. A successful Knowledge (local) check (DC 15) will reveal that Molly and her ogre crew have a filthy reputation as merciless killers who delight not only in plundering vessels for their riches, but also in destroying the ships themselves and sending all hands to the bottom of the sea. Now the villain and her followers have seized control of the Old Lighthouse of Misty Bay located off a lightly populated coastline. For generations the lighthouse beacon has protected the fishermen of this region, warning them of the dangerous rocks that lurk just below the level of the high tides. Recently, the hag has put out the beacon, darkening the lighthouse; misery and destruction are sure to follow as ships start to blunder into the rocks. Blackmail is apparently Black Molly’s aim in this venture: She conveyed a message to the nearest shore community, the fishing village of Poisson, demanding the princely sum of 50,000 gp. Until she receives this ransom, she intends to hold the lighthouse and its beacon hostage. The fate of the human keepers who tend the lighthouse is unknown to the seaside communities at this time, but they fear the worst. The Sea Witch is ostensibly a rescue mission: The PCs are pitted against the evil of Black Molly and the brawn of her savage ogre crew. It is the heroes’ task to retake the lighthouse and, if possible, free its captives from the clutches of their jailer. What neither the PCs nor the shore communities yet realize is that while she 1would be pleased to have the gold, Black Molly is in fact after bigger treasure. Molly has no intention of giving up the lighthouse — at least, not until she finds what her master sent her here for. Lying on the sea floor practically at the base of the rock on which the lighthouse sits is the wreck of the war galley Flying Cloud, which according to popular legend was captained by a cleric who wore around his neck an amulet of the planes. Black Molly wants this prize, but so far she hasn’t been able to find it. She’s scoured the wreck without finding any sign of the magic item. Now she’s trying to determine where to search next, for the item might well be somewhere near the wreck. If she can’t find it, she’ll start torturing her captives to find out if they have any useful knowledge about the amulet.

The wizard Kavorquian is dead. But certain items belonging to his adopted son were in the wizard's keeping at the time of his demise. Now someone must venture into the silent vaults of Kavorquian's stronghold and recover the missing property. Queen's Harvest picks up its story where B11, King's Festival, left off. It can be played as a sequel to that adventure or as a complete adventure in itself. It is tailored for beginning Dungeon Masters and players and contains helpful hints on adventuring and the land of Karameikos. The story develops simply, but ultimately leads the player characters into the nether reaches of Penhaligon's politics to confront Ilyana Penhaligon, mad pretender to the throne! TSR 9261

The outpost of Fort Dolor has experienced an unprecedented stretch of peace in recent times. Then nearly the entire garrison disappears on a supposed routine patrol, and the town— still on the frontier— is left nearly defenseless. Can the adventurers dig to the bottom of the mystery at Fort Dolor before they, too, disappear? Pgs. 82-103

The Cult of the Dragon, along with its dragon allies and the Red Wizards of Thay, seek to bring Tiamat from her prison in the Nine Hells to Faerûn. To this end, they are sweeping from town to town, laying waste to all those who oppose them and gathering a hoard of riches for their dread queen. Continued in The Rise of Tiamat.

The renegade magic-user Bargle is wanted, dead or alive. Rumor holds that he dwells in the bowels of a nearby abandoned keep, performing all sorts of foul sorcery. Only the truly brave, or perilously foolish, would dare to challenge Bargle in his own domain. Expanded dungeon of the BECMI red box sample dungeon.

A bargain struck between a dwarf chieftain and a great divine power forms the heart of this adventure. The chieftain, unwilling to step down from her position as ruler, seeks a way to hide from the god. When the party rescues some of her kin, they are offered riches for recovering a long lost magical shroud with the power to obscure mortals from the eyes of the gods. But recovering the shroud draws the attention of the god’s agents, and the party must choose a side. In this storied and fate-filled adventure for eleventh-level and up PCs, the party must battle their way through a ruined dwarven armory before deciding the fate of the chieftain.

The PCs answer a call for heroes by the Church of Traladara, asking for help in finding an ancient relic- the Shield of Halav. This is located in a lost temple, and the PCs must locate this temple, and brave its dangers to recover the shield before two competing teams from other churches find it first. Part one involves setting up the adventure, doing research, following clues, and discovering the site of the lost temple. Part two; once the site is known (ruins under a modern town) the heroes must travel there and find the entrance. Part three is braving the lost temple, filled with traps, puzzles, and other dangers, to find the missing shield, and then culminating in a climatic showdown with the completing teams.