
This is the first of the three adventures that comprise the Bleak House campaign. It brings the heroes into Ravenloft (if they aren't there already), introduces them to Rudolph van Richten, and starts them on the long trail that eventually brings them to the door of the manor knows as Bleak House Included in Bleak House: The Death of Rudolph van Richten TSR 1141

A mission to find a rare recipe ingredient for a local wizard. The recipe to fashion that magic item calls for a few drops of fey blood. Hmmm...where in the world can that be found?

Faced with an unusual alliance of giants raiding the countryside, the party must venture into the steading of hill giant chief Nosnra and uncover maps to the locations of the other giant strongholds. “Steading of the Hill Giant Chief ” can be run as a stand-alone adventure, or you can play it as the first part of a four-part series that continues with “Warrens of the Stone Giant Thane” (Dungeon 198), “Glacial Rift of the Frost Giant Jarl” (Dungeon 199), and “Hall of the Fire Giant King” (Dungeon 200). The adventure is part of the Against the Giants series originally by Gary Gygax, hence the writing credit.

Valachan: Hunter’s Moon is a slasher/gothic horror adventure for 4-5 level characters of 8-9th level. It can be played over the course of 6-8 hours and should roughly take one playing session, if the party is quick, or two if the party is progressing slowly. This is the fourth and final part of the Carnival of Lost Souls campaign, which can also be played as a standalone adventure. Valachan: Hunter’s Moon features: Fully fleshed out Trial of Hearts with dangerous encounters along the journey Rules for sabotaging rival parties before the Trial New custom monsters to make combat encounters truly memorable and exciting High-quality maps, also available in universal vtt format Check out the previous adventures in the series: Lamordia: The Hardest of Hearts, Dementlieu: Dance with the Devil and Kalakeri: The Forbidden Temple! And look out for the special Campaign Guide, which will explain in detail how to best set up and play the campaign. However, if you want to start your campaign right now, don’t worry - we have included a short appendix at the end of each adventure that will explain the basics! Disclaimer: We are a team of writers from Ukraine, so the unprovoked war and senseless aggression of the terrorist state of russia influenced our initial timelines significantly. However, we are now as safe as we can ever be under the constant threat of missile strikes, and determined to finish the whole series! And after that - who knows, maybe even more cool adventures will follow ;)

The village of Farleigh's Well is the target of a vindicative fey noble. The villagers have been seen parading through the Misty Forest, leaving their crops to rot in the field. The characters must contend with powerful fey creatures on their home plane in this action-packed adventure. What's Inside: A highly adaptable single session adventure. Two original NPCs with full stat blocks. Two original magic items. Detailed combat tactics and roleplaying hints for novice and experienced DMs alike. Two brilliant maps to help you bring the adventure to life. Choose from either the Full version with art and page design or the Lite version for easy printing.

The village of Bad an Fithich is besieged by a monster and the villagers offer a reward for its head. Thus far none have succeeded, but the tales tell only of a large wolf, which seems like an easy bounty. The party’s first night in the village is marked by the cry of a banshee proclaiming their inevitable doom, but if they listen closely they may hear another story. Pgs. 119-127

Trapped in the mysterious Castle Amber, you find yourselves cut off from the world you know. The castle is fraught with peril. Members of the strange Amber family, some insane, some merely deadly, lurk around every corner. Somewhere in the castle is the key to your escape, but can you survive long enough to find it? TSR 9051

The wizard Kavorquian is dead. But certain items belonging to his adopted son were in the wizard's keeping at the time of his demise. Now someone must venture into the silent vaults of Kavorquian's stronghold and recover the missing property. Queen's Harvest picks up its story where B11, King's Festival, left off. It can be played as a sequel to that adventure or as a complete adventure in itself. It is tailored for beginning Dungeon Masters and players and contains helpful hints on adventuring and the land of Karameikos. The story develops simply, but ultimately leads the player characters into the nether reaches of Penhaligon's politics to confront Ilyana Penhaligon, mad pretender to the throne! TSR 9261

He wanted a scabbard - but got the shaft. If the book is to believed, there's a magical sword - completely unguarded! - ripe for the taking. This short adventure starts with the players finding a diary describing the final resting place of Hrothgar and his powerful intelligent sword. In a quest for the sword, the players investigate a small cavern system and find the sword in a gelatinous cube. Pgs. 32-37

This material was originally published as three separate adventures: G1 (STEADING OF THE HILL GIANT CHIEF), G2 (THE GLACIAL RIFT OF THE FROST GIANT JARL), and G3 (HALL OF THE FIRE GIANT KING). Contained herein are referee notes, background information, maps, and exploration keys for three complete adventures using the ADVANCED DUNGEONS & DRAGONS rules. This module can be used alone or as the first in a series of adventures that includes Dungeon Modules D1-2 (DESCENT INTO THE DEPTHS OF THE EARTH), D3 (VAULT OF THE DROW), and Q1 (QUEEN OF THE DEMONWEB PITS). TSR 9058

You are Erystelle of Dorneryll, famed elfin champion and magic-user. After years of adventuring, you have come home to the Emerlas - the hauntingly beautiful elfin woodland at the tip of Canolbarth forest. A place of legends and of peace. The journey has been long, but soon the winding forest track will bring you to Dorneryll, the majestic oak tree home of your childhood. Ahead, you glimpse a plume of smoke curling lazily into the sky. Dorneyll is close, and your mind floods with thoughts of home. Suddenly, your reverie is shattered! The thin plume of smoke is gone, an in its place a column of red flame leaps high among the trees. Dorneryll is under attack! Gripping your lance, you urge your mount into a gallop. Starbow surges forward; your war dogs close on her heels... Blade of Vengeance is an adventure for one player and one dungeon master, featuring a lone elf against the forces of evil. Can you save the Emerlas from destruction? The answer waits inside. TSR 9108

The prince's godmother commissions you to retrieve the prince's jade crown, held in the tower of the vampire! The vampire's tower has three levels, and the three-level dungeon below 45 rooms. The party must be wary! Lethal traps abound. Marching order is important. A straight-forward dungeon crawl with many Gygaxian rooms and encounters. No roleplaying to speak of. Pgs. 4-18
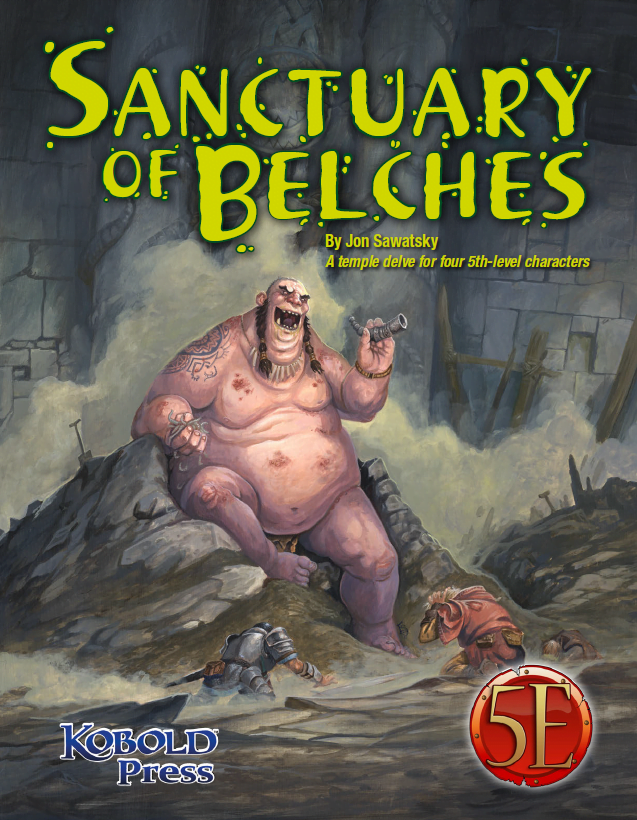
The trouble began several weeks ago when a duergar excavation team went to work in a long-abandoned temple. Drawn to the temple by stories of riches and artifacts, the duergar hired several giants as laborers before cracking the temple’s sealed doors. The largest of the giants, a loathsome Thursir mutant named Huppo, used his acidic vomit to expedite tunneling into the temple’s collapsed hall of worship. Then, Huppo found the horn—an unusual instrument made from a single piece of stone, with a mouthpiece so intricate only a master carver could have made it. The horn became the giant’s obsession. Seeing only the horn’s potential sale value, the dwarves demanded Huppo turn it over to them, but Huppo refused. To force compliance, the dwarves stopped feeding the gluttonous brute, but Huppo had already found his own source of food; in deep areas of the temple, worms were chewing out of the rocks, and Huppo ate them by the fistful. He also played the horn. Then, after several days of blowing the horn and devouring the strange worms, Huppo released a belch so noxious the dwarves had no choice but to lock him in a sealed chamber and carefully consider their next move. The horn’s call, however, had caught the attention of passing nomadic orcs. They set up camp outside the temple entrance in the hope of finding the horn and its player. That’s the current situation at the temple: the giant refuses to stop blowing the horn and belching out deadly clouds of stomach gas; the dwarves are frightened and edgy while their leader is obsessed with malevolent whispers; orcs are threatening to overrun the place; and the population of worms grows steadily as something awakens deep in the stone beneath the sanctuary of belches.

Come and wolf down the adventure! It’s been a long time since the people of Welton have worried about anything but sheep ticks and late frosts, but now a pack of strangely determined wolves are spiriting away entire flocks at a time and driving farmers from their fields. With food running low and their sorcerer-in-residence nowhere to be found, the village council send out a desperate plea for brave adventurers to destroy the beasts. Is the job as easy as a walk in the woods, or is there more to the Wolves of Welton than mere animal cunning? There’s only one way to find out… A fresh take on the ancient 'kill ten wolves' quest that RPG fans will be so familiar with, The Wolves of Welton is designed to be played from start to finish in just one 3-6 hour session with limited preparation from the DM. All major characters have roleplaying notes included and full-size environment maps are included.

Part 1 of an Expert-level quest into a hostile wilderness. This adventure takes place in the Known World of the D&D game, as outlined throughout the D&D game rule books and modules. The DM may find it useful to consult the Companion and Masters Sets, as well as most of the X-series of Expert Set modules. D&D Expert Set module X9, The Savage Coast, would be especially helpful, as Tortles of the Purple Sage could easily serve and continue that module's direction and plot like, adding a previously undescribed area (the Great Northway) to the Known World. The DM may also place the areas and events of this adventure within an existing campaign setting, as long as the geographical areas of the campaign match those set forth here. Pgs. 40-62

One of the original D&D classics, "The Isle of Dread" is a hex crawl wilderness adventure. It focuses on surviving primitive beasts, dinosaurs, and pirates while uncovering the mystery of the island's inland city, where a great treasure awaits. From the cover: "This module contains maps and background material for the Isle, fifteen new monsters, and suggestions for further adventures. In addition, The Isle of Dread contains a map and background information for a large continent, and eleven smaller maps for encounters on the island itself. In this module, players will push their way through dark jungles and treacherous swamps to discover the lost plateau, and the final secrets of - the Isle of Dread!" TSR 9043
Barovia has long suffered under the rule of Count Strahd von Zarovich, but the evil that plagues this land extends well beyond the walls of Castle Ravenloft. See what keeps the good citizens of Barovia awake at night.

The Frozen Necromancer is a three-part adventure for Fifth Edition that takes player characters from levels 1 to 4. This adventure is the first in a storyline of four modules called The Demonplague that can be used as an entire campaign that takes characters from level 1 to 20. The entire adventure (or just pieces, characters, or encounters from The Frozen Necromancer) can be dropped into any fantasy setting with minimal changes
The Siege of Castle Rend is an adventure for the fifth edition of the world’s first roleplaying game, suitable for five 5th-level characters. It takes place over four parts, and each part can be completed in one or two sessions of play, depending on your group’s playstyle and how long you like to play in a single sitting. If all goes according to plan over the course of this adventure, the player characters will expose an usurping lord, fight orcs, acquire a stronghold, defend it from an invading army, win the admiration of a town filled with potential vassals, and make political connections within the Barony of Bedegar. Of course, no adventure goes according to plan. The PCs will invariably throw these well-laid schemes into chaos, and they’ll have to improvise. But if we know how things would have gone if the PCs never showed up (or are cowards), it makes it easier for us GMs to improvise when things go off the rails. Published by MCDM

A goblin warband has found the secret tunnel which leads from the dwarven keep of Hearth-Home to the nearby hills. The tunnel is intended to be a means of escape if the keep ever falls to attackers, but now it has provided goblins with an easy way into the Underkeep. So far, the goblins have confined their attentions to the various underground rooms that make up the Underkeep, but sooner or later they will find a way to the surface. They pose a serious threat to Hearth-Home - the goblins must be cleared out of the Underkeep so this breach in security can be repaired before the orcs hear of it and overrun the dwarven keep. This adventure is slightly more challenging than Red Hand Trail, and it is recommended that it is played after that quest and before Palace of Dread. However, the scenario in Trouble Below can easily be played independently from the rest. Part of TSR 1076 The Goblin's Lair