
Earth giants, frost giants, fire giants... when the giants strike out to raid and destroy the civilized lands, it becomes apparent that something much larger and more dangerous lurks in the background. A group of adventurers must locate the spark that has ignited this spreading fire and find a way to snuff it out before it engulfs the world. Revenge of the Giants is a super-length adventure that takes characters from 12th level to 17th level. It includes background material, adventure hooks, new monsters and magic items, and a powerful, unfolding story that shows off the best of the paragon tier of play. It also includes a double-sided battle map depicting key encounter sites, designed for use with D&D Miniatures.

Summoned from across the multiverse, a small group of heroes must enter an ancient pyramid and prevent the Elder God Nyarlathotep's return to power. A Lovecraft-themed oneshot.
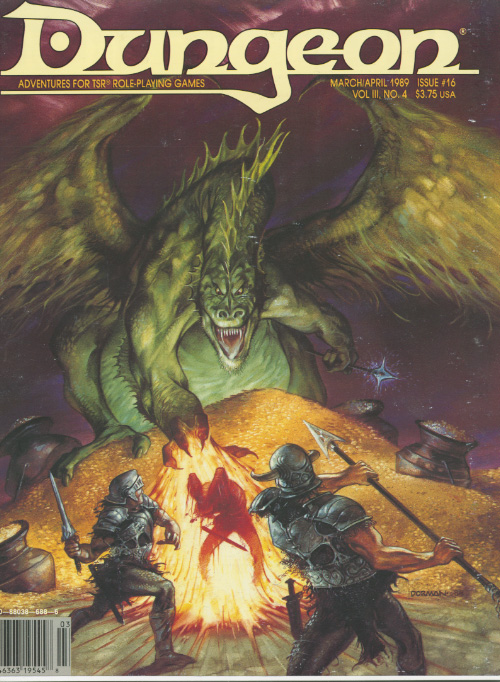
A city of the dead has no business coming back to life. "The dead just want a little respect." The village of Wargrave's only claim to significance is as the resting place of soldiers from a long-ago battle. Now it seems that the dead are stirring. Roleplaying of forces at cross-purposes, with sentient undead. Set nominally in the Forgotten Realms, but the adventure is essentially generic. Pgs. 38-42

At times adventuring groups will hit a town after a successful foray and go their separate ways for a short time. This adventure centers on such a scenario with one member opting to chase down a thief that has burgled the merchant’s guild. When checking with their cohorts the adventurer discovers they are the only one interested and, since its only one thief, the challenge should be fairly easy….right?
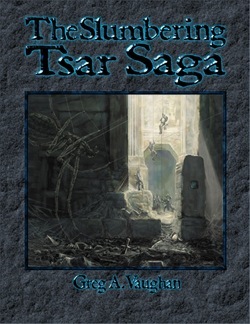
The Sleeper Awakes! At last, after languishing in its crypt for an age, the secrets of the slumbering city of Tsar burst forth in all their macabre glory. Poured forth from the eldritch furnaces and crucibles of the Necromancer and Orcus himself comes Frog God Games bringing you at long last The Slumbering Tsar Saga™. Something Stirs in the City of Evil Over the distant northern hills, beyond The Camp, and past the Desolation stand the pitted walls of Tsar. A hundred armies have crushed themselves against this bulwark in futile attempts to breach the city. Even the combined might of the Heavens and Earth were unable to break through in the final battle of Tsar. So why was the city suddenly abandoned on the verge of victory, and what waits for those foolish enough to enter the Temple-City of Orcus? The Black Gates Await Only the bravest and most powerful of heroes dare the depths of the Desolation and live to tell of it. But what happens when they penetrate that blasted landscape and look upon the gates of the very center of evil on the earth. Can even heroes of such renown breach the Walls of Death and live?

Deep in the Marsh of Chelimber lie the ruins of a great wizard’s tower. SEER has received intelligence, which she imparts via her emissary Hsing, that deep beneath the marsh in the remains of an old tower is knowledge of older magics. This could be just what Parnast needs to resist the onslaught of Bad Fruul and his armies!

As the adventurers depart Honeyfest to go on their next adventure, one or more of the characters may suddenly come down with a terrible sickness. To make matters worse, as they make to leave town (or visit the local apothecary), the market square is suddenly thrown into chaos by a plague wizard and his pet otyugh spreading filth!

DMs, do you wish you had more time to put together fresh, innovative adventures for your players? Have you ever been stuck for a new plot line, but been unwilling to delve into the reading and preparation required by full-length modules? Here is a AD&D game accessory designed for the DM who wants variety and challenge for player characters. Adventure Pack I contains 12 short modules, each a complete stand-alone adventure. The scenarios are unique and unusual; they will intrigue characters of all levels, and offer a variety of settings and plots for the DM to choose from. These adventures are suitable for one-time play, or can be inserted into your campaign at any time. Each module includes one or more maps, background for the DM, NPC capsules, and complete encounter descriptions. The scenarios are designed for a specific range of player character levels, and can easily be made more or less difficult if necessary. Now, with a minimum of preparation, you can give your player characters a challenge that will last for as little as one day of game time or months of it. DMs are sure to find Adventure Pack I convenient, innovative, and invaluable! This conversion guide allows DMs to run the 12 adventures in the original module with 5th Edition rules and provides new monsters and magic items! To use this conversion guide you will need a copy of I13 Adventure Pack 1, originally available in hard-copy and now for sale in digital format at DMs Guild.
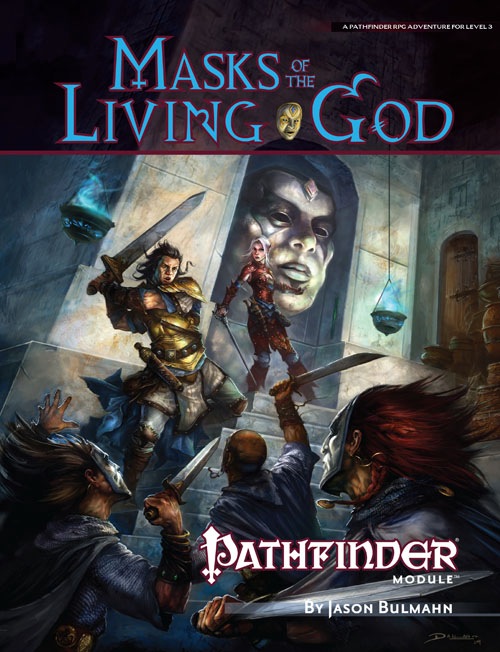
Razmir the Living God used his power to conquer an entire country; now he and his mask-wearing priests enforce peace and generosity—though some say their tools are intimidation and fear. His worshipers preach charity and self-worth, blaming rival faiths for crafting lies about the glories of the Living God. Now the cult has come to the city of Tamran, feeding the poor and promising happiness to those who serve Razmir. Yet ugly rumors persist of bribery, extortion, and strange disappearances associated with the new temple. Are these stories just gossip and lies spread by rival faiths? Or is the church of the Living God more than it seems? Part Two of the Price of Immortality trilogy.

Noel Needs Elves is our Christmas tongue-in-cheek adventure! While it could be a 'real' adventure it was designed to just have a good time with some holiday strangeness! After getting done with your first adventure you head to a fortress in a canyon to resupply and heal up. There you meet Lady Noel who is involved in a fight of her own. She trades you healing for the promise to deliver a message to the Elves on the other side of the canyon. Happy holidays everyone!

The mining town of Glister has a problem. The latest caravan only arrived with a part of its supplies. Orcs waylaid them, took much needed goods, and are now making demands that the town return an artifact that is theirs, but the town is unfamiliar with. Help track down information about this artifact and possibly defend the city from an orc invasion! A 4-hour Adventure for 1st-4th Level Characters Part 2 of Kossuth's Kiss

TENTACLES. VERY DANGEROUS. YOU GO FIRST. Adventure in the Underdark, Part Two The colony of svirfneblin, while grateful for the adventurers’ deeds, is still in need of a reliable source of drinking water. The kuo-toa hold the lake, and there is the matter of the tentacled menace the party faced previously… This adventure is a continuation of Tentacles. Why Did It Have to Be Tentacles?, but can be run by itself as well. It is designed to easily fit into any standard fantasy setting. A 4-hour adventure for 6th-8th level characters

𝐅𝐨𝐫 𝐭𝐡𝐞 𝟓𝐭𝐡 𝐞𝐝𝐢𝐭𝐢𝐨𝐧 𝐨𝐟 𝐭𝐡𝐞 𝐰𝐨𝐫𝐥𝐝'𝐬 𝐦𝐨𝐬𝐭 𝐩𝐨𝐩𝐮𝐥𝐚𝐫 𝐫𝐨𝐥𝐞𝐩𝐥𝐚𝐲𝐢𝐧𝐠 𝐠𝐚𝐦𝐞! In the steaming jungles of the east, the Feathered City rises like a jewel from the lush forests. An important stop on many aerial trade routes, the skies above the city are filled with griffons, rocs, and airships from the far corners of the world. But your adventure takes you to the very belly of this exotic city. Forced into the service of a night hag, you must help her find and eliminate her enemy - a demon with no name, that rules from the shadows. This is a mystery adventure for characters level 5-10, and optimized for a party of 5 level 7 characters. It takes about 10 hours, or two sessions, to complete. 𝐁𝐞 𝐰𝐚𝐫𝐧𝐞𝐝 - 𝐭𝐡𝐢𝐬 𝐢𝐬𝐧'𝐭 𝐚𝐧 𝐚𝐝𝐯𝐞𝐧𝐭𝐮𝐫𝐞 𝐟𝐨𝐫 𝐭𝐡𝐞 𝐟𝐚𝐢𝐧𝐭 𝐨𝐟 𝐡𝐞𝐚𝐫𝐭! It contains horror elements that may be too graphic some players, and even worse - this adventure packs an old school punch. Teamwork and caution are needed to survive long enough to hear the Tiger's Song.

"The Alchemists' Guildhall" is a rusalka lair suitable for four or five 6th-level characters. This adventure can be completed in one session.

A Four to Six Hour Adventure for 11th-16th Level Characters in Dungeons and Dragons 5E The Adult Green Dragon Valturnax has attacked the nearby village of Hartsvale, threatening to destroy them completely if they do not submit to his rule by nightfall. To save the town, adventurers must ascend the mountain by climbing through the caves housing the dragon’s minions and face him in his lair – and they need to do so before the sun sets. This adventure is meant to be quite challenging. Enemies know the adventurers are coming and have had time to prepare, and they do so intelligently. This adventure draws some inspiration from Tucker's kobolds. As an added bonus, this adventure is available completely for free.

This quest is for a party that urgently needs to resurrect a fallen character but lacks the means of casting or accessing standard resurrection spells. With no other options, the party seeks a hag whose preternatural magic can bring the deceased character back to life. However, the characters must save the hag from a misguided group of knights looking to slay her. Includes a quest-related NPC that a player can control if they're waiting for their character to be resurrected.
:strip_icc()/pic529222.jpg)
The Black Tower is an adventure designed for use with either the Rolemaster books Arms Law, Claw Law, Spell Law and Character Law; or the Advanced D&D Players Handbook, DMG and Monster Manual 1. Rolemaster parties should consist of 5 to 8 characters, level 1-3. AD&D parties should consist of 5 to 8 characters, level 1-4. The main part of this adventure is written in a form which makes it partially independent of the games system chosen. The details of NPC's, creatures and specific magic items are presented at the end of this episode. This is the first part of the Black Tower adventure, though the tower itself does not appear in this issue. This scenario introduces the characters to the area, and to some of its inhabitants. Characters playing this episode should have both the equipment, and a reason, to enter the tower in the next issue. Magical weapons given in the adventure will have two plusses, one for the twenty-sided dice based ADED system, and one for the percentile dice based ROLEMASTER system. eg. +1/+5 meansa +1 AD&D weaponora +5 ROLEMASTER weapon. This will also apply to magical armour and shields. The ROLEMASTER weapons will be superior, not magical, except where specifically stated.
The village of Hillthorpe has been under the "protection" of a rough sleeping stranger. The extortion began with demands for a bushel of wheat or a basket of apples, accompanied by threats of rats and mice being sent to ravage the sick and sleeping, and to ruin the stores. Over time, the demands escalated, reaching the point where the village could no longer afford to pay without starving to death over winter (3 sacks of grain, a barrel of ale, and all the ripe cheese you have each week!). As a result, the village is seeking outside help.

This module is designed for characters who have made their way through the Freeport Trilogy. Characters new to Freeport are at disadvantadge, however. Hell in Freeport sends the characters to the depths of the Hell as pawns of an undead duke. When they discover the truth of their mission, they must race against a sinister clock to save two cities. Act 1 kicks off with a battle against a cornugon on the Freeport docks. The characters are hailed as heroes for defeating the fiend, and are summoned to the Church of Retribution to help in the battle against Hell. Tee old inquisitor who greets them is actually Jalie Squarefoot, an infernal lich who took this form to search for the perfect cat's-paw. Squarefoot wants to take the souls of Freetown, a city in Hell, but must first get around a contract poin: he can't take the city until the Tyre tower clock-now stopped- strikes midnight. He sends the party to Devil's Cry, an inslan off the coast of Freeport, with instructions to close the gate to Hell hidden inside. In truth, he knows the party will be transported straight to the Third Circle when they try. Inside Devil's Cry the party finds the remnants of a great battle fought between an invading devil's army and the Church of Retribution, and battle their way past undead defenders until they reach the gate itself and unwittingly trigger it. Act 2 begins with the party in a twin of the complex they explored in Devil's Cry, but now they are deep in Hell. They fight their way back to the cavern entrance, only to find that they are not on the Prime anymore. When they voyage back their homeport, they instead find themselves in Freetown, a city of scaped slaves in a dark mirror image of Freeport. Once in Freetown, they make the acquaintance of the city's mayor Wycleffe-a servant of Jalie Squarefoot-who persuades them to go on a quest to Tyre to restart the tower clock. They travel the Styx to the Eight Circle and fight their way into a long-buried vity, and then into the tower clock itself. They restart the clock and begin the trip home, but are waylaid by devils and taken prisioner. Act 3 opens with the party naked and in chains in the infernal prison called the Forge. They learn that Jalie Squarefoot and Wycleffe have duped them, and that the supposed rebels of Freetown are actually its protectors. The characters must escape or win their freedom in the gladiator pits before the tower clock they restarted destroys both Freetown and their home city of Freeport. They battle back to Freetown, taking revenge on their captors in the process, and capture the city from Wycleffe with the help of the rebels. Finally it falls to the PCs to enter the tower clock and stop it and Jalie Squarefoot before the fiend's plan can come to fruition. After being tricked and manipulated throughout the adventure, the party finally has their revenge on the duke and his minions.

Tortles of the Purple Sage - Part 2 completes a D&D Expert Set wilderness adventure which began in DUNGEON issue #6. Through the gate stones, into the unknown. This adventure takes place in the Known World of the D&D game, as outlined throughout the D&D game rule books and modules. The DM may find it useful to consult the Companion and Masters Sets, as well as most of the X-series of Expert Set modules. The DM may find it useful to consult the Companion and Masters sets, as well as most of the X-series of Expert Set modules. Expert Set module X9, The Savage Coast, would be especially helpful, as Tortles of the Purple Sage should easily serve to continue that module's direction and plot line, adding previously undescribed areas to the Known World. The DM may also place the areas and events of this adventure within an existing campaign setting, as long as the geographical areas of the campaign match those set forth here. Pgs. 8-25