This adventure sees the party tumbling between two mad goblin inventors. This is the first time the characters will meet Professor Passifou and his inventions. Also available in French

Figgy Puddin' Steals Christmas is a short adventure for three to six characters, and optimized for 2nd level characters. We also include Scaling Suggestions, allowing you to run this adventure for lower- or higher-level characters. We anticipate a run-time of 2- to 4-hours. There's a bit of roleplay in this adventure, which may extend the playtime. Adventure Background A traveling jester known as Figgy Puddin’ and her Coal Smudge Gang have stolen Christmas presents and now hold them for ransom. While safe and secure in her lair, she awaits either a payment of an outrageous ransom, or a crew of heroes to claim the presents after they navigate her not-so-festive lair. What's the Adventure? After you introduce the hook, the adventure occurs in Figgy Puddin's lair - a refurbished kobold bunker consisting of eight rooms. As the characters explore the linear dungeon, they encounter new creatures, complete challenges, and are tested about their Christmas knowledge. However, the final confrontation with the naughty Figgy Puddin' could make for a very Unhappy and Unmerry Christmas for our heroes, the children of Thistleton, and their parents. Who Is Figgy Puddin’? Figgy Puddin’ was once a happy jester who loved Christmas. For years she traveled the realm, bringing fun and festive cheer to villages and children while preparing the way for Santa. However, times have become tough, and entertainment doesn’t always pay as well as one would like. As Figgy prepares for retirement, she’s learned she doesn’t have enough gold to last. During this time, she’s also decided that Santa doesn’t know who she is, let alone appreciate the work she puts in every year. Using her savings, extortion, blackmail, and other nefarious means, she’s convinced several mechanical geniuses and arcane specialists to help her refurbish her underground bunker with wondrous effects, creatures, and tests. To fund her retirement, she’s taken extreme measures to make some quick gold — holding Christmas presents for ransom.
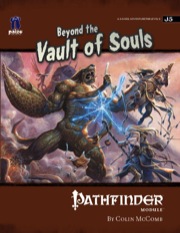
Magical soul gems have been stolen from the secret vault of the goddess of death and scattered across the planes. Some want these gems to unlock the secrets of the multiverse. Others want them for personal power. Still others want them to resurrect a fallen deity. As the god of oblivion looms near, can the PCs retrieve the gems from their new owners in time to save their world? Beyond the Vault of Souls is a planar adventure for 9th-level characters, compatible with the 3.5 edition of the world’s oldest roleplaying game. Within you’ll visit the Eternal City of Axis, brave the dangers of the Abyss, and match wits with the torturer daemons of Abaddon. This adventure is set in the Outer Sphere of the Pathfinder Chronicles campaign setting, but can easily be placed in the strange planes and dimensions of any game world. It can be used on its own or enhanced with information from The Great Beyond, A Guide to the Multiverse.

Dragonspear Castle. All who live within several hundred miles have heard the name and know its import. Once home to the proud and the brave, it stands now a ruin, cloaked behind a history of murder and diabolic plots. Few go there, for the only reward to be found is death. Rumors abound that Dragonspear holds a portal to the sinister planes, but until now those have been unfounded. Following a great battle against orcs and trolls from the High Moor who had taken possession of the castle, a temple to ward against further evil was established. However, by the Time of Troubles, that temple and its clergy had disappeared. Now, a horde of fiends and monsters has amassed at Dragonspear Castle, and it terrorizing the surrounding countryside. The portal is active, that is for certain. The army of Daggerford needs reinforcements! Is you party made of the stuff of heroes? Hordes of Dragonspear can be played using either the Battlesystem miniatures rules, or the quick combat resolution system found in DMGR2, The Castle Guide. Alternatively, a few simple changes render the entire module playable without any special rules. TSR 9369
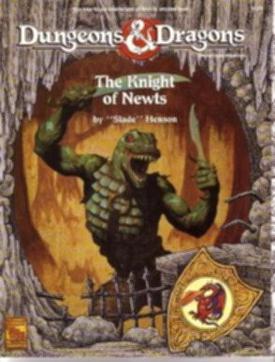
Centuries ago in the Black Swamp, Castle Kraal was a well-respected keep. Its warriors defended the folk of Thunder Rift from the marauding bands of ogres and goblins who swarmed to attack from the Horned Hills. And then one day the keep and all of its warriors vanished, never to be seen again. Now, all these years later, historians are still trying to find the answers to the disappearance of Castle Kraal, answers which may be hidden in Kraal's ruins. The heroes are asked to investigate and to try and solve the mystery. Be Warned: Not every mystery wishes to be solved! Recommended for beginning players and DMs For use with the DUNGEONS & DRAGONS Game Box. TSR 9434

Children and a cleric have been kidnapped from a small coastal town by undead creatures who crawled out of the sea. Defend the Captain's Folly Tavern, investigate the mystery, swim through underwater caverns, and fight the monstrous denizens of the deep in order to save the kidnapped civilians! This adventure includes: 4 New Monsters, 4 New Magic Items, A Seafaring Skill Challenge, & Complications for an Underwater Chase Encounter!

The PCs have traveled to the Nine Hells to confront an outpost of devils responsible for slave raids on their homeland. In this realm of burning ash and fire-streaked skies, the infernal legions prepare constantly for war. Pgs. 138-143

War brews beneath the emperor's notice, nature convulses as unholy demons bring woe to entire prefectures, and hobgoblin mercenaries wearing powerful machine armor march in greater numbers than ever before. Will you rise to save the empire or is Soburin destined for destruction? Soburin is beset upon by dark forces from its ancient past—not only the evil mists that transform men into monsters, but now too the return of a potent necromancer set to bring about a reign of agony, despair, and death! In the looming crisis the immortals that have treated the world as their gaming set are gathering their agents and pawns, deploying unique warriors across the continent with goals as mysterious as they are. It is within this epic game of intrigue that the adventurers become entangled as they undertake quests for the governmental bengoshi in the Sukochi, Yokuba, Ikari, Hakaisuru, Fuson, and Gekido prefectures as well as visit the enigmatic Tsukisasu, city of oni. Demons begat by the entities that consumed nature plague the party during their travels as do a very special gang of smugglers, the gun-toting Mubo Brothers, and the bloody hobgoblin mercenary erikotera warriors suddenly far more populous across the countryside than ever before. By the time all is said and done the PCs take part in a furious mass battle, nail-biting race through an undead dungeon, and finally an epic fight against an ancient evil atop the Hone-Noroi bone tower before it all comes crashing down! This extensive adventure path takes characters from 3rd to 12th level and includes all previous Mists of Akuma modules (Scourge of Róbai Shita Temple, Feud Primordial, Fangs of Revenge, Cursed Soul of the Scorpion Samurai, Yai Sovereign of Storms, and Revenge of the Pale Master) paired together with connecting material that creates one intensive campaign sure to delight GMs and players for months on end! It would be exhausting to list everything that's inside of the 374 pages of Trade War—here are some quick highlights and if you think this book is for you, peruse the table of contents (below) and sample PDFs. Over 50 maps 90 different NPCs and monsters 6 highly-rated adventure modules ranging from straightforward dungeon crawls to sandboxes of intrigue and back (and 2 sidequests by Andrew Engelbrite and Dirk van de Rijt) 8 new class archetypes: survivalist barbarians, smuggler bards, acrobat monks, tumbler rogues, enigmatic eye warlocks, desperado warlocks, and wizards of the inside out 32 new martial arts stance feats including new weapons martial arts stances Hyperlinks throughout to make accessing statblocks from the core rules a breeze Rules for mass combat An epic 9-level bone dungeon inspired by Buddhist hells Mists of Akuma character sheets

What could happen while traveling the vast Savage Frontier? Just about anything! Encounters in the Savage Frontier includes 24 unique encounters of various difficulty that can be used while the adventuring party travels the Savage Frontier. It also includes several new creatures and magic items, digital hand-drawn maps (10 as downloadable .jpg files), and original artwork. Some of the encounters are short and brief, while others may take you a full gaming session to complete. Available for Fantasy Grounds
The adventurer awakens buried in a coffin only to be inadvertently rescued by a goblin grave-robber. With no recollection of how they came to be buried alive, the adventurer is thrust into an encounter with the goblin and his party who have stolen a precious heirloom off their unconscious body. Before starting this adventure the GM and player should discuss what heirloom item the adventurer possesses. Though having immense sentimental value, the heirloom shouldn’t be magical, and it should be of minor monetary value. It should be a worn item that can easily be removed such as a ring, bracer or necklace.

The Final Installment of the Tiddy Mun Trilogy Warning: This adventure is not for the most hardcore of grimdark enjoyers. Do NOT play this adventure if you do not like: Happiness, Joy, Fun, Dancing, Mischief, Maybe a little bit of mayhem, general naughtiness In the third and final installment of the Fennebog trilogy of adventures, the characters will have to brave the land of Fennebog once again. They must defeat violent darklings, negotiate with manipulative pixies and most importantly, meet the demands of a melodramatic archfey. The village of Berribury is in trouble. The characters must deliver an object called the Stranger Stone to the village so they archfey Tiddy Mun can perform a ritual to reverse the flood. A Two-Hour Adventure for Tier 1 Characters. Optimized for APL 3. CONTENT WARNING: Flooding, Manipulation, Deceit, Denial, Entrapment, Alcohol

The legendary spellcaster Emirikol the Chaotic has turned the region into a wild magic zone, a place where all magic goes awry. The only way to put things back to normal is to retrieve the source of the problem deep inside the Ooze Chambers of Emirikol! This adventure is for 4th level characters and can be run on its own or as part 3 of the Litany of Arrows adventure path. This adventure contains, 2 pages of new magic items, 8 new monsters and NPCs, a full write-up of Bwimb II, the Paraelemental Princess of Ooze, an entity referred to in many D&D products but never fully fleshed out and stats for the 3rd edition iconic heroes Regdar and Mialee, who play a major role in this adventure. It's got over 10 pieces of original art, full color maps, tagged and untagged, and a special handout for the player who obtains the Ooze Fist of Emirikol. This adventure builds on the story begun in the platinum-selling Castle of Corellon and the follow-up, Warpath of Gruumsh.

Old Olga and Young Yvonne is a four- to six-hour adventure for 1st-4th level characters, designed for Dungeons & Dragons 5th Edition, with a village theme, hags and witches, an abducted child to save, some horror, and mysteries to solve! Willow Creek, a remote farming village, is in trouble: livestock is going missing and reappears gutted in the woods, crops fail and fields blight - and now the bastard child of young Yvonne has gone missing as well. What no one in the village knows: Yvonne is a budding witch secretly feuding with Old Olga, an evil hag in the woods - who now demands a human sacrifice from Yvonne in return for her child. Who can sort out this mess, bring back the innocent child, prevent a murder, and return peace and quiet to Willow Creek? This adventure can also be used as a mini-campaign sandbox. With the branching and inter-connecting scenes, locations, and NPCs it provides, combined with the guidance on how to run a "village adventure", the material provided here on more than 60 pages can easily cover up to eight hours of playtime. Included with this adventure are: + an original custom creature, the young witch + 12 original fleshed out NPCs, including personality traits and roleplaying tips + a toolset for creating villager NPCs quickly + 7 hand-drawn maps of important locations + 4 alternative story rewards (depending on how the adventure resolves)

“...when the floor trembled and the whole town shook, the people knew Mario had been found a couple of minutes later the dust settled again on the buildings and streets. Silence. The people’s wait to see who came out of the sewers, who would emerge victoriously was agonizing. The fate of the town swung on the outcome of the battle…” Extracts from The Witch Doomsday in Master Bard Blue Barry’s Tales of Silver. This adventure is designed for four to six 2nd- to 3rd level characters and is optimized for five characters. Designed to be a one-shot to play between four and six hours. A band of deep goblins settled in the sewers of Red Witch Cove and took the towns as hostages. They take what they want when they want it without regard for the people around them and their acts are bringing the doom of the town that the merchants were holding back. The package contains: -Color version. -Black and White version. -Maps and battle maps.

Blinsky's Toyshop is our take on what happens to Blinsky and Piccolo during, or after the Curse of Strahd campaign. Blinsky, the toymaker in Vallaki with the cute monkey wearing a pink tutu, received a large inheritance from a long-time client. The client, Obtavius Swat, a retired adventurer and avid collector of toys, left his entire estate to Blinsky. The estate included coin, precious gems, art, and his collection of toys, some made by Blinsky and others he acquired during his travels. Blinsky used the fortune to pay a wizard to create a small island in the middle of Lake Zarovich, located just outside of Vallaki. He then paid masons and workers to build a fantastic new toyshop, which he designed to be an experience for both the young and old alike. Though the number of children in Barovia was increasing, mostly imparted to the devil Strahd’s downfall, Blinsky wanted to touch the inner child of the adults in the city. He wanted happiness. He wanted smiles. He named the castle Blinsky’s Toyshop of Marvels. One of the toys, a small silver tiara kept in a black satin-lined ivory jewelry box, was such a lovely piece. Blinsky couldn’t stand the thought of leaving it in the box. He already had enough gold and losing the small tiara wouldn’t be a large loss, so he decided to give it to his monkey – Piccolo (see Creatures of the Toyshop). He smiled at the thought of her running around in her pretty, shiny tiara. Sadly, as Barovian luck would have it, trapped inside the tiara is the sole of an evil gnome wizard named Aribetha Strangge. In his old age, Obtavious Swat forgot that he and his fellow adventurers used the tiara to imprison the gnome’s soul. Yesterday, when Blinsky placed the tiara on Piccolo’s head, silver tendrils cascaded from the tiara and into poor Piccolo’s skull, allowing Aribetha to control the monkey. Now, Aribetha has incapacitated Blinsky in the toyshop’s tower, brought many of the toys to life, and imprisoned or killed many of the workers and customers. The adventure includes costumes (which the character may wear), Strahd Hand Puppets, and a possessed Piccolo.
Provost Faurious has procured an Aethervane, an astrolabe-like instrument tied to Kythri that's used to navigate manifest zones. Unfortunately for the Provost, the Riedran ship that was carrying the Aethervane across the Sea of Rage to deliver it to their agent in Regalport fell victim to piracy. The player characters are dispatched to Regalport to meet up with the Provost’s agent there and petition High Prince Rygar for more information about the stolen cargo. When the characters dock in Regalport, they meet the Provost’s contact and are ushered into a meeting with High Prince Rygar. Wishing to show his intolerance for piracy, Rygar charters one of his own ships for the party’s use as they investigate the stolen cargo. Upon arriving at the crash site of the stolen cargo, the party is set upon by a fleet of pirates known as the Wind Whisperers. When things turn sour, a new surprise reveals itself as an unnatural storm rolls in, a stolen airship at its heart. The Wind Whisperers have found a way to convert the Aethervane to serve their own purposes. Seeking aid from Rygar and House Lyrandar, the heroes chase after the pirates by sail and airship. As they do, they are bedeviled by the Chaos Fleet—strange ships sailed by an even stranger crew that are drawn to the Aethervane and the chaos it brings. In a final airborne confrontation, the party boards the rogue airship and retrieves the sought-after artifact, with a chance to salvage or sink the stolen vessel in the process…
The Granddaddy of All Dungeons Returns! Rappan Athuk, the legendary mega-dungeon by Frog God Games and Necromancer Games is nothing more and nothing less than a good, old–fashioned, First Edition dungeon crawl updated for the Pathfinder Roleplaying Game. Very difficult, Rappan Athuk will truly strike fear into the hearts of the most stalwart adventurers. It offers legions of inventive traps, tricks, strange features, and monsters—many of them never before seen. It affords numerous opportunities for roleplaying, but anyone willing to brave these subterranean halls better arrive ready to rumble, or their lives will be short indeed. Many, many players have lost favored PCs delving into the depths of this dungeon, all the while giggling like children and having the time of their lives. Hundreds, if not thousands of players have combed the halls of Rappan Athuk over the years, seeking treasure and fame, making it one of the best-known dungeon locations the game has ever produced. Even players who have never entered its halls know the term: “Don’t go down the Well!” Also available for S&W and broken into multiple adventures. Also see https://paizo.com/store/byCompany/f/frogGodGames/pathfinderRPG/rappanAthuk for expansions for this product.

Bring the haunting themes of Edgar Allan Poe to your table! Baronness Elenore Rennet has yet to return home from a masque at Moldavia Manor two nights ago. Can the players find her and uncover the hideous secrets brooding inside the grim estate of Count Moldavia? Masque of the Worms is a 1st-level one-shot originally written for a live playthrough by the Castle Mac crew in the courtyard of the Edgar Allen Poe Museum in Richmond, VA. Check out their fantastic performance on the Castle Mac YouTube channel. This adventure is optimized for the live-streaming, one-shot format, but makes for a spooky and thrilling session at any table. It is sure to make even the bravest hearts shudder!
The Temple of Tesh-Yatra is a setting-neutral dungeon delve for a party of 6th level adventurers, inspired by the classic funhouse dungeons of yesteryear. The dungeon takes 6-10 hours to fully explore. It features a high proportion of non-combat encounters: puzzles, exploration, and the occasional deadly centrifuge. The ungodly fusion of a mad scientist’s lab and a planar temple, the dungeon includes an encounter that can launch your players into the Nine Hells – for a price... The Temple of Tesh-Yatra includes two new constructs to use in your game: the sinister Maimers, and the enigmatic Skorverra; as well as a new magic item: the Amulet of Tesh-Yatra, an artisan’s dream! The Temple of Tesh-Yatra also comes with a VTT battlemap (transparent PNG format). The Temple of Tesh-Yatra was originally set in the Outlands, as an extraplanar dungeon. But given its self-contained nature and the Temple's age, it is well-suited to any wildnerness, and would work equally well seeding a hex crawl.

*THIS IS A D&D NEXT/5E PLAYTEST ADVENTURE* Imani, a Turmishan wizard and former adventurer, seeks the aid of heroes to infiltrate Dretchroyaster’s lair and recover the Diamond Staff of Chomylla—the key to powerful magic and wisdom locked away for thousands of years. In addition to his own sagely interest in the lore of lost Uvaeren, Imani recognizes the dangers of such powerful magic falling into evil hands. The dracolich has secured the staff in his lair’s cen- tral chamber, using ancient wards of protection that can be bypassed only by four artifact-idols once belong- ing to a cult of Bhaal. Each group of adventurers enters the dungeon through a different section of the dun- geon—a forgotten temple of Bhaal, a vast underground lake, a troglodyte village, or Dretchroyaster’s vaults. Dretchroyaster’s lair is no simple set of caverns and ancient ruins. It sits atop a source of great power and energy, which the dracolich and his Cult of the Dragon allies hope to use to unlock the secrets of the staff. Only by undertaking a unified assault against Dretchroyas- ter’s lair can the adventurers hope to recover the Diamond Staff and survive the dracolich’s fury. The adventurers must make their way through the lair and recover the Bhaalite idols that will help unlock the Diamond Staff, all the while dealing with the lair’s creatures and avoiding the dracolich as he pur- sues intruders. Entering the Chamber of the Diamond Staff, the heroes must overcome its magical wards and claim the staff before being slain by the dracolich and his servants.