
Greatwall is in peril - not from military forces of Iuz, but from lack of goods and supplies. Caravans from Willip have ceased thanks to increased dangers on the Willip Critwall Grabford Trail. As the key fort positioned to contain the Iuzian flood, Greatwall is a strategic necessity. Its failure would mean a major incursion along the border. Your characters are hired to escort a caravan from Greatwall to Willip; if its merchants are afraid to come to the fort, the fort will go to them. This should be simple, cut and dried guard job. Right? Of course not. There are many surprises in store for your little caravan, and your characters will need to keep their wits about them day and night in order to make it to the other end. Secret plans are afoot, conspiracies are brewing, and nothing is as it seems while on the Border Watch. This module uses information presented in the From the Ashes boxed set and the Iuz the Evil accessories. However, ownership of these two products is not necessary to play this module. TSR 9406

Few planes possess the raw malevolence of the Infinite Layers of the Abyss. It is a place of random violence, appalling cruelty, and pure, unadulterated wickedness. Here, unreasoning malice rules, and countless demons torture and murder for the joy of it. The Abyss is innovative in its wretchedness, with each fleeting moment birthing new and awful psychotic acts of utter evil. Those who brave its depths find no relief from its corrosive nature, nor respite from the cancerous seeds of evil blooming within all who tarry here; they find only anguish, pain and if they're lucky, sudden, abrupt death. "Into the Maw" is the ninth chapter of the Savage Tide Adventure Path, a complete campaign consisting of 12 adventures appearing in Dungeon magazine. For additional aid in running this campaign, check out Dragon magazine's monthly "Savage Tidings" articles, a series that helps players and DMs prepare for and expand upon the campaign. Issue #356 of Dragon magazine features an expanded list of strange and exotic magical items that could be purchased from the mercane merchants encountered during "Into the Maw." In order to rescue a friend, the PCs must sail into the Abyss and infiltrate a prison built by the Prince of Demons. Pgs. 48-85

Just as the trail led from the STEADING OF THE HILL GIANT CHIEF to the frozen wastes where was found the GLACIAL RIFT OF THE FROST GIANT JARL, so the adventure in the latter place has let (or transported) the intrepid party to what they hope will be their last challenge. They are about to venture into the hot and smoking barrens which are in effect Muspelheim, the home of fire giants. This module contains background information, referee's notes, three level maps, and exploration matrix keys. It provides a complete module for play of ADVANCED DUNGEONS & DRAGONS, and it can be used alone or as the last of a three-part expedition adventure which also employs DUNGEON MODULE G1 (STEADING OF THE HILL GIANT CHIEF and DUNGEON MODULE G2 (GLACIAL RIFT OF THE FROST GIANT JARL). TSR 9018

Lost Laboratory of Kwalish explores an alternate expedition into the Barrier Peaks. The legendary inventor disappeared in the peaks eons ago… as it turns out, finding a crashed planar ship and studying its technology to fuel his own experiments—only now, Kwalish’s lost research is desperately needed! This adventure explores two locations within the Barrier Peaks, and includes new monsters, magic items, and spells, plus sci-fi trinkets, random encounters, and even rumors of the area submitted by the player community! Further featuring new art, maps (from Claudio Pozas), and even a cartoon (from Jason Thompson)—as well as the famed suit of powered armor, as edited by Jeremy Crawford on the Dragon+ livestream! Best of all, all monies that Wizards of the Coast receives from sales of this PDF are donated to Extra Life. Your purchase of this adventure goes to a truly great cause!

Player's pickup the quest from the Greyhawk Adventurer's Guild to escort a barge down the Nyr Dyv.

Years ago, brave heroes put the denizens of the Temple of Elemental Evil to the sword. Now, dark forces whisper again in the shadows of the once-deserted temple - forces far more insidious and dangerous than any sane person could dream. Evil has risen again to threaten the village of Hommlet. A continuation of the original AD&D Temple of Elemental Evil, made for a party of 4th-level adventurers, taking them up to 14th level.

"Gnolls have captured the heroes! After stripping the characters of all equipment except their armor and clothing, the gnolls drag them to an expansive briar maze known as the Twisted Thickets and set them loose. Then, armed to the teeth, the gnolls hunt down their prey. The characters must survive the hunt and outwit their pursuers. Stripped of your armor and weapons, you are cast into the Twisted Thicket and hunted like rabbits. If you want revenge, you must first survive Yeenoghu's evil Hunters. After dealing with the gnoll hunters, the heroes can try to reclaim their lost equipment and exact revenge on the tribe, which lairs in the caves beneath Dead Gnoll’s Eye Socket." Pgs. 2-14

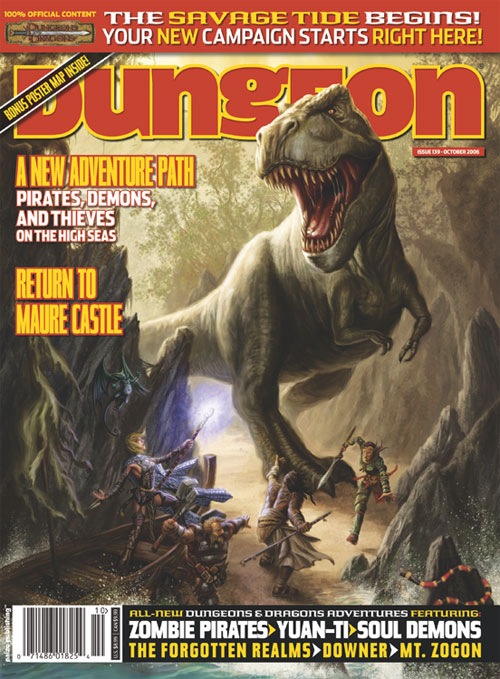
Deep under the ruins of Maure Castle lie the Chambers of Antiquities, vaults designed by ancient wizards to store magic items even they didn't quite understand. A continuation of last year's hit "Maure Castle." This adventure is set under the infamous ruins of Maure Castle, a monolithic edifice of night-black granite built by a powerful family of wizards. The Maures sealed themselves into the dungeons below their castle long ago, and today these dungeons have become one of the most infamous adventuring sites in the land. Although estimates have placed the number of monster-infested and trap-haunted dungeon levels below Maure Castle at 17, there may in fact be even more. This adventure presents one of those dungeon levels in detail. Pgs. 76-101
The first savage tide has already touched the mortal world, yet none who live today recall this time of red ruin. Unleashed from the cruel heart of a fell seed known as a shadow pearl, this savage tide swept over an ancient city perched atop the crown of a remote island. The tide transformed beggar and noble, merchant and thief, resident and visitor into feral, ravenous fiends. The fruits of centuries of labor came crumbling down in a matter of days, and when the survivors tried to stem the tide by destroying the pearl, the resulting blast of power sunk their city into the boiling lake of death. Through it all, the Abyssal architect of the savage tide watched, taking pride in the ruin. When the tide's final ripples had faded, what was left became known as the Isle of Dread. Now, after a thousand years, the true masters of the Isle of Dread look upon new targets, new cities beyond the horizon, compelled by the hateful will of their demonic lord Demogorgon to prepare for the coming glory. This time, the doom will not be limited to one hapless city. This time, all of civilization waits unknowing on the shore, blissfully ignorant of what the incoming tide brings in. "There Is No Honor" is the first chapter of the Savage Tide Adventure Path, a complete campaign consisting of 12 adventures that will appear in the next twelve issues of Dungeon. For additional aid in running this campaign, check out Dragon's monthly "Savage Tidings" articles, a series that helps players and DMs prepare for and expand upon the campaign. Issue #348 of Dragon kicks off this series with details on six affiliations based in Sasserine that your players may wish to join. And if you're running Savage Tides in the Forgotten Realms or Eberron, make sure to check paizo.com for the latest conversion notes for each adventure. The Savage Tide Adventure Path debuts as a new band of heroes confronts exotic monsters, undead pirates, and a sinister guild of thieves on the cusp of unleashing a murderous coup. Pgs. 14-46

Indomitable it stood for centuries, a symbol of order in a world of chaos. Bastion of the pass through the Kamph Mountains, the very stones of the Keep of Adlerweg were the stuff of legends. What evil power had strength enough to take it? How were its defenses swept aside? Fell creatures now attend the battlements that overlook the only pass between Berghof and the sea. This is not a pretty problem to be solved by the militia of the local villages. These and more may be needed to withstand the mayhem stirred up by the fall of the keep. Indeed, if the Keep is not retaken, and retaken soon, the Hold of the Sea Princes itself may not be secure. Now is the time for heroic action. Aided by the Sentinel, former protector of the legendary Guardians of Adlerweg, have you the courage and the determination to rid the keep of its sinister occupants? UK3: "The Gauntlet" (1984), by Graeme Morris, is the third UK-series adventure and the second half of the two-part Adlerweg series. It was run as the final round of the GamesFair 1983 AD&D Open (and won by a RuneQuest fan!). It was then published in 1984. TSR 9111

Ranked in 2004 as the single greatest adventure of all time by Dungeon magazine, this is a compilation of three series of modules: the G series "G1-2-3 Against the Giants" (G1 Steading of the Hill Giant Chief, G2 Glacial Rift of the Frost Giant Jarl, G3 Hall of the Fire Giant King), the D series (D1 Descent into the Depths of the Earth, D2 Shrine of the Kuo-Toa, D3 Vault of the Drow), and Q1 Queen of the Demonweb Pits. The characters begin by attempting to stop giant raids that have become prolific. They find out that the giant alliance is caused by the drow. They then descend into the Underdark in order to find the drow and stop their sinister plan. TSR 9179

An expansion on the original Tomb of Horrors with plot and explanation. Contains a facsimile of the original adventure. The Dark Intrusion is causing the dead to rise from their graves. This is linked to a being known as the Devourer. Following the trail of Desatysso, a wizard who followed a similar quest, the players must enter the Tomb, and beyond that, the cursed City that Waits and the Fortress of Conclusion.

Ten years ago, zombies arose from the foamy sea to take vengeance against the inhabitants of Firewatch Island. Now, they have risen again, just in time to welcome the visiting player characters! Will your heroes manage to escape the island with their lives (to say nothing of their delicious brains)? The PCs have to clear the island and learn its secrets, then defend it against an undead attack and then travel to the bottom of the ocean to seal Dagon's Maw! Pgs. 19-50 Updated to 5th Edition in Ghosts of Saltmarsh

Sinister Forces Terrorize a Town The town of Brindinford is in the midst of its annual street fair. Joy and merriment abound - until calamity disrupts the celebration. Are rival gangs responsible? Is the government sliding into tyranny? Or is a nightmarish plot about to come to fruition? "The Speaker in Dreams" is a stand-alone adventure for the DUNGEONS & DRAGONS® game. Player characters are in for a wild ride in this river town. Leave the dungeon behind: the terrors lurking in Brindinford are more challenging by far! In The Speaker in Dreams, the town of Brindinford is besieged by evil forces under the command of Ghaerleth Axom. A street fair is interrupted by an attack, which serves as a distraction for the villain's forces to attack the keep of the local baron. This provides an entry point for the player characters into the main quest to discover the secret alliances trying to take over the town. The Speaker in Dreams is an event-based, rather than site-based, adventure.

"Wherein the local clergy makes the terrible mistake of not hiring enough assassins for the job." Synopsis: The heroes have just returned from the abyss (Occipitus) and reestablish themselves in Cauldron, when they are assaulted by a group of professional assassins. After they repel the attack, they trace back the lead to the temple of Wee Jas, where they find plenty of opposition from the second in command, Ike Iverson. After dispatching of the cleric and securing of a (spare) soul cage, the group finds evidence of a place important to the cagewrights' cause - an ancient underground complex named Karran Kurral. Mounting an expedition to that place, they find more evidence towards the horrific destiny on schedule for Cauldron. However, they gain access to the Soul Pillars after defeating a dracolich, that they can use to gather plenty of intelligence on the cagewrights' plans. Pgs. 12-51

The wizard Allustan requests the party's company on a trip to Blackwall Keep, a militia outpost on the border of a treacherous swamp. But what of the green worms and unkillable zombies plaguing the region, and what fell secret is locked in the keep's forlorn basement? "Encounter at Blackwall Keep" is the third installment of the Age of Worms Adventure Path, a complete campaign consisting of 12 adventures, several "Backdrop" articles to help Dungeon masters run the series, and a handful of poster maps of key locations. For additional aid in running this campaign, check out Dragon's monthly "Worm Food" articles, a series that provides additional materials to help players survive this campaign. Check out issue #335 of Dragon for three sample cohorts that they might want to take on. Pgs. 16-40

Stirrings of an ageless war between Law and Chaos are drawing you into an epic adventure! A Struggle More Savage than Good vs. Evil Imagine a time before the words Good and Evil had meaning, a day when the world was young. Discover an ancient conflict that predates the stars. It was in these days that Law and Chaos forged worlds out of nothingness; their war began while the cosmos was yet unfinished. The Rod of Seven Parts defines epic role-playing. The reappearance of the Rod has awakened the powers of Chaos, and their queen seeks to turn the whole world into a battleground. Bold heroes must undertake the enormous task of seeking out and assembling the pieces of the Rod, but even its power cannot stand alone. Ages ago, primal forces of Law stood fast against Chaos; now their champions must once more confront the Queen of Chaos and her foul spyder-fiends, lest the flame of civilization be extinguished. Follow the quest for the capricious Rod as it leads characters on a journey of high fantasy. The Rod of Seven Parts is designed for four to six heroes and heroines of levels 10 to 12. This boxed set includes: Initiation to Power, a 96-page book of grand adventure playable in any AD&D world, including original campaigns; The War Against Chaos, a 64-page book of world-crossing adventures pitting PCs toe to toe against the minions of Chaos; Might and Menace, a 32-page book detailing the mysterious powers of the Rod of Seven Parts: how it affects both its enemies and its friends; Monsters, a 16-page book of new villains, new monsters, and even a new race! 6 two-sided reference cards; 6 full-color poster maps portraying the key locations heroes can visit. Read about this ancient artifact in the epic novel The Rod of Seven Parts by best-selling author Douglas Niles! TSR 1145

All ocean voyages are fraught with peril, yet a voyage to the infamous Isle of Dread might seem to some old salts to be a deliberate goading of the gods of the sea. Many of those who have attempted the voyage before managed to return to civilization often choose not to speak of the trials they experienced on that dangerous route, yet those whose lips can be loosened by a draught of grog whisper amazing stories... tales of pirates, sea monsters, terrifying storms, and perhaps most harrowing of all, of a strange and sinister land without land, a floating graveyard of dead ships mired in a sargasso the size of an island. This place has many names, but its most well-known may be it's most apt - Journey's End. "The Sea Wyvern's Wake" is the third chapter of the Savage Tide Adventure Path, a complete campaign consisting of 12 adventures appearing in Dungeon magazine. For additional aid in running this campaign, check out Dragon magazine's monthly "Savage Tidings" articles, a series that helps players and DMs prepare for and expand upon the campaign. Issue #350 of Dragon magazine features a regional guide to the seafaring environs the PCs can expect on the journey to the Isle of Dread. It’s time to bid farewell to the city of Sasserine as the PCs board the Sea Wyvern for a 3,000-mile voyage south into the uncharted waters of the Vohoun Ocean. Their destination: the Isle of Dread. Pgs. 16-48

Part 3 of the Shackled City Adventure Path "Wherein a tribe of the Sea Mother's children suffer for sparing the life of a mad prisoner they probably should have eaten." Synopsis: The adventure begins with an Umber Hulk attack in the middle of the city. The fame gained by assisting during the attack allows them to gain the notice of a representative of Davked Splintershield. The group is asked to rescue Zenith Splintershield from a Kuo-Toan temple in the Underdark. But to find it, they have to visit Crazy Jared to locate an entrance to it. Upon journeying to Crazy Jared's, they fight Hookface's offspring. After more travelling, they are able to descend into the Underdark. Once they find the Kuo-Toan temple, they must fight through many hard challenges, only to realize that Zenith is not a prisoner, but instead is a prophet. Zenith does not go willingly, and so must be captured. Pgs. 28-61

After a riot erupts in the streets of Cauldron, the PCs must track down a missing paladin before the mob tears the city apart. The PCs try to stop an assassin during the riot and get invited to a meeting, where they are tasked to search for the missing paladin. After some investigating they will travel to Vaprak's Voice, an ancient Spell Weaver laboratory, at the edge of the Demonskar. In the dungeon they will find the "Starry Mirror", a puzzle/travel device through which they have to travel, to find the missing paladin. Part 4 of The Shackled City Adventure Path Pgs. 44-82