
The northwest corner of the Duchy of Bast is ruled by Sir Elwin of Monoth the 4th Earl of Kawall. This pudgy ruler sits in his tower in the small city of Phillipsburg which is a hub of the Caravan trade. The town is rather dirty and mostly considered a backwater area for good reasons. This city is a stopping point on the upcoming release of “FQ4 In the Caravan Service” Get a jump on the next adventure by getting used to one of the main settings. Phillipsburg, along with the Barony of the Knolls are point “A” and point “B” in the next adventure!

A fiend lurks among the Black Blade goblins. A shapeshifting barghest fashioned by the General of Gehenna to exact revenge on all goblin-kind. It’s aim: to kill as many goblin leaders as possible… A masked goblin approaches the party asking for help. Two tribe leaders are dead. But a rival for chief has control of the crime scene. Will the party discover the barghest among the goblin ranks? Can they stop this imposter before it strikes again? Adventure Overview The adventure’s story is spread over 4 parts and takes approximately 4 hours to play. The adventure begins with a Call to Action scene. Part 1: Goblin Politics. Krill sends his emissaries to implore help from any strong intermediary. The party is asked to investigate the murder of Thrawn in Dringly’s lair. This is Story Objective A. Part 2: The Opposition. Gain entry into Dringly’s lair and investigate the murder of Thrawn. Gather enough evidence to find the killer. This is Story Objective B. Part 3: To The Lair! Now that the players have determined the barghest (Yeep) is to blame, they need to get to Krill’s lair quickly as he is in imminent danger. This is Story Objective C. Part 4: The Barghest.When the players arrive at the lair, they need to get to Krill and expose and defeat the barghest. This is Story Objective D. Adventure Background A barghest named Yeep has begun its onslaught of attacks against the Black Blade goblins. Starting with Chief Gnar, then his second in command Thrawn, the barghest is moving methodically down the line of command. Krill is now chief. But he has some problems: Two leaders of the Black Blades are dead. Who killed them and why? Is he next? Dringly, the next in command, has decided to take his lair for himself, declaring himself Chief of the Black Blades. Who are the Black Blades? The Black Blades are a tribe of goblins in the local area. They are known for dipping their blades in a dark black substance. It is rumored these blades are poisonous. The Black Blades regularly attack passersby on the road to rob them. The Black Blades have two lairs, one run by a chief who leads the whole tribe, and another overseen by a boss lieutenant. The Black Blades have a well-established pecking order which is how Krill stands to become chief. The next in line is Dringly, who has also declared himself chief and wants Krill dead. Krill suspects that there is something suspicious about two leaders being killed within a day of each other, but he has already burned Gnar’s body without any investigation. He needs to investigate the body of Thrawn, but it is in Dringly’s lair. Krill wishes to avoid direct confrontation with Dringly at the present for three reasons: 1) Any violence would only kill his own tribe members and further divide the lairs. 2) He believes there is still hope for negotiation to reunite the Black Blades. 3) He believes that if he were to attempt negotiations himself, Dringly would kill him. This adventure features: Two maps. Ready for your favorite Virtual Tabletop. A full color pdf. A black and white pdf. One custom monster, a reprint of barghest, all others available in the Monster Manual. Four hours of entertainment involving: roll playing a goblin bard, investigating a murder scene, tracking down a barghest before it strikes again. Applicable to any setting.

With the Heart of Light secured, the adventurers now pursue the Ebon Stone, hidden in a remote keep. Part 2 of 2. Part 1 titled The Heart of Light. Pgs. 43-52

It all begins with a simple request (doesn’t it always?) from an old farmer. The request – protect his cattle herd from vicious wolves. Simple enough for the brave adventurers, right? But it doesn’t stay that way. Not at all. Soon, the adventuring party will find themselves in the thick of it as they solve puzzles, avoid traps, fight for their lives, and endure witty taunting. And in the end, they discover an artifact that may, or may not, be useful to them. This adventure includes a cursed shield, a new undead creature, and a new artifact. Total party experience earned is approximately 14,500.
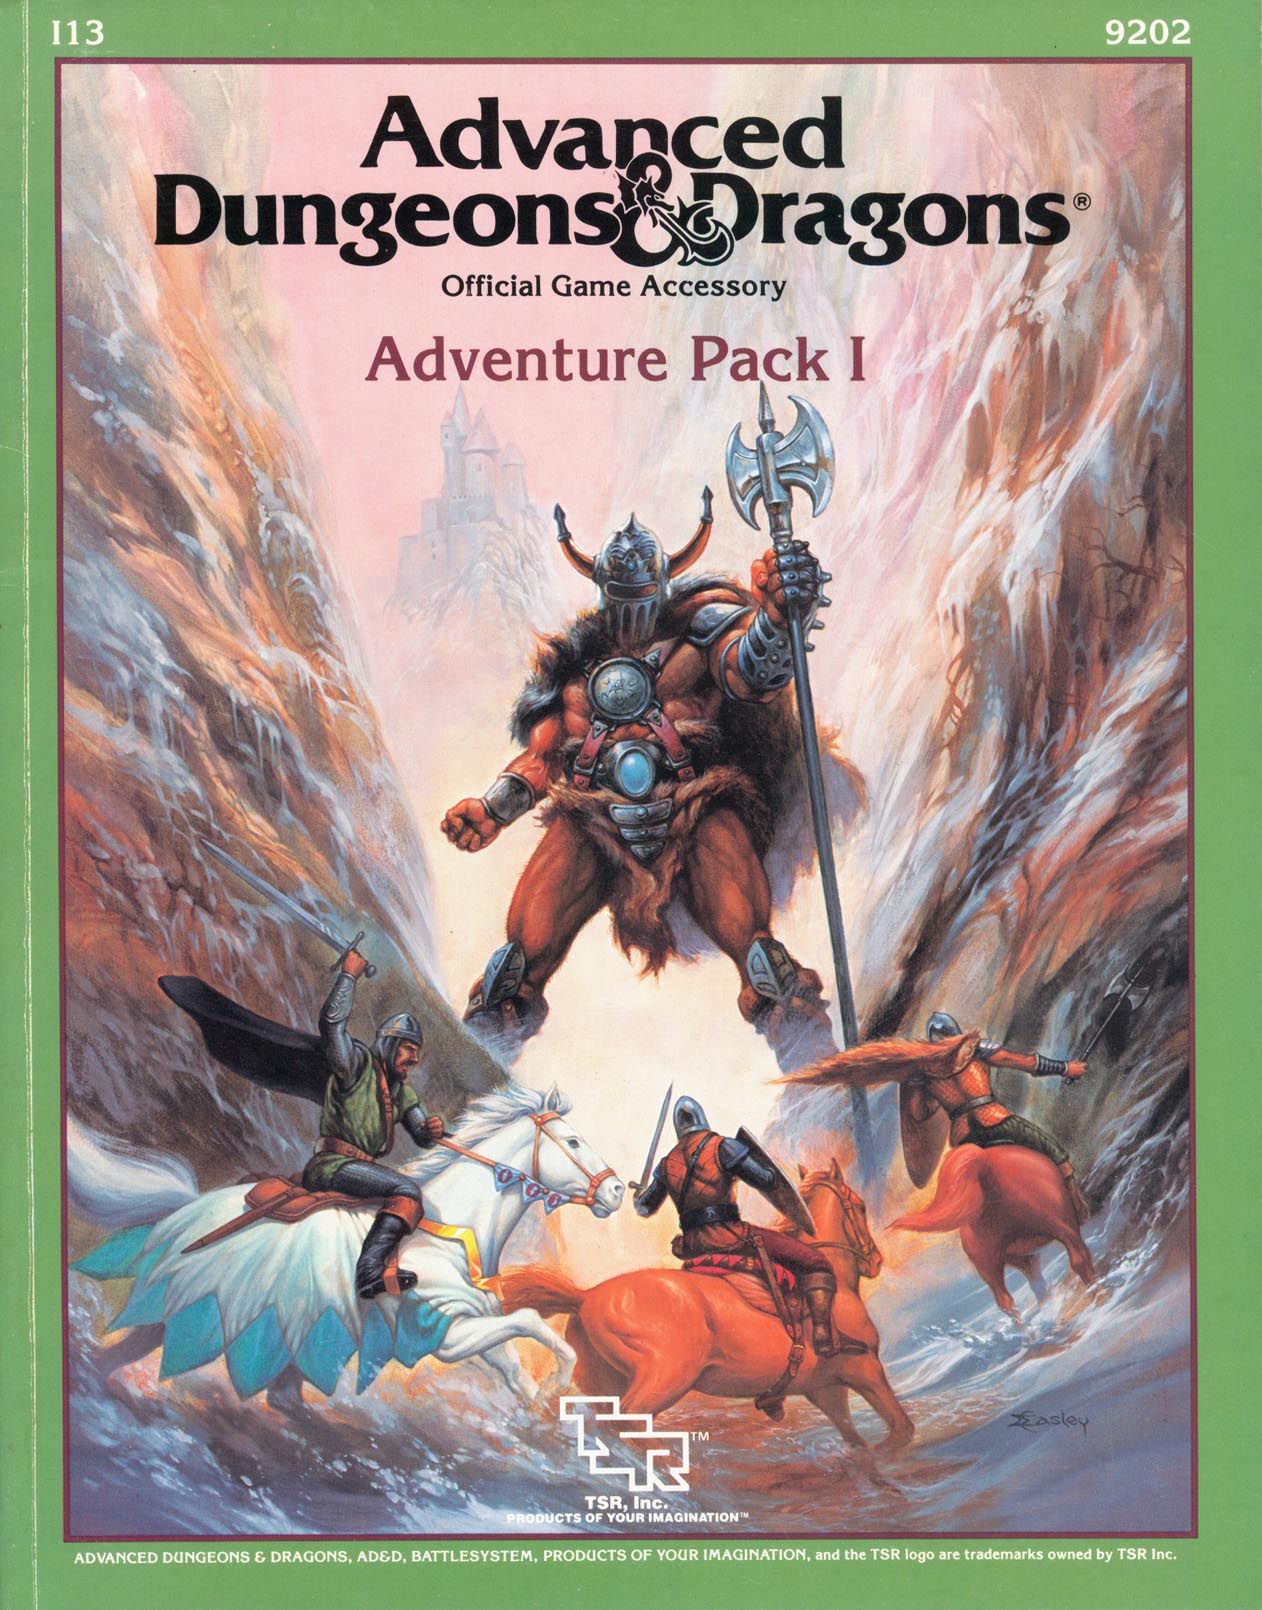
A walk in the woods, a trip to the zoo, a day at the circus - harmless enough, right? Wrong, as players will discover when things are not as they appear to be. Included in I13 Adventure Pack I - https://www.adventurelookup.com/adventures/i13-adventure-pack-i TSR 9202

A mad venture across the fourth dimension. Hang onto your helmets in this topsy-turvy dungeon. Be warned that the accidental release of the Evil One (described in the text) could have devestating consequences on the PCs, not to mention the local campaign area. The DM should consider alternatives to the Evil One's powers if they are felt to be too destructive. Pgs. 32-39

Vengeance of the Winter Queen A small town has been attacked by an unknown entity in the midst of celebrating their Midwinter Festival and many of the citizens have been frozen solid. Discover who or what is responsible for the condition of the villagers by entering the frozen catacombs beneath the temple grounds! A 3-5 hour Dungeons & Dragons 5th Edition adventure for 5th - 10th level characters.
En garde! "Go away, or I shall taunt you a second time!" A duchess recruits the party to deal with a monstrosity. Pgs, 60-67

A moderate sized town perfect for adventurers to relax in and pick up extra supplies and lift a pint or two. This particuliar town is a focal point in several adventures in Filbar including FN6 - Sunken Temple of Bulu and F3 - Adventure in Skull Pass. A larger settlement than Xer, Feastelburg offers a variety of different shops for the well-heeled and 'healed' adventurer. As the Mayor of Feastelburg says "Oy, pull out a stool and drop a coin or two for something that suits your fancy"
Framed by the Covenant of the Knife and thrown in the notorious Blackmaw Prison, Karl Manderholm awaits his execution at the hands of the deadly assassins’ guild. In order to save him, the PCs must enter Blackmaw in the guise of lowly prisoners and expose the one man who can clear Karl’s name, the Shadowmaster of the Covenant himself. Pgs. 34-50

"The Riverfront Rat Gang" is a ratfolk lair, also featuring wharflings and a doppelrat, designed for five 1st level characters. This adventure can be completed in one session. The old dockyards once served as the primary center of commerce in town. Years ago, political pressure from an influential merchant who wanted the docks to be loser to her business forced shipping concerns to move their docks upriver. The new facility accommodates larger ships, and the old docks fell into disuse. Talk of converting the property into a set of riverside shops died when a rat infestation proved to be an unsolvable problem. Thus, the old dockyards have been decaying for years. This situation suited a former thieves' guild member, a ratfolk rogue, named Matimer Creel. A botched robbery (for which Matimer blamed his accomplice) turned the guild against Matimer, who fled from certain death at the hands of the guild master. He hid out in the old dockyards, confident that not even guild members bothered to go there. From there he began to exact revenge against the guild by ruining its plans or stealing directly from it. He also befriended the rat population, thanks to a golden rat's tooth he acquired, and the vermin help with his schemes. A trio of rat-like wharflings and a doppelrat, washed up on the riverbank near the docks, have joined Matimer's retinue.

In Prisoners of the Drow, a band of adventurers storm a drow outpost, confront the drow mage in charge of it, and rescue prisoners held within. The heroes must bypass traps and devious defenses to reach their goal and accomplish their mission. The adventure is designed for a party of five adventurers between levels nine and twelve. It features: Encounters by Level - Varying types and quantities of creatures are suggested based on the party's actual level, allowing each encounter to present the appropriate challenge to the party. Encounter Notes - Suggestions for how to run combats are provided for game masters who place an emphasis on engaging, tactical battles. Inciting Action - Suggestions for ways to present the adventure to players are provided. Ease of Use - The format and style of the document allows the game master to find information quickly while running the game at the table. Detailed Maps - What's an adventure without maps? Not much else to say here. This adventure is designed as the first in a two-part series. The second adventure Into the City of Spiders takes the adventurers into a drow compound far from the surface. https://www.drivethrurpg.com/product/247674/Into-the-City-of-Spiders
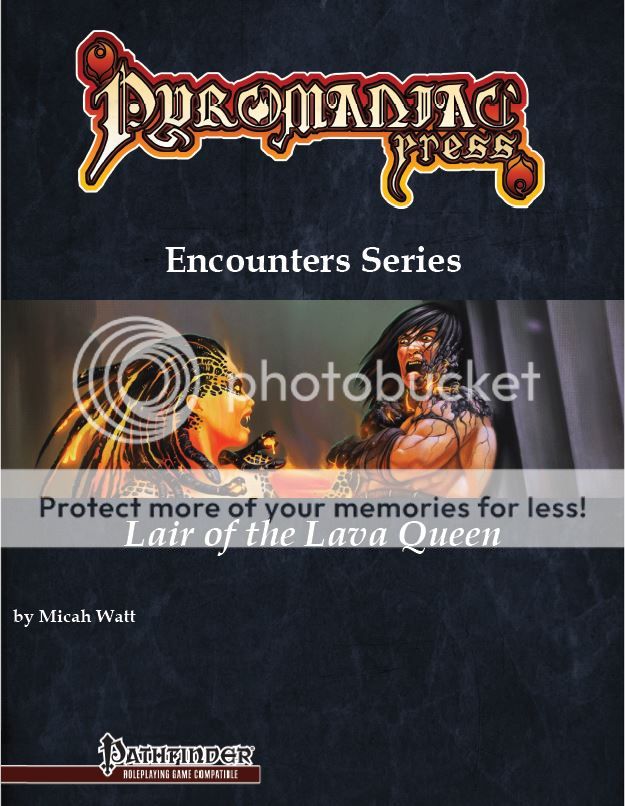
Rumours tell of a secluded cave where a powerful cleansing artifact resides, guarded by a mythical creature that no one has seen and lived to tell the tale. Heat boils forth from this cave, and tortured shrieks echo on the wind. Do you have what it takes to brave the Lair of the Lava Queen?

Deep below the surface lies an ancient beholder city called Ilth K'hinax. In times past, hundreds of beholders called it home - until simmering rivalries within their society exploded into warfare. The few survivors fled, leaving the city deserted for hundreds of years. However, the story of Ilth K'hinax's glory was passed down from one generation of beholders to the next. Now, after countless years of self-imposed exile, the beholders are back! After securing the city, the hive mother of Ilth K'hinax implemented a plan to wipe out all the beings living above it. Unfortunately for the beholders, several facets of the hive mother's plan have been revealed through the exploits of a party of adventurers. Now, this group of heroes must meet eye to eye with Ilth K'hinax's newest occupants in an effort to stop the hive mother's pernicious plan! "Eye to Eye" is the last of three adventures featuring the nightmarish beholder. It can be played as an individual mission or as part of the series that began with "Eye of Pain" and continued in "Eye of Doom." TSR 9536

In this all-new adventure, the characters acquire a treasure map tattooed on tanned human skin. It shows the location of famed pirate Bloody Jack’s last haul, where hundreds of thousands of gold coins lie waiting to be taken. But exploring his long-abandoned island hideaway isn’t as easy as it first seems. Bloody Jack didn’t leave his treasure unguarded — and the best way to keep the undead legions well-stocked is to lure treasure-hunters to their death…

𝐓𝐡𝐞 𝐟𝐢𝐫𝐬𝐭 𝐚𝐝𝐯𝐞𝐧𝐭𝐮𝐫𝐞 𝐢𝐧 𝐭𝐡𝐞 𝐔𝐩𝐫𝐢𝐬𝐢𝐧𝐠 𝐒𝐚𝐠𝐚. The PCs have escorted a trade caravan to the dwarven stronghold of Nirzumbil and are preparing for a boring trip home. But what is that sound of horns in the distance? And why are the dwarves closing the front gates to the mines? This is an adventure for 2nd level PCs. It is the first in a series of adventures detailing on orc uprising against the dwarves with sinister implications. Includes a 5th edition write up of the Dread Warrior, an undead that previously appeared in Monsters of Faerun.

Recent earthquakes have unearthed a small section of a lost dwarven fortress. The dwarves are long gone, but rumors suggest they might have left treasure or weapons behind. After a journey into the Underdark, the characters find a barred iron door bearing the names of several ancient dwarven clans. Pgs. 90-95

𝐓𝐡𝐞 𝐟𝐨𝐮𝐫𝐭𝐡 𝐚𝐧𝐝 𝐟𝐢𝐧𝐚𝐥 𝐚𝐝𝐯𝐞𝐧𝐭𝐮𝐞 𝐢𝐧 𝐭𝐡𝐞 𝐔𝐩𝐫𝐢𝐬𝐢𝐧𝐠 𝐒𝐚𝐠𝐚. The orc uprising around Nirzumbil must come to an end! The Mercur trade coster is benefiting too much from the blockade of the dwarven stronghold and threatens to corner the market on iron ore and gems for years to come. If the orc warlord commanding the armies can be slain, the orc forces will surely fall apart. But how to find and kill a warlord who is powerful enough to unite thousands of orcs? This adventure features 5th edition conversions of the krenshar, senmurv, portal drake, and stone flyer.
Into the Forsaken Temple's Crypt is a short adventure for four 10th-level characters. The adventure takes place in a buried temple crypt, which has been sealed for centuries. Dungeon Masters can adjust it for higher-level characters by expanding the dead magic areas and increasing the number and power of constructs and undead that inhabit the complex. Some things are best left untouched, and some secrets are best left untold. One such secret is the location of the resting place of the traitor Ellowyn Blacktree. Her body has lain undisturbed for centuries, undead but immobile, in the prison the elves created for her. The elven histories tell that Ellowyn was a powerful wizard back in a time beyond human reckoning. While others worked diligently to learn magic, Ellowyn's arcane powers came to her quickly. In her youth, she called this a blessing from Corellon Larethian, and she worked diligently to serve him for the good of all elvenkind. In time, she became one of seven female elves entrusted with the care of a mythal, or elven place of power, devoted to preserving the balance of magic and nature. But Ellowyn, it is said, kept a terrible secret of her own: She had fallen in love with a drow whom history knows as Orith To'rellen. One dark winter night she betrayed her sisters, Corellon, and all of elvenkind by allowing Orith and the followers of Lolth to overrun and defile the mythal. Ellowyn herself was then betrayed by the drow, who abandoned her on the surface near a vampire's lair as they returned to their home in the Underdark, leaving her to face certain death and elven justice alone. In the depths of their grief and anger, the elves sentenced Ellowyn, perhaps unwisely, to dwell forever in the darkness that she had chosen, thus ensuring that she never followed the normal path of life and death that most elves take. Many elves died at her hands before they could restrain her. With terrible spells rarely seen even in that ancient time, they bound her in an underground crypt far away from any living thing. There, the legends say, she waits, nursing a terrible hatred against elves, drow, Corellon, Lolth, and especially Orith To'rellen.

An adventure site for 3-5 characters of levels 3-4. Featuring two new monsters from the forthcoming guide, The Hag's Hexes! Seven fully developed encounter areas! It's National Gumdrop Day on February 15th, and the forthcoming release entitled THE HAG'S HEXES has a candy hag and its candy-coated minions, so we're releasing this exclusive, seven-encounter adventure site featuring two new monsters -- the enticing Gumdrop Ooze and the cursed Crul -- to celebrate!