
“Gorgoldand’s Gauntlet” takes place in a cave network in the side of a cliff overlooking a lake and can be inserted easily into any campaign. Gorgoldand’s Gauntlet is a site-based adventure with a pre-dominance of puzzles and traps. The PCs discover a map leading to the Gauntlet and explore it looking for treasure. They test their strength and wits against various traps and puzzles created by a gold dragon who converted a cave network into a proving ground to surreptitiously test the abilities of local adventuring bands. If they make it all the way to the end of the Gauntlet, they’ll have the chance to fight a dragon construct made of the dungeon's treasure hoard and have the chance to gain access to a magic item that can have a significant impact on their adventuring careers. Pgs. 39-51

"I can’t stand to lose again..." The small farming village of Devil’s Run is about to have its yearly pumpkin festival. Unbeknownst to many, Old Pete Barker, a pumpkin farmer of many years, was having difficulty growing his pumpkins. Pete doesn’t have an ample water source, unlike Molly Simms, his primary rival for the festival's coveted largest pumpkin award, whose farm lays near a stream. Fixated on winning the grand prize, Old Pete made a deal with a dark force, the Feeder of Desires, but the deed cost him and the village dearly. “Plant me in the ground and I will make you strong." Peter Barker's body transformed into a vine-like creature with a jack-o-lantern head, and he now ‘waters’ his thriving pumpkin fields with the blood of kidnapped villagers, binding them below the earth while the pumpkin vines burrow into their flesh and feed. These vines have started to enter the town, creating pumpkin-vine creatures which snatch villagers and drag them to his underground lair. Will the adventurers save the village of Devil's Run and put a stop to Pete's pumpkin-patched plots? Let the Pumpkin Festival Commence! ►2– to 4–hour adventure for three to five characters ►Scalable for 3rd—7th level (optimized for 5th) ►5 beautifully mapped areas for your adventurers to explore ►7 new monster stat blocks, including the Pumpkin Terror, Vine Hound, and pumpkin-headed Pete Barker himself! ►Ripe for Halloween, Thanksgiving, or Fall adventuring! PDF Purchaser Bonuses ►HDR map files for each area (both gridded and gridless) ►Virtual Tabletop Tokens for the monsters Also for Roll20 and Foundry VTT
Into the Forsaken Temple's Crypt is a short adventure for four 10th-level characters. The adventure takes place in a buried temple crypt, which has been sealed for centuries. Dungeon Masters can adjust it for higher-level characters by expanding the dead magic areas and increasing the number and power of constructs and undead that inhabit the complex. Some things are best left untouched, and some secrets are best left untold. One such secret is the location of the resting place of the traitor Ellowyn Blacktree. Her body has lain undisturbed for centuries, undead but immobile, in the prison the elves created for her. The elven histories tell that Ellowyn was a powerful wizard back in a time beyond human reckoning. While others worked diligently to learn magic, Ellowyn's arcane powers came to her quickly. In her youth, she called this a blessing from Corellon Larethian, and she worked diligently to serve him for the good of all elvenkind. In time, she became one of seven female elves entrusted with the care of a mythal, or elven place of power, devoted to preserving the balance of magic and nature. But Ellowyn, it is said, kept a terrible secret of her own: She had fallen in love with a drow whom history knows as Orith To'rellen. One dark winter night she betrayed her sisters, Corellon, and all of elvenkind by allowing Orith and the followers of Lolth to overrun and defile the mythal. Ellowyn herself was then betrayed by the drow, who abandoned her on the surface near a vampire's lair as they returned to their home in the Underdark, leaving her to face certain death and elven justice alone. In the depths of their grief and anger, the elves sentenced Ellowyn, perhaps unwisely, to dwell forever in the darkness that she had chosen, thus ensuring that she never followed the normal path of life and death that most elves take. Many elves died at her hands before they could restrain her. With terrible spells rarely seen even in that ancient time, they bound her in an underground crypt far away from any living thing. There, the legends say, she waits, nursing a terrible hatred against elves, drow, Corellon, Lolth, and especially Orith To'rellen.

𝐍𝐨𝐰 𝐰𝐢𝐭𝐡 𝐚𝐧 𝐢𝐥𝐥𝐮𝐬𝐭𝐫𝐚𝐭𝐢𝐨𝐧 𝐛𝐲 𝐂𝐇𝐑𝐈𝐒 𝐇𝐎𝐋𝐌𝐄𝐒 𝐚𝐧𝐝 𝐚 𝐏𝐑𝐈𝐍𝐓𝐄𝐑-𝐅𝐑𝐈𝐄𝐍𝐃𝐋𝐘 𝐃𝐔𝐍𝐆𝐄𝐎𝐍 𝐌𝐀𝐏! 𝐓𝐇𝐄 𝐑𝐔𝐈𝐍𝐄𝐃 𝐓𝐎𝐖𝐄𝐑 𝐎𝐅 𝐙𝐄𝐍𝐎𝐏𝐔𝐒 is a fifth edition (5E) conversion of the ground-breaking introductory adventure for Dungeons & Dragons that served as a DM aid in the first 𝐃&𝐃 𝐁𝐚𝐬𝐢𝐜 𝐒𝐞𝐭, released by TSR in 1977. This set included a 48-page rulebook covering the first three levels of play, and was skillfully edited by 𝐃𝐫. 𝐉. 𝐄𝐫𝐢𝐜 𝐇𝐨𝐥𝐦𝐞𝐬 from the original 1974 D&D rules written by 𝐆𝐚𝐫𝐲 𝐆𝐲𝐠𝐚𝐱 and 𝐃𝐚𝐯𝐞 𝐀𝐫𝐧𝐞𝐬𝐨𝐧. Holmes advanced the "Sample Dungeon" concept by writing a new thematic dungeon with a strong backstory, creating an adventure that has remained a fan favorite over the decades. Officially, its only title is "Sample Dungeon" but colloquially it goes by various names based on Zenopus, the doomed wizard who built the dungeon under his tower. An adventure for 1st to 2nd level characters; four pregenerated characters are included. Also includes ideas for using it as an adventure site in 𝐆𝐡𝐨𝐬𝐭𝐬 𝐨𝐟 𝐒𝐚𝐥𝐭𝐦𝐚𝐫𝐬𝐡. 𝐍𝐎𝐓𝐄: Using this conversion requires a copy of the original dungeon found in the (1977) Basic D&D rulebook. However, Wizards of the Coast has provided a free pdf of this dungeon since 2008 on their website, see the first page of the pdf for the link. 𝐂𝐎𝐍𝐓𝐄𝐍𝐓𝐒: Introduction, page 2 The Setting, page 3 About the Dungeon, page 4 Dungeon Master's Map, page 5 Areas of the Dungeon, pages 6-13 Appendix A: Further Reading, page 13 Appendix B: Dungeon Factions, page 14 Appendix C: Portown Rumors, pages 15-17 Appendix D: Use with Ghosts of Saltmarsh, pages 18-19 Appendix E: Pre-generated 1st level characters, page 20 𝐈𝐧𝐜𝐥𝐮𝐝𝐞𝐬 𝐭𝐡𝐞 𝐟𝐨𝐥𝐥𝐨𝐰𝐢𝐧𝐠 𝐧𝐞𝐰 𝐦𝐨𝐧𝐬𝐭𝐞𝐫𝐬, 𝐍𝐏𝐂𝐬, 𝐚𝐧𝐝 𝐌𝐚𝐠𝐢𝐜 𝐈𝐭𝐞𝐦𝐬 𝐟𝐨𝐫 𝟓𝐄: Cleaning Cube, Veteran Smuggler, Thaumaturgist, Monstrous Sand Crab, Lemunda, Monstrous Rat, Brazen Head of Zenopus, Verminslayer Longsword, Lesser Wand of Petrification, Scroll of Stone to Flesh The Ruined Tower of Zenopus was featured as part of the "D&D Classics" column in Issue #32 of Dragon+ magazine! Go to 𝐝𝐫𝐚𝐠𝐨𝐧𝐦𝐚𝐠.𝐜𝐨𝐦 or find the link on the Wikipeda page for Dragon magazine. 𝐂𝐑𝐄𝐃𝐈𝐓𝐒: Original Dungeon: J. Eric Holmes Conversion, Added Content & Cartography: Zach Howard Content Review & Editing: Scott McKinley Interior Art: Chris Holmes (“Octopus Attack”, page 9) Cover Art: “Italian Coast Scene with Ruined Tower” by Thomas Cole, 1838. Open Access Image from the National Gallery of Art at images.nga.gov Format: Derived from the “Adventure Template for Open Office/LibreOffice” by Dale Robbins on DMs Guild Dungeon Maps drawn using the application Gridmapper by Alex Schroeder
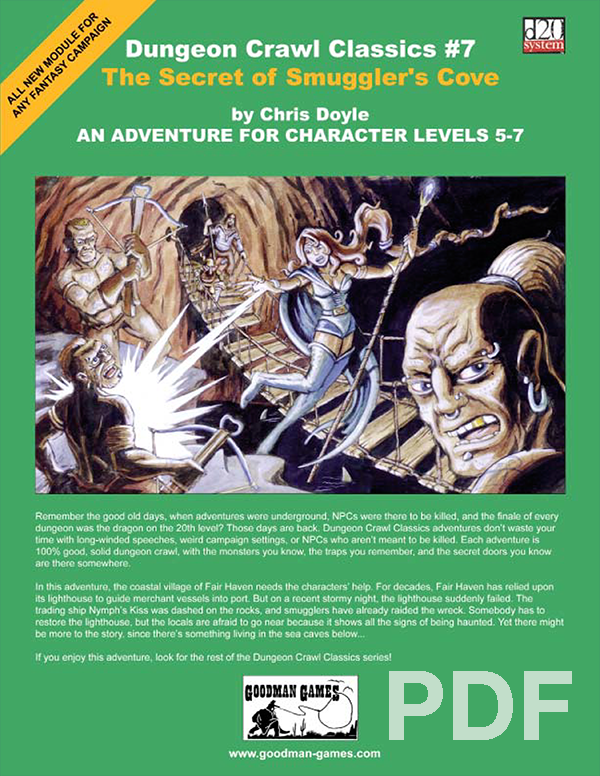
In this adventure, the coastal village of Fair Haven needs the characters’ help. For decades, Fair Haven has relied upon its lighthouse to guide merchant vessels into port. But on a recent stormy night, the lighthouse suddenly failed. The trading ship Nymph’s Kiss was dashed on the rocks, and smugglers have already raided the wreck. Somebody has to restore the lighthouse, but the locals are afraid to go near because it shows all the signs of being haunted. Yet there might be more to the story, since there’s something living in the sea caves below…

"The Spectre of Sanguine Isle" is an adventure included in the product "Calpurnia's Guide to Practical Traps". It's an adventure that features traps from the document. The isolated town of Cupidinum has been shaken by a senseless murder. The culprit has fled to Sanguine Isle, and it's up to the heroes to find him and bring him to justice. But the fugitive doesn't want to be caught, and he knows a thing or two about guerilla warfare. Can the heroes catch their elusive prey? And was his crime quite as straight-forward as it was made out to be?

Kelick’s Crossing is a frontier town set on side of the mighty Saint Torgoth’s Causeway. The bridge expanse over the river allows adventurers and traders an easy above water crossing into the frontier. While it has a well-trained guard staff that controls passage across the bridge and protecting the citizens. This setting offers an excellent frontier town where PCs can replenish gear and sell their hard fought loot.

The chase to save your family continues! After your encounter at the cove, you head south across Esaq to try and catch the slavers. With some experience under your belt, you are feeling more confident about your fighting ability, but it is about to be tested yet again. This scenario picks up where DQ1 left off and is the middle of a trio of adventures.

Sometimes you can just be in the wrong place at the wrong time... Sheltering from a savage storm, a group of fledgling adventurers find themselves trapped by circumstances and powerful forces from a bygone age. Escaping from dark and dismal caverns, the heroes must brave a nightmarish trek through haunted and hostile terrain, pursued by an mysterious assailant to the very walls of Anduria – home of the greatest civilisation in the world. On the edge between madness and salvation, they must broker a deal with shadowy cults and political powers to determine not only their own fate, but potentially that of the Eternal City itself.

In City Year CY444 the greatest Dwarf mage of all time, Archmage Panzar, mounted his Flying Pig and rode up to the Necklace to do battle with Guth-Targ Greller Ak Terraak, an Efreet, and her army in her asteroid palace. Despite his great magical powers, Panzar failed and his burnt and petrified body fell from the asteroid and crashed down upon a hillside somewhere in the Borderlands. His fall drove a narrow pit into the hillside to a great depth, although neither his body nor his legendary magical equipment were ever recovered. But now a seal ring bearing the mark of the House of Panzar has been found in a riverbed thirty miles west of the border city of Karan. The river is fed by streams emerging from the hill above it – Dol Jint. Could this large hill be the final resting place of the great mage and, more importantly, all his loot? The Pit of Panzar has over 300 encounter locations over 5 levels, this is a MEGA-DUNGEON scenario that follows the Dunromin University Press paradigm of Great Quality at the best possible value for money. The Pit of Panzar is designed for OSR and AD&D 1st and 2nd Edition, or pretty much any TTFRPG, intended for 5 to 8 adventurers of 6th to 9th level

Deep beneath the streets of a bustling trade town, trouble is brewing—or rather, fermenting. A mischievous band of cheese-obsessed goblins has taken over the sewers, swiping every wheel, wedge, and slice of cheese they can get their sticky fingers on. Their leader? The grotesquely gluttonous Sewer Mermaid, a bloated monstrosity ruling over her rancid dairy domain. This silly, over-the-top dungeon crawl is packed with cheesy hazards, slippery chases, and goblin-fueled chaos. Inspired by the absurd Cheddar Goblin ad from Mandy and a bizarrely captivating sewer mermaid miniature, this adventure is a perfect low-level romp for groups who enjoy laughter alongside their loot. What’s Inside? A lighthearted yet challenging adventure for Level 2 adventurers. Unique enemies, including teleporting Cheese Goblins and a boss who weaponizes rotting dairy. A sewer dungeon filled with traps, puzzles, and absurdly pungent dangers. Multiple adventure hooks for easy integration into your campaign. Perfect for a one-shot or a side quest in any city-based campaign, Cheese Goblins will have your players questioning their dietary choices for years to come. Will your party put an end to the Great Cheese Heist, or will they become just another tale of lost adventurers… swallowed by the stink?

Uncover the curious tale... When the party are shipwrecked they take shelter in an old forgotten cottage. They soon find themselves uncovering the mysterious death. One thing is for sure, they are not alone... Back to the sea is a 3-5 hour one shot, recommended for Level 3-4 adventurers. It offers a refreshing and different look at Ghosts in D&D. Contains 3 beautiful original digitally illustrated Maps. Unique Monsters and interesting combat scenario. Encourages player creativity and problem solving. Screen reader version.
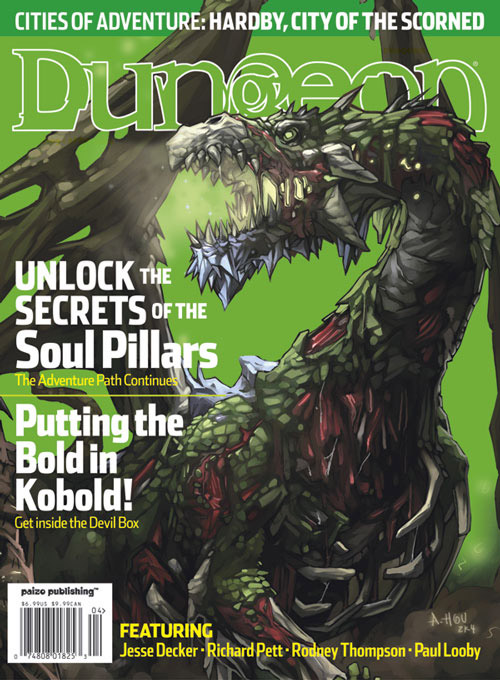
"The Devil Box" is a D&D adventure suitable for four 2nd-level PCs, although it can be modified for parties of 1st or 4th-5th levels as noted int the "Scaling the Adventure" sidebar. Characters completing the adventure are likely to advance to 3rd level. Much of the action takes place in a small town during a festival; this town can easily be dropped into an existing campaign. Since "The Devil Box" expects the PCs to deal with kobolds as temporary allies, it throws in some ethical dilemmas for good-aligned characters. Paladins and good-aligned clerics my have difficulties with such an alliance, but kobolds are definitely the lesser of the two evils involved in this adventure. If the party spurns the assistance of potential kobold allies, you may wish to modify the adventure to make it a bit easier on the player characters, as encounters have been written with the assumption that the heroes have a little help. Uploader's note: A hilariously creepy adventure involving a circus (freakshow), with in style illustrations! (Grid maps included, but not separate maps.)

"House of Reeds and Whispers" is the lair of a pair of red hags, suitable for four characters of 8th level. This adventure can be completed in one session. Two red hag sisters recently exsanguinated an eccentric collector named Nahl Fry and took up residence in his swamp-side home. Liori and Ijith were seeking an artifact from the ancient city of Talitheos, the sunken stronghold of the red hags. They found the artifact, a pair of knitting needles made from blood-infused coral. in Nahl Fry's collection. The sisters yearn to understand how the artifact works, and so they are testing its dark powers against a nearby hamlet. They have knitted rapidly growing crimson reeds that funnel the blood of fauna and farm animals back to the house. The hamlet's leader, Galnas, hires the PC's to investigate. The party must press through the reeds, defeat the sisters' guardians, face the hags, and end the reedy infestation.
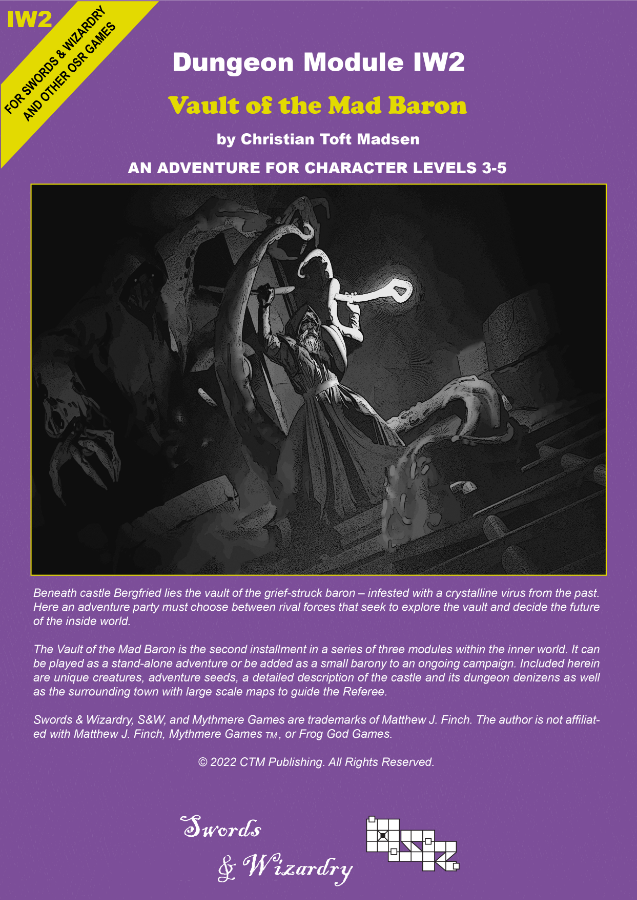
Beneath Castle Bergfried lies the vault of the grief-struck Baron – heavily infested with a crystalline virus from the past. Here an adventure party must choose between rival forces that seek to explore the vault and decide the future of the Inside World. ‘Vault of the Mad Baron’ is the second installment in a series of three modules in the Inner World. It can be played as a stand-alone adventure or be added as a small barony to an ongoing campaign. The scenario can be used with Swords & Wizardry or any other early variant of game rules and is suitable for PCs level 2-5. Inside you will find: A 60+ page old-school module with a layout optimized for fast and easy interfacing. An adaptable barony complete with town, castle and dungeon. Unique districts with encounters and sights. 6 major factions fully detailed with headquarter, plans, and missions for the PCs. Detailed description of a castle and associated dungeon levels. Downloadable maps for both players and the Referee. Locations allowing the PCs to travel to another era within the setting. Unique new creatures and magic items.

The mountains are the border between our kingdom and the realm of the fire giants. Look far eastward. See how the peaks turn black? Their forges must burn night and day to mark the mountains so. Some mornings, sunrise dims from the smoke and soot. Long have we watched the pass and tallied our fortunes at its stillness. Recently, though, there are signs our luck is turning. Fiery orbs sail through the night skies and land too near these woods. Scouts report deep craters shrouded in smoke and ash. One sits a mere hour’s walk from this outpost. I fear the enemy makes ready some terrible weapon . . .
"Lost Halls of Everforge" is a flame dragon wyrmling lair suitable for four or five 3rd level characters. This adventure can be completed in one session.

About: This encounter was cooked up in the Write your First Encounter workshop by the Storytelling Collective. It CAN be slid in as a side quest in any urban or sub-urban context, or be adapted to add confusion to any rescue mission you are presently running. Synopsis: Through the doorway a young woman shackled to the wall matching the description of Helena can be seen. Though disheveled and looking to be in great discomfort, her beauty is remarkable. But on closer inspection, there are other people here — three identical Helenas! Noble woman Elize Cleron has hired the party to infiltrate the catacombs under the Schaefer Estate and free her twin sister Helena. Helena is being held captive by the Schaefer family, trade rivals rumored to have ties to the underworld. Elize has been unable to free her sister herself because of her identical appearance. Rather than pay an unrealistic ransom, Elize has provided the party with what they need to break her out. This encounter is intended for 3rd level characters.

You have travelled to the legendarily festive town of Hamlet Court for the world famous Midwinter festival. You’re not in town long before you discover that the previous night, the annual Villager vs. Kobold snowball fight turned violent, putting a dampener on the festive mood. Madam Mayor looks solemn as she asks you to investigate exactly what has turned the long peaceful Snowbolds violent. She suggests you head to their Snow Cavern and fix the issue before it ruins Midwinter

The kingdom of Dunador is in trouble. Since the king, Halfred of Dunthrane, was killed in a hunting accident, the land has hovered on the brink of civil war. Crown Prince Edmund, at 18 only half-trained and quite unprepared to assume the throne, has yet to be crowned. Currently he is on a pilgrimage to the holy shrine of Nevron in the province of Andevar. While the uncrowned king is far from home, anarchy reigns in Dunador. Throughout the realm, plots are brewing and evil hands are eagerly clutching at the sword of treason. Inevitably the focus of these intrigues is in the troubled province of Andevar to the north. For it is here that the young Prince has journeyed and here that he must be crowned. In this dark hour Dunador has but one faithful servant: Hollend, chief advisor to the old king. Painfully aware of all that is at stake, Hollend has sought the aid of a brave party of adventurers in a desperate bid to tip the scales in favor of truth and justice. But, even as the party secretly enters Andevar, the forces of evil strike with blinding speed and ruthless determination. TSR 9163