
The Village of Hommlet has grown up around a crossroads in a woodland. Once far from any important activity, it became embroiled in the struggle between gods and demons when the Temple of Elemental Evil arose but a few leagues away. Luckily of its inhabitants, the Temple and its evil hordes were destroyed a decade ago, but Hommlet still suffers from incursions of bandits and strange monsters. TSR 9026

Desolate and abandoned, the evil alchemist's mansion stands alone on the cliff, looking out towards the sea. Mysterious lights and ghostly hauntings have kept away the people of Saltmarsh, despite rumors of a fabulous, forgotten treasure. What is its sinister secret. Made for 5-10 character of levels 1-3, contains maps, handouts and encounter descriptions. The Sinister Secret of Saltmarsh is the first installment in a series of three modules designed and developed in the United Kingdom for beginning adventures with the AD&D rules. TSR 9062

The final confrontation with the giant, King Snurre, and the entry of mighty adventurers into the caverns under his stronghold (DUNGEON MODULE G3, HALL OF THE FIRE GIANT KING) discovered the Dark Elves, the Drow, had instigated the giant alliance and its warfare upon mankind and its allied races. This module contains background information, a large-scale referee's map with a matching partial map for players, referee's notes, special exploration and encounter pieces, a large map detailing a cavern area, encounter and map matrix keys, and an additional section pertaining to a unique new creature for use with this module and the game as a whole. A complete setting for play of ADVANCED DUNGEONS & DRAGONS is contained herein. This module can be played alone, as the first part of a series of three modules (with SHRINE OF THE KUO-TOA, D2, and VAULT OF THE DROW, D3), or as the fourth part of a continuing series of modules which form a special progressive campaign scenario (DUNGEON MODULES G1, G2, G3, D1, D2, D3, and Q1, (QUEEN OF THE DEMONWEB PITS). TSR 9019

The PCs return to Diamond Lake to consult with the sage Allustan, they find the town in shambles and Allustan is missing. Locals tell tales of a terrible dragon's rampage through town. Unfortunately for the characters, the dragon is only the beginning. "A Gathering of Winds" is the sixth installment of the Age of Worms Adventure Path, a complete campaign consisting of 12 adventures, several "Backdrop" articles to help Dungeon masters run the series, and a handful of poster maps of key locations. For additional aid in running this campaign, check out Dragon's monthly "Worm Food" articles, a series that provides additional materials to help players survive this campaign. Those who have studied the cult of Kyuss and read through the Apostolic Scrolls they recovered in "The Champion's Belt" may qualify for the wormhunter prestige class, a highly customizable five-level prestige class detailed in Dragon #338's "Wormfood." Pgs. 38-66

"A dwarven prince has requested your party's aid in quelling the coming invasion (if there is one, of course). Do you take him at his honorable word, and gird yourselves for battle? Or do you listen to the street talk, and take the side of those who disbelieve the warmongering? Most importantly of all: what if you make the wrong choice?" Patriots of Ulek is an adventure set in the world of Greyhawk - designed for a party of six to eight characters of first to third level who must help defend the Principality of Ulek against the despot’s horde and uncover a conspiracy which could lead to Ulek’s defeat. Fighters and clerics with healing spells are best suited to this adventure, as it involves a substantial amount of combat. Mages are helpful, but not required. Thieves will find minimal opportunities to practice their trade, although their skills as spies and scouts may come in handy. This adventure was designed specifically for inexperienced players and beginning dungeon masters. TSR 9385

Part 3 of the Shackled City Adventure Path "Wherein a tribe of the Sea Mother's children suffer for sparing the life of a mad prisoner they probably should have eaten." Synopsis: The adventure begins with an Umber Hulk attack in the middle of the city. The fame gained by assisting during the attack allows them to gain the notice of a representative of Davked Splintershield. The group is asked to rescue Zenith Splintershield from a Kuo-Toan temple in the Underdark. But to find it, they have to visit Crazy Jared to locate an entrance to it. Upon journeying to Crazy Jared's, they fight Hookface's offspring. After more travelling, they are able to descend into the Underdark. Once they find the Kuo-Toan temple, they must fight through many hard challenges, only to realize that Zenith is not a prisoner, but instead is a prophet. Zenith does not go willingly, and so must be captured. Pgs. 28-61

Greatwall is in peril - not from military forces of Iuz, but from lack of goods and supplies. Caravans from Willip have ceased thanks to increased dangers on the Willip Critwall Grabford Trail. As the key fort positioned to contain the Iuzian flood, Greatwall is a strategic necessity. Its failure would mean a major incursion along the border. Your characters are hired to escort a caravan from Greatwall to Willip; if its merchants are afraid to come to the fort, the fort will go to them. This should be simple, cut and dried guard job. Right? Of course not. There are many surprises in store for your little caravan, and your characters will need to keep their wits about them day and night in order to make it to the other end. Secret plans are afoot, conspiracies are brewing, and nothing is as it seems while on the Border Watch. This module uses information presented in the From the Ashes boxed set and the Iuz the Evil accessories. However, ownership of these two products is not necessary to play this module. TSR 9406
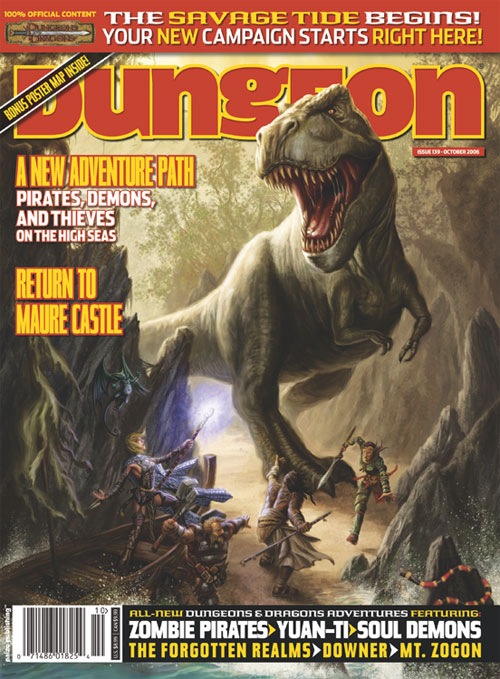
The first savage tide has already touched the mortal world, yet none who live today recall this time of red ruin. Unleashed from the cruel heart of a fell seed known as a shadow pearl, this savage tide swept over an ancient city perched atop the crown of a remote island. The tide transformed beggar and noble, merchant and thief, resident and visitor into feral, ravenous fiends. The fruits of centuries of labor came crumbling down in a matter of days, and when the survivors tried to stem the tide by destroying the pearl, the resulting blast of power sunk their city into the boiling lake of death. Through it all, the Abyssal architect of the savage tide watched, taking pride in the ruin. When the tide's final ripples had faded, what was left became known as the Isle of Dread. Now, after a thousand years, the true masters of the Isle of Dread look upon new targets, new cities beyond the horizon, compelled by the hateful will of their demonic lord Demogorgon to prepare for the coming glory. This time, the doom will not be limited to one hapless city. This time, all of civilization waits unknowing on the shore, blissfully ignorant of what the incoming tide brings in. "There Is No Honor" is the first chapter of the Savage Tide Adventure Path, a complete campaign consisting of 12 adventures that will appear in the next twelve issues of Dungeon. For additional aid in running this campaign, check out Dragon's monthly "Savage Tidings" articles, a series that helps players and DMs prepare for and expand upon the campaign. Issue #348 of Dragon kicks off this series with details on six affiliations based in Sasserine that your players may wish to join. And if you're running Savage Tides in the Forgotten Realms or Eberron, make sure to check paizo.com for the latest conversion notes for each adventure. The Savage Tide Adventure Path debuts as a new band of heroes confronts exotic monsters, undead pirates, and a sinister guild of thieves on the cusp of unleashing a murderous coup. Pgs. 14-46

Indomitable it stood for centuries, a symbol of order in a world of chaos. Bastion of the pass through the Kamph Mountains, the very stones of the Keep of Adlerweg were the stuff of legends. What evil power had strength enough to take it? How were its defenses swept aside? Fell creatures now attend the battlements that overlook the only pass between Berghof and the sea. This is not a pretty problem to be solved by the militia of the local villages. These and more may be needed to withstand the mayhem stirred up by the fall of the keep. Indeed, if the Keep is not retaken, and retaken soon, the Hold of the Sea Princes itself may not be secure. Now is the time for heroic action. Aided by the Sentinel, former protector of the legendary Guardians of Adlerweg, have you the courage and the determination to rid the keep of its sinister occupants? UK3: "The Gauntlet" (1984), by Graeme Morris, is the third UK-series adventure and the second half of the two-part Adlerweg series. It was run as the final round of the GamesFair 1983 AD&D Open (and won by a RuneQuest fan!). It was then published in 1984. TSR 9111

A shadow from the past, the Ghost Tower of Inverness has loomed ever larger in the mind of the great Seer of Urnst, Now he has convinced the Duke that an expedition should be organized to go to the ancient keep and recover its greatest treasure — the fabled Soul Gem. TSR 9038

Lost Tombs, Volume 2 The lich Lyzandred: a madman, an undead archmage, a survivor of the twin cataclysms that destroyed tow great empires. His name invokes fear in the hears of the smallest children, the bravest warriors, and the wisest sages. Like a malicious cat, the lich toys with all who stumble into his maze, tormenting them with strange puzzles and obscure riddles, monsters and demons, weird traps and dangerous magics. All who enter the crypt of Lyzandred find themselves scarred with his rune, proof of their visit -- and their folly. But there is a method to the madness of Lyzandred, a purpose to his twisted games. If you're lucky, you might even live to learn about it. The Lost Tombs series begins with Star Cairns (Volume 1) and concludes with The Doomgrinder (Volume 3). Each adventure is playable separately, or they can be linked to form an epic-length story. TSR 9580

If the PCs are to avert the Age of Worms, they must invade the heartland of Kyuss' power, the Wormcrawl Fissure, and destroy one of the world's most powerful dracoliches before the Wormgod awakens. "Into the Wormcrawl Fissure" is the eleventh installment of the Age of Worms Adventure Path, a complete campaign consisting of 12 adventures, several "Backdrop" articles to help Dungeon masters run the series, and a handful of poster maps of key locations. For additional aid in running this campaign, check out Dragon's monthly "Worm Food" articles, a series that provides additional materials to help players survive this campaign. Issue #343 of Dragon presents statistics for some extraplanar entities the PCs may wish to call upon to aid them in the Wormcrawl Fissure. Pgs. 54-89

A hunt for a missing key leads the heroes from the streets of the city of Greyhawk to the Tomb of Blood Everflowing in the treacherous Cairn Hills. Pgs. 18-20, 22 & 24-39

The Lost Tombs, Volume 3 The Doomgrinder, a mysterious stone windmill many leagues east of the City of Greyhawk, has for centuries been a source of rumors, frustration and fear. The rumors say that vast treasures are stored inside-all cursed. The frustration belongs to hundreds of adventurers who over the years have attempted to enter the windmill and failed. The fear is felt by those who believe the world will end when the stone sails of the Doomgrinder turn again. In the City of Greyhawk, powerful spellcasters read bad omens for the future, and the Doomgrinder is part of them. Some see no future at all, good or bad. TSR 9581

Isle of the Ape is an adventure module for the Dungeons & Dragons role-playing game World of Greyhawk campaign setting, in which the events occur in a magical demiplane of the same name created by the mad archmage Zagyg Yragerne TSR 9153

The Free City: a shining gem in the crown of cultured civilization. Beneath the surface of this bustling metropolis is a rot, festering in the darkness, manipulating the lives of those unaware of its presence. Now a small adventuring band from out of town may be in over their heads. Their actions in Diamond Lake have attracted the wrath of one of the city’s hidden masters. A gang of infiltrators and an enigmatic mastermind plot their destruction, and only tracing the rot to the root can stop the onslaught. "The Hall of Harsh Reflections" is the fourth installment of the Age of Worms Adventure Path, a complete campaign consisting of 12 adventures, several "Backdrop" articles to help Dungeon masters run the series, and a handful of poster maps of key locations. For additional aid in running this campaign, check out Dragon's monthly "Worm Food" articles, a series that provides additional materials to help players survive this campaign. Check out issue #336 of Dragon for five attractions to tempt your PCs to spend some of their hard-earned loot. This issue of Dragon also features an Ecology of the Spawn of Kyuss, one of the central creatures featured in this campaign. Pgs. 34-60

Few planes possess the raw malevolence of the Infinite Layers of the Abyss. It is a place of random violence, appalling cruelty, and pure, unadulterated wickedness. Here, unreasoning malice rules, and countless demons torture and murder for the joy of it. The Abyss is innovative in its wretchedness, with each fleeting moment birthing new and awful psychotic acts of utter evil. Those who brave its depths find no relief from its corrosive nature, nor respite from the cancerous seeds of evil blooming within all who tarry here; they find only anguish, pain and if they're lucky, sudden, abrupt death. "Into the Maw" is the ninth chapter of the Savage Tide Adventure Path, a complete campaign consisting of 12 adventures appearing in Dungeon magazine. For additional aid in running this campaign, check out Dragon magazine's monthly "Savage Tidings" articles, a series that helps players and DMs prepare for and expand upon the campaign. Issue #356 of Dragon magazine features an expanded list of strange and exotic magical items that could be purchased from the mercane merchants encountered during "Into the Maw." In order to rescue a friend, the PCs must sail into the Abyss and infiltrate a prison built by the Prince of Demons. Pgs. 48-85

At last- an opportunity to avert the threat to the little town of Saltmarsh! The real enemies have been identified-- evil, cruel creatures, massed in force and viciously organized. Can the brave adventurers thwart this evil and ensure the safety of Saltmarsh? The Final Enemy is the final part in the series of three modules designed and developed in the United Kingdom for beginning adventures with AD&D rules. Its plot follows directly from those of the first two parts (U1 - The Sinister Secrets of Saltmarsh, and Module U2 - Danger at Dunwater.) TSR 9076

Don't Get Burned! Follow a half-forgotten legend to treasures untold and a fiery doom. Pgs. 30-41

The End of the World Is at Hand! A hideous death cult has seized control of an ancient artifact-monument known as Tovag Baragu. The power behind the cult is the Old One himself, Iuz the Evil, demonic master of an empire. He's on an all-or-nothing quest for supremacy over the world—and the heavens beyond. To stop him, heroes must face horrors never dreamed of, journeying to a shadowed city where Death rules and the living cower. Here, Iuz will achieve his mad dream by destroying the imprisoned master of that alien citadel: Vecna, the mightiest lich, an immortal demigod. Two items exist with the power to stop Iuz—the Eye and the Hand of Vecna—but using them carries fantastic risks. Not even the gods know what will be unleashed when these items are fully activated. Die Vecna Die! takes the heroes from the Greyhawk campaign to the demiplane of Ravenloft and then to the Planescape city of Sigil. However, none of the material from those settings is required for play. TSR 11662