
In this adventure, the heroes face the sinister Baron Metus, the vampire who took the life of Van Richten's son, Erasmus. Metus, with Daclaud Heinfroth, has been doing the bidding of the ghost of Madame Radanavich in her quest to destroy Rudolph van Richten. But Metus has his own reasons for seeing van Richten destroyed as well. Included in Bleak House: The Death of Rudolph van Richten TSR 1141

Red dragons. Storm giants. Dragon rulers. Frost giants. They're all here, in this book, in complete, ready-to-play mini-adventures. No matter what level your characters are, there is something here for you (and them). Need a diversion? Want to spice up a long-running campaign? Want to play, but don't have more than an hour or so? This is the book for your gaming group. As DM, you have everything you'll need to play right at your fingertips. As players, you'll have challenges worthy of your characters. This book has something for everyone. This product includes a random spell generator for dragons, complete with instructions. Contains 14 adventures. TSR 9211
To a reigar, art doesn't imitate life, it is life. "An Artist's Errand" is an AD&D Spelljammer adventure for 4-6 good-aligned characters of level 6-8 (about 35 levels total). The module assumes the party is familiar with spelljamming. The party should include at least one spell-caster, preferably a wizard, but a party of resourceful (and powerful) fighters and rogues should be able to complete the adventure. PCs with an understanding of navigation, elvish, and engineering will come in handy as well. The party need not own a spelljamming ship to complete this adventure. Pgs. 8-31
The hunter becomes the hunted. Monsters prowl the hills, but you never see more than one at a time. The players will need to hunt down a polymorph monster. In order to confront it, they'll need to fight through its lair. Pgs. 4-13

The characters are summoned by the Norse gods to track down two dwarves, one of whom has made a weapon for the giants to use against the gods. The mission takes the characters to Jotunheim, on the plane of Gladsheim, to take the god-slaying weapon from the giants.
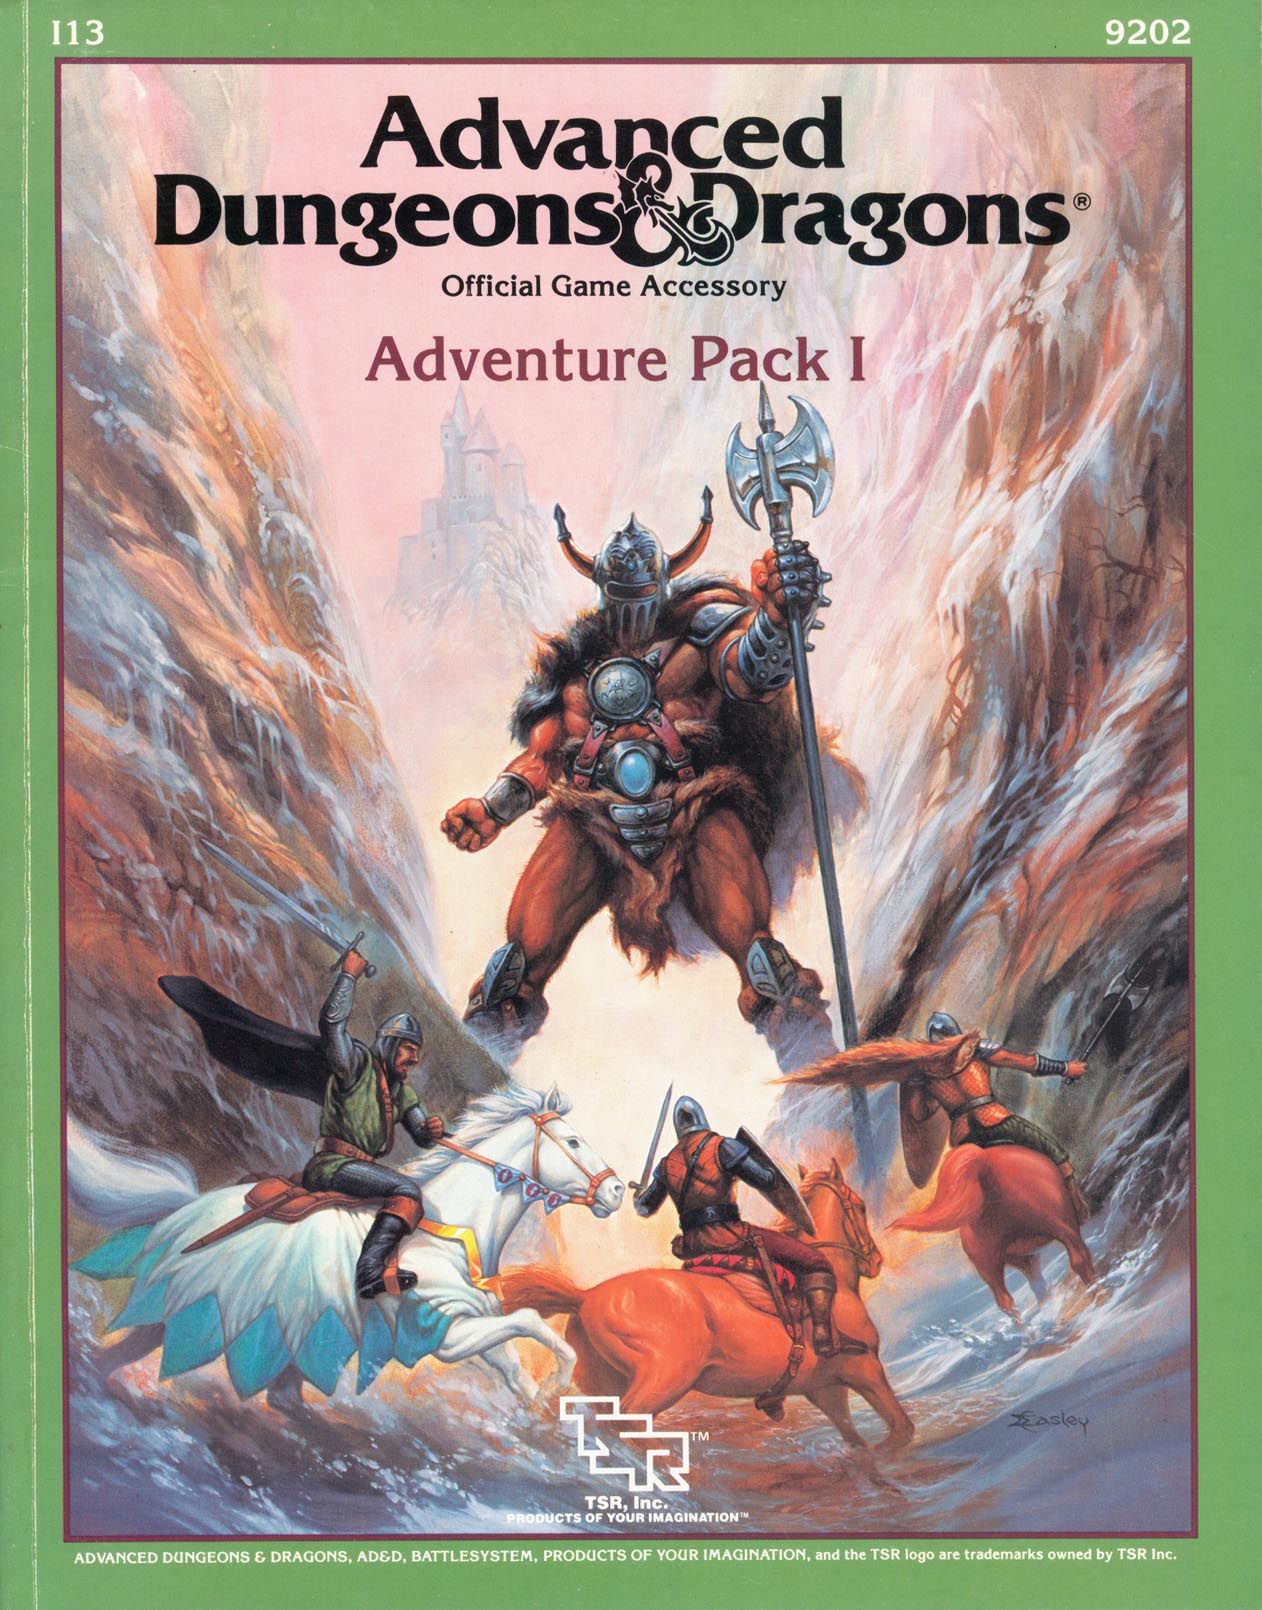
Characters strike a blow against evil when they take on orcs and assassins in these scenarios. Included in I13 Adventure Pack I - https://www.adventurelookup.com/adventures/i13-adventure-pack-i TSR 9202

Horrible hauntings, cruel curses, dark secrets...this is no pleasure cruise! The mists of Ravenloft know no boundaries and observe no rules. One way or another, they always get what they want - this time with some help from a cursed captain and his ship. Player characters boarding an innocent-looking ship will soon find themselves aboard a haunted vessel, destined for an island inhabited by a new form of undead creatures. But that's not the end of the horror - an evil necromancer lies at the root of the evil on the island. The battle isn't over until he's been defeated! Ship of Horror is an adventure set in Ravenloft with two beginnings: one for PCs already in Ravenloft, and one for DMs looking for a way to push his PCs into Ravenloft from other worlds. The adventure includes three new monsters, new spells, and several handouts ready for distribution to players. Ship of Horror is an adventure for four to six players of levels 8-10 looking for grisly chills and thrills! TSR 9321

The Sword of the Dales, an icon of the Dalelands symbolizing the unity and strength of the people, has reappeared! Created by Shraevyn the weapons-mage hundreds of years ago, the lost Sword had become nothing more than a fantastic children's tale - until now. A group of warriors led by Randal Morn, rightful ruler of Daggerdale, rushed to the Sword's resting place to recover it, but dark forces awaited them, and Randal and his men fell to an ambush. Only one man escaped, yet he brought with him the hope that Randal Morn yet lives. Resolved to rescue his leader, that lone survivor turned to the great Elminster of Shadowdale for aid. But Elminster is gone, off plane-hopping while the fate of Daggerbale hangs in the balance. Hence, it is up to Lhaeo, scribe to the old mage, to find a group of heroes who have mettle enough to face down the menace which claimed Randal Morn and his hearty followers... This is the first of three adventures that grant player characters the opportunity to determine the fate of Daggerdale. The saga continues with "The Secret of Spiderhaunt" and concludes with "The Return of Randal Morn." TSR 9484
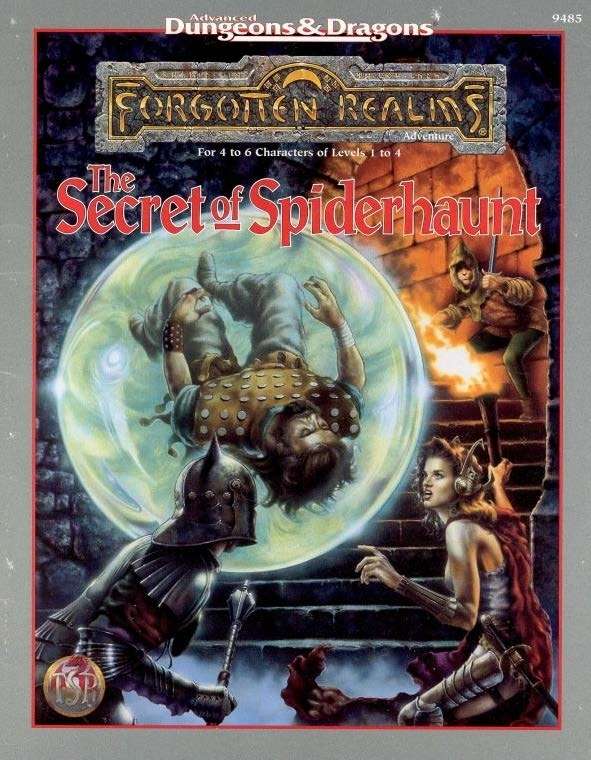
The infamous Sword of the Dales has always held a certain fascination in the eyes and hearts of the citizens of the Dalelands. Thus, it was no surprise when Randal Morn, rebel leader of Daggerdale, led an expedition into the crypt of a long-dead wizard to recover the weapon. Shaevyn the weapons-mage had created the Sword long ago, and it stood to reason that the blade would be waiting within his tomb. Perhaps the Sword of the Dales woulld allow Randal Morn to rule Daggerdale once again. But Randal Morn never returned from that fated party. Only tales of terror told by a lone survivor held any clues as to Randal's fate. A brave hand of heroes accomplished what Randal Morn's group failed to do in part one of this adventure trilogy, "The Sword of the Dales." Battling through the tomb's undead inhabitants, those heroes reached the burial crypt of Shraevyn. There, resting in the center of the coffin, was the Sword of the Dales, its azure glow filling the chamber. However, there was no sign of Randal Morn. Only a note signed by his hand held any clue as to his fate. "Seek me in Spiderhaunt," it proclaimed. "The fate of Daggerdale is in your hands." This is the second part of a trilogy of modules that began with "The Sword of the Dales." The saga concludes with "The Return of Randal Morn." TSR 9485

A shadow from the past, the Ghost Tower of Inverness has loomed ever larger in the mind of the great Seer of Urnst, Now he has convinced the Duke that an expedition should be organized to go to the ancient keep and recover its greatest treasure — the fabled Soul Gem. TSR 9038

You don't know where - or what - you are. You wake up in a dungeon. But how did you get there, and why? This adventure is for a solo paladin character, on a quest to gain a war horse. The character is suffering from amnesia and believes him/herself to be a normal fighter to begin. The quest begins with the character in the middle of an adventure in a dungeon, but not remembering how they got there. After defeating several undead including an intelligent zombie leader, the paladin gains a magic stone to summon a paladin mount. Pgs. 28-35
This adventure is set in the van Richten estate, a free-floating realm in the Mists of Ravenloft. While this scenario serves as the conclusion to the other adventure included in this boxed set, it can also stand alone with relatively minor modifications. Removing most of the monsters and emphasizing the intangible supernatural phenomena makes this adventure especially apt for a Masque of the Red Death campaign. Regardless of where it is set, you may play this adventure many times without it unfolding exactly the same way twice. Suitable for use with the Bleak House campaign or the Masque of the Red Death Setting. Included in Bleak House: The Death of Rudolph van Richten TSR 1141

The town of Byr is in need of heroes. Residents of the town of Byr have been kidnapped. Some think it was marauding Hobgoblins, but a grizzled and crippled veteran who helped to drive the Chagmat (monstrous spider-people) back many years ago believes that the Chagmat are back. Their forgotten temple is believed to be up on Little Boy Mountain. He argues that the mountain is where answers, and the missing townsfolk, can be found. Pgs. 33-48

X11 Saga of the Shadow Lord consists of two linked adventures as a mini-campaign: In the first adventure called Elvenstar, PCs try to steal a magic item from the Shadow Lord to thwart his planned invasion of a peaceful neighboring kingdom. Encounters in this adventure include a village populated by adventurers, and a cloud giant living in a small castle, before the party reaches the Shadow Lord's lair for the final encounter. In the second adventure, also enclosed in module X11, The Halls of Drax Tallen, the Shadow Lord returns more powerful than ever. His undead minions are searching for another magical item to give him immense power and the PCs must find this item before he does. Player characters must get past the undead army of the Shadow Lord and infiltrate his haunted fortress to retrieve the magical Elvenstar. TSR 9165

A light in the Belfry is the first RAVENLOFT adventure to feature an Interactive Audio CD. As player explore Morgorth's dreadfilled manor, they will actually hear the lamentations of tortured spirits, the clash of swords and thunderous roar of magic. With almost 100 tracks of dialogue, sound effects and mood music, TSR's Interactive Audio CD Adventures add a new dimension to the horror of Ravenloft. TSR 9494

Stirrings of an ageless war between Law and Chaos are drawing you into an epic adventure! A Struggle More Savage than Good vs. Evil Imagine a time before the words Good and Evil had meaning, a day when the world was young. Discover an ancient conflict that predates the stars. It was in these days that Law and Chaos forged worlds out of nothingness; their war began while the cosmos was yet unfinished. The Rod of Seven Parts defines epic role-playing. The reappearance of the Rod has awakened the powers of Chaos, and their queen seeks to turn the whole world into a battleground. Bold heroes must undertake the enormous task of seeking out and assembling the pieces of the Rod, but even its power cannot stand alone. Ages ago, primal forces of Law stood fast against Chaos; now their champions must once more confront the Queen of Chaos and her foul spyder-fiends, lest the flame of civilization be extinguished. Follow the quest for the capricious Rod as it leads characters on a journey of high fantasy. The Rod of Seven Parts is designed for four to six heroes and heroines of levels 10 to 12. This boxed set includes: Initiation to Power, a 96-page book of grand adventure playable in any AD&D world, including original campaigns; The War Against Chaos, a 64-page book of world-crossing adventures pitting PCs toe to toe against the minions of Chaos; Might and Menace, a 32-page book detailing the mysterious powers of the Rod of Seven Parts: how it affects both its enemies and its friends; Monsters, a 16-page book of new villains, new monsters, and even a new race! 6 two-sided reference cards; 6 full-color poster maps portraying the key locations heroes can visit. Read about this ancient artifact in the epic novel The Rod of Seven Parts by best-selling author Douglas Niles! TSR 1145

For a long time you have heard legends about the Island of Vacros; when you were only a child, the stories about evil minotaurs were used to scare you into behaving. Now you are grown, and you no longer believe children's stories. But King Trueon of Cathos is worried: his daughter Princess Lydora has been kidnapped, and he has found clues that she has been taken to the ancient and evil island of Vacros. You have heard rumors that a large and dangerous mazework lies beneath the surface of the island - a mazework that is guarded by minotaurs. Of course many rumors are false, but then again... The Maze of the Riddling Minotaur is the second in a series of invisible ink modules: using the invisible ink pen included in this module, you may play the adventure by yourself. After you have played the solo version, you have not used up the module: instructions are provided as to how you may change the solo version into an exciting group adventure! TSR 9060

The battle between the mighty undead army of the Witch-King of Vaasa and the forces of Bloodstone has come to a standstill. As long as the source of the Witch-King's power is at work, his evil forces will never be defeated! As the rulers of Bloodstone Pass, it is up to you to find and destroy the sources of Vaasa's power. All you have to do is journey to the Abyss, confront the mightiest demon of all, steal the Wand of Orcus, and take it to the Seven Heavens to be destroyed. The Throne of Bloodstone is the fourth and final installment in a series of modules specially designed for high-level characters. While it is not necessary to have played any of the three previous modules, The Throne of Bloodstone is the climax of an epic struggle for a kingdom against the forces of darkest evil. Recommended for characters of levels 18-100, The Throne of Bloodstone is the highest-level adventure ever published by TSR! TSR 9228

Things are darkest before they go totally black. He wears black, hires orcs, and looks depraved - but don't be fooled. He's far more dangerous than he seems. Thaddigren Dentiata recently arrived in the village of Sisak, and within 3 months had constructed a great tower on the outskirts. The villagers have become more wary of him, since he employs the help of orc henchment (albeit polite ones), and also is suspected of using dark magic. Since then, livestock has begun disappearing from the surrounding pastures, and two drunk men fell upon a terrible fate when they went to investigate the tower secretly. One was killed and the other remains missing. The villagers have confronted Dentiata, but he and his henchmen politely turned aside their questioning. The players arrive just after one of the town elders was taken by orcs from the village after trying in vain to rally the rest of the townspeople. The players will spend some time in the village gathering information and then attack the tower itself, ending in a final battle with the evil wizard. The module provides details on all buildings in the town as well as all NPCs and stores. Pgs. 6-24
A very big problem from a very small source. Pay the toll or feed the troll' seems pretty obvious. Too bad that it isn't. A tricky gnome has used illusions to fleece anyone crossing a bridge, posing as a fearsome troll. To direct more traffic across his bridge, he has also set fire to the Great Bridge downstream. The players find the Great Bridge burned and follow this detour. At the bridge, the players will fight with the illusory troll. After a few rounds, it flees back to the gnome's lair under the bridge, and the players will need to deal with a combination of the gnome and his traps if they investigate. Pgs. 22,23 & 69