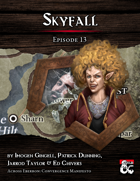
Save Sharn from planar catastrophe in the epic thirteenth and final episode of the Across Eberron: Convergence Manifesto adventure path. This three-part adventure is designed for five 7th-level characters. Your party does not need to have played past episodes to enjoy Skyfall, though previous adventures (see below) with the Clifftop Guild will deepen their experience. Written for use with either Eberron: Rising from the Last War or the Wayfinder's Guide to Eberron by Keith Baker. Adventure Summary: In this climactic conclusion to Across Eberron: Convergence Manifesto, the adventurers are charged with saving the magical metropolis of Sharn before a vengeful academic can destroy its manifest zone using the convergence of Eberron’s 13 planes. Characters must race across the city’s diverse districts in a battle of wits and weapons, locating artifacts linking the 13 planes and disabling the Convergence Engine before it is too late.
In the town of Easthaven, a group of adventurers is tasked on a routine mission to resupply an expedition to the Reghed Glacier. But everything is not quite as it seems, and it's not long before the chronographer's misfortunes become apparent.

*THIS IS A D&D NEXT/5E PLAYTEST ADVENTURE* Imani, a Turmishan wizard and former adventurer, seeks the aid of heroes to infiltrate Dretchroyaster’s lair and recover the Diamond Staff of Chomylla—the key to powerful magic and wisdom locked away for thousands of years. In addition to his own sagely interest in the lore of lost Uvaeren, Imani recognizes the dangers of such powerful magic falling into evil hands. The dracolich has secured the staff in his lair’s cen- tral chamber, using ancient wards of protection that can be bypassed only by four artifact-idols once belong- ing to a cult of Bhaal. Each group of adventurers enters the dungeon through a different section of the dun- geon—a forgotten temple of Bhaal, a vast underground lake, a troglodyte village, or Dretchroyaster’s vaults. Dretchroyaster’s lair is no simple set of caverns and ancient ruins. It sits atop a source of great power and energy, which the dracolich and his Cult of the Dragon allies hope to use to unlock the secrets of the staff. Only by undertaking a unified assault against Dretchroyas- ter’s lair can the adventurers hope to recover the Diamond Staff and survive the dracolich’s fury. The adventurers must make their way through the lair and recover the Bhaalite idols that will help unlock the Diamond Staff, all the while dealing with the lair’s creatures and avoiding the dracolich as he pur- sues intruders. Entering the Chamber of the Diamond Staff, the heroes must overcome its magical wards and claim the staff before being slain by the dracolich and his servants.
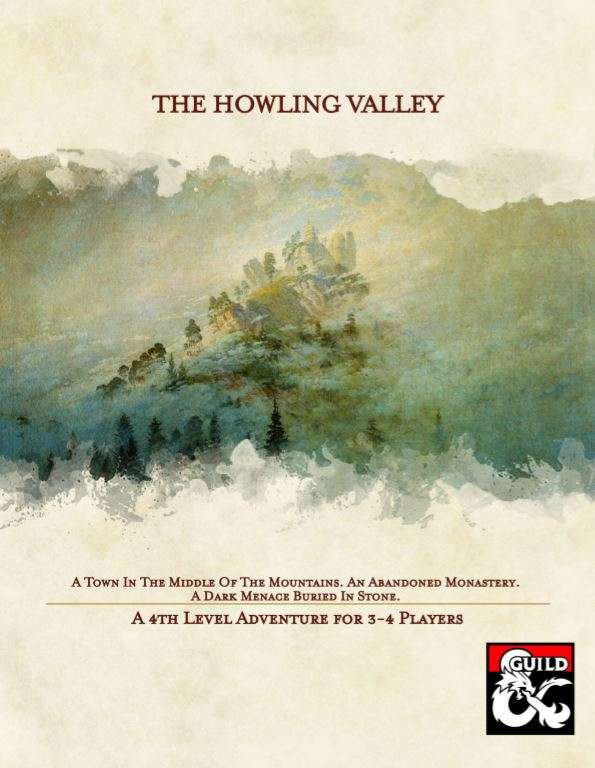
A cry for help by a small village in the Howling Valley. An abandoned monastery on top of the mountain. Hordes of undead pouring into the realms. A mad mage with bad intentions. Will you be able to put an end to the unfortunate events in the valley?

Driven off course by a devastating storm, you crash land on an island where sailors are lured beyond the foreboding treeline. While searching for your comrades, you find yourselves trapped between two warring cultures. Can you unlock the mysteries of Locria before it kills you? Pgs. 51-59

This alternate starter campaign takes you to all the familiar locations of the Lost Mine of Phandelver adventure from the other side of the veil. Some places look the same, some very different. The entire plane is trying to strip you of your mind, your memory, and your motivation. Discover how the Forge of Spells was fueled. Learn the location of lost adventurers from the original Phandelver expedition. See what Cragmaw Castle looked like in its prime. All of this and more, as this takes you from level 1 to level 5 with well over 20 hours of play time. If you are looking to start a new campaign or just experience familiar locations in a new setting, this supplement accommodates. Inside you'll find: Maps: Nine encounter maps Cragmaw Castle rebuilt, including the upper floor, and underground level. Wave Echo Cave before it was tunneled. A very different looking Redbrant Hideout Ruins of a town similar to Phandalin A swamp and muck version of Cragmaw Hideout Plus new magic items, and more Monsters: 37 new creatures Lore Information on a shadowy Yuan-ti empire A new offshoot of the abyssal demonhive A cult using the stoic ways of stone to evade the Raven Queen's watchful eye and pilfering ways. New players vying for control of the Shadowfell Shadowfell Guide: Information on the plane, its inhabitants, and included with this supplement is the best selling Shadowfell Random Encounters appendix. Easter Eggs Hidden throughout the story are references to Lost Mine of Phandelver. Including references to other hard cover books as well.

Monster hunting is a noble profession for only the bravest adventurers. But when a monster queen hires the party to reunite her family and restore her honor, the traditional methods of death and dismemberment are no longer on the table. Melusine is missing her children and the party must recover them all alive.
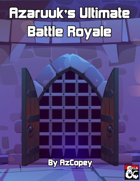
You step forward into the circle of runes and feel your stomach lurch. Within a blink of an eye, you find yourself in the arena. You can no longer see the audience but you can faintly hear them cheering and chanting beyond the arena’s walls... In Azaruuk's Ultimate Battle Royale the players find themselves whisked away to Sigil, the city in the center of the multiverse, where the must face off against each other in Azaruuk's arena. In this arena they will fight Azaruuk's Homunculi and dodge devious hazards all while trying to defeat the others to become the Ultimate Champion! This module is intended for two or more level 10 players, however it can be run for players of any level with only a little tweaking required. There is no need for a dedicated Dungeon Master when running this module. Everyone can have their own character and responsibilities of the Dungeon Master can be shared between everyone. It includes: An exciting player versus player encounter Rules for building better balanced characters including how to handle equipment Rules for running this module without a dedicated DM Various hazards such as lava pits and lightning rods A new Arena Action mechanic for dynamic hazards A new monster to fight: azaruuk's homunculus Two new items designed to make PvP combat more exciting: insignia of ba'sha and tonic of exceptional healing A detailed map of the Arena

Cheese Goblins III — The Church of Lavache A Level 4 Adventure of Holy Havoc and Dairy Doom by Infinite Initiative High on a lonely hill, the Church of Lavache has gone strangely silent. What was once a peaceful chapel now glows with sickly yellow light. Locals whisper of cheese-scented smoke curling from its windows… and giggling shapes scampering through the graveyard after dark. Inside, something ancient stirs. A deranged warlock—Darius Manchego—has seized the sanctuary and begun a ritual to summon Lavache, an obscure archfey of dairy, indulgence, and decay. Cheese Goblins swarm the halls, corrupting pews, altars, crypts, and even the sacred dead. If the ritual completes, the Matron of Cheese will step through the veil—and the town below may drown in holy curdled chaos. Adventurers must storm the defiled church, navigate its cheese-slicked catacombs, disrupt the ritual flames, and confront Darius before Lavache fully manifests… or face the archfey herself in all her gooey, bovine glory. Inside the Adventure A complete 5e one-shot for characters level 4 • A hilltop church overrun by goblins, traps, riddles, and corrupted magic • A branching dungeon with dynamic time pressure—delays strengthen the final encounter • A cheese-slick sanctuary fight, a cursed family crypt puzzle, and a summoned archfey showdown • A chaotic boss battle with Darius Manchego and (if the party is too late) Lavache, the Matron of Cheese • A new magic item: Curdled Charm of Cheese Conjuring Adventure Hooks The Sudden Takeover – Overnight, the church begins oozing cheese and goblins barricade the road. A Priest in Panic – A trembling clergyman begs the heroes to reclaim his overrun chapel. Bounty on the Cheese Warlock – A wanted poster offers coin for the capture of Darius Manchego, last seen near the church. Part of the Thirsty Tiger Tales series by Infinite Initiative—short, atmospheric adventures built to run in one or two sessions.

The Great Trial is a 5e adventure for characters starting at 7th-level and ending at 10th-level. It's a dungeon consisting in the 3 levels, where the first level is the lowermost one and the last is the uppermost one: First level is composed by mean traps, puzzles and combat; Second level is a labyrinth with a construct Minotaur - the Minotal - and an iron wyvern, brand new creatures; The last and uppermost level is actually a jungle-like demi-place filled with dinosaurs in an open world format. Aenor Gleenwith, a powerful elf wizard, wants to make history alongisde Acererak for his Tomb of Horror and Halaster for his Undermountain. So he created his own dungeon. To test its efficiency, he captures adventurers and puts them in the lowermost level, where they need to work together to survive and leave the dangerous place. At the end, Aenor himself greets the group offering them apologies for the harm caused, to fix all damage caused and also rewarding them for the forced help. This module can be run in any setting, campaign, or as a one-shot. It should take around 10 to 14 hours to complete it since it contains 3 Chapters.

When Volothamp Geddarm hires you to recover a missing key, you find yourself wrapped up in a series of murders in Lower Skullport. Can you find the killer before they find you? Part One of the Skullport Shakedown trilogy. A Two- to Four-Hour Adventure for Tier 2 Characters. Optimized For: APL 8
This book goes over the various rules around the faction of the Zhentarim in Phandalin and the Forgotten Realms, making it easy for any new or veteran DMs to integrate it more into the core stories being told, and making the faction feel more useful for the players that choose to join. The adventure, Barrhindlun sees the adventurers working for the Zhentarim and traveling to the town of Leilon and finding their way beneath to the muddy lost city of Barrhindlun, where bandits of the Xanathar Guild have been sent to reclaim a Crystal Orb.

In ruins since the eruption of Mt. Hotenow, Thundertree is finally being rebuilt. The Lords’ Alliance is particularly interested in restarting a lucrative logging trade, but the bureaucratic wood-elf ambassador of Neverwinter Wood isn’t convinced. A mission to check on construction at New Thundertree and help with diplomacy quickly turns into an exciting dungeon delve as the entrance to an ancient temple is discovered! Can your party survive long enough to learn the mystical secrets of Thundertree’s past and claim its riches? Includes maps and a new magic item! The Lost Temple of New Thundertree one-shot is designed for 5th-7th level characters. This thrilling adventure is well-suited for parties who have completed Lost Mine of Phandelver or are roaming the Sword Coast region (ie: Neverwinter, Phandalin, Helm's Hold, Port Llast, Triboar, etc.) as part of Dragon of Icespire Peak or Storm King’s Thunder, but these campaigns are certainly not required. Though it takes place in Thundertree, the adventure can easily be moved to other settings. Content warning: undead; water hazards; tentacles

Expand your game with this collection of 56 NPCs of various Challenge Ratings, thirteen of which include maps and details of their lairs. Add these NPCs as a side-quest, a main villain, a one-shot, a bounty for easy money, or however else you wish. Written by some of the best-selling authors on the Dungeon Masters Guild and outstanding podcasters, each NPC includes an image, a backstory, motives, flaws, and a stat block. Some even include new magic items!

The legendary spellcaster Emirikol the Chaotic has turned the region into a wild magic zone, a place where all magic goes awry. The only way to put things back to normal is to retrieve the source of the problem deep inside the Ooze Chambers of Emirikol! This adventure is for 4th level characters and can be run on its own or as part 3 of the Litany of Arrows adventure path. This adventure contains, 2 pages of new magic items, 8 new monsters and NPCs, a full write-up of Bwimb II, the Paraelemental Princess of Ooze, an entity referred to in many D&D products but never fully fleshed out and stats for the 3rd edition iconic heroes Regdar and Mialee, who play a major role in this adventure. It's got over 10 pieces of original art, full color maps, tagged and untagged, and a special handout for the player who obtains the Ooze Fist of Emirikol. This adventure builds on the story begun in the platinum-selling Castle of Corellon and the follow-up, Warpath of Gruumsh.

Have you ever wanted to raid your neighbor’s garage for that tool they “borrowed” a year ago? Or dig through your friend’s closet because you know half your wardrobe is hiding in there? What if you had a band of adventurers to do it for you? The wizard Rastakeen needs a book returned that he lent his not-so-esteemed colleague, Frex, some time ago. Apprentices are for running errands you don’t want to do yourself, right?

The Cage: A valuable trinket was stolen from the well-protected manor of the lady Morrigan Strange, and she enlists the help of some able-bodied adventurers to retrieve it. As it is the way of things, it turns out the problem is not as simple as it first seemed. A vile demon was trapped in the stolen orb and threatens to kill everyone in sight after its release! The package includes background information about the involved characters, a few details about the town of Beregost, several maps, and lots of adventure!

A series of short encounters and story hooks that may cause your party to question the safety of their local tavern… Designed for characters of all levels

Your chase to wipe out the vampires of Undermountain leads to the Slitherswamp. The master vampire is close at hand! Part Three of the Vampire Hunt trilogy.

The characters, members of the Clifftop Adventurers’ Guild, have been tasked with acquiring the Chains of Mur’taal, an artifact tied to Thelanis, by their guild handler, Lhara. This artifact is the latest in a series that Provost Nigel Faurious has commissioned the Clifftop guild to retrieve for him. The adventure starts when the characters arrive in Rhukaan Draal via Orien caravan. They’re given a chance to explore a small portion of the city before they head to a local bar to meet their contact provided by Lhara. Accompanied by a local guide, they make their way to the Seawall Mountains, where they’ll have to follow clues and their intuition to find the Valley of the Hero, which conceals the artifact that they’ve been hired to obtain. In order to earn the artifact, characters must first pass three tests laid before them by the Story: The Test of Courage, the Challenge of Wisdom, and the Trial of Honor. Once they finish the tests and collect the artifact, the party heads back toward Rhukaan Draal. But there are Marguul forces in the area, and they don’t intend to let the heroes escape with a priceless piece of their folklore…