
Stop the goatfolk, or watch the world be tread UNDER THEIR IRON HOOVES The goatfolk of Capra are a cruel, mericless race from the olden days. They sacrificed their souls to devils and swept the world like a plague, conquering and enslaving. The united races managed to enact a ritual and banish them out of time...but the Caprans have returned. Raiding parties strike from the wastes, stealing men, women and children in the night and dragging them off to Capran's black temples. Only the heroes can find out the Capran's true purpose and end the threat before the armies of goatmen sweep the world once more in iron and blood. Features 5 NEW MONSTERS designed to work together. Every combination is a new, interesting tactical challenge. UNIQUE MECHANICS: Each battle is presented on a unique battlefield. Will your players adapt or perish? ROLEPLAYING: How will players deal with the men who sell their brethren for a quick buck? Will they negotiate with the dark elves who have a tenous alliance with the goatfolk?

In this level 5 adventure for three to five players, a suspicious death brings our adventurers to the village of Degorod on the night of an annual festival. Celebrations turn into chaos as an unknown force abducts villagers from above. The group must investigate the cause and, in the end, decide who to help. Pgs. 101-107

Corruption grows in what used to be the Dayawlongon archipelago's most sacred island. When a wanted fugitive flees to the blighted holy land, the player characters are asked to chase after and apprehend the renegade. As the adventure unfolds, it soon becomes apparent that the roots of corruption run deep. This can be run as a standalone adventure or as a sequel to the Between Tangled Roots adventure from Journeys Through the Radiant Citadel. What's included? 1 infectious adventure divided into single-page sections for easy running 2 fully-colored maps with unlabeled versions for players (made with assets from 2-minute Tabletop) 3 new creature statblocks with clickable links for quick access 4+ ending variations based on what the player characters do throughout the adventure Content Warnings: Abduction, betrayal, corruption, death, disease, mental manipulation, violence

Marek the Stalwart, Paladin of the Knights of the Eternal order has stolen a powerful magical artifact. Fleeing the order’s keep he has left several slain paladins of the order in his wake. Our adventurers have been charged with returning Marek, preferably alive, and the artifact to the Knights of the Eternal Order so he can face trial for his crimes This adventure is designed for 4-6 characters of level 4-5. I would love to hear any feedback you have after looking over/running the adventure. Cover art provided by Marco Ortiz https://www.facebook.com/marcosartcommissions/

"A hundred-year curse caused by a group of adventurers slowly turned a tower and the hills around it into a region touched by the very finger of death, where life is incapable of thriving. As the curse grows in power and reach, on its way lie the town of Beregost, whose population now suffer, sicken and die every day under these nefarious powers. The government and local clerics infrutiferously attempt to remedy the situation, while desperately seeking any who could help them." Tower of the Pale Lady is a 4-hour adventure for a group of 1st-4th level characters. It is set in the town of Beregost, at the southern edge of the Sword Coast, in Faerûn, in Toril, in the Forgotten Realms. However, with little modifications, you can run this adventure in whatever world you wish. This adventure includes NPCs related to the story and to the Forgotten Realms, which might bring your players to other different plots as they play through. New ways of using old spells and items, presented as introduction to reinforce creative possibilities throughout play.
The poor village of Bunting Freely, somewhat off the beaten track, is suffering from an oral health crisis. The villagers are plagued by overly aggressive Tooth Fairies due to a confluence of events in recent history.

The town of Innisfall lives in the shadow of dragons, but has managed to broker a peace with them through the years and avoided outright destruction. Now, a dragon has been murdered and the visiting party of adventurers is accused of perpetrating the deed. Can our heroes prove their innocence and restore the uneasy truce the town has lived under for generations?…

𝐏𝐚𝐫𝐭 𝟒 of the Tower of Bondage “The Middle Tower” introduces Olive Slime and Slime Creatures from notable 1e AD&D fame as well as another of Aumvor’s tortured servants. In this adventure you will go deeper into the tower and find: ● 26 encounters ● More enslaved wraiths ● More traps ● More slime ● More phylacteries ● More danger Discover the Undying One’s library and find tools needed to defeat him, if your players are to escape the tower alive. This release also includes a side view of the tower to better understand the layout of the dungeons. 𝐀𝐥𝐬𝐨, 𝐟𝐨𝐫 𝐭𝐡𝐨𝐬𝐞 𝐰𝐡𝐨 𝐮𝐬𝐞 𝐑𝐨𝐥𝐥𝟐𝟎, 𝐜𝐨𝐦𝐢𝐧𝐠 𝐬𝐨𝐨𝐧: Roll20 Map Pack for Roll20, featuring plain maps for players, without the secret doors and other goodies marked. Coming very SOON. Look for it on DM’s Guild.

This quest is for a party looking to acquire diamonds to use as components for higher-level resurrection spells. To gather what they need, the characters embark on a brief expedition to the Elemental Plane of Earth where diamonds are fairly abundant. However, the party only has an hour to gather as many diamonds as they can before the portal—and the entire cave area—collapses. Includes a quest-related NPC that a player can control if they're waiting for their character to be resurrected.
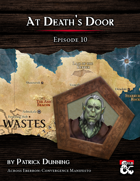
At Death’s Door is a dungeon crawl that takes place almost entirely in the upper chambers of the Lair of the Keeper. This lair belongs to an ancient dracolich that perhaps styles themselves after the legends of the Keeper, or perhaps even inspired them. Stormhome. The player characters are called to the home city of House Lyrandar to meet with Guild Handler Lhara regarding their quest for an artifact tethered to Dolurrh, the Realm of the Dead. The Descent. Traveling by airship over the horrors of the Demon Wastes, the party descends into a vast canyon to find the Lair of the Keeper. After agreeing on a pickup point, the party skydives into the hellish landscape and hides to avoid the notice of a would-be god, then explores the surrounding area. The Lair of the Keeper. The bulk of the adventure takes place in the upper chambers of a dracolich’s lair in a manifest zone tied to Dolurrh, the Realm of the Dead. Surviving the horrors of this place is the main challenge of the adventure. The Ghaash’kala. There is one last challenge standing between the players and their escape to the airship. The orc tribes called the Ghaash’kala consider it their holy duty to protect the rest of the world from the horrors of the Demon Wastes. They will attempt to stop anything from escaping the Wastes, unfortunately including our heroes.

The Proving Glade is a one-shot adventure meant for parties or duets. Your characters arrive in a small settlement that has a big problem. The forest, its lifeblood, has seemingly withdrawn its bounty. Others have gone in, only to return hours later confused about how they got out. Will your party have the wherewithal to navigate the treacherous forest, pass its surprising tests, and uncover what’s truly going on? I wanted a forest adventure that felt alive and busy. I also didn’t want every encounter to be solved with the swing of a sword. The Proving Glade is about questioning value, morality, judgement, and redemption. This adventure was written as part of the Summer 2019 RPG Writer's Workshop. We also submitted In the Heart of the Forest. While these two adventures are not necessarily connected, they both involve navigating difficult and dangerous scenarios in a forest and could naturally be strung together. This Product Includes -A 3 to 4 hour one-shot designed for parties or 1-1 play. -A new Sidekick stat block: Daelin Hoofbane, ranger extraordinaire. -A new custom creature: the mysterious and powerful Alseiad, a glade nymph of incredible beauty. -2 new maps: One region map for the forest around Quaervarr near Silverymoon and one battle map for The Hydra's Mire.

An unceasing rain has settled over the hamlet of Holmford and with it a darkness has fallen. Minister Scrim is dead, livestock and crops wither and rot and now a child is missing. Whispers of an old hate returning feed fear and paranoia. All the while the Hornwood looms hiding it’s vile secret. Light must return to Holmford before history repeats and more innocents perish.

The Lamenting Lighthouse is a four-hour adventure for 5th-10th level characters, designed for Dungeons & Dragons 5th Edition, with a nautical theme, heavy undead and horror elements, and mysteries to solve! One lonely lighthouse shines the way through the rocks and shoals that deny entry to the northern Moonshae Isles. But when the party’s transport approaches, a horrific gale at their backs - no light is in sight... The party must venture ahead of their vessel in a race against the storm to the restore the beacon before their ship is lost. What has befallen the keepers, and what dark secret does the lighthouse hold? Will the heroes prevail, or will they join the lighthouse's lament? This adventure can easily be inserted into a run-through of Ghosts of Saltmarsh. This one-shot can also serve as a nautical interlude in any on-going campaign where the characters have to take to the sea. Included with this adventure are: + 6 original custom creatures, the dread wraith, the dread wight, the swarm of seagulls, the captain, the rating, and the sailor + 12 player hand-outs with notes that shed light on the mystery of the lamenting lighthouse, with a randomization mechanic that ensures a degree of replayability + 9 original fleshed out NPCs, including personality traits and roleplaying tips + 2 original magical artifacts + 7 hand-drawn maps of important locations + a story reward and 2 story hooks for continuing the adventure (depending on how the adventure resolves)
Provost Nigel Faurious’s research has revealed the location of an icy spire near the eastern side of Icewhite Island. The Provost needs the Hoarfrost Flower, an artifact found inside this spire, to make his Convergence Manifesto a reality. Eager to complete his work as quickly as possible, the Provost previously paid for an expedition from the Deathsgate Guild to explore the icy spire at the same time the Clifftop Guild surveyed the Shining Valley in the last adventure. The Deathsgate expedition’s ship, the Nightwood Cask, was destroyed by the cold of the Risia manifest zone. They made it to the island on lifeboats and headed to the spire, hoping to use it as shelter until someone from the Deathsgate Guild comes to rescue them. The spire’s builders are long gone and forgotten, but their traps and magic remain. Mror archeologists once found this place while in search of their ancestors that many believe hailed from the Frostfell. Only their camp remains in the foyer of the spire, where the party from Deathsgate waits. While the Deathsgaters’ supplies dwindle, they argue among themselves on their next steps. Should they try and make it to shore and hope their ship somehow survived, continue to wait, or delve deeper into the spire to complete the task they were hired for?
Pursued by wolves and worse, the party must fight a running battle to take refuge at the relative safety of the Bittermoon Inn, a decrepit old inn high in the mountains. But night is falling, can they uncover the secrets of the inn and use them to survive the night? This adventure can be played as a stand alone one-shot, or can be used as a drop-in side quest to almost any campaign. It is suitable for a party of about 5 characters at the First Tier (Levels 1-4). The players must fight a running battle with wolves to reach Bittermoon, then they must discover the secrets of the inn before escaping through a smuggler's tunnel. Finally they must face off against their unseen opponent at Skull Cavern. There are four encounter maps included with this title.

This alternate starter campaign takes you to all the familiar locations of the Lost Mine of Phandelver adventure from the other side of the veil. Some places look the same, some very different. The entire plane is trying to strip you of your mind, your memory, and your motivation. Discover how the Forge of Spells was fueled. Learn the location of lost adventurers from the original Phandelver expedition. See what Cragmaw Castle looked like in its prime. All of this and more, as this takes you from level 1 to level 5 with well over 20 hours of play time. If you are looking to start a new campaign or just experience familiar locations in a new setting, this supplement accommodates. Inside you'll find: Maps: Nine encounter maps Cragmaw Castle rebuilt, including the upper floor, and underground level. Wave Echo Cave before it was tunneled. A very different looking Redbrant Hideout Ruins of a town similar to Phandalin A swamp and muck version of Cragmaw Hideout Plus new magic items, and more Monsters: 37 new creatures Lore Information on a shadowy Yuan-ti empire A new offshoot of the abyssal demonhive A cult using the stoic ways of stone to evade the Raven Queen's watchful eye and pilfering ways. New players vying for control of the Shadowfell Shadowfell Guide: Information on the plane, its inhabitants, and included with this supplement is the best selling Shadowfell Random Encounters appendix. Easter Eggs Hidden throughout the story are references to Lost Mine of Phandelver. Including references to other hard cover books as well.

The heroes’ journey is finally at its climax. The evil god Tunkorl has just been freed from his prison and only the strongest and bravest mortals of the realm can defeat him before he regains full strength and throws the world in another dark age. However, the ultimate final fight will not be as straightforward as it seems when the party becomes trapped in a time dilated cross section of Carceri, struggling to get back to the real world and finish the job. Escape the Labyrinth is D&D 5e mini adventure for 3-7 characters of 20th level. This adventure is designed for a single 3-hour session which can be part of a special event, the end, or beginning of a campaign. The heroes go between fighting the big bad evil god (round by round) and trying to escape the mutliple layers of the Labyrinth of Futility a space-time dilated cross section of Carceri.
The town of Proskur has been cut off from the rest of the kingdom of Cormyr by a terrible storm, just as its people begins to suffer from a feinting sickness. Now the crops are failing. Are these the acts of a vengeful god? Or something more sinister? While aiding the good peoples of Cormyr in their plight against goblin hordes, the restless dead, a band of cut-throat pirates and the wilds of the Gritstone Moorland, the adventurers must investigate the true cause behind these calamities while uncovering a century old past, following in the footsteps of a legendary band of knights. Will they bring the fight to the evil hag, Bad Blood Hattie in her accursed Bloodtower lair? Or doom Proskur to become a blighted ruin?

In the Anauroch desert, darkness is growing. The followers of the Vile Spore Goddess Zuggtmoy have stolen the dreams of the Bedine Seeress Deja, trapping them in an eldritch artifact. Unless her dreams are returned, the Seeress will descend into madness, and her people along with her.

You hear rumours of an unclaimed wizard's tower, a worthy prize for any practitioner of the arcane arts! Do you have what it takes to face its challenges and claim it as your own? This is a one-to-one adventure designed for one player of the wizard class and one DM.