
Modrons, Mephits & Mayhem is a Dungeons & Dragons 5E tier 2 adventure for three to five characters of levels 5-8. It is primarily set in a modron-designed research facility that has been abandoned by its creators but retains guardians that are still active. Additionally, two groups have broken into the facility with their own goals in mind; the githyanki and their red dragon cohort are antagonistic and provide the main source of combat in this adventure, while a modron traveling with a few mephits may prove friendly although ultimately troublesome. Inspired by adventure games in which the protagonists explore baroque, esoteric technological fortresses, and seeded throughout with factions that sport competing and often bizarre goals, Modrons, Mephits & Mayhem is sure to test the mettle of any group of players, and will provide endless amusement for Dungeon Masters seeking something different from the typical hack-and-slash dungeon crawl. This 70-page adventure features: *Two wilderness areas, random wilderness encounters, and a massive, interlinking 3-level dungeon filled with bizarre puzzles. *Ancient machinery powered by elemental portals, all of which can be activated, turned off, or manipulated by the player characters and the various factions within the modron facility. *Planar creatures like githzerai and githyanki, modrons, mephits, and elemental guardians, skillfully placed into the High Moor area of the Forgotten Realms setting. *Monsters and NPCs that have detailed (yet easy to run!) personalities and goals that will provide tons of roleplaying opportunities. *Notes and sidebars on running the NPCs with added complexity, or simplifying the NPCs' motives to make the adventure more straightforward. *Tactics notes for every single encounter! *An appendix that features all monster stat blocks, and both tagged (DM) and untagged (Player) versions of the dungeon maps. *Wilderness hex map by Elven Tower Cartography! Three interlinked dungeon levels by Dyson Logos...and one of them is a flying fortress! Cover art by Patrick E. Pullen!

Beneath the moorlands of Thar, hidden from all for centuries, lies the Broken Halls of Goldahroud. It seems to have been inhabited until recently as the blood marks on the walls are only a few weeks old. What mysteries lie beyond the doorway from the Tomb of Kered? Fear of the markings have forced the SALT Consortium to turn again to hiring adventurers to face what horrors await them in the Broken Halls of Goldahroud.

The party seeks out Commodore Krux at the Happy Beholder. After speaking with the patrons, the party learns that Krux has disappeared and gets a lead to check out his ship, the Second Wind. At the ship, the party learns from Fel Ardra and Flinch that Krux is being held prisoner by the Amoebros in a cave on the underside of the Rock of Bral. The party infiltrates the Amoebros’ lair, gets past the guards, and learns of the animal experimentation performed by the gang. In a final climactic scene, the party rescues Krux from Ripples, the wicked boss of the plasmoid gang.

With the discovery of an enormous diamond deposit nestled on their borders, the kingdoms of Peldadrin and Belford both claim the repository of indispensable gemstones as their own. After years of negotiations fail to bring a peaceful resolution, the two nations (further incited by sentiments of national pride that have risen over the years of negotiations) determine the diamonds will be claimed only through war. In the early days of the war, Private Geth Heston, a Belford scout with rich Peldadrin ancestry, was dispatched into enemy territory to uncover Peldadrin unit formations, patrol routes, and any other information he could find. It’s been two weeks since Geth sent his latest report, putting Belford command in a state of unease. The information Geth alluded to in his last message could change the course of the war, if proven true.

Outside Briar Glen lies a dangerous swamp, and deep within it runs the Weeping River. Those who venture too far into the swampland near the river are overcome with grief and cry until their tears turn to blood. If they’re lucky, they die quickly. Lately, however, women in town disappear into the swamp near the Weeping River at night... and return in the morning, entranced but unscathed. Their families want to know why they return at sunrise with no memory of the previous night. These women found themselves a friend in the boo-hag, angry at the townsfolk for damaging her swamp. She initiated the women into her coven and tasked them to drain the life energy from their families to help the boo-hag heal the swamp.
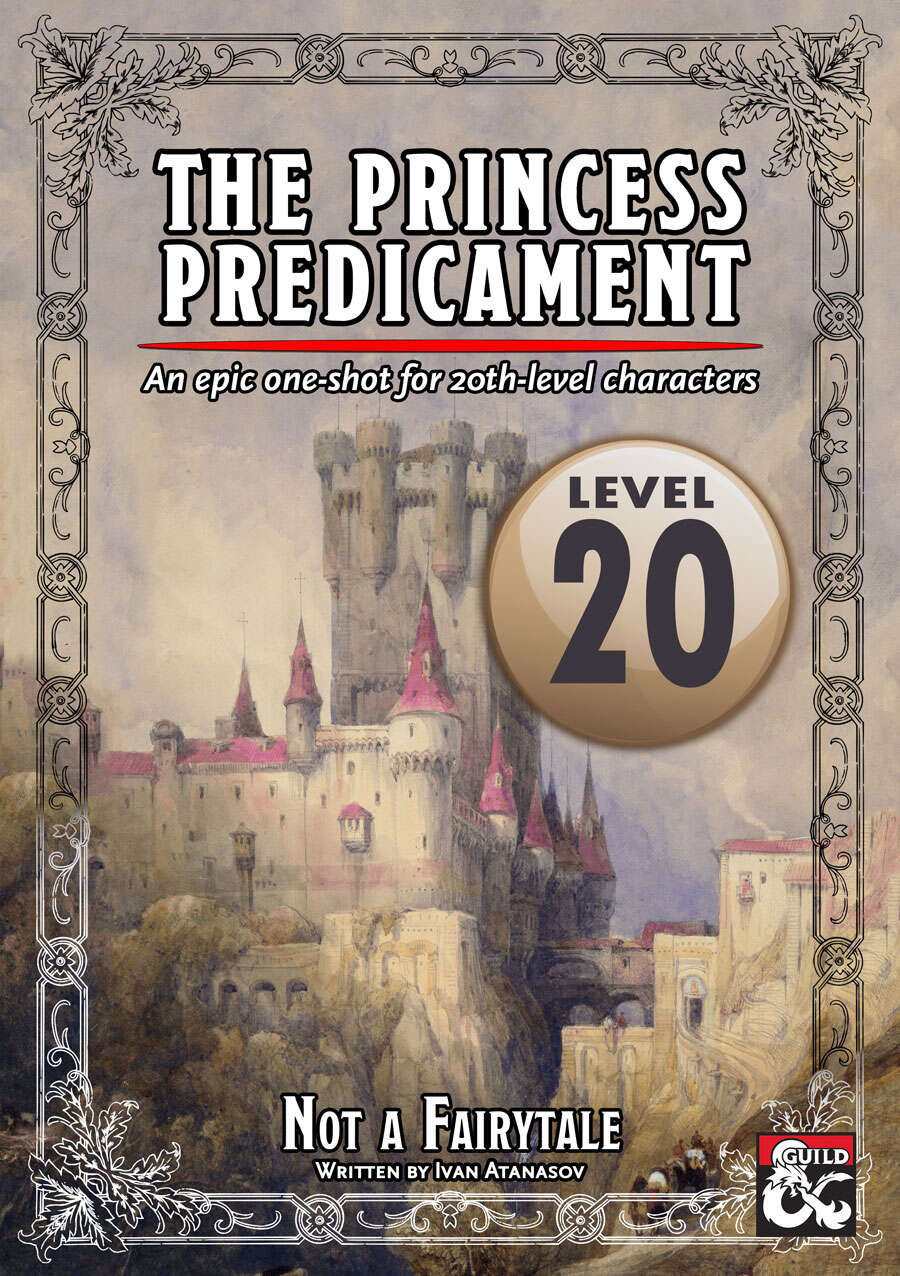
An exiled queen threatens to kidnap her own daughter. A lonely king laments his lost heroic days. A troubled princess struggles with her awakening powers. The realm's most renowned heroes must find a way to fix the dysfunctional royal family in order to save reality. The Princess Predicament is a one-shot adventure for 20th-level characters. It includes: - adorable pink rooms and horrible shadow monsters - a battle for the fate of the world and a battle for a little girl's future - a doll castle - legendary statblocks - 20th-level pregens

An original one-shot adventure designed for 3-6 level 3 characters. SUMMARY: A recent archaeological expedition in Icewind Dale has uncovered a remarkable discovery: the Spine of the World mountain range is, in fact, the actual spine of a great giant. The discovery confirms an ancient legend, that giants as tall as mountains once roamed the Forgotten Realms. Lead archaeologist Silja Stengravar knows the truth. Centuries ago, a lich, threatened by the giants’ ancient elemental power, banished their race to an abandoned planet known as Kaiva. The lich was defeated, but its curse remains, protected by its minions in the heart of Garagai Mountain. Held captive to the curse, the giants are suspended in time, unable to roam free and claim Kaiva as their own. Silja’s discovery has summoned the portal to Kaiva. Will adventurers brave the perilous journey through the hostile and awe-inspiring planet to destroy the curse and reawaken the giants? DETAILS: 2-4 hour session for 3-6 players Play-tested material Unique items and mechanics Printable cards 16-page campaign guide Enjoy the adventure? Share your experiences with me! Hashtags: #SleepingGiantMountain #GiantsOfKaiva

Dr. Rudolph Van Richten and his network of investigators have hunted and put an end to numerous creatures of the night across the Domains of Dread. But some foes are more elusive than others, and will require the aid of heroes to put an end their reign of terror and close out these open cases. A gathering of the Keepers of the Feather turns deadly when murderous birds overwhelm a seaside town. "An Unkind Nature" is the introductory adventure for the villainous wereraven, Nathaniel Hoken. and provides the basis for an extended campaign that will find adventurers aiding the Keepers of the Feather and traveling across the Sea of Sorrows and its island domains. This chapter also introduces a new magical item: Bluebeard's Tear. Content Warning: Murder, Abduction, Bird Attacks, Stormy Weather.

The characters, members of the Clifftop Adventurers’ Guild, have been tasked with acquiring the Chains of Mur’taal, an artifact tied to Thelanis, by their guild handler, Lhara. This artifact is the latest in a series that Provost Nigel Faurious has commissioned the Clifftop guild to retrieve for him. The adventure starts when the characters arrive in Rhukaan Draal via Orien caravan. They’re given a chance to explore a small portion of the city before they head to a local bar to meet their contact provided by Lhara. Accompanied by a local guide, they make their way to the Seawall Mountains, where they’ll have to follow clues and their intuition to find the Valley of the Hero, which conceals the artifact that they’ve been hired to obtain. In order to earn the artifact, characters must first pass three tests laid before them by the Story: The Test of Courage, the Challenge of Wisdom, and the Trial of Honor. Once they finish the tests and collect the artifact, the party heads back toward Rhukaan Draal. But there are Marguul forces in the area, and they don’t intend to let the heroes escape with a priceless piece of their folklore…

Veil Down Conquered is a free preview of the full-length adventure KOBOLDS VS. OGRES, coming in 2018! Veil Down is an affluent halfling village known for its vintners and farmers. Recent kobold incursions into the region around Veil Down have forced gangs of monsters closer and closer to civilized land...and this has brought a gang of ogres to the idyllic village! After driving the halflings out, the ogres have attempted to make the best of their situation and turn the village into their new home, but in a village built for halflings, these ogres are going to have a hard time fitting in... This adventure site contains a chapter from the forthcoming adventure Kobolds vs. Ogres, coming in 2018. Fully presented as a standalone site, expanded gameplay content includes a much more in-depth look at the gnome town of Hardbuckler, briefly touched in Volo's Guide to the Sword Coast and Sword Coast Adventurer's Guide. Additionally, extensive random encounter tables round out the book, steeped in historical lore from the Forgotten Realms campaign setting, presenting stunning mysteries, interesting sites to explore, and evocative NPCs and monsters. This chapter only begins the trials and tribulations players will face in Kobolds vs. Ogres!

"Ribbons of blood dance through the air, tracing wide crimson arcs before fraying into thousands upon thousands of bright red droplets. The cheerful tavern atmosphere evaporates in a moment, rent apart by screams and cries. A woman with grey hair stands near the bar, grasping at the dagger in her throat with fingers made slippery by blood. She sways and collapses. More screams. A man stands before her. He is holding the hilt of the dagger, but lets it slip from a gory hand as the woman falls. He freezes for a moment, then spins and sprints away, knocking aside people as he goes. A young, flaxen-haired woman at the back of the tavern cries out, “Stop him! Stop him!” as he approaches the entrance – the entrance where you and your comrades are standing. What do you do?" A lonely outsider murders a popular village local before a room full of witnesses. But could he be innocent? The Lurker Beneath Red Larch is a 4-6 hour adventure for characters of 3rd-4th level. It is full of roleplaying, problem solving and challenging combat encounters.
The residents of Castle Gealladh have been visited by an ominous banshee with a warning: “Leave or die”. Your adventuring company finds themselves drafted by a wizard named Milo Tenpenny and tasked with investigating the castle and ridding it of undead. In your investigation, you will find that there is more to this warning than it seems — and that something far worse than spirits haunt this castle.

The Shades of Bodach Ridge Whitepeak has a dark history of black magic originating with the evil witch Skruul the Reaper. The dark rituals she conducted seemed sure to plague the region, until a plucky group of adventurers thwarted her plans sending her into a state of perpetual fractured undeath. Now souls scatter from her old haunt on Bodach Ridge. What could have set these souls free?

It all begins with a simple request (doesn’t it always?) from an old farmer. The request – protect his cattle herd from vicious wolves. Simple enough for the brave adventurers, right? But it doesn’t stay that way. Not at all. Soon, the adventuring party will find themselves in the thick of it as they solve puzzles, avoid traps, fight for their lives, and endure witty taunting. And in the end, they discover an artifact that may, or may not, be useful to them. This adventure includes a cursed shield, a new undead creature, and a new artifact. Total party experience earned is approximately 14,500.

nside this full-color, 132-page anthology you’ll find five best-selling Adventurer’s League quests for level 1-10 characters. Inside are over 20 illustrations, including a half-dozen full-page pieces by the esteemed Andrea Alemanno. Also included are instructions on how to weave these adventures into an ongoing story arc as part of your campaign. Tier 1 (Level 1-4): The Cornflower Hive (SFBAY-04-01): What links an infamous Zhentarim mercenary with a brilliant but tormented artificer? To find out, the adventurers must break the goblinoid siege of the village of Westfir. After the bizarre goblins are defeated, the Cornflower Hive must be destroyed. Ultimately, what secrets are held in the grain mill by the Westfork river? The White Well (PDXAGE-01-01): The Gommurg Clan of hill dwarves rarely deal with outsiders. The dwarf clan’s isolation has gifted them with great skill and wealth. Unfortunately, their pride has made them vulnerable to an ancient power confined centuries ago. An exile has magically foretold the clan’s destruction. This diviner is the only one who knows how to stop the evil threatening the Gommurg. Tier 2 (Level 5-10): The Barrows of Solina (STORM-01): Zhentarim traders. Shadowy figures roaming the fields near Hillsfar. How do these all relate? Everything traces back to the recently unearthed grave-barrows. Rescuing a caravan from undead attackers, the adventurers learn of an ancient danger. The Dark Hunt (PDXAGE-02-01): The village near Oreclasp Keep has been reporting brutal owlbear attacks that have left people missing or dismembered. Lord Oreclasp has placed a bounty for every owlbear beak brought to Oreclasp Keep. The villagers don’t suspect the deeper problems brewing in the land. Under Earth & Stone (SFBAY-04-02): A Mulmaster refugee named Ani Kuleimatt discovered references to a forgotten mine near the Moonsea, a mine rumored to produce an unexpected export. The adventurers are hired to locate the complex and secure its resources for the Mulmaster Diaspora.

Rauvin Vale: Ashes of Lhuvenhead After a scout arrives at Hilltop and reports that hobgoblins have been spotted approaching the ruins ofLhuvenhead, the adventurers must travel to the destroyed town and dispatch the hobgoblin forces, working for the Blue Dragon Nahaunglaroth and the Blood of Morueme, before they can establish a base. A Forgotten Realms Adventure for 2nd Level Characters.

Save the village of Millvein! Prevent a war with the drow! In this 3-4 hour adventure for 4-5 characters of 2nd level, travel to a small chitine lair to prevent them from destroying the small village of Millvein and inciting a war between the surface and the drow. Includes: A 3-4 hour adventure for 2nd level characters Map of the village of Millvein 2 DM maps Stat blocks for all monsters the players might encounter. See where the adventure began in Into the Underdark - Part 1 A Family Affair The adventure continues in Into the Underdark - Part 3 They Call It A Mine

The yuan-ti anathema, Hessatali, calls out to his yuan-ti faithful from his prison in the Abyss. His network of vipers has uncovered the ruins of ancient Ss’tatha’lass and the Fane of Hessatali, a fountain of pure venom that will return the demi-god to life. Above the buried ruins of Ss’tatha’lass, yuan-ti agents have moved to control the politics of Scornubel. The characters fall into a complex yuan-ti plot that spans the breadth of the realm, pits the heroes against the forces of the Abyss, and explores the culture of the yuan-ti.
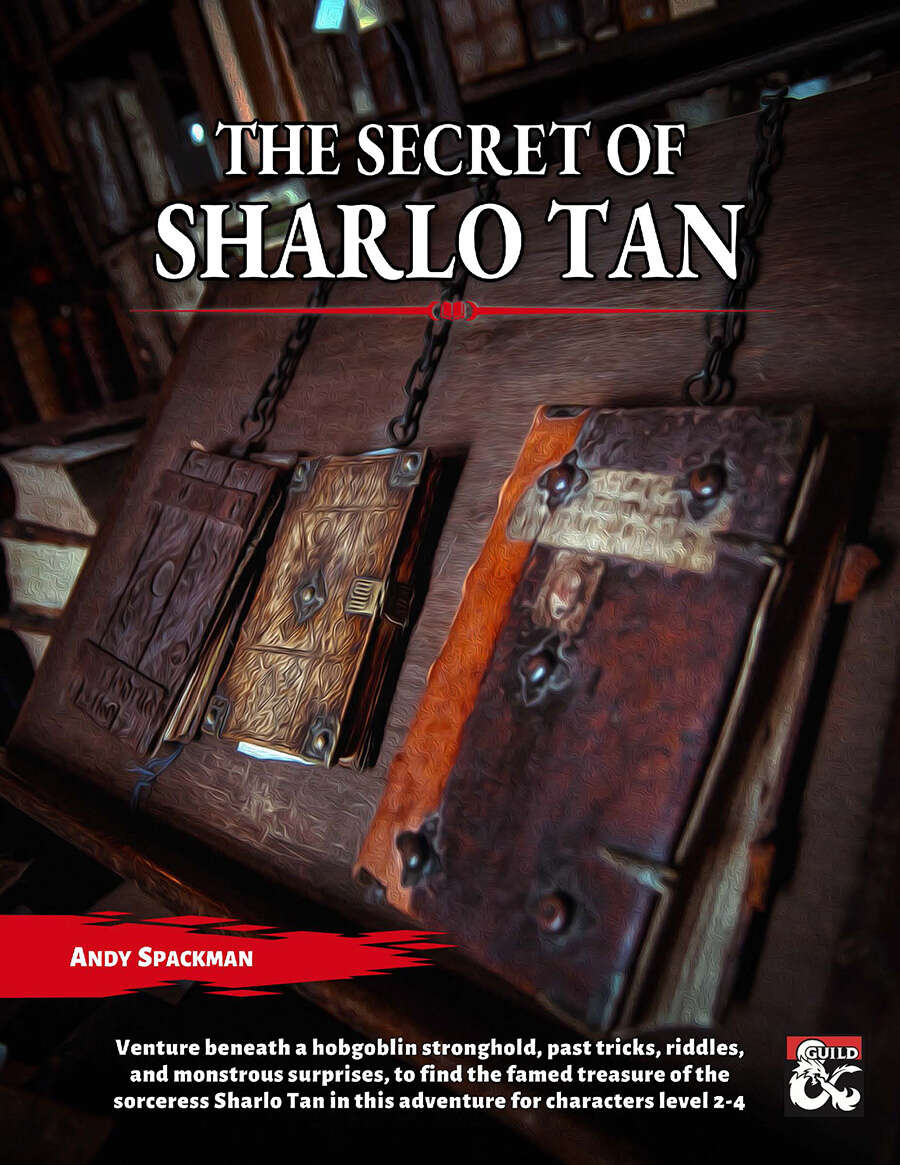
Sharlo Tan was a sorceress. She was a scholar. She was a spy. And she left behind a legendary trove of treasure, guarded by riddles, secrets, and the passage of time. But it isn’t an ancient rumor that has the people of Rivesby on edge. The hobgoblins of the Lamellar Banner have encamped less than a day’s march away, and no one knows what has brought them out of their stronghold. In this richly detailed adventure, players can choose whether to play peacemaker or treasure hunter, explorer or exterminator. But they won’t be the only ones playing games, as they encounter creatures and NPCs who have their own conflicts and motivations. The Secret of Sharlo Tan is a mid-length adventure for levels 2-4 that easily plugs into any 5e campaign. It’s particularly suited to those who love witty books, solveable riddles, and nuanced interactions, but it readily accommodates smash-mouthed impatience as well. Depending on playstyle, it can fill 2-4 play sessions of 3-4 hours. The adventure includes: * 40-page fully illustrated PDF with player handouts * 3 stat blocks * 4 dungeon maps in DM and unmarked versions * 11 all-new magic items

In the fourth installment of the Into the Underdark adventure series, characters come face to face with the heretofor unseen puppet master behind most of the strife and chaos in the Shadowed Hallows, Gyldrith the Chosen, a dreaded deep dragon! Includes: Three all new maps of Gyldrith's lair, and those of her minions Two all new monsters, the Ancient Deep Dragon and her Warlock of the Deep Dragon A new player option, the Deep Dragon patron for the Warlock Class. Unnumbered maps suitable for use in your favorite VTT Continues the story from Into the Underdark Part 1 - The Descent with areas and NPCs from The Shadowed Hollows Gazetteer