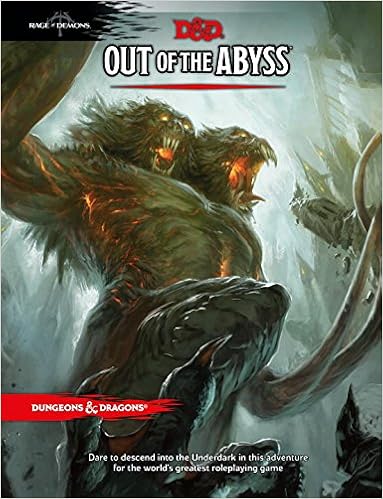
The Underdark is a subterranean wonderland, a vast and twisted labyrinth where fear reigns. It is the home of horrific monsters that have never seen the light of day. It is here that the dark elf Gromph Baenre, Archmage of Menzoberranzan, casts a foul spell meant to ignite a magical energy that suffuses the Underdark and tears open portals to the demonic Abyss. What steps through surprises even him, and from that moment on, the insanity that pervades the Underdark escalates and threatens to shake the Forgotten Realms to its foundations. Stop the madness before it consumes you! Note for DMs: This adventure is not for the faint of hearted, to run or to play. The module starts with 10 NPCs traveling with the party through the grueling Underdark. This number can grow. The encounters within the book are often incredibly deadly for the characters that would be going through it. This is because the module expects them to run or talk their way through the events, or, in some cases, the module expects them to lose. If your players aren't the kind of party to run, talk, or surrender, do not get this adventure. The module almost requires that you use milestone leveling because the experience provided does not commonly get players to the levels they should be once they get to certain milestones in the story (7th when they leave the underdark, 15th when they face the demon lords.) Good luck and happy questing.
Pirates and powderkegs. An undersea menace has the merchants of Scalabar up in arms. A strange sea monster is plaguing the trade ships near Scalabar, a coastal city. You have arrived in Scalabar at the behest of Sora Calhaigne. The lady of House Calhaigne needs brave heroes to investigate the loss of her galleon, the Morning Star. She has reason to believe that the sea monster is not what it seems. Includes a list of random city encounters, a keyed map of the port city, Scalabar, as well as a simple overland map of the Scalabar coast, a map of a typical two-story warehouse, a keyed map of the pirate caves, and a keyed map of the ship Thresher. Pgs. 10-27
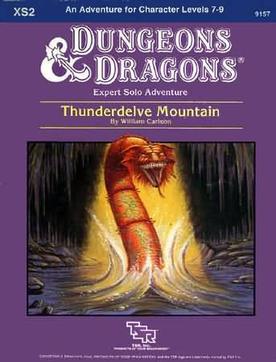
The ancient dwarven kingdom of wonder and fable is no more! Only the tales of it's grandeur remain to entertain the children, or so you thought. Then you met Nimron. Distraught and desperate, you alone can pass the gates sealed so long ago. Within are the lairs of bandits, cutthroats, and worse. The evil that destroyed the dwarven home - the Halls of Paradise - is awakened again. Into this horror ventured the dwarven princess Grona Marblefist to reclaim her kingdom. She, like so many others, has not returned. Now you must face this peril alone. Thunderdelve Mountain is a solitaire adventure for the DUNGEONS & DRAGONS Expert game. Players who don't wish to face the fallen Halls of Paradise alone may also use this adventure for group play. TSR 9157
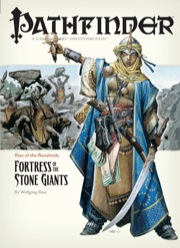
The Giants are on the March! The Rise of the Runelords Adventure Path continues! Driven to battle by a maniacal warlord, the once-peaceful stone giants of the Storval Plateau threaten to destroy the sleepy town of Sandpoint. Will fast action and quick wits be enough to save the defenseless community? Yet, even if the giants' initial raid can be repelled, only by striking at the heart of their titanic war machine—the black-towered fortress of Jorgenfist—can the menace be quelled. But who knows what mysterious bloodlust spurs the usually peaceful giants to war, or what mysteries lie beneath their ancient fortress?

The Frozen Necromancer is a three-part adventure for Fifth Edition that takes player characters from levels 1 to 4. This adventure is the first in a storyline of four modules called The Demonplague that can be used as an entire campaign that takes characters from level 1 to 20. The entire adventure (or just pieces, characters, or encounters from The Frozen Necromancer) can be dropped into any fantasy setting with minimal changes

Chapter 2: The Sinister Secret of Saltmarsh In this version of the adventure, the characters find navigational charts and logs aboard the Sea Ghost that implicate its crew as slavers. Ned Shakeshaft is a Scarlet Brotherhood agent. He makes an attempt to foil the characters, but his true intent is to surrender and implicate Gellan Primewater as a key villain. The distraction afforded by the lizardfolk and the looming sahuagin threat gives the Scarlet Brotherhood the opportunity to bring more agents into town. posing as mercenaries brought in by Anders to protect the town. If Gellan can be removed from the council, Solmor might ask one of the characters to take his place.

The greatness of a dwarven citadel is measured by its greatness of wealth. The dwarves steadily work mines and forges to fuel the wealth needed to make their presence known throughout the realms. Unfortunately, this also makes them known to those that would seek the opportunity to steal their glory and riches. This story occurs in a place that has experienced this struggle for millennia. New threats emerge as old threats become rivals through the tides of time. This story... your story... is another chapter of this ancient struggle.

In the far reaches of the world, under a lost and lonely hill, lies the sinister Tomb of Horrors. This labyrinthine crypt is filled with terrible traps, strange and ferocious monsters, rich and magical treasures, and somewhere within rests the demilich. Remake of the original AD&D adventure.

The characters, members of the Clifftop Adventurers’ Guild, have been tasked with acquiring the Chains of Mur’taal, an artifact tied to Thelanis, by their guild handler, Lhara. This artifact is the latest in a series that Provost Nigel Faurious has commissioned the Clifftop guild to retrieve for him. The adventure starts when the characters arrive in Rhukaan Draal via Orien caravan. They’re given a chance to explore a small portion of the city before they head to a local bar to meet their contact provided by Lhara. Accompanied by a local guide, they make their way to the Seawall Mountains, where they’ll have to follow clues and their intuition to find the Valley of the Hero, which conceals the artifact that they’ve been hired to obtain. In order to earn the artifact, characters must first pass three tests laid before them by the Story: The Test of Courage, the Challenge of Wisdom, and the Trial of Honor. Once they finish the tests and collect the artifact, the party heads back toward Rhukaan Draal. But there are Marguul forces in the area, and they don’t intend to let the heroes escape with a priceless piece of their folklore…

The characters are summoned by the Norse gods to track down two dwarves, one of whom has made a weapon for the giants to use against the gods. The mission takes the characters to Jotunheim, on the plane of Gladsheim, to take the god-slaying weapon from the giants.

Sinister, twisting images...Horrific nightmares lurking at the corners of the mind...These are descriptions used to tell the tales of the Labyrinth of Madness. But these tales of the labyrinth are only legends, really, nothing more than stories used to frighten children at night - until a mysterious scepter is found, bearing within its crystal head a visage of insanity and terror, and also delivering a message: "Disturb not the Labyrinth of Madness again, and live a while longer." Now a powerful temple suffers from a tragic curse that is somehow linked to the labyrinth. Does there exist a group of heroes who can penetrate this dark and terrible place to life the curse...and survive? Labyrinth of Madness is a multiple-level, three- dimensional dungeon adventure, a puzzle within a puzzle, that commemorates 20 years of gaming with TSR. TSR 9503
Jack Mooney owner of the "Jack Mooney & Sons" Circus. Wants to hire the PCs to capture a great cave bear with a brilliant golden coat.

The Sea Witch is a short adventure for four 10th-level characters. The difficulty of the adventure can be adjusted by changing the level of main antagonist (Black Molly, the sea hag pirate) or by altering the number of her ogre servants. To tailor the encounter to groups of different levels, refer to table 4-1 in Chapter 4 of the DUNGEON MASTER’S GUIDE. The adventure is set off a lightly populated coastline known as Misty Bay, but adapts easily to any coastal region in existing campaigns. The sea hag known as Black Molly is a notorious pirate who has plagued the coastal cities for the better part of a decade. A successful Knowledge (local) check (DC 15) will reveal that Molly and her ogre crew have a filthy reputation as merciless killers who delight not only in plundering vessels for their riches, but also in destroying the ships themselves and sending all hands to the bottom of the sea. Now the villain and her followers have seized control of the Old Lighthouse of Misty Bay located off a lightly populated coastline. For generations the lighthouse beacon has protected the fishermen of this region, warning them of the dangerous rocks that lurk just below the level of the high tides. Recently, the hag has put out the beacon, darkening the lighthouse; misery and destruction are sure to follow as ships start to blunder into the rocks. Blackmail is apparently Black Molly’s aim in this venture: She conveyed a message to the nearest shore community, the fishing village of Poisson, demanding the princely sum of 50,000 gp. Until she receives this ransom, she intends to hold the lighthouse and its beacon hostage. The fate of the human keepers who tend the lighthouse is unknown to the seaside communities at this time, but they fear the worst. The Sea Witch is ostensibly a rescue mission: The PCs are pitted against the evil of Black Molly and the brawn of her savage ogre crew. It is the heroes’ task to retake the lighthouse and, if possible, free its captives from the clutches of their jailer. What neither the PCs nor the shore communities yet realize is that while she 1would be pleased to have the gold, Black Molly is in fact after bigger treasure. Molly has no intention of giving up the lighthouse — at least, not until she finds what her master sent her here for. Lying on the sea floor practically at the base of the rock on which the lighthouse sits is the wreck of the war galley Flying Cloud, which according to popular legend was captained by a cleric who wore around his neck an amulet of the planes. Black Molly wants this prize, but so far she hasn’t been able to find it. She’s scoured the wreck without finding any sign of the magic item. Now she’s trying to determine where to search next, for the item might well be somewhere near the wreck. If she can’t find it, she’ll start torturing her captives to find out if they have any useful knowledge about the amulet.

Freeport's in crisis, as war breaks out on the high seas and orcs riot in the streets. A map promises the biggest haul of booty in history, but nothing is as it seems. Buried with that treasure is a terrifying evil Freeport thought banished forever. Black Sails Over Freeport, the first mega-adventure for the award-winning pirate city, is filled with enough swashbuckling challenges to test the mettle of any band of heroes. Its 256 pages are packed with action, intrigue, and danger, delivered with the style and professionalism you've come to expect from Green Ronin. Black Sails are on the horizon. Do you have what it takes to face them?
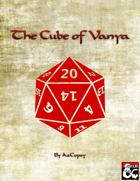
Inspired by the "Happy Fun Ball" from the web series Critical Role, The Cube of Vanya is a magical adventure through demi-planes created by an ancient wizard, now destabilized by a malevolent dragon. The adventurers find themselves trapped within a series of themed planes with no idea how they got there. Navigating these planes to find a means of escape, they uncover the secrets of the cube while piecing back together their own memory. During the campaign the adventurers may fight shadow demons in an inn which is really a prison, flee a tornado while perched perilously in the sky, forge a weapon within a volcano, and much more. The module is structured in a non linear manner allowing the adventurers to choose their own way, or for the DM to pick and choose their favourite bits to highlight. The adventure was written with four level 5 players in mind but it would be easy to tweak for different sized groups around that level.

When an ill-favored orb drops from the sky and devastates the countryside, only the PCs stand between an ambitious wizard, a cult of dragons, and a dark ambition that could bring an army of fiendish wyrms into your campaign world! "The screams became overpowered by the sound of the terrible falling star--a black orb of malign energy hurled from the firmament in the dead of night. In that instant, the village of Rhale was utterly destroyed, reduced to a hollow crater of flaming decay. Now, frightened talk of a dark presence descended from above has taken root, though none can put name to the faceless fear that might reside within this terrible orb." While traveling the countryside, the player characters witness an explosive event - the falling of a meteor into a distant hillside. Soon thereafter, they encounter several mercenaries menacing some refugees. From them, the PCs can learn, that a group of dragon worshippers called the Black Covenant are in the area and intend to use the fallen star for their own nefarious purposes. Upon arriving at the crater, the PCs find that the falling star is in fact a massive sphere of iron with an opening in its side. They enter the sphere to find a small complex of rooms protected by numerous traps and guardians. They also battle several members of the Black Covenant, until they make their way to the heart of the complex, where they discover the source of the Covenant's interest in the Black Egg, they try to use it to create a half-fiend red dragon. The PCs must succeed if they wish to prevent the creation of an army of fiendish dragons. Lot's of monstrous NPCs with class levels and templates for enemies (half-black dragon orc warriors level 7, for example) are used in this adventure. Pgs. 57-78
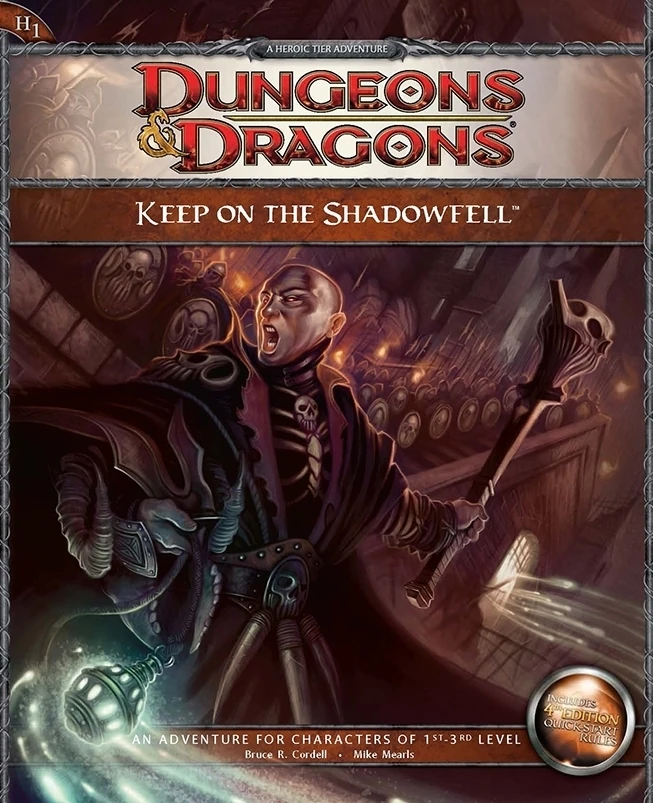
Darkness looms near Winterhaven! Kobold brigands have grown ever bolder in their attacks, marauding the once peaceful town, and a known explorer has been missing ever since their departure to the excavation site of a dragon burial site. When the party investigates, they will discover that the kobold's leader, Irontooth, bears a tattoo of a ram-headed demon. This is a troubling portent, for the townsfolk will report that this can only mean the dread god Orcus, master of death, has an active cult in that ruined keep! It is up to the party to enter the Keep on the Shadowfell and put a stop to the cult's fell machinations before it threatens all the realm. There they will fight the evil priest Kalarel, Scion of Orcus and seal off the vile portal to the dark realms he is master of. Should the heroes seize victory, glory and treasure are sure to be theirs. But first they must endure the challenges of that dreaded KEEP ON THE SHADOWFELL!

In the Yatil Mountains south of Perrenland there is rumored to be a magical hoard of unsurpassed value, a treasure of such fame that scores of adventurers have perished in search of it. Find the perilous Lost Caverns of Tsojanth and you may gain the hidden wealth of the long-dead arch-mage-- if you live. Module S4, this contains a brief wilderness journey to the caverns, but the bulk is underground. The caverns are noted as a previous lair of the Arch-mage Iggwilv- though she is long gone, her Demonomicon remains. This module marks the first appearance of several monsters and items that would later appear in the Monster Manual 2 and Unearthed Arcana. A labyrinth features in the caves. TSR 9061

Your cousin Rolph is dead - and while there is cause for sadness, there is also cause for celebration. As his heir, you were willed his dominion: Fenhold. Of course, the Deep Swamp is threatening to engulf all of your new holding. People are seeing ghosts and disappearing mysteriously. Animals die without reason, and crops are suddenly blighted. The farmers don't like the swampdwellers, the swampdwellers don't like the farmers, and no one likes the halflings. The entire civil service of the dominion seems to have either worked for the failure of the dominion or resigned due to actions of the others. It's going to be tough task to make all this ship-shape once again, but you're 15th level now. Isn't it about time you settled down? TSR 9210
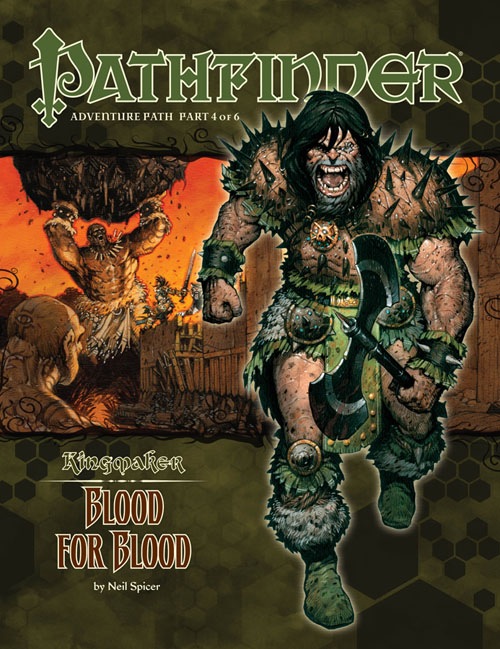
A Pathfinder Roleplaying Game adventure for 10th-level characters, this volume of Pathfinder Adventure Path is part 4 of 6 of the Kingmaker Adventure Path, in which the heroes win and defend a small kingdom from threats foreign and domestic. PCs should advance to 13th level by the end of this adventure. “Blood for Blood” begins with the PCs having returned home from solving the mystery of the Varnhold Vanishing. Shortly after their arrival, they learn that new problems have developed during their absence—there are rumors of an army marching toward their nation!The PCs race to the village of Tatzlford, where they help defend the village from an attack by a small but earnest force of bandits, barbarians, and several lumbering trolls after being warned in advance by a troubled woman who has fled from Fort Drelev to the west. Following the skirmish, she pleads with the PCs to save her father and sister from peril.From there, the PCs strike out into the swamplands of the Slough to the west, exploring new lands and finding opportunities to make new allies and eliminate long-term threats to the region. Their initial goal, though, should be infiltrating Fort Drelev, where they’ll have a chance to confront the traitor Drelev with his crimes and rescue the Fort’s beleaguered settlers. During this time, the PCs learn where Armag’s tribe has been holding the daughters of Drelev’s senior officers hostage. Arriving at the ancient site, the PCs attack Armag’s barbarian encampment and overcome the sinister powers of the Black Sisters to free the girls. Then, entering the tomb, they face deadly traps, ancient undead horrors from a war-torn age, and the trials of the tomb’s immortal, divine guardian. In the final chamber, the PCs encounter Armag himself, armed with the ancient sword of his namesake.