
The characters are summoned by the Norse gods to track down two dwarves, one of whom has made a weapon for the giants to use against the gods. The mission takes the characters to Jotunheim, on the plane of Gladsheim, to take the god-slaying weapon from the giants.

While you search for treasure, others search for you. A treasure vault without guards or traps - can it be true? Pgs. 16-30
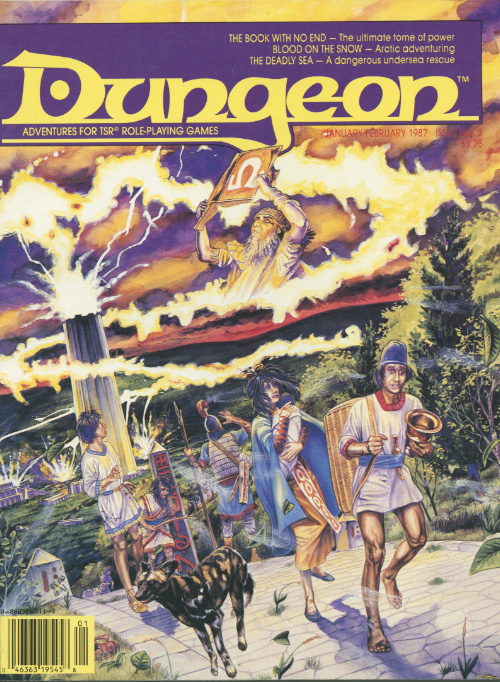
A vanished tome, a faded legend, and the end of the world. Out of the eons, the deadliest artifact. At least one magic-user is required, and fighters and thieves would be very helpful. Magic-users may have a special interest in this quest due to the nature of the item for which they search. Traps and puzzles are a dominant theme, and problem solving is necessary. Pgs. 41-64
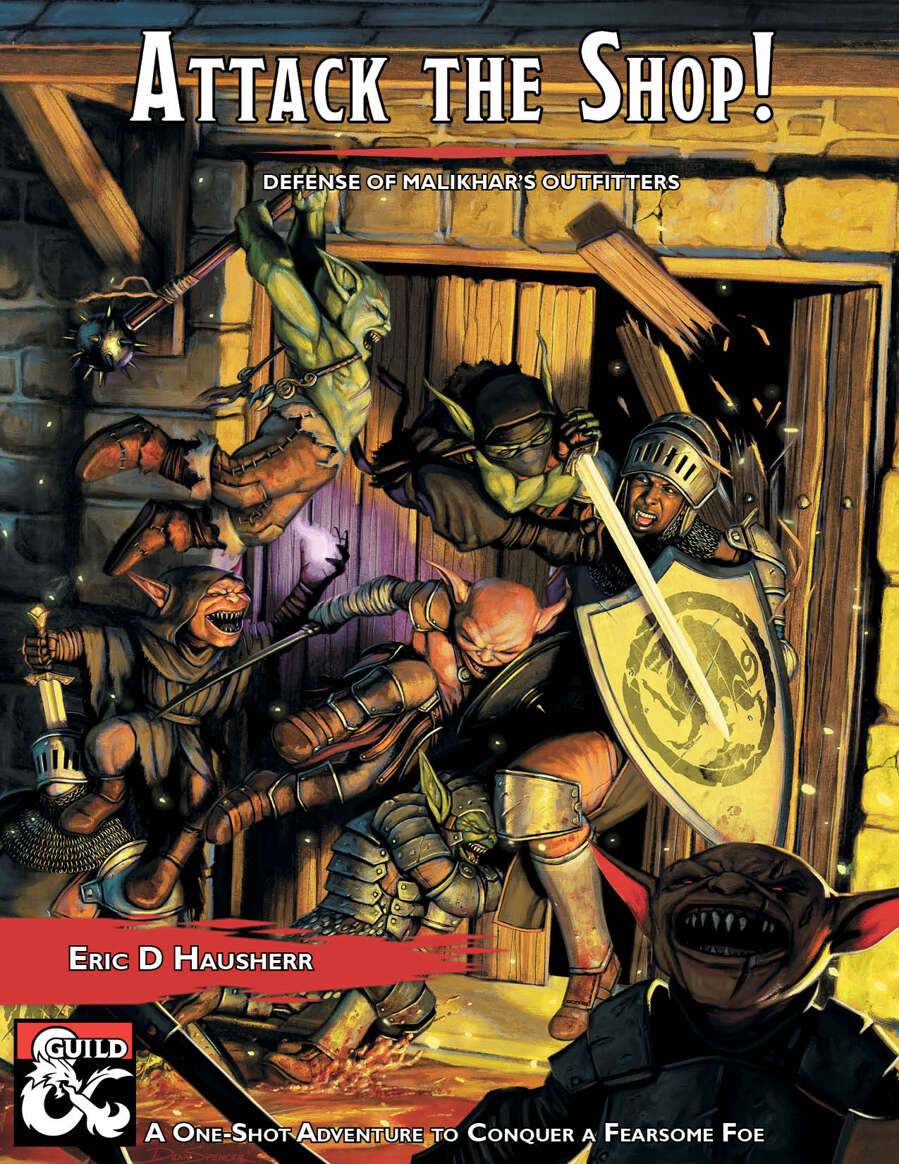
Attack the Shop! is a Dungeons and Dragons adventure optimized for four to five player characters. The adventure is designed to play in one session of approximately four to five hours. Five premade fourth level characters are included to facilitate getting into the action quickly. The adventure takes place in the city of Scornubel in the Forgotten Realms but can be placed in any city without trouble. The characters are mercenaries hired to take an overnight job that pays very well. The instructions from the employer, Malikhar, are simple. Keep the cargo safe in his shop for the night and get paid handsomely.
Men always seek the blood of monsters. Some spill it to avenge their massacred families. Others swim through an ocean of gore to find treasures worth the envy of kings. A few know blood can be a priceless treasure in and of itself. Alchemy has long used the lifeblood of monstrosities as arcane fuel, and of all the legendary beasts, the blood of the gorgon holds the most secrets. Few know the blood's darkest lore, its ability to draw out the monster within every soul. Those who drink gorgon's blood are forever changed, and the darkest horrors of their mind unleashed. The heroes hunt a deadly murderer who stalks the streets of the Free City of Zobeck after nightfall, and cross blades with a guild of monsters who rule the city from below. Lucky heroes might risk no more than their lives. Unlucky heroes must wager their souls in a game where monsters and men dance close enough to share their blood and their fate.
Slain in disgrace, reborn in fury, armed to the teeth: Flame returns! Flame is back - and is he mad! The sequel to "Into the Fire" from Dungeon 1. Pgs. 42-63
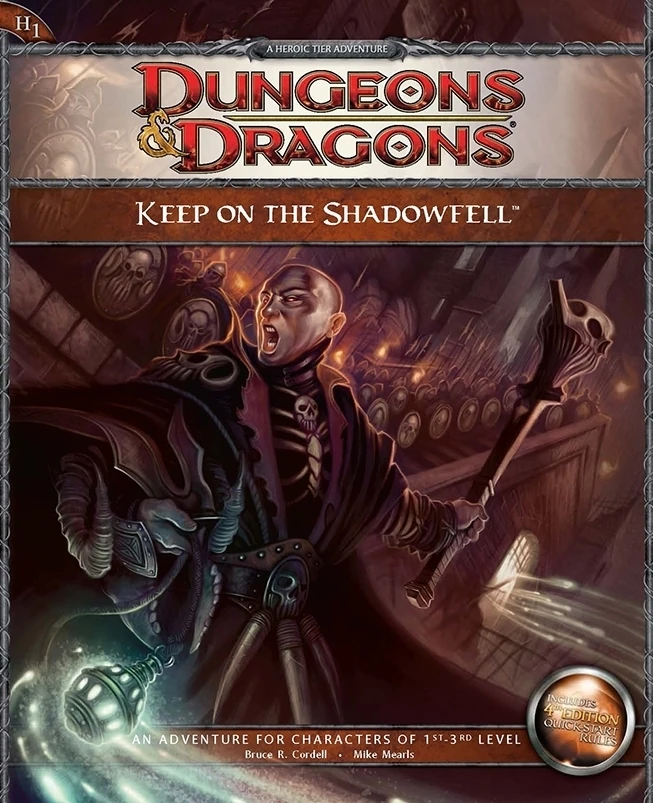
Darkness looms near Winterhaven! Kobold brigands have grown ever bolder in their attacks, marauding the once peaceful town, and a known explorer has been missing ever since their departure to the excavation site of a dragon burial site. When the party investigates, they will discover that the kobold's leader, Irontooth, bears a tattoo of a ram-headed demon. This is a troubling portent, for the townsfolk will report that this can only mean the dread god Orcus, master of death, has an active cult in that ruined keep! It is up to the party to enter the Keep on the Shadowfell and put a stop to the cult's fell machinations before it threatens all the realm. There they will fight the evil priest Kalarel, Scion of Orcus and seal off the vile portal to the dark realms he is master of. Should the heroes seize victory, glory and treasure are sure to be theirs. But first they must endure the challenges of that dreaded KEEP ON THE SHADOWFELL!

The Sea Witch is a short adventure for four 10th-level characters. The difficulty of the adventure can be adjusted by changing the level of main antagonist (Black Molly, the sea hag pirate) or by altering the number of her ogre servants. To tailor the encounter to groups of different levels, refer to table 4-1 in Chapter 4 of the DUNGEON MASTER’S GUIDE. The adventure is set off a lightly populated coastline known as Misty Bay, but adapts easily to any coastal region in existing campaigns. The sea hag known as Black Molly is a notorious pirate who has plagued the coastal cities for the better part of a decade. A successful Knowledge (local) check (DC 15) will reveal that Molly and her ogre crew have a filthy reputation as merciless killers who delight not only in plundering vessels for their riches, but also in destroying the ships themselves and sending all hands to the bottom of the sea. Now the villain and her followers have seized control of the Old Lighthouse of Misty Bay located off a lightly populated coastline. For generations the lighthouse beacon has protected the fishermen of this region, warning them of the dangerous rocks that lurk just below the level of the high tides. Recently, the hag has put out the beacon, darkening the lighthouse; misery and destruction are sure to follow as ships start to blunder into the rocks. Blackmail is apparently Black Molly’s aim in this venture: She conveyed a message to the nearest shore community, the fishing village of Poisson, demanding the princely sum of 50,000 gp. Until she receives this ransom, she intends to hold the lighthouse and its beacon hostage. The fate of the human keepers who tend the lighthouse is unknown to the seaside communities at this time, but they fear the worst. The Sea Witch is ostensibly a rescue mission: The PCs are pitted against the evil of Black Molly and the brawn of her savage ogre crew. It is the heroes’ task to retake the lighthouse and, if possible, free its captives from the clutches of their jailer. What neither the PCs nor the shore communities yet realize is that while she 1would be pleased to have the gold, Black Molly is in fact after bigger treasure. Molly has no intention of giving up the lighthouse — at least, not until she finds what her master sent her here for. Lying on the sea floor practically at the base of the rock on which the lighthouse sits is the wreck of the war galley Flying Cloud, which according to popular legend was captained by a cleric who wore around his neck an amulet of the planes. Black Molly wants this prize, but so far she hasn’t been able to find it. She’s scoured the wreck without finding any sign of the magic item. Now she’s trying to determine where to search next, for the item might well be somewhere near the wreck. If she can’t find it, she’ll start torturing her captives to find out if they have any useful knowledge about the amulet.

THE FIRST SET OF DUNGEONS ON DEMAND ADVENTURES! The first volume of Dungeons on Demand includes the first four dungeons: Bandit's Nest - Level 1 Adventure Dungeon Insidious Experiments - Level 4 Adventure Dungeon Fierce Tempers - Level 8 Adventure Dungeon Lord of Gloomthrone - Level 12 Adventure Dungeon It also includes the following supplements: New Twists on Old Monsters - Gaming Supplement Imbued with Magic - Gaming Supplement The bundle includes hundreds of pages worth of materials and supplements sure to keep your gaming sessions busy!

In the Yatil Mountains south of Perrenland there is rumored to be a magical hoard of unsurpassed value, a treasure of such fame that scores of adventurers have perished in search of it. Find the perilous Lost Caverns of Tsojanth and you may gain the hidden wealth of the long-dead arch-mage-- if you live. Module S4, this contains a brief wilderness journey to the caverns, but the bulk is underground. The caverns are noted as a previous lair of the Arch-mage Iggwilv- though she is long gone, her Demonomicon remains. This module marks the first appearance of several monsters and items that would later appear in the Monster Manual 2 and Unearthed Arcana. A labyrinth features in the caves. TSR 9061

A series of small earthquakes have brought a sense of disquiet to the town of Daern Kelton and Roslof Keep. Against these strange earthly portents, the members of the Ivory Scimitar have claimed their place as a true Mithel Company, but even greater danger now awaits them in the second level of the Dungeon of the Black Fey Mithelvarn. What lost secrets will be revealed as they journey below? What new threats and adventures can be had in Daern Kelton? The town opens its doors to the brave new heroes of the Company of the Ivory Scimitar. Here continues the Roslof Keep Campaign in the pages of ROS2, The Tremors in the Machine. This adventure is formatted to both 1E & 5E gaming rules. Also available in PDF.

The long-forgotten monastery to the Lord of Winds hides a secret of immense evil. The PCs are tasked with delving into the abandoned ruins and discover if two Houses are related in some way. Scales from level 4 to level 10, but originally designed for characters of 7th level. Pgs. 17-39

"A great cat sits upon the northern grasslands, my friend, waiting to pounce on adventurers just like you." As you part the tall grass with your sword, the words of the tavernkeeper echo in your head. "He was the mightiest wizard we'd ever known, and that Lion Castle was his home." Your friends' voices mingle with the tavernkeeper's. "He's but a ghost now, haunting those halls, and waiting for an heir." The ground rises slightly. A strong wind rushes through the field. Suddenly, the grasses part, and Lion Castle rises majestically before you! "Magical riches await those who enter!" "Beware of man-beasts!" Voices flood your head again. Will you brave the haunted castle? Can you afford not to? It's all up to you in this D&D Solo Adventure. Ghost of Lion Castle is for one player only, but that one player makes all of the choices and enjoys all of the rewards. An entire castle and courtyard await your exploration. The adventure also includes a complete solo combat system. TSR 9097

The Tranquil foothills of the Sword Mountains are quickly plunged into chaos, as a series of earthquakes spread their way through the region. Adding to this danger, bands of vicious, flesh-eating monstrosities have clawed out of the shattered earth, attacking travellers and local residents. Rumours of wealth and riches have drawn the adventurers to the area; little do they know that it is not gold and jewels these monsters protect, but a volatile portal into the Underdark with a disturbing secret.
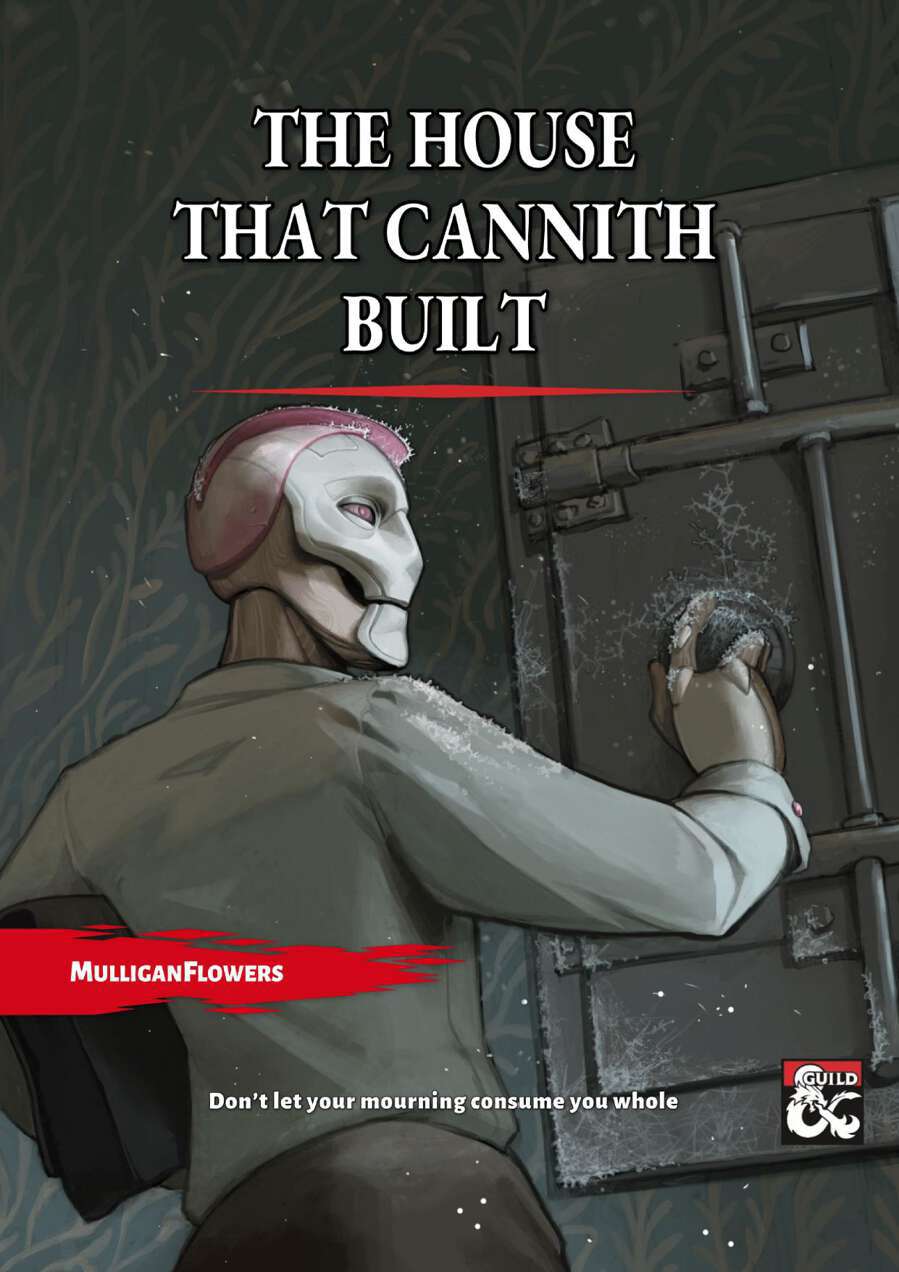
Amidst the misty, mournful waste stands a house unaffected by time. The secrets hidden inside could change the world or remain buried in obscurity. The mission of your party is to head there and retrieve all valuable papers and artifacts. But what could await on the way through the lands of distorted magic? Nobody knows for certain. This adventure is designed for a team of four 3rd-level characters. Estimated time: 2–3 sessions, 4–6 hours each. This adventure is focuses on exploration of the Mournland, all that is left from the kingdom of Cyre.

An Arch-Mage who can kidnap a dragon is one tough Arch-Mage. Definitely not for those who are afraid of heights. An evil archmage, Ezoran, has kidnapped a dragon in order to discover the means to seize control of a cloud giant's castle. The adventures are tasked with rescuing the dragon by the dragon's mate. The adventure revolves around tracking and navigating through dense jungle and working through a cloud giant's fortress. Pgs. 50-63
This book goes over the various rules around the faction of the Zhentarim in Phandalin and the Forgotten Realms, making it easy for any new or veteran DMs to integrate it more into the core stories being told, and making the faction feel more useful for the players that choose to join. The adventure, Barrhindlun sees the adventurers working for the Zhentarim and traveling to the town of Leilon and finding their way beneath to the muddy lost city of Barrhindlun, where bandits of the Xanathar Guild have been sent to reclaim a Crystal Orb.

Sinister, twisting images...Horrific nightmares lurking at the corners of the mind...These are descriptions used to tell the tales of the Labyrinth of Madness. But these tales of the labyrinth are only legends, really, nothing more than stories used to frighten children at night - until a mysterious scepter is found, bearing within its crystal head a visage of insanity and terror, and also delivering a message: "Disturb not the Labyrinth of Madness again, and live a while longer." Now a powerful temple suffers from a tragic curse that is somehow linked to the labyrinth. Does there exist a group of heroes who can penetrate this dark and terrible place to life the curse...and survive? Labyrinth of Madness is a multiple-level, three- dimensional dungeon adventure, a puzzle within a puzzle, that commemorates 20 years of gaming with TSR. TSR 9503

The greatness of a dwarven citadel is measured by its greatness of wealth. The dwarves steadily work mines and forges to fuel the wealth needed to make their presence known throughout the realms. Unfortunately, this also makes them known to those that would seek the opportunity to steal their glory and riches. This story occurs in a place that has experienced this struggle for millennia. New threats emerge as old threats become rivals through the tides of time. This story... your story... is another chapter of this ancient struggle.

Somewhere under a lost and lonely hill of grim and foreboding aspect lies a labyrinthine crypt. It is filled with terrible traps and not a few strange and ferocious monsters to slay the unwary. It is filled with rich treasures both precious and magical, but in addition to the aforementioned guardians, there is said to be a demilich who still wards his final haunt (Be warned that tales told have it that this being possesses powers which make him nearly undefeatable). Accounts relate that it is quite unlikely that any adventurers will ever find the chamber where the demilich Acererak lingers, for the passages and rooms of the Tomb are fraught with terrible traps, poison gases, and magical protections. Furthermore, the demi-lich has so well hidden his lair, that even those who avoid the pitfalls will not be likely to locale their true goal. In the far reaches of the world, under a lost and lonely hill, lies the sinister TOMB OF HORRORS. This Labyrinthine crypt is filled with terrible traps, strange and ferocious monsters, rich and magical treasures, and somewhere within rests the evil Demi-Lich. TSR 9022