
"An army on the move, an ancient artifact, its purpose long forgotten, and the sinister plans of an unknown foe: When these elements combine, it's bad news for the good-aligned cities of the Blood Plateau. A massive band of orcs is marching on the Monastery of the Yellow Lotus, intent upon taking the "Flower That Does Not Bloom." The heroes must trek through goblin-infested tunnels and monster-filled woods ahead of the orcish horde, in a deadly Race to the Yellow Lotus." This adventure is the second in the "Tales from the Blood Plateau" series, but works well as a standalone or an intro to another campaign. Though the party does not actually engage the Death Knight/Blackguard antagonist, he is the primary driving force behind the events of the adventure. Published by MonkeyGod Enterprises and Highmoon Press

The dragonmen have taken Solace. Its beautiful tree houses lie black and battered amid the stumps of great vallenwood trees. Kapak Draconians, armed with poisoned weapons, enforce a brutal martial law on the survivors. And Solace is only one outpost: the dragon armies control the plains. Only the elven kingdom of Qualinesti stands unconquered. The rest of the plainsmen suffer the most: a long slave caravan hauls hundreds of them to the fortress prison of Pax Tharkas. "Dragons of Flame" is the second in TSR's series of Dragonlance adventures for use with the AD&D game system. Your players will adventure in the world of Krynn and visit strange places such as Qualinost or the Sla-Mori, encountering bizarre draconians and disgusting Aghar. They can play the modules as a set of separate adventures or as a great quest that spans the entire Dragonlance story. Art by Jeff Easley. TSR 9132

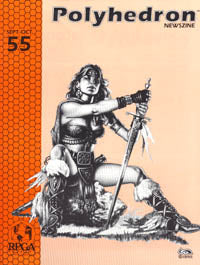
Having now realized that they require 4 Mithel Standards at the same time, the Ivory Scimitar will be faced with actually taking a Banner from another Mithel Company. This scenario pits the characters against the waning might of Men of Iron, and should allow them to claim the Banner for House Aldenmier, thus guaranteeing that they can clear the final level of Mithelvanr's Labyrinth. This adventure is formatted to both 1E & 5E gaming rules.

STRANGENESS AND TERROR FROM BEYOND THE GRAVE! Borgenwold is cursed, they say. Cursed by pride and greed to cower in fear of the past. A fell monstrosity from beyond the grave has risen to devour this town and all who dwell here. Open this book and to find... a town in the grip of horror, drunken monster hunters in way over their heads, debts, desperate bargains, miraculous goblins feasting upon godflesh, the treasures of the dead, and the price to be paid by those who seek to claim them. The Beast of Borgenwold is a 59-page Old School Roleplaying Adventure designed for characters of between 1st and 3rd level, and designed to be compatible with Old School Essentials by Necrotic Gnome, and other B/X and OSR affiliated games. mini hexcrawl (12 hexs) plus a small dungeon

Meaningful decisions, unexpected twists and memorable characters are the foundations of this dark 4-hour adventure for 5th to 10th level characters. A chance encounter on an unassuming road leads to a dangerous and lucrative opportunity. But what seems simple on the surface turns out to be much more below. Thrust into a world where every enemy has an enemy and everyone has their own dark motive, the only chance to survive is to ally with the right foe. Sometimes “doing the right thing” comes only in shades of black. Six Summoned Swords is a stand-alone adventure that begins on the side of the road leading to Phlan and can be easily accessed by any adventurers traveling through the Moonsea region. In addition to a world full of intrigue and complex character choices, purchasing this adventure includes: An Official Adventurers League magic item certificate Printable portrait cards with roleplaying tips for important NPCs Gridded reference maps for combat encounters Condition icons to help track character status Special Certificate Holder ideal for event play NEW: Season 8 Item Unlock Handout - prints 9 to a page, one for every player! * Looking for an adventure to run at your special game day or convention? This adventure includes a “certificate holder” that features specially created art of the adventure’s magic item. When printed in colour and on card stock, it perfectly frames the official AL magic item certificate from this adventure and makes for an unforgettable souvenir. About the Swords Below the Moonsea Saga The saga consists of three adventures, with this adventure serving as a stand-alone prelude. The series continues with Six Striking Swords and Six Swords Unbound, the two of which should be played in tandem.

The Nobriskovs are a proud and pious noble family beset by troubles they wish to keep quiet. When their angelic daughter is abducted by duergar slavers, the player characters are asked to surreptitiously rescue her from her captors. However, the distinction between predator and prey blurs as they discover the noble scion's secret. What's included? 1 hair-raising adventure divided into single-page sections for easy running 3 fully-colored maps with unlabeled versions for players (made with assets from 2-minute Tabletop) 4 statblock variations for cursed creatures in addition to detailed mechanics on implementing a more virulent strain of lycanthropy 6+ ending permutations based on what the player characters do and how they do them Content Warnings: Violence, death, abduction, slavery, horror
Jack Mooney owner of the "Jack Mooney & Sons" Circus. Wants to hire the PCs to capture a great cave bear with a brilliant golden coat.

Part 1 of an Expert-level quest into a hostile wilderness. This adventure takes place in the Known World of the D&D game, as outlined throughout the D&D game rule books and modules. The DM may find it useful to consult the Companion and Masters Sets, as well as most of the X-series of Expert Set modules. D&D Expert Set module X9, The Savage Coast, would be especially helpful, as Tortles of the Purple Sage could easily serve and continue that module's direction and plot like, adding a previously undescribed area (the Great Northway) to the Known World. The DM may also place the areas and events of this adventure within an existing campaign setting, as long as the geographical areas of the campaign match those set forth here. Pgs. 40-62

"A hundred-year curse caused by a group of adventurers slowly turned a tower and the hills around it into a region touched by the very finger of death, where life is incapable of thriving. As the curse grows in power and reach, on its way lie the town of Beregost, whose population now suffer, sicken and die every day under these nefarious powers. The government and local clerics infrutiferously attempt to remedy the situation, while desperately seeking any who could help them." Tower of the Pale Lady is a 4-hour adventure for a group of 1st-4th level characters. It is set in the town of Beregost, at the southern edge of the Sword Coast, in Faerûn, in Toril, in the Forgotten Realms. However, with little modifications, you can run this adventure in whatever world you wish. This adventure includes NPCs related to the story and to the Forgotten Realms, which might bring your players to other different plots as they play through. New ways of using old spells and items, presented as introduction to reinforce creative possibilities throughout play.

Introductory module for the Hollow World setting. First Adventure in the Blood Brethren Trilogy. Into the Depths! Under the ruins of Barleycorn Monastery, a tunnel leads one thousand miles downward. Through it, a rescue mission into the Broken Lands turns much stranger. Much more Serious. For the trail leads to the Hollow World. Launch your D&D game players into fabulous lost-worlds adventure across the Hollow World! Travel the Azcan Empire. Explore the secret labyrinth of the Great Pyramid in Chitlacan. Fly to the core of the world and enter the Smoking Mirror, before the monstrous Prince Kano enacts his devastating scheme - a scheme called: NIGHTWAIL! Nightwail is the first adventure for the D&D Hollow World Campaign Set. (The Hollow World boxed set is required to play.) This 64-page adventure fits easily into your existing campaign, either as a stand-alone adventure or as part of the continent-spanning Blood Brethren trilogy. These three linked modules can be played in any order - but the adventure starts here! Easily adaptable to the AD&D game! TSR 9303

The exciting artifact series concludes with AS3 – Peregrination. With a pair of control rods in hand you are guided to an ultimate prize, a Gnomish flying vessel! The rods have directed you to a crashed ship buried in the sandy beach. A check of the debris sheds light on the mystery of the artifact and a description of how to repair the intricate machine. Apparently finding the vessel is just the start!

Irtep’s Dish is an adventure for characters from 6th to 8th level. This adventure requires the skills of a rogue or some other expert at traps, a cleric or character that can heal allies and offer beneficial bonuses to the team, a wizard or other master of the arcane arts, and a fighter to take care of “the heavy lifting.”

Questing through the forest, you will be tested. Which side will you take between a wizard and the Keepers of the Veil? Will you be able to find the materials necessary to help cure your friend of the ancient evil that assails him? And when it comes down to it, what are you willing to sacrifice for your beliefs? Third Time’s the Charm picks up where Second Glance left off and invites the PC to find a wizard who can help heal the Crystalline Curse slowly paralyzing the PC’s friend and protector. As the party grows closer on this adventure, learning to depend on one another, they must also navigate the Veiled Wood’s changing landscape, deciding who they can trust and who they will help as much lies in the balance. Though this was written as the third installment in the Crystalline Curse Trilogy, this adventure can be inserted into any campaign setting and scaled accordingly. Third Time’s the Charm is part of our mission to bring you high-quality, ready-to-play material that supports adventuring parties of 1 Player and 1 DM. This adventure is written for a third-level character in a one-on-one 5th edition D&D campaign. Everything you need for your own two-person game is inside! This product includes: -A 3rd or 4th-level adventure adaptable to any setting -Stat blocks for one new creature and two NPCs -A region map, two sitemaps, and a hand-drawn dungeon map to aid the PC’s investigations -A fully realized forest region with fleshed-out NPCs and places to explore -Detailed backstory for the ancient warrior sheltered inside the PC’s treasured amulet -Four custom magical items And helpful tips for DMing a one-on-one game This adventure is perfect for those looking to begin or continue their duet campaign. Published by D&D Duet.
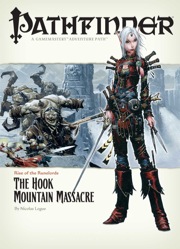
Them Ogres Ain't Right... The Rise of the Runelords Adventure Path continues! The notorious Hook Mountain ogres, known for their violent and savage ways, have slaughtered the soldiers of Fort Rannick. The few surviving rangers need heroes to help them retake this key fortification before the ogres use it as a staging ground for further assaults on the region. Yet why have the ogres chosen now to launch this sudden attack? What sinister force grows in the surrounding wilderness, and what ties to the mysterious Sihedron Rune do the ogres of Hook Mountain hide? Are the rumors of an army of giants massing for war true?

After undead start appearing near the local town of Angstadt, the Burgomaster and Father become worried. What could be causing these foul creatures to rise? After conducting research, the clergy discover that the throne room of a celestial avatar is located only a few days away from the town. Perhaps this holy site could hold a relic capable of turning the undead?

Lots of stronghold assaults and shipboard travel/encounters in this one. This adventure's deep political basis might be seen as an introduction for the domain-focused adventures of Companion-level play. This adventure is for use with the Dungeons & Dragons Basic, Expert, and Companion Rules, and includes the intrigue of engaging with nobility's lands and agendas. Intro: All is not well in the kingdom of Vestland. Not only is the king dead and the holy Sonora Crown missing, but the heir to the kingdom was lost at birth and no on knows where to find him. As if this wasn't bad enough, the forces of the Ethengar Khanate, never on the best of terms with Vestland, are now massing on the borders, hoping to take advantage of Vestland's plight. To complete the rosy picture, traitors from within also threaten to speed the downfall of the High Kingdom. Sounds like a job for you. You must find the long-lost heir to the kingdom and recover the Sonora Crown, the mystical device without which a king cannot be crowned. Standing in your way are traitors and spies from within and invaders from without the kingdom of Vestland. Time is running out! Can you save Vestland from disaster? TSR 9218

He wanted a scabbard - but got the shaft. If the book is to believed, there's a magical sword - completely unguarded! - ripe for the taking. This short adventure starts with the players finding a diary describing the final resting place of Hrothgar and his powerful intelligent sword. In a quest for the sword, the players investigate a small cavern system and find the sword in a gelatinous cube. Pgs. 32-37
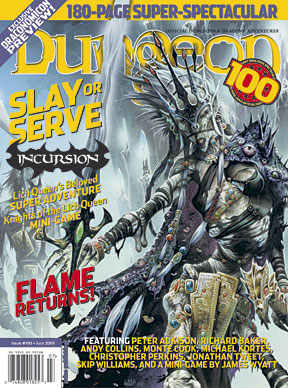
The PCs follow the trail of some particularly competent kobold thieves to the lair of a dragon cult deep in the swamp. There they discover efforts underway to grant sentience to the skeleton of a powerful red dragon once named Flame. Eventually the PCs determine that trouble has returned to the Western Mountains in the form of a band of fire giants ruled by a clone of the original red dragon named Flame.

Numb Island sits in the north seas and is home to Miles Away a struggling settlement with a variety of problems. This adventure setting has a variety of different side adventures that can be used in a continuing campaign or as individual scenarios. Each of the scenario has a level recommendation so that you, the DM, can pick and choose what the party may be ready for and what adventures are better to pass over. In the Filbar campaign the adventurers found themselves on Numb Island several times during their adventuring career and were not strangers in Miles Away!

This adventure picks up where AS1 – Artifact of Gegios left off. You return to the city of Gegios to divide treasure and determine what the strange wand is. Your return trip may have given you a clue in that travel to the east causes it to vibrate less while moving in a western direction causes it to shake more. What is the significance of this anomaly? Is your party ready to find out? Bring your water wings folks you’re probably going for a swim!