
All ocean voyages are fraught with peril, yet a voyage to the infamous Isle of Dread might seem to some old salts to be a deliberate goading of the gods of the sea. Many of those who have attempted the voyage before managed to return to civilization often choose not to speak of the trials they experienced on that dangerous route, yet those whose lips can be loosened by a draught of grog whisper amazing stories... tales of pirates, sea monsters, terrifying storms, and perhaps most harrowing of all, of a strange and sinister land without land, a floating graveyard of dead ships mired in a sargasso the size of an island. This place has many names, but its most well-known may be it's most apt - Journey's End. "The Sea Wyvern's Wake" is the third chapter of the Savage Tide Adventure Path, a complete campaign consisting of 12 adventures appearing in Dungeon magazine. For additional aid in running this campaign, check out Dragon magazine's monthly "Savage Tidings" articles, a series that helps players and DMs prepare for and expand upon the campaign. Issue #350 of Dragon magazine features a regional guide to the seafaring environs the PCs can expect on the journey to the Isle of Dread. It’s time to bid farewell to the city of Sasserine as the PCs board the Sea Wyvern for a 3,000-mile voyage south into the uncharted waters of the Vohoun Ocean. Their destination: the Isle of Dread. Pgs. 16-48

This AD&D scenario is designed to be a humorous departure from regular adventuring. The "heroes" are a fellowship of monsters on a quest to recover a magical item for an orc chieftain whom they have displeased. Having lost the map given to them, they must gain entry to a frontier outpost - probably by sneaking through sewers - and recover the map from a locked safe in the commanders quarters. Once they again have the map, the monsters must travel overland to an abandoned elven witches' temple on the shore of a mountain lake, where they will find the object of their quest. Pgs. 23-32

5e Solo Gamebooks presents Citadel of the Raven, the third in our series of solo adventures. Citadel of the Raven is the sequel to Tyrant of Zhentil Keep, but is also playable as a standalone solo adventure. The first solo adventure in this series is titled The Death Knight’s Squire. At 589 entries, you can expect a lot of variety from this solo quest. There are several main paths your character could take, and numerous encounters and options on those paths (including short sub-threads designed for specific classes), making the number of possible adventures practically endless. Add to that the characteristics of your class, and the numerous variegated combat encounters, and it’s safe to say that no two run-throughs of Citadel of the Raven will be the same.

Base of Operations is a short adventure intended for four 5th-level characters. DMs can easily modify the adventure to suit higher- or lower-level adventurers, or larger or smaller parties of adventurers. Simply adding a few monsters to every encounter area makes the adventure more challenging for larger parties, and adding levels to any of the humanoids can make them more of a threat to high-level groups. For low-level adventurers, make the relationship between the two factions within Brightstone Keep more strained, and take away a few monsters from each group. You can remove levels from some of the humanoids in the adventure to make it a lower-level challenge, but it is important that the orc cleric (described in encounter area 8) still have the ability to animate the dead. Still, he can have fewer minions around him when encountered, and that makes him less of a challenge for a lowlevel party.

What is the Lost Lands? The Lost Lands is the home campaign world of Necromancer Game's and Frog God Game's own Bill Webb. This campaign has been continuously running since 1977. Many of the adventures published by Necromancer Games and Frog God Games are directly inspired by this campaign. They have evolved over the decades, and more material continues to flow from it as the dice keep rolling. Sages and wizards of legend speak of the Lost Lands—many of the players who have lived and died in Bill's campaign over the years now have a place in history (in the books). Frac Cher the dwarf, Flail the Great, Bannor the Paladin, Speigle the Mage, and Helman the Halfling are well known to the fans of Bill's work. This is the game world, and these are the adventures in which the players of these famous characters lived and died. Hundreds of players over the past 35 years have experienced the thrills and terrors of this world. The Sword of Air is the centerpiece of the Lost Lands. Currently, this epic tome consists of several parts: 1. The Hel’s Temple Dungeon—kind of like Tomb of Horrors on crack. This six-level, trap-and-puzzle infested dungeon formed the basis of Bill's game through his high school and college years. Clark Peterson’s very own Bannor the Paladin spent several real life months in the place, and, sadly, finished the objective. This is where the fragments of the fabled Sword of Air can be found…perhaps. 2. The Wilderness of the Lost Lands extending to the humanoid-infested Deepfells Mountains and providing detail about the nearby Wizard’s Wall. This so-called “wall” was raised by the archmages Margon and Alycthron harnessing the Spirit of the Stoneheart Mountains to raise the land itself, creating a massive escarpment to block invaders from the Haunted Steppes. These archmages are actual player characters from the early 1980s who live on in the legends of the Lost Lands. Over 70 unique encounter areas are detailed, and each one is a mini-adventure in itself. New wilderness areas may be added based on bonus goals described below! 3. The Ruined City of Tsen. Legend has it the city was destroyed by a falling meteor. This place forms an aboveground dungeon area the size of a city, with over 100 detailed encounter areas. It’s a very dark place…even at noon. 4. The Wizard’s Feud—This campaign-style adventure pits the players in a long-running series of intrigues and battles between two archmages. Which side will they take? Their actions all play into the overall quest, and could well determine which side wins. Law and Chaos are not always what they seem, and if the wrong decisions are made, the entire ordeal could fail. Remember, one of the wizards WANTS Tsathogga to win. 5. New monsters, new demons, new spells, and new rules for various aspects of play. 6. The Tower of Bells. This dungeon is the result of the workshop Bill ran at PaizoCon 2013, where the participants assisted him in building an old-school dungeon. Visit the tower and discover the secrets of the “artist” within. Beware: those entering may never come out!

After a series of successful exploits you and your associates decide it is time for a nice vacation. You pull into the large city of Breckengarden to take a few weeks off when you are approached by a courier. After a clandestine meeting you are informed that several well-known adventurers have been disappearing and the party has been asked to resolve the issue. The bigger problem is the likely source of the kidnappings is the master of the Cloud Giant kingdom that floats above the ground!

Sometimes only a hint of an adventure is given to players and more information is required. In FV12 - Monteleone Chariot this is just such a case. As the party reaches town they begin to hear of a mysterious relic from the past civilization and both information and backers must be investigated. Will your party be able to determine facts from fables? Whose interest will they serve in their investigation or will they just try and locate the item for themselves?

The Archpriest, leader of the Church, has defied a summons to the Immortal Capital. You have been chosen to retrieve the recalcitrant pontiff. Kidnap the Archpriest is designed to be an implicit tutorial for diplomacy, stealth, theft, bluffing, and cunning. It is a system-less, setting-less heist module featuring: a city (with a map) a fortress (with interior and exterior maps) two hectic days and nights a guide to designing your own heists. glorious black and white art by Luka Rejec scheming cardinals, frantic servants, and secret plots By the author of the CoinsandScrolls blog and Tomb of the Serpent Kings.

The Legend of the Black Monastery Two centuries have passed since the terrible events associated with the hideous cult known as the Black Brotherhood. Only scholars and story-tellers remember now how the kingdom was nearly laid to waste and the Black Monastery rose to grandeur and fell into haunted ruins. The Brothers first appeared as an order of benevolent priests and humble monks in black robes who followed a creed of kindness to the poor and service to the kingdom. Their rules called for humility and self denial. Other religious orders had no quarrel with their theology or their behavior. Their ranks grew as many commoners and nobles were drawn to the order by its good reputation. The first headquarters for the order was a campsite, located in a forest near the edge of the realm. The Brothers said that their poverty and dedication to service allowed them no resources for more grand accommodations. Members of the Black Brotherhood built chapels in caves or constructed small temples on common land near villages. They said that these rustic shrines allowed them to be near the people they served. Services held by the Brothers at these locations attracted large numbers of common people, who supported the Black Brotherhood with alms. Within 50 years of their first appearance, the Black Brotherhood had a number of larger temples and abbeys around the kingdom. Wealthy patrons endowed them with lands and buildings in order to buy favor and further the work of the Brothers. The lands they gained were slowly expanded as the order’s influence grew. Many merchants willed part of their fortunes to the Black Brotherhood, allowing the order to expand their work even further. The Brothers became bankers, loaning money and becoming partners in trade throughout the kingdom. Within 200 years of their founding, the order was wealthy and influential, with chapters throughout the kingdom and spreading into nearby realms. With their order well-established, the Black Brotherhood received royal permission to build a grand monastery in the hill country north of the kingdom’s center. Their abbot, a cousin of the king, asked for the royal grant of a specific hilltop called the Hill of Mornay. This hill was already crowned by ancient ruins that the monks proposed to clear away. Because it was land not wanted for agriculture, the king was happy to grant the request. He even donated money to build the monastery and encouraged others to contribute. With funds from around the realm, the Brothers completed their new monastery within a decade. It was a grand, sprawling edifice built of black stone and called the Black Monastery. From the very beginning, there were some who said that the Black Brotherhood was not what it seemed. There were always hints of corruption and moral lapses among the Brothers, but no more than any other religious order. There were some who told stories of greed, gluttony and depravity among the monks, but these tales did not weaken the order’s reputation during their early years. All of that changed with the construction of the Black Monastery. Within two decades of the Black Monastery’s completion, locals began to speak of troubling events there. Sometimes, Brothers made strange demands. They began to cheat farmers of their crops. They loaned money at ruinous rates, taking the property of anyone who could not pay. They pressured or even threatened wealthy patrons, extorting money in larger and larger amounts. Everywhere, the Black Brotherhood grew stronger, prouder and more aggressive. And there was more… People began to disappear. The farmers who worked the monastery lands reported that some people who went out at night, or who went off by themselves, did not return. It started with individuals…people without influential families…but soon the terror and loss spread to even to noble households. Some said that the people who disappeared had been taken into the Black Monastery, and the place slowly gained an evil reputation. Tenant farmers began moving away from the region, seeking safety at the loss of their fields. Slowly, even the king began to sense that the night was full of new terrors. Across the kingdom, reports began to come in telling of hauntings and the depredations of monsters. Flocks of dead birds fell from clear skies, onto villages and city streets. Fish died by thousands in their streams. Citizens reported stillborn babies and monstrous births. Crops failed. Fields were full of stunted plants. Crimes of all types grew common as incidents of madness spread everywhere. Word spread that the center of these dark portents was the Black Monastery, where many said the brothers practiced necromancy and human sacrifice. It was feared that the Black Brotherhood no longer worshipped gods of light and had turned to the service of the Dark God. These terrors came to a head when the Black Brotherhood dared to threaten the king himself. Realizing his peril, the king moved to dispossess and disband the Black Brother hood. He ordered their shrines, abbeys and lands seized. He had Brothers arrested for real and imagined crimes. He also ordered investigations into the Black Monastery and the order’s highest ranking members. The Black Brotherhood did not go quietly. Conflict between the order and the crown broke into violence when the Brothers incited their followers to riot across the kingdom. There were disturbances everywhere, including several attempts to assassinate the king by blades and by dark sorcery. It became clear to everyone that the Black Brotherhood was far more than just another religious order. Once knives were drawn, the conflict grew into open war between the crown and the Brothers. The Black Brotherhood had exceeded their grasp. Their followers were crushed in the streets by mounted knights. Brothers were rounded up and arrested. Many of them were executed. Armed supporters of the Black Brotherhood, backed by arcane and divine magic, were defeated and slaughtered. The Brothers were driven back to their final hilltop fortress – the Black Monastery. They were besieged by the king’s army, trapped and waiting for the king’s forces to break in and end the war. The final assault on the Black Monastery ended in victory and disaster. The king’s army took the hilltop, driving the last of the black-robed monks into the monastery itself. The soldiers were met by more than just men. There were monsters and fiends defending the monastery. There was a terrible slaughter on both sides. In many places the dead rose up to fight again. The battle continued from afternoon into night, lit by flames and magical energy. The Black Monastery was never actually taken. The king’s forces drove the last of their foul enemies back inside the monastery gates. Battering rams and war machines were hauled up the hill to crush their way inside. But before the king’s men could take the final stronghold, the Black Brotherhood immolated themselves in magical fire. Green flames roared up from the monastery, engulfing many of the king’s men as well. As survivors watched, the Black Monastery burned away, stones, gates, towers and all. There was a lurid green flare that lit the countryside. There was a scream of torment from a thousand human voices. There was a roar of falling masonry and splitting wood. Smoke and dust obscured the hilltop. The Black Monastery collapsed in upon itself and disappeared. Only ashes drifted down where the great structure had stood. All that was left of the Black Monastery was its foundations and debris-choked dungeons cut into the stones beneath. The war was over. The Black Brotherhood was destroyed. But the Black Monastery was not gone forever. Over nearly two centuries since its destruction, the Black Monastery has returned from time to time to haunt the Hill of Mornay. Impossible as it seems, there have been at least five incidents in which witnesses have reported finding the Hill of Mornay once again crowned with black walls and slate-roofed towers. In every case, the manifestation of this revenant of the Black Monastery has been accompanied by widespread reports of madness, crime and social unrest in the kingdom. Sometimes, the monastery has appeared only for a night. The last two times, the monastery reappeared atop the hill for as long as three months…each appearance longer than the first. There are tales of adventurers daring to enter the Black Monastery. Some went to look for treasure. Others went to battle whatever evil still lived inside. There are stories of lucky and brave explorers who have survived the horrors, returning with riches from the fabled hordes of the Black Brotherhood. It is enough to drive men mad with greed – enough to lure more each time to dare to enter the Black Monastery.

Fangwood Keep has changed hands innumerable times since its founding decades ago on the border between the warring nations of Molthune and Nirmathas. Over the years, both countries have sacrificed money and soldiers in an effort to control the fortress along the Marideth River valley, both for its tactical location and for its secure defenses. Recently, however, the battles around Fangwood Keep have dwindled to a trickle as Nirmathas has firmly rooted itself in the surrounding valley, allowing the tide of war to shift elsewhere and peace to settle at last over Fangwood Keep. This respite was shattered by the arrival of a renegade Molthuni commander named Pavo Vos. Obsessed with capturing Fangwood Keep and unraveling the fortress’s mysteries, the defecting lieutenant unlawfully used his platoon to secure the castle, much to the ire of both the Molthuni and Nirmathi governments. Now the task of bringing Vos to justice and reclaiming Fangwood Keep for Nirmathas lies solely in the PCs’ able hands.

This heist adventure that takes place almost entirely at Fort Bones. It is split into five scenes: Karrnathi Opening. The characters meet Vedim ir’Durna, a noble from the region who is willing to help the player characters infiltrate the Fort. Guild Handler Lhara introduces their prize: a necromantic artifact called the Queen of Night, tied to the plane of Mabar. Valenar Gambit. Whether by wit or stealth, the characters find their way inside the walls of Fort Bones. They might use the incoming Valenar attack as a distraction, find a secret entrance, or plant themselves on a visiting dignitary’s staff. Castling. Safely inside, the characters must figure out when the artifact is unguarded, and find their way into the castle’s inner sanctum. Check. The characters must navigate their way past a magical vault door, then descend into the crypts. The Queen of Night is guarded by a terrifying construct. Endgame. With the artifact in their hands, will the characters be able to escape with their lives?

This adventure is a prequel to the first ever stand-alone module published Palace of the Vampire Queen by Wee Warriors She is simply called the Vampire Queen. A being so powerful and evil that the mere mention of her title, raises shrieks of horror and anguish. Her reach is seemingly infinite and her machinations sinister beyond the un-derstanding of mortal men. But those very same mortals must stop her. The path to victory leads to only one place. A place of legend and mystery; the Palace of the Vampire Queen! For the first time the ruined Palace Keep is detailed and ready for exploration! The adventure includes one new monster and two new magic items. This module is designed for the First Edition game using six to eight characters of first level.
/pic4510372.jpg)
It begins in the marketplace or main square of a town when the calm, peaceful day is interrupted by a hulking golem trouncing through town, smashing objects, and attacking townsfolk. The party witnessing this should intervene and stop the rampaging golem with combat or by luring it into a nearby warehouse to trap it so it can be damaged and, eventually, destroyed by the town guards. When the party examines the golem’s remains, they find bones encased in the metal armor and the name 'Quartztoil' written in gnomish script. The town guard explain that this is the eighth construct they have encountered in the area in the past six months. The party can then go on to investigate the name 'Quartztoil', leading them to learn of an old, gnomish, aspiring artificer, Penaral Quartztoil, who had a lab and workshop in a tower in the nearby mountains, but who has not been heard from for close to a century. Published by Nord Games

Fresh-faced and more than a little hung-over our newly graduated mage of the great Dunromin College of Magic and his friends step into the tea-room next to the Porter’s Lodge and ask for something for a headache. Within minutes they find themselves accosted by the smiling figure of Malcolm Darkstar, Bursar of the College and owner of the tea-rooms, keen to ask them a favour… This is an introductory level set of scenarios designed to take a starting-level party on their first exciting adventures; The Lost Son; The Return of the Cauldron of Millent and the Murder at the Red Barn

The dragonmen have taken Solace. Its beautiful tree houses lie black and battered amid the stumps of great vallenwood trees. Kapak Draconians, armed with poisoned weapons, enforce a brutal martial law on the survivors. And Solace is only one outpost: the dragon armies control the plains. Only the elven kingdom of Qualinesti stands unconquered. The rest of the plainsmen suffer the most: a long slave caravan hauls hundreds of them to the fortress prison of Pax Tharkas. "Dragons of Flame" is the second in TSR's series of Dragonlance adventures for use with the AD&D game system. Your players will adventure in the world of Krynn and visit strange places such as Qualinost or the Sla-Mori, encountering bizarre draconians and disgusting Aghar. They can play the modules as a set of separate adventures or as a great quest that spans the entire Dragonlance story. Art by Jeff Easley. TSR 9132

The characters have finally escaped from the maze and returned to complete the mission they originally started-they must infiltrate the tower of King Ovar and end his evil reign. Will the characters discover the secrets of the missing queen and the wizard Zayene's influence? Or will they perish in dragon fire?

How dangerous is a wounded dragon? A black dragon has seized Ravenglade Keep, though not without resistance! Badly wounded in the fight, the Warriors of Sehanine have fled their home and now turn to the outside world for help. There’s no time to lose! Can you arrive at Ravenglade Keep in time and discern allies from foes on the way? Warriors of Sehanine is a Dungeons & Dragons adventure module for a party of four to five characters from 3rd to 5th level. • Experience the Wood of Sharp Teeth on the way to Ravenglade Keep in a 12 to 16 hour adventure of 38 pages, written by Mithral Best Selling creators Florian Emmerich, JVC Parry and DMsGuild Adept Ashley Warren • Rock the (virtual) table with four breathtaking maps by Dean Spencer & Erin Harvey that come with player and DM versions • Bring the adventure to life with stunning artwork and player handouts by Raluca Marinescu,Henrik Rosenborg & Nathalie Lehnert • Show the NPCs with selected exclusive Trash Mob Minis
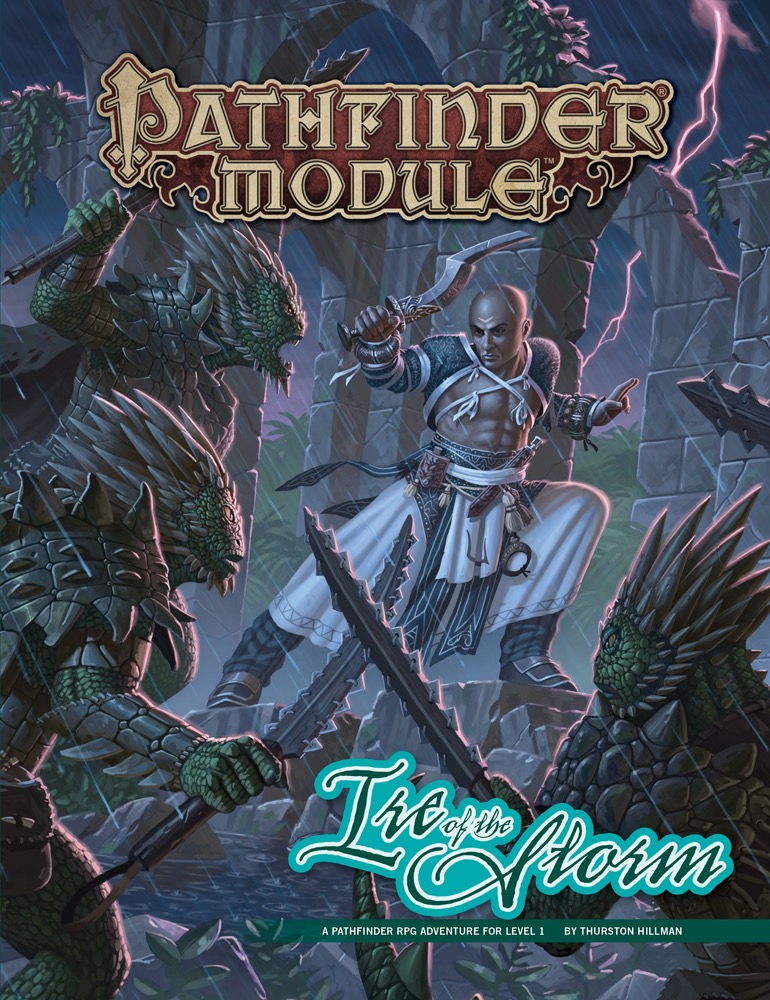
Pridon's Hearth is Sargava’s newest colony, pushing the country’s borders further south than ever before and attracting treasure-hunters, fortune-seekers, and troubled souls hoping for a fresh start. But unnaturally powerful storms rock the tiny settlement just as the local lizardfolk tribe declares war on the colonists within. Are these threats somehow related? What became of the heretical cult of Gozreh that journeyed to the region a century ago, and do its corrupt teachings hold the key to calming the growing hurricane? Can the heroes protect the growing community from raging tempests and hostile monsters alike? And what role does the shadowy Aspis Consortium play in these recent dangers? These challenges and more await heroes willing to face down the Ire of the Storm! Designed for use with Pathfinder Roleplaying Game, this adventure is packed with excitement and unique personalities! Written by rising star Thurston Hillman, Ire of the Storm is a deluxe adventure for 1st-level characters, and includes 64 action-packed pages of tropical dangers, jungle ruins, and two new monstrous foes, plus a gorgeous double-sided poster map featuring the Sargavan colony of Pridon's Hearth and an exploration map providing an overview of the entire surrounding region. Players can expect to reach 6th level upon completion of this adventure—or wind up food for all manner of scaly menaces!
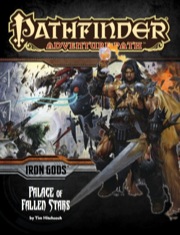
Book 5 in the Iron Gods campaign: Somewhere deep within Silver Mount, the greatest of the Iron Gods is rising to power. But before the heroes of Numeria can oppose it, they must f irst defeat the Technic League and the Black Sovereign, for the corrupt cabal controls access to the legendary site. Will the clues harvested from an ancient android oracle and the technological wonders gathered from strange ruins across Numeria be enough for the heroes to prevail? Or will they simply become the latest upstarts to be crushed under the Technic League’s metal boot?

Your players have ventured so far north that they are within reach of the last vestiges of humanity. You are weary from your travels and decide that a respite in Gregat, City of the Shrine. The area is also home to several other spots of interest that you may go to since you are in the region. This ‘sandbox’ style offers several adventures for your players but beware, they are just as deadly as any dungeon delve!