
60 years ago, a wizard's tower was encased in a magical glacier. Now a crack has appeared, exposing the tower for adventures. Inside, a magic artifact turns any who did in the tower to undead, including the PCs.
Reports of the owlbear incident were vastly exaggerated. When is an evil mage not an evil mage? While visiting the small village of Carthington Cross, the PCs hear a tale about a wizard who unleashed an owlbear on Carthington Cross and its unsuspecting community. After a night of stories and gossip in the local inn, the heroes are approached in the morning by this same notorious wizard who needs their help. Pgs. 18-28

"The end times approach. To everything there is a season. Every campaign has to come to an end sometime, so why not go out with a bang? The Apocalypse Stone is an epic adventure to challenge high-level characters, but beware, it will destroy your world. This adventure has it all: gods and devils, plague and pestilence, rains of fire, and world-shattering conflicts. Here is an opportunity for PCs to display undreamt-of heroism. . . or fall to ultimate defeat. The Apocalypse Stone is a tool for Dungeon Masters to present extremely challenging encounters for high-level parties, to wrap up a long-running campaign. . .or both. This adventure is a literal universe-ender. Past a certain point in the campaign, there is nothing the players can do. The world *will* end.

The Ghost Tribe of Orcs were driven from their home under Wyvern Tor by some terrible evil. They marched to Phandalin and attacked, only to be defeated. Now the heroes will go beneath Wyvern Tor to discover the terror that chased out the orcs and perhaps find the source of the orc’ssardonyx. Journey to Beneath Wyvern Tor is the third of four parts in the After Lost Mine series. It will play out the journey to the orc’s former cave settlement and then into the darkness beneath. Part IV will have the party deal with the terror from the Underdark that drove out the orcs.
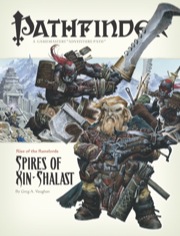
A Runelord Rises! The Rise of the Runelords Adventure Path concludes! The Runelord of Greed, Karzoug the Claimer, stirs in the legendary city of Xin-Shalast. There are more forces than an ancient evil wizard at work in this remote corner of Golarion, a place where the boundaries between reality and nightmare are unnaturally thin. Karzoug's minions have awakened as well, among them giants and dragons and devils and worse. Could there be an even deeper evil poised to emerge from the darkness at the dawn of time? Can the Rise of the Runelords be stopped?

Ten days ride north of the great city, there is a small town named Treefall. Up until recently, this town was well known for its rich harvests, happy villagers, and prosperous weather. These days, however, the once-proud details from Treefall have turned darker. Instead of tales of unending prosperity, you hear hushed whispers of a great curse that has struck the once-happy village. Word has it that, where once roamed contented cattle, now strange beasts hunt by the moon's cold light and terrorize the hapless region. You have scoffed with the others at these stories. Despite the things you've seen in you adventures with your friends, the thought that such ill might befall such a sleepy town strikes you as terribly unlikely. There is plenty of evil in the world, true, but there are also much bigger and better targets. But, tonight despite the firmness of your disbelief, the stories come to find you. You have been traveling north along the roads on your own business, enjoying the rich fall colors and warm afternoons. Your camp os small and secure, with a roaring fire and meat cooking over the flame. It's one of those crisp autumn days that makes you long for a warm hearth after a long ride in the cool air. Still, the fire is good enough for now and you and your friends have a wonderful meal, talking and singing and laughing, anticipating a restful sleep beneath the blanket of stars. Until the beast attacks.

The Last Point is a prison and outpost of the Corrive Empire, a realm ruled by a cruel green dragon named Lady Corrive. The Corrivians are well known for their hatred of magic users, and their extensive slave trade industry. A forest realm with coasts on three sides and mountains running through the center, Corrive is rich with a variety of resources. However, the rocky northern coast is out of the way of their navy and relies heavily on hired ships to help transport various goods including prisoners and slaves to isolated outposts, training centers, and slave colonies. The northwest coast of Corrive is rocky and many parts of it are elevated, making it isolated from much of the mainland. The Last Point is a recycling center where captives meant for death row who are either deemed “not important enough” to execute publicly or “too disgraceful” to execute publicly are sent to be tortured and then killed. The place seems to operate on sort of a “well, we have too many so some have to go now” policy. The Last Point has no official deadlines for killing.

All ocean voyages are fraught with peril, yet a voyage to the infamous Isle of Dread might seem to some old salts to be a deliberate goading of the gods of the sea. Many of those who have attempted the voyage before managed to return to civilization often choose not to speak of the trials they experienced on that dangerous route, yet those whose lips can be loosened by a draught of grog whisper amazing stories... tales of pirates, sea monsters, terrifying storms, and perhaps most harrowing of all, of a strange and sinister land without land, a floating graveyard of dead ships mired in a sargasso the size of an island. This place has many names, but its most well-known may be it's most apt - Journey's End. "The Sea Wyvern's Wake" is the third chapter of the Savage Tide Adventure Path, a complete campaign consisting of 12 adventures appearing in Dungeon magazine. For additional aid in running this campaign, check out Dragon magazine's monthly "Savage Tidings" articles, a series that helps players and DMs prepare for and expand upon the campaign. Issue #350 of Dragon magazine features a regional guide to the seafaring environs the PCs can expect on the journey to the Isle of Dread. It’s time to bid farewell to the city of Sasserine as the PCs board the Sea Wyvern for a 3,000-mile voyage south into the uncharted waters of the Vohoun Ocean. Their destination: the Isle of Dread. Pgs. 16-48

The Sea Witch is a short adventure for four 10th-level characters. The difficulty of the adventure can be adjusted by changing the level of main antagonist (Black Molly, the sea hag pirate) or by altering the number of her ogre servants. To tailor the encounter to groups of different levels, refer to table 4-1 in Chapter 4 of the DUNGEON MASTER’S GUIDE. The adventure is set off a lightly populated coastline known as Misty Bay, but adapts easily to any coastal region in existing campaigns. The sea hag known as Black Molly is a notorious pirate who has plagued the coastal cities for the better part of a decade. A successful Knowledge (local) check (DC 15) will reveal that Molly and her ogre crew have a filthy reputation as merciless killers who delight not only in plundering vessels for their riches, but also in destroying the ships themselves and sending all hands to the bottom of the sea. Now the villain and her followers have seized control of the Old Lighthouse of Misty Bay located off a lightly populated coastline. For generations the lighthouse beacon has protected the fishermen of this region, warning them of the dangerous rocks that lurk just below the level of the high tides. Recently, the hag has put out the beacon, darkening the lighthouse; misery and destruction are sure to follow as ships start to blunder into the rocks. Blackmail is apparently Black Molly’s aim in this venture: She conveyed a message to the nearest shore community, the fishing village of Poisson, demanding the princely sum of 50,000 gp. Until she receives this ransom, she intends to hold the lighthouse and its beacon hostage. The fate of the human keepers who tend the lighthouse is unknown to the seaside communities at this time, but they fear the worst. The Sea Witch is ostensibly a rescue mission: The PCs are pitted against the evil of Black Molly and the brawn of her savage ogre crew. It is the heroes’ task to retake the lighthouse and, if possible, free its captives from the clutches of their jailer. What neither the PCs nor the shore communities yet realize is that while she 1would be pleased to have the gold, Black Molly is in fact after bigger treasure. Molly has no intention of giving up the lighthouse — at least, not until she finds what her master sent her here for. Lying on the sea floor practically at the base of the rock on which the lighthouse sits is the wreck of the war galley Flying Cloud, which according to popular legend was captained by a cleric who wore around his neck an amulet of the planes. Black Molly wants this prize, but so far she hasn’t been able to find it. She’s scoured the wreck without finding any sign of the magic item. Now she’s trying to determine where to search next, for the item might well be somewhere near the wreck. If she can’t find it, she’ll start torturing her captives to find out if they have any useful knowledge about the amulet.

“Siege of Bordrin’s Watch” is the sequel to “Rescue at Rivenroar,” continuing the unfolding story of the Scales of War campaign. This adventure features exploration, roleplaying opportunities, and combats in dynamic environments. In this adventure, a new threat looms to the west: A vast horde of orcs and their despicable kin emerge from the barren lands bent on plunder and conquest. While the Elsir Vale and other lands mobilize their meager forces to respond to the danger, a call has gone out to those heroes of the Vale to join forces and help to push back this new evil before it’s too late. Pgs. 4-55

In the frontier stronghold of Purdey’s Rest, rumors of mysterious lost ruins lead a group of young adventurers into the wilderness — and the forgotten dungeons of a legendary dark mage. Facing off against evil bandits, foul undead, and ravenous monsters, the characters seek the rewards of wealth and fame. But before they can claim either, they must survive all the deadly threats of Hazakor’s lost halls. The Hidden Halls of Hazakor is a starter adventure for fifth edition fantasy roleplaying, written with a special focus on young, beginning Gamemasters of ages twelve and up. In a friendly and straightforward fashion, this adventure explores some of the ways a good fantasy RPG dungeon crawl can be put together. It offers advice on how to just let things happen during a game session, and how to not be overwhelmed by all the directions in which an adventure can go. It talks about how to bring nonplayer characters to life, how to have fun running monsters, and how to challenge the other players and their characters alike. The Hidden Halls of Hazakor is for any player who’s ready to sit in the GM’s chair for the first time — and who is ready to learn some of the tricks and techniques that help all GMs run great games. The PDF download also includes untagged maps for Purdey's Rest and the Hidden Halls of Hazakor dungeon, making it easy to run the adventure in a virtual tabletop setup. These maps are missing the number key and any features that should initially be known only to the GM (including traps and secret doors). The publisher's website offers free pregenerated characters for the adventure, but they are not included in the adventure. The website also has a free GM Guide as well. Insane Angel Studios

Can the city of Redshore be saved from utter destruction? "The Razing of Redshore" is a D&D adventure that confronts the party with the destructive force of an awakened sperm whale druid and the sinister machinations of a secret cabal of powerful assassins. It is designed to provide such a group with an opportunity to continue their adventuring careers into the realms detailed in the "Epic Level Handbook". This book is not required to make full use of this adventure, though; any pertinent information from the supplement is reproduced here. Pgs. 72-106

In part one of the Randal Morn Trilogy, "The Sword of the Dales," the legendary leader of Daggerdale, Randal Morn, was captured by unknown assailants as he sought to regain the great weapon for which that adventure was named. A stalwart band of enthusiastic heroes was recruited to ride to his aid, yet all they recovered was the Sword itself and a message: "Seek me in Spiderhaunt Wood." In the second part of the trilogy, "The Secret of Spiderhaunt," those same adventurers found Randal and freed him briefly, yet he was almost as quickly torn from their grasp by an agent of the evil Zhentarim, seeking to end the threat of Randal Morn's return to power. In this final episode, the heroes must follow the kidnapper's trail and rescue Randal Morn again before the Zhentarim finish interrogating him and the axe falls upon his neck. Armed with the Sword of the Dales and aided by a powerful spirit that lives within the weapon, the heroes must march into the heart of Zhent-occupied Dagger Falls, free Randal Morn, and save the city from utter destruction. The job is dangerous - perhaps more than the heroes can handle - yet those who would live in songs and legends cannot concern themselves with living to a ripe old age! This is the final part of a trilogy of modules that began with "The Sword of the Dales" and "The Secret of Spiderhaunt." TSR 9488

The Archpriest, leader of the Church, has defied a summons to the Immortal Capital. You have been chosen to retrieve the recalcitrant pontiff. Kidnap the Archpriest is designed to be an implicit tutorial for diplomacy, stealth, theft, bluffing, and cunning. It is a system-less, setting-less heist module featuring: a city (with a map) a fortress (with interior and exterior maps) two hectic days and nights a guide to designing your own heists. glorious black and white art by Luka Rejec scheming cardinals, frantic servants, and secret plots By the author of the CoinsandScrolls blog and Tomb of the Serpent Kings.

Lord Galveston's lands are plagued by murders. For the past several months people have been disappearing. Some bodies have turned up, their corpses found along the banks of the river. Strange tracks of a cat-like creature have been found around the villages, and rumors abound that a charon fiend, a dreaded beast of chaos, has come from the nearby wood and settled in the area. The latest victim is the Deacon of the Four Saints Church in Capendu. His body, found in the river, sent the alarmed villagers in search of aid. The adventure unfolds in the lands of the aged Lord Galveston and plunges everyone into a twisted tale of wild beasts and the restless dead.

This deluxe adventure takes heroes into the ruins of Gardmore Abbey, a monastery that was once the base of a militant order of paladins devoted to Bahamut. According to legend, the paladins brought a dark artifact back from a far crusade and stored it in their abbey for safekeeping, and evil forces gathered to assault the abbey and take it back. What the legends don’t tell is that this artifact was actually the Deck of Many Things, a force of pure Chaos. This adventure brings characters into the extensive dungeons beneath the ruins - dungeons that are warped and twisted with the raw forces of Chaos surrounding the cards of the deck.

This AD&D scenario is designed to be a humorous departure from regular adventuring. The "heroes" are a fellowship of monsters on a quest to recover a magical item for an orc chieftain whom they have displeased. Having lost the map given to them, they must gain entry to a frontier outpost - probably by sneaking through sewers - and recover the map from a locked safe in the commanders quarters. Once they again have the map, the monsters must travel overland to an abandoned elven witches' temple on the shore of a mountain lake, where they will find the object of their quest. Pgs. 23-32

A quick-paced exploration of the magic tower, home to the great Solomon, the Master Conjurer, an expert in fiendology. Adventurers have to find Control Orbs to disable the tower's security system before it destroys them, and discover the secrets of the tower in the process. Their progress will be ushered by a seemingly helpful entity with nefarious intent - Zarloxar, the blue Abishai. The success of adventurers could also finally spell freedom to the fiend... or not if players, under stress, will realize the trickery in time. Part of "Detailed Encounter" series - each "Detailed Encounter" - features new monsters with unique stat blocks, new magic items, a custom battle map, and detailed NPCs. It also has story hooks and advice enough, to quickly turn it into a separate adventure!

A mystery scenario involving exploration of a drow archmage's tower while trying to solve the mystery of his involvement to the latest rumors of kidnapings in the nearby town. Benevolent academic or vile predator? The good people of Fern do not seem to agree these days about the nature of the owner of the iconic Dusk Tower. With a supporting cast that includes an innkeeping druid, a scorned sculptor, a belittled apprentice, an invisible butler, and a mysterious tower basement the heroes are sure to have their hands full. Can they uncover the secrets of Dusk Tower before it is too late?

Haedirn Lastlight is a respected elven wizard and sage. After the death of his lover Lyonthel, the elf has been overcome with grief and has locked himself away in his study- a small manor on the cliffs of Wailing Crag. Haedirn has not been seen for over a year now, and those that knew him are beginning to worry. Worse still, a band of ogres has been terrorizing the nearby town, slaughtering the town folk and haughtily boasting the elf wizard is dead. The PCs must put a stop to the ogres' attacks, make way to Wailing Crag to root out the rest of their gang, and lay Haedirn Lastlight's tortured remains to rest.