
The kingdom of Dunador is in trouble. Since the king, Halfred of Dunthrane, was killed in a hunting accident, the land has hovered on the brink of civil war. Crown Prince Edmund, at 18 only half-trained and quite unprepared to assume the throne, has yet to be crowned. Currently he is on a pilgrimage to the holy shrine of Nevron in the province of Andevar. While the uncrowned king is far from home, anarchy reigns in Dunador. Throughout the realm, plots are brewing and evil hands are eagerly clutching at the sword of treason. Inevitably the focus of these intrigues is in the troubled province of Andevar to the north. For it is here that the young Prince has journeyed and here that he must be crowned. In this dark hour Dunador has but one faithful servant: Hollend, chief advisor to the old king. Painfully aware of all that is at stake, Hollend has sought the aid of a brave party of adventurers in a desperate bid to tip the scales in favor of truth and justice. But, even as the party secretly enters Andevar, the forces of evil strike with blinding speed and ruthless determination. TSR 9163

The Fortress of the Yuan-Ti describes a fortress build into a cliff side and the slave village outside. The Adventure is the third of three but can easily be played by its self. The adventure revolves around the players discovering the dark plot to revive the demon Sertrous and then stopping it. The adventure describes the outside, inside, and hanging towers of the fortress. The adventure concludes in a forth extra-planer tower were you fight the boss. It also includes 4 sidetracks from portals that explain how they get the materials for the ritual. Final part of the Barrow of the Forgotten King series.

"For untold eons, Eshebala ruled over Vulgarea, the 193rd Layer of the Abyss...content to revel in hedonism, corrupt the hearts of her dwindling followers and inflict petty cruelty. Yet, if there are days in the Abyss, there came one when she realized she despised her own province. She hated demonkind. She hated the Abyss. It had become unbearably tedious, spent...done. The burgeoning goddess decided she would dip her toe back into the lives of mortals, and quest to remember...to understand her own existence...But that was a lofty goal for a mind that had long ago begun to unravel. Instead...She is learning that all she has left is cruelty...and it was always cruelty that gave her power, so she now believes, to the woe of any who cross her path." Partly inspired by a scant notation by Carl Sargeant in 1992's TSR book Monster Mythology: "Eshebala is the foxwoman deity of vanity, charm, greed, and cunning. Her symbol is a female fox. Eshebala appears as a foxwoman, a shapely fur-covered female with a fox’s head, or as a beautiful young elf maiden. She is bedecked in rich clothing and jewels, and carries a silver mirror. Eshebala’s realm of Vulgarea can be found on the 193rd layer of the Abyss. She is wily and vain. She favors beautiful things and collects jewelry and art, the tackier and flashier the better. She prefers to overcome her opponents using subtlety rather than force, seducing and devouring out of boredom. She loves gossip, and always insists on being the center of attention. Eshebala is a patron of evil shapeshifters who use their wits and wiles before resorting to violence." Eshebala is a true chaotic evil demon goddess, behaving 100% true to form, and an extremely challenging opponent to take down for your players. An unforgettable 262 page jaunt for Levels: 15-17, with multiple possible modes of play, including Party Mode for up to 12 players. Profusely and paintstakingly illustrated over the course of several years by an award-winning professional illustrator. No stock illustration in this beast! A loving, dark & insanely detailed exploration of the 193rd Abyssal Plane An exuberant nod to the most grueling, deadly dungeons ever created Rich encounters that play out in a unique way each time 100 + NEW CREATURES 200 + NEW TREASURES (& possibly the most illustrated treasury ever provided) 82 BOOKS for PCs to discover 70 + NEW SPELLS & RITUALS, INCLUDING DETAILED OPTIONS FOR DEMON SUMMONING 50 + NEW TRAPS, HAZARDS & EFFECTS (guaranteed to run amuck) 4 RANDOM TREASURE TABLES, including a TABLE OF GEMSTONES that would be useful in any campaign 2 NEW CLASS SHIFTS: the Demonologist & the Exorcist!
You are a Dragon Wing captain aboard the Storm Chaser, a huge levitating Skycastle fueled by powerful arcane forces and electrical energy harnessed from storms. When a hostile castle appears from behind a large cloud bank, you are tasked to lead a team to infiltrate the enemy stronghold and take it down from the inside. The forces aboard the fast-approaching threat would overwhelm the combatants and defenses of the Storm Chaser; failure is not an option. Dragon Wing is a battle focused one-shot designed for 3-5 players of roughly 10th level. With beautifully designed maps and a fully guided sequence of rooms and areas, your players will infiltrate the giant stronghold, tackle intricate puzzles and tough combat scenarios with an array of monsters.

The ancient world of Harth withers beneath its dying sun…but it’s not dead yet. High in the night sky, a vampire’s tower is torn apart by a rampaging angel. People and monsters are trapped. Magical treasure lies scattered everywhere. It’s all yours for the taking, if you can find a way out before the angel finds you. This adventure is a one-shot dungeon-delve into a wizard’s tower. In space. With vampires. This is an alien-survival-horror-movie of an adventure (or at least, you can choose to play it that way). ADVENTURE TYPE: One-Shot / Low Level / Level 3 / Dungeon Delve / Tower / Vampires / Survival-Horror DESIGN NOTES This adventure is intended for low-level characters (around level 3). It is focused mostly on exploration, with several social encounters and opportunities for deadly combat. It runs 3 to 5 hours. There are 17 unique magical items, 17 unique monsters, and 17 unique rooms. I swear I did not plan that, it just worked out this way.

Death Is in the Cards The remnants of the Ebon Fold are cutting a deadly path through the Falkovian countryside, draining travelers of their life force and leaving withered corpses in their wake. Hot on their trail you come across the sole survivor of one of these deadly attacks, a young vistani man with an extraordinary skill for fortune-telling. His tarokka deck helps close the gap between you and the assassins. Together you follow the trail through Darkon, the dark domain of the lich lord Azalin, to the city of Nartok. With an Unholy Alliance... Something very strange is happening in Nortok. The killers enter the Temple of the Eternal Order and don't come out. It seems that the state of religion of Darkon is giving succor to these assassins. To make matters more confusing, the Kargat, the domain's secret police, has put aside its feud with the Eternal Order and has a large contingent staying at the temple as well. These three organizations working together bodes ill for the residents of Nartok. ... And Schemes Within Infernal Schemes Great amounts of life energy are being collected for some foul purpose, although no one seems to know what exactly it is. The tarokka cards provide only mysterious glimpses of the future - a future in which a powerful evil sweeps the land and Death walks the world. Can you discover the truth of what is happening in the temple in time to avert the disaster predicted by the cards? Death Ascendant is a full-length adventure that can be run as a stand-alone scenario or as the second part in the Grim Harvest series. It contains a 64-page adventure booklet plus a full-color poster map detailing the Temple of the Eternal Order. TSR 9526

A bargain struck between a dwarf chieftain and a great divine power forms the heart of this adventure. The chieftain, unwilling to step down from her position as ruler, seeks a way to hide from the god. When the party rescues some of her kin, they are offered riches for recovering a long lost magical shroud with the power to obscure mortals from the eyes of the gods. But recovering the shroud draws the attention of the god’s agents, and the party must choose a side. In this storied and fate-filled adventure for eleventh-level and up PCs, the party must battle their way through a ruined dwarven armory before deciding the fate of the chieftain.
A wandering farm boy falls foul of an ancient trap and is plunged into a death-like sleep. The cure lies in a temple hidden in the green gloom of Merthington Woods, but to find it, the adventurers must brave a set of terrible traps laid by a forgotten sect of priests...
A Star-Crossed Tragedy. When the party is hired to investigate a haunted castle, they’re drawn into a tale of hatred, love and betrayal stretching back more then 300 years. Will they be able to free the ghosts haunting Arevon Castle, or will they find themselves just another footnote in its long history of misery?

Aumvor is aware of the intruders and sends a warning with a powerful fire ball. Satisfied that the party has lost interest, Aumvor returns to his vault where he can safely leave his remains and travel the planes in search of greater power. Perhaps the PCs that survive the blast may have the upper hand. Growing closer to the final chapter, the party of adventurers will find that the only way out is into the tank for a swim. Aumvor the Undying has hidden here in this dungeon for centuries, waiting for his chance to resurface as the emperor of Netheril. The time has passed slowly and Aumvor’s powers are waning. He has hidden phylacteries well, but what use will they be if he has no vessel I which to dwell. Aumvor makes a final effort to kill the party before returning to his vault to wait in ambush for them. In “𝐏𝐚𝐫𝐭 𝟓 The Lower Tower”, you will find the secret at the bottom of the tower, 16 exciting and deadly encounters, and a lot of zombies floating in cadaver soup. Ever fight zombies while swimming and dodging specters? Here is your opportunity. Also coming soon, Roll 20 Map Pack for The Tower of Bondage.

Deep beneath the keep of Castle Greyhawk, a really nasty device is creating mutated, unpleasant monsters that are running wild throughout the castle and the twelve-level dungeon beneath. The call has gone out for heroic, fearless, and perhaps foolish adventures to out-hack, out-slash, and sometimes even out-think hordes of doughmen, headless mice, manic bee queens, really bad dead things, burgermen, crazed chefs, and movie moguls. If they survive these and much odder obstacles, the characters still have to find the nasty monster creator and put it out of business. Castle Greyhawkcontains 13 detailed levels for adventuring and exploration. Each is a separate adventure written by different author and each has its own unique brand of baffling weirdness. Some levels involve solving puzzles and some require good old hacking and slashing. The adventure can be played separately or all together as a grand quest to free Castle Greyhawk from the evil, rotten hordes that are plaguing it. The common theme of this dungeon is that no joke is so old, no pun so bad, and no schtick so obvious that it can't be used to confuse and trip up PCs! 13 Adventures for Character Levels 0 to 25. TSR 9222

Strange tales of a mad queen and a hoard of legendary treasure have driven adventurers into the jungles of the great trade road between Tiefon and Nextyaria for a generation, but now new information has come to light. A travelling bard has uncovered certain keys to the location of the lost queen's mysterious volcanic home, and the secret that may thwart her seeing immortality and invulnerability. Once again, the Barrens takes center stage as characters must via for a chance to grow rich and expand their legend among the heroes of the Nameless Realms! The Infamous Black Label series continues with this second part to the Barrens trilogy as characters must dodge the marauding forces of bandit lords, discover a wayward bard, and then journey to the caldera fortress of the Hall of the Spider Queen. What secrets does that dark sanctuary hold? Only time, dice, and the comradery of the gaming table will tell. This adventure is formatted to both 1E & 5E gaming rules.

Displace Beast Maze is an adventure that has one long encounter that is a combination of a puzzle (maze) and combat encounter (Displacer beast). The Displacer beast tentacle's ability to attack through the maze walls, knowledge of the layout, and hit-and-run tactics make the labyrinth both a useful and possibly deadly lair for the creature. Pgs. 27-29

"The adventure begins with the PCs lost in the streets of Sigil's Lower Ward." --from the module. The PCs are approached by a tiefling telling them about a job. The tiefling's employer wants the heroes to search for a child who is rumored to be some sort of chosen one from an ancient prophecy. Includes a map of Durkayle's Stronghold, a map of the Black Sail Tavern, a map of the Screaming Tower, and an isometric map of Zactar Cathedral.

5e Solo Gamebooks presents The Tortured Land, the fourth in our series of solo adventures set in the Forgotten Realms. With this adventure, we take off the gloves and throw your PC into the thick of some serious danger in the frigid north of Faerun. Only the most hardened adventurers will make it through this adventure in one piece, and with several different paths available, replayability is assured. The Tortured Land will provide you with hours of enjoyable, challenging play time. Arriving in a lonely village in the middle of the northern plain known as The Ride, your hero is soon drawn into a quest to retrieve a precious artifact. From there they will journey even further north, towards the barren waste known as the Tortured Land, in search of an unknown enemy. There are items to collect, codewords to activate and perils to avoid. And of course, many combat encounters! As always, hyperlinks are included in the text to facilitate easy navigation, removing the need for scrolling between entries.
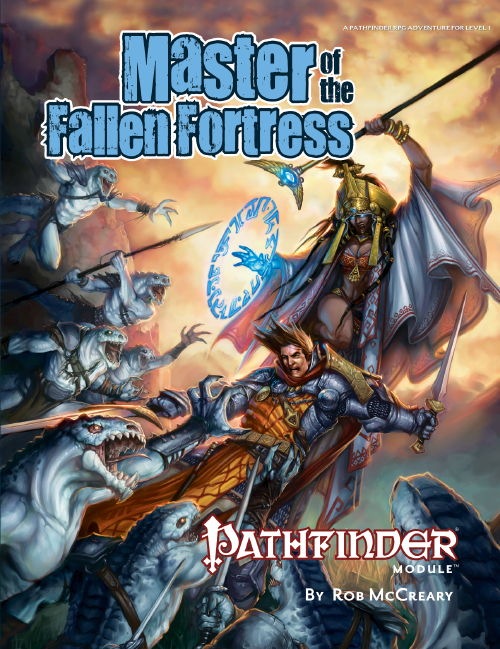
The ruined siege castles outside Absalom have long beckoned adventurers looking to make a name for themselves. Now an earthquake has cracked open one of these fabled ruins, and its lost mysteries and fantastic treasures lie exposed for the first time in centuries. But the tower's empty halls once more echo with living footfalls, and a new master has claimed the Fallen Fortress as his own.

Rumor has reached your ears that the legendary Amulet of Rafael is in this region. Further investigation has revealed that a reclusive nobleman in the north called Xantus is currently in possession of the item. While details are sketchy about the item, it is well known that quite powerful in the hands of a mage. You decide that you will go north and locate the “Ice Lord” and see if he is willing to part with the item.

Blinsky's Toyshop is our take on what happens to Blinsky and Piccolo during, or after the Curse of Strahd campaign. Blinsky, the toymaker in Vallaki with the cute monkey wearing a pink tutu, received a large inheritance from a long-time client. The client, Obtavius Swat, a retired adventurer and avid collector of toys, left his entire estate to Blinsky. The estate included coin, precious gems, art, and his collection of toys, some made by Blinsky and others he acquired during his travels. Blinsky used the fortune to pay a wizard to create a small island in the middle of Lake Zarovich, located just outside of Vallaki. He then paid masons and workers to build a fantastic new toyshop, which he designed to be an experience for both the young and old alike. Though the number of children in Barovia was increasing, mostly imparted to the devil Strahd’s downfall, Blinsky wanted to touch the inner child of the adults in the city. He wanted happiness. He wanted smiles. He named the castle Blinsky’s Toyshop of Marvels. One of the toys, a small silver tiara kept in a black satin-lined ivory jewelry box, was such a lovely piece. Blinsky couldn’t stand the thought of leaving it in the box. He already had enough gold and losing the small tiara wouldn’t be a large loss, so he decided to give it to his monkey – Piccolo (see Creatures of the Toyshop). He smiled at the thought of her running around in her pretty, shiny tiara. Sadly, as Barovian luck would have it, trapped inside the tiara is the sole of an evil gnome wizard named Aribetha Strangge. In his old age, Obtavious Swat forgot that he and his fellow adventurers used the tiara to imprison the gnome’s soul. Yesterday, when Blinsky placed the tiara on Piccolo’s head, silver tendrils cascaded from the tiara and into poor Piccolo’s skull, allowing Aribetha to control the monkey. Now, Aribetha has incapacitated Blinsky in the toyshop’s tower, brought many of the toys to life, and imprisoned or killed many of the workers and customers. The adventure includes costumes (which the character may wear), Strahd Hand Puppets, and a possessed Piccolo.

Awash in a sea of phlogiston, three wizards battle for mastery of reality! But with each new day all gains are lost and the game begins anew. It is up to the adventurers to upset this ancient balance, winning free of the shrinking demi-plane before all is reduced to the roiling stuff of raw Chaos! Will you strike a bargain, swearing fealty to one of the fell masters? Or will you attempt to master your own fate, pitting your luck and skill against arcane foes? Whatever you decide, you must act quickly, for gray worms press in from all sides and time grows short! An exploration-based adventure for 2nd level PCs, Fate's Fell Hand challenges new and old players alike. Only the most cunning of PCs can hope to thwart the machinations of three dire wizards and escape Fate's Fell Hand!

An Introductory Adventure for Storm King's Thunder. As evening approaches, you spot a wooden signpost next to a trail that heads north into the hills. Nailed to the post are three arrow-shaped signs. The two marked “Waterdeep” and “Daggerford” follow the High Road but point in opposite directions. The third, marked “Nightstone,” beckons you to follow the trail. If memory serves, Nightstone is roughly ten miles up the trail. This is Chapter 1 of the greater story available for free on the Dungeon Master's Guild.