
Are you ready for some HACK 'N' SLASH action? Do you yearn to unveil the hidden mysteries of the DWARVES? Are you thirsty for some UNEXPECTED encounters? The long lost Dwarven Kindgom of Gleodemar holds a relic of the past, Svarogs's Anvil, a magical artifact that can boost weapon production. The Heroes are sent to reclaim it, but the ancient fort is not empty and the new denizens have settled for good and do not seem keen on sharing any treasures. Will the Heroes manage to overtake them in a direct (and bloody) confrontation, or will the try to slip through the shadows to reach their goal? Maybe they will be captured and the "cavalry" will have to save them? In this adventure anything goes and it takes only one mistake to unravel the Heroes' careful plans and make them prisoners of the Keep. In this slightly challenging 5e hack 'n' slash adventure for 4th level PCs you will find: - a detailed story behind the Dwarven Kingdom of Gleodemar - a powerful dwarven artifact - a back-up NPC party, in case the heroes require a "deus ex machina" intervention - an optional ethical dilemma, to spice things up - both DM and player-safe maps - 3 boss monsters that can be used as future antagonists - non-stop action and suspense until the last minute of this 3-act mad rash and if all of that still does not sound fun, there's ALSO a race against time before the curtain falls. Download away! (and don't forget to share your feedback, we'd love to hear it!)

Many centuries ago, the dwarven kingdom of Sarphil stretched out across the Galena Mountains east of the Moonsea. They dug for the precious metals hidden beneath the rocky terrain, and they established numerous cities and settlements to aid in their excavation and manufacturing efforts. This was during the early days of Myth Drannor, the elven kingdom in the forest of Cormanthor, and the dwarves and elves initially clashed as each sought resources and expanded their territories. Myth Drannor and Sarphil eventually settled their differences, and many dwarves moved into the elven city to offer their services and expand their knowledge. In the Galena Mountains, Sarphil continued to flourish. Unfortunately, these days of prosperity did not last long. The last great king of Sarphil was lost in the dwarven city of Mount Throndor, beneath the mountain peak of the same name, and Sarphil withered under bitter clan disputes since no single family could claim legitimate lineage over the fragmented kingdom. What happened under Mount Throndor has been a mystery for thousands of years. Many attempts have been made to reclaim the lost riches and legacy of the last Sarphilan king, but powerful wards have prevented intrusion under the mountain, wards erected by the dwarves of Sarphil. Were the wards built to keep outsiders from intruding – or to keep something inside from escaping? An enterprising dwarven leader wants to find out, but she is going to need some help from a band of heroes. Horrors of Mount Throndor is a Dungeons & Dragons adventure of exploration, darkness, and terror featuring a lost dwarven city overrun by forces from the Far Realm and the journey to cleanse it once and for all. The adventure is designed for a group of 11th-level characters, and successful completion of the adventure should put the characters at 16th level. Here There Be Monsters Mount Throndor has become infested with madness from the Far Realm. During their journey to penetrate the ward and through the city itself, the characters are going to face gibbering horrors, unpredictable slaadi, fanatic stone giant cultists, degenerate star spawn horrors, mutant derro, undead dwarves, and countless golems. The ancient breweries of Mount Throndor have produced alementals who slither in the darkness, and a great dwarven war juggernaut named Big Hans stomps through the city. Legendary Villains and Epic Moments Though it has been sealed, Mount Throndor is not empty. The characters have opportunities to meet, interact with, and (likely at least) combat against powerful foes within the legendary dwarf city. A dwarf lich, a Far Realm spider goddess, an iron-encased demilich, and a melted flesh derro warlock monstrosity all await, along with a mind-bending force - Great Cthulhu! The characters have a chance to face an avatar of Great Cthulhu in the dwarven depths in the final confrontation of the adventure to free Mount Throndor and rid Faerun of a Far Realm invasion! An Adventure of Exploration Mount Throndor is a big, sprawling complex, a dwarven city with two major strongholds, a bridge system spanning a massive underground lake, and a deep mining complex. The scale is difficult to grasp and convey. Previous examples of adventures featuring these elements have included maps - usually lots of them, great spawling maps connected at ends to make huge subterranean dungeons. It is the classic image of a D&D dungeon crawl, and the map is a key component to its visualization. However, in this adventure, the maps are handled differently. There are certain areas, ususally outside the dwarven city itself, that include maps that are suitable for use at the game table, either in theater of the mind style or grid-and-miniatures. Mount Throndor itself is presented with an abstract map, and exploring it utilizes the exploration procedure outlined in Appendix A. Characters traverse the huge subterranean system using this abstract system, and during their travels they are going to run into random encounters and sites with more interesting and complex encounters.

Stirrings of an ageless war between Law and Chaos are drawing you into an epic adventure! A Struggle More Savage than Good vs. Evil Imagine a time before the words Good and Evil had meaning, a day when the world was young. Discover an ancient conflict that predates the stars. It was in these days that Law and Chaos forged worlds out of nothingness; their war began while the cosmos was yet unfinished. The Rod of Seven Parts defines epic role-playing. The reappearance of the Rod has awakened the powers of Chaos, and their queen seeks to turn the whole world into a battleground. Bold heroes must undertake the enormous task of seeking out and assembling the pieces of the Rod, but even its power cannot stand alone. Ages ago, primal forces of Law stood fast against Chaos; now their champions must once more confront the Queen of Chaos and her foul spyder-fiends, lest the flame of civilization be extinguished. Follow the quest for the capricious Rod as it leads characters on a journey of high fantasy. The Rod of Seven Parts is designed for four to six heroes and heroines of levels 10 to 12. This boxed set includes: Initiation to Power, a 96-page book of grand adventure playable in any AD&D world, including original campaigns; The War Against Chaos, a 64-page book of world-crossing adventures pitting PCs toe to toe against the minions of Chaos; Might and Menace, a 32-page book detailing the mysterious powers of the Rod of Seven Parts: how it affects both its enemies and its friends; Monsters, a 16-page book of new villains, new monsters, and even a new race! 6 two-sided reference cards; 6 full-color poster maps portraying the key locations heroes can visit. Read about this ancient artifact in the epic novel The Rod of Seven Parts by best-selling author Douglas Niles! TSR 1145
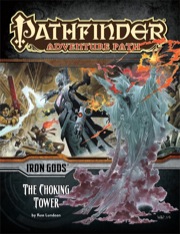
Book 3 in the Iron Gods campaign: Numeria’s newest heroes have uncovered a greater threat than the one posed by the gang of bandits and its god. An even more powerful deity is rising in the enigmatic Silver Mount, but before the heroes can confront it, they must uncover the legacy of this strange deity’s first worshiper. Clues point to the technophobic town of Iadenveigh—a farming community with its own need for heroes. What role could the mysterious Smoke Wizard of the Choking Tower play in this unfolding threat? Will the heroes be ready for their inevitable battle with Numeria’s Iron God?

Tortles of the Purple Sage - Part 2 completes a D&D Expert Set wilderness adventure which began in DUNGEON issue #6. Through the gate stones, into the unknown. This adventure takes place in the Known World of the D&D game, as outlined throughout the D&D game rule books and modules. The DM may find it useful to consult the Companion and Masters Sets, as well as most of the X-series of Expert Set modules. The DM may find it useful to consult the Companion and Masters sets, as well as most of the X-series of Expert Set modules. Expert Set module X9, The Savage Coast, would be especially helpful, as Tortles of the Purple Sage should easily serve to continue that module's direction and plot line, adding previously undescribed areas to the Known World. The DM may also place the areas and events of this adventure within an existing campaign setting, as long as the geographical areas of the campaign match those set forth here. Pgs. 8-25

As an ominous comet passes over Toril, a young researcher from Candlekeep goes missing. In darker corners of the Realms, eldritch horrors stir, answering the call of a dead god. Will the heroes be able to save the scholar before they succumb to an Elder Evil from beyond the reaches of sanity? This single session adventure is perfect if you are looking to introduce science-fiction themes into your game or just enjoy Lovecraftian horror. It has copious references to the Spelljammer setting and could be used as a springboard into that campaign setting. The Call of Atropus requires Mordenkainen's Tome of Foes to run effectively.

After spending a little time going through dusty old tomes and documents your group has discovered a tapestry offering you clues to a long dead and buried king. Since kings are usually buried with their riches and no information shows that his tomb has been located perhaps a little grave robbing may be in order! This adventure has several wilderness spots for exploration as well as an old burial cairn with several levels. The only problem is that the king isn’t really “dead” in the normal sense.
An ancient gate to the abyss lies undisturbed in the Valley of Obelisks. Sinister forces seek to reactivate the gate for their own ends, can the heroes stop them in time?
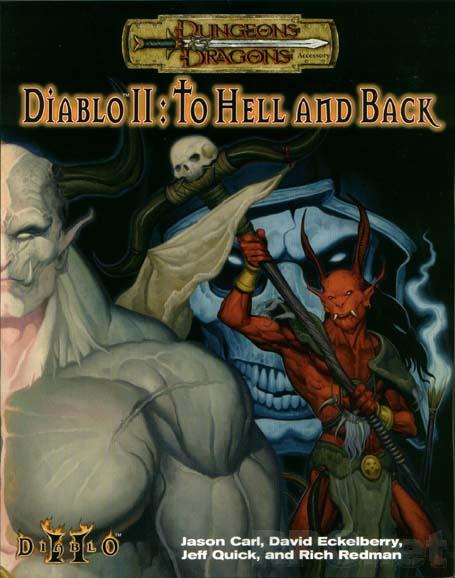
Bringing Diablo II to the tabletop. The legendary Diablo and Diablo II computer games come to life with the release of the tabletop Diablo II: To Hell & Back roleplaying adventure. All a player needs is the Dungeons & Dragons(r) Player's Handbook (0786915501-8/00) to accompany the Diablo II game. Every level and all 4 acts of the computer game are represented in the tabletop mega-adventure, which will also include 64 pages of monsters, information for levels 1-30, and over 60 maps!

Today's offering is a one-page adventure built for a solo 3rd level character. While in between normal adventures you have been tracking an escapee known as Johan Cupid and believe to have picked up a lead in Jakestown. With the bandit hiding out in an old manor house you see a payday coming. Not a traditional "Valentine's" theme this adventure reminds you that sometimes Cupid's arrows sting!

Rumor has it that an evil temple resides in the forest as well as a mad mage who may or may not consume children. While these rumors abound speculation of the existence of such is frequently countered with the tenacity of the elves watching over the forest and how it would be unthinkable for them to allow such issues to occur. Note: This seems an incomplete adventure. While the evil temple is mentioned, there are no maps for it. Also the mad mage is given back ground, there are not stats for an encounter.

Ducklings. It's not too late too close this page, and go and find an adventure about happy-go-lucky halflings, or emotionally stable young adventurers. This is not that story. You can still walk away, and find some other engagement that your players will forgive you for running. Open this little document, and you will be introduced to the wretched streets of Elysium. Home of aberrations, mystery and futile quests for meaning in the drowned streets of the tortured city. Escape is unlikely. Enjoyment fleeting. I implore you, turn away and don't look back. Mind flayers stalk streets plagued by invisible death. Curses bubble from ancient evils sleeping beneath the water. Questions lead to questions, which evolve into answers you will only regret asking for. Go whilst you still can. There is nothing here for you but death. Prologue: Welcome to Elysium Chapter One: The Crooked House Chapter Two: The Broken Prison Chapter Three: The Temple of the Gaunt Silhouette Chapter Four: The Grand Library Chapter Five: The Adamant Asylum Chapter Six: The Dancing Spider Chapter Seven: The Undercity An adventure for characters of level 15+ Contains: An introduction to Elysium, a Ravenloft domain filled with eldritch mystery and drowned secrets, including Life In Elysium, The Rule Unspoken and the Marks of Horror that set Elysium apart. Guidance on Madness in Elysium, with Elysian Madness tables for your horror/amusement. A list of Elysian locations, some of which will be expanded in later releases. Elysian random encounter tables, day & night. An Elysian Wild Magic table, miserable magic items and tragic trinkets. The first installment - The Crooked House, in which we meet the Duchess and her parade of dead husbands. The seconf installment - The Broken Prison, where the shadows of gods walk amongst men The third installment, The Temple of the Gaunt Silhouette, where broken fragments of reality are reached by strange avenues. The fourth installment, The Grand Library, where the things we wanted to forget prove impossible to truly banish. The fifth installment, The Adamant Asylum, where medicine and madness meet. The sixth installment, The Dancing Spider, in which there is no rest for the wicked. The seventh installment, The Undercity, where your worst suspicions are confirmed. Three new character backgrounds: the Eldritch Detective, the Information Broker and the Tempter of Fate. The long-suffering Elysian character race, with two subraces. The first One Page Woes collection, included here for your convenience, which contains thirteen reasons to be thoroughly miserable.

All ocean voyages are fraught with peril, yet a voyage to the infamous Isle of Dread might seem to some old salts to be a deliberate goading of the gods of the sea. Many of those who have attempted the voyage before managed to return to civilization often choose not to speak of the trials they experienced on that dangerous route, yet those whose lips can be loosened by a draught of grog whisper amazing stories... tales of pirates, sea monsters, terrifying storms, and perhaps most harrowing of all, of a strange and sinister land without land, a floating graveyard of dead ships mired in a sargasso the size of an island. This place has many names, but its most well-known may be it's most apt - Journey's End. "The Sea Wyvern's Wake" is the third chapter of the Savage Tide Adventure Path, a complete campaign consisting of 12 adventures appearing in Dungeon magazine. For additional aid in running this campaign, check out Dragon magazine's monthly "Savage Tidings" articles, a series that helps players and DMs prepare for and expand upon the campaign. Issue #350 of Dragon magazine features a regional guide to the seafaring environs the PCs can expect on the journey to the Isle of Dread. It’s time to bid farewell to the city of Sasserine as the PCs board the Sea Wyvern for a 3,000-mile voyage south into the uncharted waters of the Vohoun Ocean. Their destination: the Isle of Dread. Pgs. 16-48

Modrons, Mephits & Mayhem is a Dungeons & Dragons 5E tier 2 adventure for three to five characters of levels 5-8. It is primarily set in a modron-designed research facility that has been abandoned by its creators but retains guardians that are still active. Additionally, two groups have broken into the facility with their own goals in mind; the githyanki and their red dragon cohort are antagonistic and provide the main source of combat in this adventure, while a modron traveling with a few mephits may prove friendly although ultimately troublesome. Inspired by adventure games in which the protagonists explore baroque, esoteric technological fortresses, and seeded throughout with factions that sport competing and often bizarre goals, Modrons, Mephits & Mayhem is sure to test the mettle of any group of players, and will provide endless amusement for Dungeon Masters seeking something different from the typical hack-and-slash dungeon crawl. This 70-page adventure features: *Two wilderness areas, random wilderness encounters, and a massive, interlinking 3-level dungeon filled with bizarre puzzles. *Ancient machinery powered by elemental portals, all of which can be activated, turned off, or manipulated by the player characters and the various factions within the modron facility. *Planar creatures like githzerai and githyanki, modrons, mephits, and elemental guardians, skillfully placed into the High Moor area of the Forgotten Realms setting. *Monsters and NPCs that have detailed (yet easy to run!) personalities and goals that will provide tons of roleplaying opportunities. *Notes and sidebars on running the NPCs with added complexity, or simplifying the NPCs' motives to make the adventure more straightforward. *Tactics notes for every single encounter! *An appendix that features all monster stat blocks, and both tagged (DM) and untagged (Player) versions of the dungeon maps. *Wilderness hex map by Elven Tower Cartography! Three interlinked dungeon levels by Dyson Logos...and one of them is a flying fortress! Cover art by Patrick E. Pullen!

"A hundred-year curse caused by a group of adventurers slowly turned a tower and the hills around it into a region touched by the very finger of death, where life is incapable of thriving. As the curse grows in power and reach, on its way lie the town of Beregost, whose population now suffer, sicken and die every day under these nefarious powers. The government and local clerics infrutiferously attempt to remedy the situation, while desperately seeking any who could help them." Tower of the Pale Lady is a 4-hour adventure for a group of 1st-4th level characters. It is set in the town of Beregost, at the southern edge of the Sword Coast, in Faerûn, in Toril, in the Forgotten Realms. However, with little modifications, you can run this adventure in whatever world you wish. This adventure includes NPCs related to the story and to the Forgotten Realms, which might bring your players to other different plots as they play through. New ways of using old spells and items, presented as introduction to reinforce creative possibilities throughout play.

Anea, the Amazon queen, and her warriors have helped neighboring king Eriklius defeat the usurper Todeuclis. When king Eriklius ascends the throne he covets the hand of Anea, but she refuses. In a fit of rage he sends his warrior Euclatis to destroy her palace and the surrounding town of Gythaclea. Anea—gravely wounded—pleads with Nyx, Greek goddess of the night. She asks for the power to take revenge. Her plea is granted, at the cost of being turned into a medusa. As rumors spread that Anea is still alive, the heroes are sent by King Eriklius to retrieve her. It seems an easy mission, but they soon discover all is not as it seems... Pgs. 157-163

So you want to be a Mage of High Sorcery? To join the esteemed organization, you must travel to the Tower of Wayreth and undertake the most important event in your life—the harrowing Test of High Sorcery! If you can survive where so many aspiring mages have failed, you will forever bind your soul to the Gods of Magic and gain access to untold arcane secrets. The Test of High Sorcery is the perfect adventure for new and veteran players looking to experience Dungeons & Dragons in a new way! It is a solo adventure, where your choices have meaningful consequences, but it also provides balanced rules to play with a group or a Dungeon Master. This 154-page tome features: - A sprawling adventure that fits perfectly as an expansion to any Dragonlance campaign, Dragonlance: Shadow of the Dragon Queen, or as a stand-alone replayable experience - A tale full of sorcerous intrigue, featuring many new characters alongside iconic favorites like Fistandantilus, Takhisis, Fizban the Fabulous, and the Gods of Magic - Innovative Destiny and Trait mechanics make your choices really matter—and ensure every mage’s Test of High Sorcery is a unique experience - Over 60 possible outcomes to determine which Order of High Sorcery you join and provide compelling new plot hooks for your character during future adventures - Dozens of unique locations with rich stories and sorcerous challenges that Dungeon Masters can use to create their own version of the Test of High Sorcery - New magic items and stat blocks, with mechanics that support clever use of enemies’ weaknesses and the environment against them - Four gorgeous sample characters, with interactive character sheets designed to be new-player friendly so that you can jump right into the story - A detailed primer on the history of Krynn and how it relates to the Mages of High Sorcery - A community survey when you finish to let you see how you compare to other mages taking their Tests of High Sorcery

The task seems easy enough: accompany a mysterious traveler and her equally mysterious package from Waterdeep to Neverwinter. In the Jewel of the North, tasks are seldom easy, though. News travels fast and the Red Wizards of Thay have learned of the traveler and the object she carries. Now a Necromancer readies an ambush for the adventurers and their ward, intent on stealing the item for his own sinister purpose. A prelude to the Lost Crown of Neverwinter Encounters season and connected to the release of the Neverwinter Campaign Setting.

An ancient secret is discovered in an overrun border town, long ago forgotten by the elves of the east. It is a magical key—so obscure that history does not remember its form or even what it unlocks. But an unseen evil searches tirelessly, even as the lost knowledge finds its way into the most unlikely hands. The adventure contained within these pages will take a group of heroes from city to ruins, from wasteland to dungeon, and from despair to hope. It presents new creatures, spells and magic items. Published by Sovereign Press.

This adventure focuses on a Zhentarim attempt to spread terror in Mistledale, although it is suitable for almost any lightly settled area northwest of the Sea of Fallen Stars. "The Raiders of Galath's Roost" is suitable for four 1st-level characters, but PCs should be at least 2nd level before tackling the adventure's second half, the Zhentarim Citadel. Even in the first half of the adventure, many of the encounters are quite formidable for 1st-level characters, and the PCs might find it necessary to withdraw and recover one or more times before completely exploring the ruins.