
Summoned from across the multiverse, a small group of heroes must enter an ancient pyramid and prevent the Elder God Nyarlathotep's return to power. A Lovecraft-themed oneshot.

The wedding was meant to unite poweful families from Everlund and Silverymoon. "Til death do us part" comes sooner for some couples than others when undead hordes and a feral demilich are uninvited guests. The Dead Wedding is a short, 3 to 5 hour adventure for characters level 14 to 16. The adventure contains maps for Moonshadow Keep and the crypt of the demilichess Regetta Arch Therm, deadly traps, and RP hooks that enable players to use high-level non-combat abilities.

Halfling thief, Alton Lightheart, awakens to discover his shadow is gone! A child's doll kills its victims in a cruel and unexpected way. A sound-stealing sword is lost in a ruined volcanic temple. Among the witch’s valley mist, The Murk, sinister fey shadows terrorize the forest, demon spirits haunt old ruins, and undead howl from the volcanic shrine. Can the adventurer’s purge the vale of evil to gain its lost magic and riches? A three part adventure: 1. Alton’s Shadow: Delirious, bloodstained, alone. Halfing thief, Alton Lightheart, awakens to discover his shadow is gone! Will the adventurers help him to confront the unknown dread that awaits him? 2. The Vanishing at Rhu: Long Ago, the folk of Rhu made an agreement with a witch to save the thorp from destruction. She honored the agreement, but the folk broke their promise. One year later the village was razed. How? What wickedness lurks among the ruins of the fallen-tree village? 3. Stillness: A temple suffers a volcanic eruption. Believing it is the will of an angry god, all of its shaman are ritually slain. After years of disuse, the temple awakens as the zealots are reborn . . . as undead. Meanwhile, a magic sound-stealing sword is lost by explorers. Should an expedition seek the weapon and uncover the secrets of the lost shrine? Published by Wicked Cool Games
Take your first exciting foray into D&D's newest campaign setting with a deadly exploit in Sharn, City of Towers. Descend into the ruined undercity to face the legacy of the daelkyr, aberrations from the evil plane of Xoriat, and come face to face with the Queen with Burning Eyes! Pgs. 16-32

In ruins since the eruption of Mt. Hotenow, Thundertree is finally being rebuilt. The Lords’ Alliance is particularly interested in restarting a lucrative logging trade, but the bureaucratic wood-elf ambassador of Neverwinter Wood isn’t convinced. A mission to check on construction at New Thundertree and help with diplomacy quickly turns into an exciting dungeon delve as the entrance to an ancient temple is discovered! Can your party survive long enough to learn the mystical secrets of Thundertree’s past and claim its riches? Includes maps and a new magic item! The Lost Temple of New Thundertree one-shot is designed for 5th-7th level characters. This thrilling adventure is well-suited for parties who have completed Lost Mine of Phandelver or are roaming the Sword Coast region (ie: Neverwinter, Phandalin, Helm's Hold, Port Llast, Triboar, etc.) as part of Dragon of Icespire Peak or Storm King’s Thunder, but these campaigns are certainly not required. Though it takes place in Thundertree, the adventure can easily be moved to other settings. Content warning: undead; water hazards; tentacles

Three months ago the township of Durgon’s Rest exiled Elia Fenfrost for practicing witchcraft. Now as the first harvest approaches there are signs that something is amiss. The crops are failing, local farm animals are becoming sick with disease, and all of the food stores have gone foul. The town’s folk suspect that the accursed blight is the work of Elia - exacting her revenge for casting her out into the wild. The PCs are the villager’s last hope, but can they find Elia and end the evil curse that has been laid upon the town before all comes to ruin?

When an ill-favored orb drops from the sky and devastates the countryside, only the PCs stand between an ambitious wizard, a cult of dragons, and a dark ambition that could bring an army of fiendish wyrms into your campaign world! "The screams became overpowered by the sound of the terrible falling star--a black orb of malign energy hurled from the firmament in the dead of night. In that instant, the village of Rhale was utterly destroyed, reduced to a hollow crater of flaming decay. Now, frightened talk of a dark presence descended from above has taken root, though none can put name to the faceless fear that might reside within this terrible orb." While traveling the countryside, the player characters witness an explosive event - the falling of a meteor into a distant hillside. Soon thereafter, they encounter several mercenaries menacing some refugees. From them, the PCs can learn, that a group of dragon worshippers called the Black Covenant are in the area and intend to use the fallen star for their own nefarious purposes. Upon arriving at the crater, the PCs find that the falling star is in fact a massive sphere of iron with an opening in its side. They enter the sphere to find a small complex of rooms protected by numerous traps and guardians. They also battle several members of the Black Covenant, until they make their way to the heart of the complex, where they discover the source of the Covenant's interest in the Black Egg, they try to use it to create a half-fiend red dragon. The PCs must succeed if they wish to prevent the creation of an army of fiendish dragons. Lot's of monstrous NPCs with class levels and templates for enemies (half-black dragon orc warriors level 7, for example) are used in this adventure. Pgs. 57-78

FQ3- Outpost of the Humanoids is the third adventure for the Filbar Quest Series. As you make your way to a meeting with the Baron of the Knolls you come across a roadside inn and a pair of old adventurers that have a small task for you near some old abandoned ruins. Sounds easy enough right? For some reason it never is easy, especially in Filbar!

Chapter 1 - When a relative of someone close to the characters goes missing from a nearby village, the players are asked to investigate. The party has to recover stolen goods from a thief before setting out from the City of Ravens Bluff. They travel through the wilds of Vesperin in search of the missing person, finding trouble and helping locals along the way. Chapter 2 - As the journey continues, the party arrives in a small hamlet suffering from a strange blight. The players will need to investigate the situation and choose sides in a longstanding feud between the mayor and a local magic user. Chapter 3 - After clearing a tribe of violent orcs from a nearby mountain pass to protect the residents of a town, the party will have to enter the lair of a long-dead dragon to rescue their quarry from a band of goblinoid slavers, where they discover an entrance into a dwarven city, lost and forgotten centuries ago. Chapter 4 - The party will have to traverse the ruins of the dwarven city, avoiding hazards and battling the horrors that lurk there, to uncover the identity of the slaver's leader. A discovery that will lead them through a treacherous forest to the city of Tsurlagol in search of a pirate ship called the Star Carver, and its drow captain, The Viper's Kiss. Along the way, they meet an unlikely ally. Chapter 5 - Once they arrive in Tsurlagol, the players will have to choose between gaining the assistance of the city council to fight the pirates head on, or making a deal with the Viper's Kiss, herself. The path they choose will either lead to an epic battle on the Sea of Fallen Stars, or into the deadly sewers and tunnels beneath the city to face an enclave of wererats, undead, and a tribe of mad, kraken-worshipping kuo-toa, in search of a fabled relic. The Laughing Horde of Ruin, Part 1 is the first module of an original 5e adventure campaign. It is designed for character level 1-5, and uses material from the Dungeon Master's Guide, Monster Manual, and Volo's Guide.

The ground-breaking introductory adventure for Dungeons & Dragons that served as a DM aid in the first D&D Basic Set, released by TSR in 1977. This set included a 48-page rulebook covering the first three levels of play, and was skillfully edited by Dr. J. Eric Holmes from the original 1974 D&D rules written by Gary Gygax and Dave Arneson. The original set included an exemplary dungeon level, but it was a loose collection of examples and not geared toward starting characters. Holmes advanced this concept by writing a new thematic dungeon with a strong backstory, creating an adventure that has remained a fan favorite over the decades. Officially, its only title is "Sample Dungeon" but colloquially it goes by various names based on Zenopus, the doomed wizard who built the dungeon under his tower

The Great Trial is a 5e adventure for characters starting at 7th-level and ending at 10th-level. It's a dungeon consisting in the 3 levels, where the first level is the lowermost one and the last is the uppermost one: First level is composed by mean traps, puzzles and combat; Second level is a labyrinth with a construct Minotaur - the Minotal - and an iron wyvern, brand new creatures; The last and uppermost level is actually a jungle-like demi-place filled with dinosaurs in an open world format. Aenor Gleenwith, a powerful elf wizard, wants to make history alongisde Acererak for his Tomb of Horror and Halaster for his Undermountain. So he created his own dungeon. To test its efficiency, he captures adventurers and puts them in the lowermost level, where they need to work together to survive and leave the dangerous place. At the end, Aenor himself greets the group offering them apologies for the harm caused, to fix all damage caused and also rewarding them for the forced help. This module can be run in any setting, campaign, or as a one-shot. It should take around 10 to 14 hours to complete it since it contains 3 Chapters.
Freeport is a fantasy “free city” you can place in a fantastic setting. Its basic premise is a pirate city gone legit… at least on the surface. In truth, the pirate tradition is alive and well in Freeport, but camouflaged by a veneer of respectability. These days the city’s pirates are privateers, legalized pirates Freeport loans out to the highest bidder. You’ll learn more in the short history of the city that follows. This should help give you a taste of the flavor of Freeport before the adventure begins and the given background is all you need to run this adventure. It is an ideal starting place for a new campaign as the player characters find themselves stranded in Freeport after a deal goes sour. A seemingly simple job plunges them into the strange underside of the city, where they uncover secrets worth dying for. Death in Freeport is the first from the Freeport trilogy, together with Terror in Freeport and Madness in Freeport. Synopsis: Death in Freeport drops the player characters into the midst of political and magical intrigue, as the hidden Brotherhood of the Yellow Sign manipulates events to bring its dread god to the world. Freeport is still a bustling center of trade, but evil currents run beneath the surface. There are secrets here, and questions unanswered. The characters will undoubtedly learn there is more here than they expect in a simple seaport. The question is, will that knowledge kill them? As the adventure begins, the player characters (PCs) have just come to Freeport on a merchant ship. While on the docks, the PCs are attacked by a press gang, who mistake them for easy marks. The press gang is handily beaten off; since they are unused to real resistance. A bookish young man named Brother Egil then approaches the PCs. He says that he’s been looking for a group that can take of itself, and that he has a job for them if they are interested: finding a missing librarian. The missing man, Lucius, disappeared two days previously, and Egil is eager to find him. Egil gives the PCs some background on Lucius and his strange behavior. The PCs are then free to investigate: They are likely to visit Lucius’s home, the temple to the God of Knowledge, and an orc pirate ship. This should form a picture of Lucius as a man searching for his own past—who found something he wasn’t counting on. Following a trail of clues, the PCs learn about the Brotherhood of the Yellow Sign. With a little luck, the PCs can trail the cultists back to their hideout, penetrate the lair, and discover secret tunnels underneath it. Deep underground they find degenerate serpent people, and eventually Lucius himself. The librarian has been tortured badly and will die without aid. The PCs also have to deal with the leader of the cult, a man they may recognize from the temple. When the cult priest is slain, they are in for an even bigger surprise. He was not human at all, but a serpent man in disguise. What this means for Freeport only the gods can say.

*THIS IS A D&D NEXT/5E PLAYTEST ADVENTURE* Imani, a Turmishan wizard and former adventurer, seeks the aid of heroes to infiltrate Dretchroyaster’s lair and recover the Diamond Staff of Chomylla—the key to powerful magic and wisdom locked away for thousands of years. In addition to his own sagely interest in the lore of lost Uvaeren, Imani recognizes the dangers of such powerful magic falling into evil hands. The dracolich has secured the staff in his lair’s cen- tral chamber, using ancient wards of protection that can be bypassed only by four artifact-idols once belong- ing to a cult of Bhaal. Each group of adventurers enters the dungeon through a different section of the dun- geon—a forgotten temple of Bhaal, a vast underground lake, a troglodyte village, or Dretchroyaster’s vaults. Dretchroyaster’s lair is no simple set of caverns and ancient ruins. It sits atop a source of great power and energy, which the dracolich and his Cult of the Dragon allies hope to use to unlock the secrets of the staff. Only by undertaking a unified assault against Dretchroyas- ter’s lair can the adventurers hope to recover the Diamond Staff and survive the dracolich’s fury. The adventurers must make their way through the lair and recover the Bhaalite idols that will help unlock the Diamond Staff, all the while dealing with the lair’s creatures and avoiding the dracolich as he pur- sues intruders. Entering the Chamber of the Diamond Staff, the heroes must overcome its magical wards and claim the staff before being slain by the dracolich and his servants.
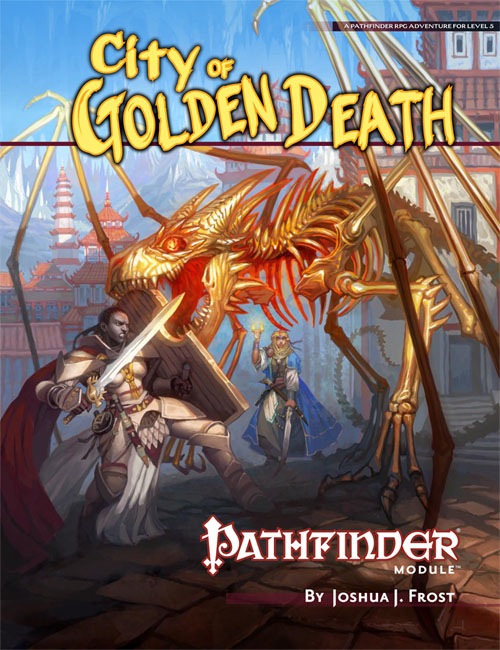
In the center of Lake Encarthan looms the dreaded Isle of Terror, accursed land of mystery and treachery. Hidden within the island's negative energy storms, the secret treasure city of the wizard-king Tar-Baphon has lain sealed for centuries. Now masked cultists have opened the golden city of Xin-Grafar to claim the wealth of the legendary city for the Living God Razmir. Can the PCs track the cultists through the poisoned swamps and blasted wastelands of the Isle of Terror to the City of Golden Death itself? And what forgotten dangers will oppose them as they struggle to prevent a dark faith from spreading across the world? Part 3 of the Price of Immortality trilogy.

Will You Venture Into the Low Crater? When the party stumbles across a ragged, battle-scarred band of knights they are amazed to hear that the hardy veterans were soundly beaten by mere kobolds. The crafty little fiends have set up in the rubble of a fallen Earthmote thought to be home to a long-dead dragon and - more importantly - its horde. When the Sable Spears charged in to drive them out, however, they were confronted with ambushes, traps and a whole lot of pain. Dare you venture where the Sable Spears failed, and explore the Low Crater in search of treasure, glory and adventure? Or will you join the sheepish ranks of adventurers turned aside by the prospect of tangling with Kobolds? Take your party through an adventure that will teach them that CR isn't everything, and that even the weakest foe can prove dangerous when they're cornered (though having the power to animate long-dead dragon bones helps too, of course).

This setting was used in the FN series and like the others in the FA series, it was used as an area for multiple adventure opportunities as well as a semi-safe haven. The main community in the area is the Village of Tomore. This community is offered as a free download! With a multitude of side adventures this area helps mid-level adventurers increase their experience point base. Close to this area is the previously published Sunken Temple of Bulu and the Ruins of Tarlac Keep.

The adventures in Dalentown continue in The Darkness Beneath Dalentown. Workers in the town’s sewers have stumbled upon the long abandoned halls of the dwarves that once settled beneath this region. What they’ve found is a haunted library. What they’ve woken is something far more sinister! The Darkness Beneath Dalentown features hordes of oozes, undead, and demons festering for years in an ancient dwarven mining stronghold. Now, they are slowly working their way to the surface, and the folk of Dalentown are in dire peril!

This is the laboratory of High Alchemist Sureves Epans. He led a group of alchemists in research for many years, but recently there was a bit of a mishap. He discovered his wife was cheating on him with one of his employees and while in a drunken stupor trying to create a discreet potion to deal with the two of them, he let loose an infectious plague on the lab which turned all but a lucky few in the facility into shambling husks of their former selves., fused with their own creations as their minds turned to know but one thought - rage. This dungeon has rules to modify all encounters for a group of players levels 4 through 6 and is intended for a party of four. If you have more players, feel free to adjust the difficulty up one level for each additional player or simply tune the monsters to your needs. This dungeon contains many original enemies, a unique puzzle, and an environment that is meant to bring a sense of terror and anxiety on your players. I consider this to be the Horror-themed adventure of the module so feel free to add some creepy music and extra details along the way to bring the area to life (or death).

The party is enlisted to assist the Righteous Host, an army formed as a last resort to defend the world against the monsters of Elemental Evil. The host is greatly outnumbered. Its leaders send the party on a series of missions, each of which will give the Righteous Host an edge in the great battle to come. This epic adventure ends with the final push against the forces of Elemental Evil in the Meadows, and the outcome is informed by how effective the party is in their missions... and whether they are willing to risk putting themselves in the front lines. If the Righteous Host loses, players may decide to travel to Hommlet or other nearby towns to defend them. Whether the host is successful or not, players can decide to follow many different plot threads: exploring the Temple of Elemental Evil, finding the lich Kell the Eldest's lair and destroying his phylactory, or following the will of Bitbaern's Shield and discovering historical sites that were previously lost. Pgs. 44-69

An older man named Mars Barz approaches you and your associate as you wander the small town of Senja. He is a local alchemist and purveyor of elixirs and has a delivery mission he needs fulfilled. You’ve got time to kill…why not!