
"Can you solve the Labyrinth within 13 hours and get back what was stolen from you?" A 4-Hour Adventure for Tier 1 characters optimized for APL 3 taking place in the Feywild Domain of Delight, Labyrinth, where everything seems possible and nothing is what it seems. This adventure takes place when the characters have been abruptly teleported into the Feywild Domain of Delight, Labyrinth. The Kobold King has given the characters thirteen hours to solve the labyrinth, or they will lose what he stole from them forever. "It's only forever, not long at all..." Pillars of Play: Skill challenges and exploration. Minimal/optional combat. Content warning: Non-consensual theft Adventure Inspiration: Jim Henson's Labyrinth (1986)

A Wall Beyond Fury is a companion adventure made to go along with the events unfolding in the Folio #13 (AT3 Playing Down the Dawn). It contains the information needed to run a side adventure that will help characters in their fight against House Vash. The blood fued with the Vash is almost at an end, but the abduction of a former ally and a last cog in the Vash machine must be taken care of. Now, the heroes must enter the Ebon Swamp in search of answers and revenge if they hope to finally put an end to all that has befallen them since they first entered the great city of Taux. This adventure is formatted to both 1E & 5E gaming rules.

A tribe of evil norkers led by a human illusionist threaten the town of Nolivari. The heroes must brave the wilderness, find Grakhirt's lair, and defeat him to ensure the safety of the local villagers. A straightforward dungeon crawl against lots of norkers! When do you get to see those guys in an adventure? Lots of monsters from the AD&D Monster Manual II as well. This adventure features a little bait-and-switch; the titular bad guy Grakhirt is assumed to be a norker, or gnoll, or some other monstrous humanoid, but is in fact a human illusionist/assassin! Note: The adventure doesn't feature caves AND a dungeon, but since the caves are treated like a dungeon with doors and numbered rooms, this is listed as a dungeon adventure as well. Pgs. 28-37

Some dozens of leagues to the north and west of the STEADING OF THE HILL GIANT CHIEF (Module G1 of this series), amidst the tallest mountain peaks, is the stronghold of Grugnur, Lord of Frost Giants. As frost giants have been amongst those who have been in the reaving bands, the party is to deal with them as the hill giants have been dealt with. Death and destruction are to be meted out to the frost giants in the same measure they gave to the peoples below. This module contains background information, referee's notes, two level maps, and exploration matrix keys. It provides a complete module for play of ADVANCED DUNGEONS & DRAGONS, and it can be used alone or as the second of a three-part expedition adventure which also employs DUNGEON MODULE G1 (STEADING OF THE HILL GIANT CHIEF) and DUNGEON MODULE G3 (HALL OF THE FIRE GIANT KING). TSR 9017

The Borderlands. An untamed wild region far flung from the comforts and protection of civilization. A lone fortified Keep is the only bastion of Good desperately striving to maintain the forces of Chaos at bay. But Evil is everywhere, lurking in dark caves, fetid swamps, forlorn forests. Bands of cutthroat brigands and ruthless tribes of humanoids eager to clash with the forces of Food rove the region. The Borderlands hold many secret wondrous locations, and opportunities for fame, prestige, and fortune are plentiful. But equally abundant are the perils, risks, and challenges to those brave enough to explore the wilds. Sharpen your swords and axes. Purchase your iron rations and tinderboxes. And Don't forget at least one 10-foot pole. Adventure awaits those with the mettle to confront Chaos in the Borderlands!

Ages ago, a religious order known as the Druun practiced rituals from inside sacred oak groves, ceremonial pools, and stone henges. In time, the Church of Law and Order suppressed the Druunic teachings, and the ancient holy sites were lost, forgotten, or converted to other uses. One such former site is located in the capital city of Dolmvay in the center of a small neighborhood known as Whiteoak Square. This neighborhood has recently been experiencing a strange phenomenon: At night, small dancing lights have been seen floating throughout the neighborhood. The residents were afraid of this sorcery at first, however, the lights seem to exude a feeling of peace and contentment, and the locals have grown used to them. How it Started: A few weeks ago, a butcher named Walton Brand was clearing out his cellar when he stumbled upon a secret underground passage that led to an ancient Druun hall. This hall was filled with lost relics, arcane lore, and forgotten treasures of the Druun. Walton told his friends, Loomis the Baker and the chandler Stefan of Walsbury, and the three men began sneaking away from their wives at night to dress in Druun finery and pretend to be men of wealth. A harlot named Red Kirsten was hired to attend them as they drank, feasted, and cavorted in the sacred hall. Unbeknownst to the revelers, the Druun hall still retained some of its magical powers and their merriment awakened the ancient guardian spirits of the grove. These creatures, known as faerlings, are the lights that have been seen dancing throughout the neighborhood. The faerlings were given life by the revelers' glee, and they project that joy and happiness onto the other residents of the neighborhood. This glee, however, is about to turn to horror. . . Oak Grove Whispers is a Labyrinth Lord™ adventure designed for 3-6 characters of 1st-3rd levels (about 10 levels total). The adventure is broken up into three chapters that take place in a small neighborhood located in the capital city of Dolmvay (the Labyrinth Lord is free to substitute any medium- to large-sized city from his own campaign world). Oak Grove Whispers involves a mixture of roleplaying, investigation, and dungeon crawling, so a diverse range of classes is recommended. As the adventure is set in a civilized city, the characters must also be careful their interaction with NPCs does not land them on the wrong side of the law. Published by Small Niche Games

A half-marilith, half-medusa druidess lich known as the Hate Blossom lairs in this dungeon, having been run out of mortal society and shunned by demonkind. She possesses the petrified-yet-still-living body of Melenkir, the first human arch-mage and the single creature to remember a ritual that may save the realm from an extraplanar threat. Only slaying Hate Blossom or convincing her to lift the curse will revive Melenkir. Published by Defy Danger and Save Verses Death

Smoke still rises from the shattered buildings and ruined streets of the troubled town of Cauldron, yet if not for the actions of a band of heroes, it would not exist at all. A sinister cabal of cultists bent on plunging Cauldron into the prison plane of Carceri had awakened the volcano below the town, and amidst the attacks of dragons and fiends from the outer planes, these heroes were able to evacuate the city and then strike at the cultists in their lair near the volcano's heart. Now, this cult, the Cagewrights, lies shattered, their members put on the defensive for the first time. All that remains is to finish the job, but the surviving Cagewrights still have some surprises left in their mysterious stronghold under the snake-haunted ruins of Shatterhorn. "Strike on Shatterhorn" is a Dungeons & Dragons adventure designed for four 18tth-level characters. This adventure is part of the Shackled City Adventure Path that began with "Life Bazaar" (Dungeon #97) and continued with "Flood Season" (Dungeon #98), "Zenith Trajectory" (Dungeon #102), "The Demonskar Legacy" (Dungeon #104), "Test of the Smoking Eye" (Dungeon #107), "Secrets of the Soul Pillars" (Dungeon #109), "Lords of Oblivion" (Dungeon #111), "Foundation of Flame" (Dungeon #113), and "Thirteen Cages" (Dungeon #114). The Adventure Path concludes in Dungeon #116 with "Asylum." Pgs. 56-82

A generic tomb usable for one off adventures or unexpected exploration discovery. An abandoned dwarven tomb has been taken over by goblins.

"Proudfoot’s Trials“ is a D&D5e one shot adventure for 3 to 6 players on level 1-3. The playing time is about 3-6 hours. It is an adventure for beginners, so it contains a few tips for the DM on how to handle various situations. The adventure also offers: - Social interaction - Wilderness challenge - Combat encounters - Traps - Riddles - Adjustment suggestions for higher levels - Sketches - City map "Proudfoot’s Trials“ can also be adapted into an established group and campaign. It provides a varied, but not too complicated plot and can be used to create an enjoyable evening for your group.

When a Thayan research expedition returns from the Glacier of the White Wyrm with only two survivors that are reduced to whispering about an ancient pyramid under the ice, perhaps it is time to discover just what scares the life out of a nation of necromancers. The events of DDEP2 Mulmaster Undone resulted in terrible geographic upheaval all around the southeastern region of the Moonsea. Massive landslides, earthquakes, tidal waves, and gnashing tornados devastated the land and the city of Mulmaster was nearly scrubbed from the face of Faerun. Fortunately, these events also revealed previously hidden artifacts—trinkets, mostly—from the ancient Netherese all around the city. The Thayans have long held an interest in the port city and wasted no time in assisting in the rebuilding efforts. They simply asked that a blind eye be turned to their archaeological interests, and in return they would continue to spend their own resources (at no expense to the Mulmasterites or even the High Blade) to rebuild the city, bigger and better than before. It wasn’t long before their interests paid off with the discovery of a research laboratory beneath the Glacier of the White Worm, far to the east of Mulmaster and nestled in the mountains. The Thayans sent a sizable expeditionary force but only two acolytes returned. The visiting Zulkir has found this particularly troublesome, and with the assistance of Rastol Shan, the head of the Cloaks, has arranged for a mercenary force to perform a more pointed investigation of the area. In return the Thayan noble has promised significant compensation. Upon arrival at the dig site, the characters are quick to discover that the laboratory hides ancient and palpable evil. The purpose of the facility can be discerned with careful investigation, and the effect of the still-active fragment of the Dark Obelisk has empowered (some may say attracted) servants of the Worm that Walks. Danger and death await, certainly, though the characters always have the option of running away and living to fight another day…
Something is killing people in Palebank Village, and if the party does not stop it they could be next.

Years ago the valley was green, and animals ran free through golden fields of grain. The princess Argenta ruled over this peaceful land and the people were secure and happy. Then one day a warrior riding a red dragon appeared in the skies over the princess’ castle and almost overnight the tiny kingdom fell into ruin. Now only ruins and rumors remain, and what legends there are tell of a fabulous ruby still buried somewhere within the Palace of the Silver Princess TSR 9044
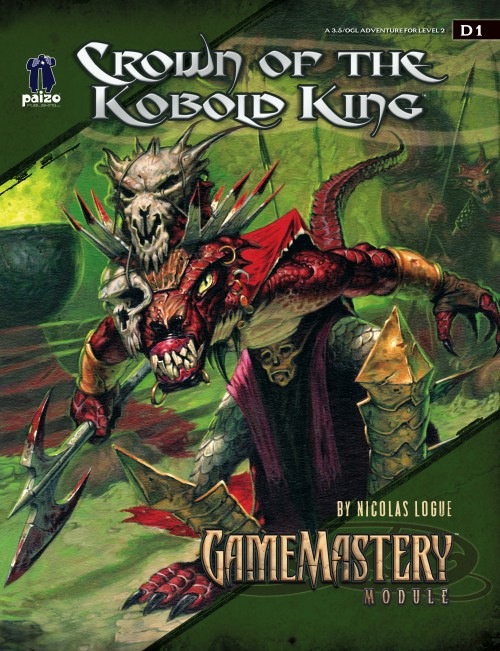
The crown of the kobold king will be anointed in blood. Five children from the town of Falcon’s Hollow have gone missing, dragged off into ruins underneath a cursed dwarven monastery. Soon they will be sacrificed to the crown, all to the glory of the twisted King of the Kobolds. If they are to be saved from this gruesome fate, brave heroes must follow their trail to the monastery and plumb the depths of its trap-laden and monster-infested halls.

Deep beneath the surface of a lake flourishing with aquatic life is the Temple of Pure Water. Within its walls your players will encounter dangerous aquatic flora, a deadly submerged temple, a sea dragon statue with power lurking within, and even a rapid downhill boat ride with sharks. Water in small doses is an elixir of life, but it large enough quantities your players may be left in over their heads as they make their way through this underwater adventure.

Deep beneath the Isle of Dread, in a place forgotten by the world of light, an ancient, unfathomable evil festers. Within the desiccated ruin known as Golsimorga, the debased kopru servants of Demogorgon work foul rites, steeping immature shadow pearls in pits of liquid insanity. None from the world above have yet fathomed what terrors lurk beneath the Isle of Dread, nor what mad scheme roils to profane life deep within the city's gangrenous corpse. "The Lightless Depths" is the sixth chapter of the Savage Tides Adventure Path, a complete campaign consisting of 12 adventures appearing in Dungeon magazine. For additional aid in running this campaign, check out Dragon magazine's monthly "Savage Tidings" articles, a series that helps players and DMs prepare for and expand upon the campaign. Issue #353 of Dragon features ways to improve the PCs' vessel, the Sea Wyvern, as they take their adventures back to the seas. When the PCs journey deep under the Isle of Dread to find the source of the shadow pearls, they discover horrors beyond imagining in a haunted underground city perched on sanity's razored edge. Pgs. 28-66

Horrors in the Dark The origin of the ShadowGate is lost in antiquity. Some claim it as the work of devils, others cannibal cultists or even demon lords. Not long after its discovery it was boarded up by the priests of the local church, and then fortified by paladins. Of late something has emerged from the portal. It remains trapped within the divine defences, but for how long?

Wanderers emerge out of the desert in the dead of night, bending low against the driving sandstorm. They are adventurers, heroes whose tale has yet to begin. And they are in trouble. For he last three days, a raging sandstorm has harried you. Your faces and hands are rubbed raw by the driving sand. Worse, not once has the sun risen in that time: 3 days worth of unbroken night. Finally, something rises out of the yellow-black haze. A massive structure, outlined in moonlight. The heroes are TRAPPED in a cursed land, harried by sandstorms. They stumble apon a ruined city and a DARK TOMB that lies beneath. Can they find a way to escape this land? Or are they doomed to be drowned in the SORROW OF THE SAND LORD?

Dr. Rudolph Van Richten and his network of investigators have hunted and put an end to numerous creatures of the night across the Domains of Dread. But some foes are more elusive than others, and will require the aid of heroes to put an end their reign of terror and close out these open cases. A simple rest turns into a waking nightmare as visions of death haunt the heroes’ dreams. A Dream of Eternal Sleep is the introductory adventure to the ghostly Night Terror, Kazander, and begins within adventurers’ own dreams. It provides the basis for an extended campaign that will take heroes through the cerebral and nightmarish domains of dread as they seek a way to confront this foe in the Nightmare Lands. Content Warning: Near-death Experiences, Recurring Nightmares, Sleep-walking, Possession.

After a riot erupts in the streets of Cauldron, the PCs must track down a missing paladin before the mob tears the city apart. The PCs try to stop an assassin during the riot and get invited to a meeting, where they are tasked to search for the missing paladin. After some investigating they will travel to Vaprak's Voice, an ancient Spell Weaver laboratory, at the edge of the Demonskar. In the dungeon they will find the "Starry Mirror", a puzzle/travel device through which they have to travel, to find the missing paladin. Part 4 of The Shackled City Adventure Path Pgs. 44-82