
The once-dwarven wizard Hehranna knows that her previous race, for all its pride and skill, is hampered and distracted by lesser concerns—family, friendship, emotion. Once they join the Hive, they won’t begrudge a few moments of pain in exchange for the industrious awakening she has to offer them. Pgs. 16-32

Local villagers whisper of a mysterious place deep in the marsh - a place shrouded in mist and dotted with barrow mounds, ruined columns, and standing stones. The tomb-robbers who explore beneath the mounds - or rather the few who return - tell tales of labyrinthine passages, magnificent grave goods, and terrifying creatures waiting in the dark. Are you brave (or foolish) enough to enter Barrowmaze? Barrowmaze Complete (BMC) is a classic megadungeon for use with any old school fantasy role-playing game. BMC includes everything in Barrowmaze I and II in the same book in addition to new material, art, layout, and cover art by Ex-TSR artist Erol Otus. Barrowmaze Complete will keep your players on their toes and your campaign going strong. BMC is brought to you by the Old School Renaissance (so don’t forget your 10’ pole). This edition includes art by the aforementioned TSR artists Erol Otus, as well as Tim Truman, Jim Holloway. New old-school artists include Peter Pagano, Cory Hamel, Stefan Poag, Zhu Bajie, Stephan Thompson, and others.

The ancient ruined city of Tamoacha is familiar to a select few scholars and fortune seekers, who know of it but not always exactly where it is. Even more secluded, lying somewhere within or beneath the ruins, is a hidden shrine said to be dedicated to Zotzilaha, the vampire god of the underworld. Adventurers who catch wind of the place are likely to find its lure irresistible. Remake of the AD&D module by the same name.

This exploration adventure is planned to be played by 4 to 5 level 4 characters. The characters, led by old Maddie (who also hides a big secret), will go deep into the swamp and into the caves to retrieve the green heart.

Stirrings of an ageless war between Law and Chaos are drawing you into an epic adventure! A Struggle More Savage than Good vs. Evil Imagine a time before the words Good and Evil had meaning, a day when the world was young. Discover an ancient conflict that predates the stars. It was in these days that Law and Chaos forged worlds out of nothingness; their war began while the cosmos was yet unfinished. The Rod of Seven Parts defines epic role-playing. The reappearance of the Rod has awakened the powers of Chaos, and their queen seeks to turn the whole world into a battleground. Bold heroes must undertake the enormous task of seeking out and assembling the pieces of the Rod, but even its power cannot stand alone. Ages ago, primal forces of Law stood fast against Chaos; now their champions must once more confront the Queen of Chaos and her foul spyder-fiends, lest the flame of civilization be extinguished. Follow the quest for the capricious Rod as it leads characters on a journey of high fantasy. The Rod of Seven Parts is designed for four to six heroes and heroines of levels 10 to 12. This boxed set includes: Initiation to Power, a 96-page book of grand adventure playable in any AD&D world, including original campaigns; The War Against Chaos, a 64-page book of world-crossing adventures pitting PCs toe to toe against the minions of Chaos; Might and Menace, a 32-page book detailing the mysterious powers of the Rod of Seven Parts: how it affects both its enemies and its friends; Monsters, a 16-page book of new villains, new monsters, and even a new race! 6 two-sided reference cards; 6 full-color poster maps portraying the key locations heroes can visit. Read about this ancient artifact in the epic novel The Rod of Seven Parts by best-selling author Douglas Niles! TSR 1145

Picking up where Chapter 33: Adventures in the Ptolus book leaves off, the adventures in The Night of Dissolution cover an arc that pits player characters against the darkest foes the city of Ptolus has ever faced. Following the threads of a hidden conspiracy, the characters find themselves up against insane cultists, wild chaos magic, and horrors from the primordial days of the world. This adventure book is laced with urban intrigue, high action, and even some dungeon exploration. Some highlights include: A description of Pythoness House, a haunted oracle/brothel that hides a trove of weapons vital in the fight against the Cults of Chaos. A huge secret temple of chaos where insidious fanatics worship the dreaded Galchutt. Details of a city-wide network of covert spies and agents that extends even into the highest echelons of Ptolus’ elite society. These adventures culminate in the player characters’ attempt to stave off the Night of Dissolution, a dark time long foretold when the slumbering Galchutt will awaken in their hidden lairs deep below the city—and bring catastrophe and woe to the world. Published by Malhavoc Press
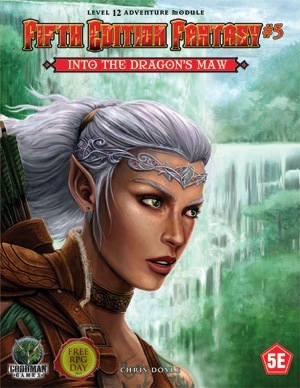
Your stalwart band treks through the trackless jungle seeking the Dragon's Maw Waterfall. At the base of the falls, behind a massive curtain of water, is rumored to be the cavern lair of a great wyrm. The local Xulmec tribesmen say the great dragon has not been seen in nearly 100 years, so perhaps its hoard lies unguarded and ready for plunder. But what role do the heroes play in a blind shaman's prophecy foretold a century ago?

In this level 3 adventure, the heroes face off against a band of orcs who live on islands in a pool of their orc god's blood. Warpath of Gruumsh is part 2 of the Litany of Arrows adventure path, following up on the platinum-selling Castle of Corellon adventure. This can very easily be run as a standalone adventure. Warpath of Gruumsh contains three versions of each full-color map (untagged, player's map and DM's Map), original artwork, one page of new magic items, and full entries on 6 new monsters, including mithral dragons and blood moon harpies.
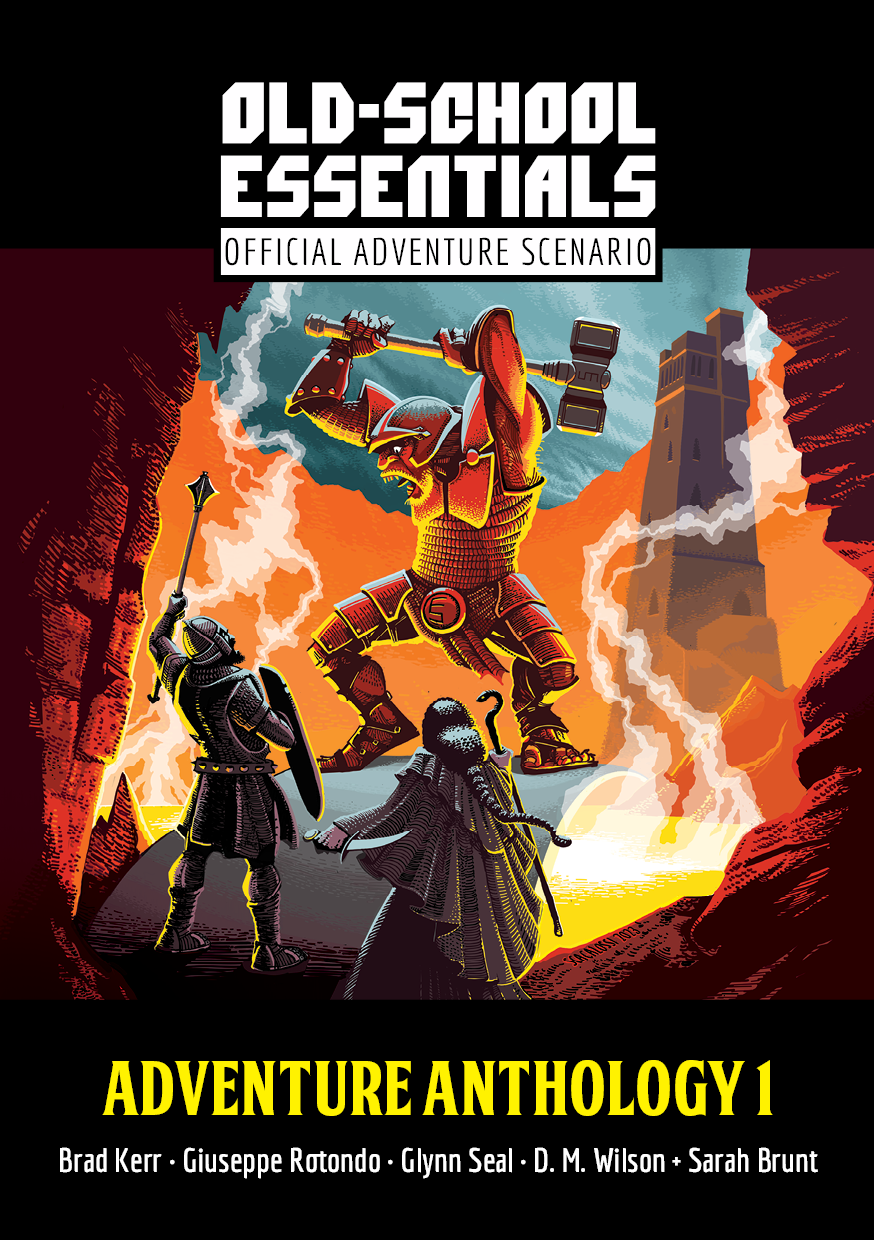
A level 2–3 sewer adventure by Glynn Seal. PCs plumb fetid sewers and recently-revealed secret halls, in search of a lost worker. In these forsaken chambers, they may find answers and treasures, but may also come face-to-face with a bloated monstrosity and its depraved followers. For Old-School Essentials (OSE) Included as one of four adventures in "Old-School Essentials Adventure Anthology 1"

Decades ago, an Osiriani Pathfinder named Bossell locked his transformed lover in the vaults beneath the Sothis Pathfinder Lodge. He then vowed that no one would ever discover his secret shame. The old and senile Bossell now relies on his assistant Fendel for everything, and the hapless assistant has disapeared into the vaults after reading his master's journal. You've been sent beneath the Lodge to destroy whatever it is that Bossell's lover has become—will you survive his secret or find yourself transformed as well?
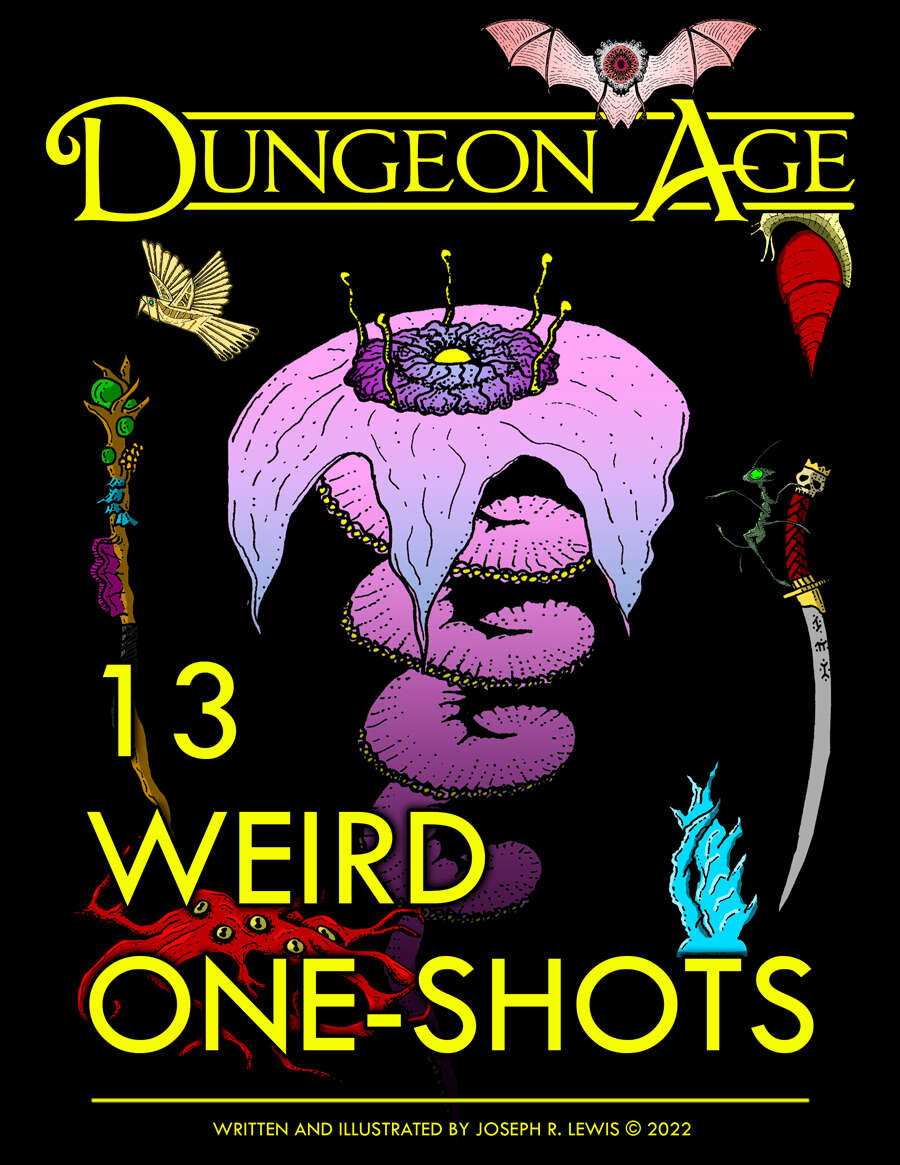
The ancient world of Harth withers beneath its dying sun…but it’s not dead yet. The land is still riddled with villages in danger, cultists in caves, angels gone mad, eldritch horrors making strange deals, raging dragons, bandits in the woods, and cruel monsters lurking in every shadow. These 13 adventures span a wide variety of locations, environments, creatures, and genres. They are meant for use as quick-play sessions or one-shots, or to be dropped into campaigns as side-quests. These are linear dungeons and mini-quests full of interactivity and strangeness, encouraging exploration, risk-taking, and creative combat. ADVENTURE TYPE: One-Shot / Low Level / Combat / Exploration / Village / Wilderness / City / Subterranean / Dungeon Delve DESIGN NOTES These 13 adventures are intended for low-level characters around Level 3 Overall, these adventures tend to be linear dungeon delves in caves or single buildings 93 unique encounter locations 69 original magic items 71 original monsters (with 28 illustrations) 13 maps/diagrams Each adventure runs 2-4 hours in length

A beloved priest has gone missing, and sinister trouble stirs beneath the Church of St. Terragnis. Can the heroes rescue the victims of an age-old evil before it claims more innocent lives?

A fiend lurks among the Black Blade goblins. A shapeshifting barghest fashioned by the General of Gehenna to exact revenge on all goblin-kind. It’s aim: to kill as many goblin leaders as possible… A masked goblin approaches the party asking for help. Two tribe leaders are dead. But a rival for chief has control of the crime scene. Will the party discover the barghest among the goblin ranks? Can they stop this imposter before it strikes again? Adventure Overview The adventure’s story is spread over 4 parts and takes approximately 4 hours to play. The adventure begins with a Call to Action scene. Part 1: Goblin Politics. Krill sends his emissaries to implore help from any strong intermediary. The party is asked to investigate the murder of Thrawn in Dringly’s lair. This is Story Objective A. Part 2: The Opposition. Gain entry into Dringly’s lair and investigate the murder of Thrawn. Gather enough evidence to find the killer. This is Story Objective B. Part 3: To The Lair! Now that the players have determined the barghest (Yeep) is to blame, they need to get to Krill’s lair quickly as he is in imminent danger. This is Story Objective C. Part 4: The Barghest.When the players arrive at the lair, they need to get to Krill and expose and defeat the barghest. This is Story Objective D. Adventure Background A barghest named Yeep has begun its onslaught of attacks against the Black Blade goblins. Starting with Chief Gnar, then his second in command Thrawn, the barghest is moving methodically down the line of command. Krill is now chief. But he has some problems: Two leaders of the Black Blades are dead. Who killed them and why? Is he next? Dringly, the next in command, has decided to take his lair for himself, declaring himself Chief of the Black Blades. Who are the Black Blades? The Black Blades are a tribe of goblins in the local area. They are known for dipping their blades in a dark black substance. It is rumored these blades are poisonous. The Black Blades regularly attack passersby on the road to rob them. The Black Blades have two lairs, one run by a chief who leads the whole tribe, and another overseen by a boss lieutenant. The Black Blades have a well-established pecking order which is how Krill stands to become chief. The next in line is Dringly, who has also declared himself chief and wants Krill dead. Krill suspects that there is something suspicious about two leaders being killed within a day of each other, but he has already burned Gnar’s body without any investigation. He needs to investigate the body of Thrawn, but it is in Dringly’s lair. Krill wishes to avoid direct confrontation with Dringly at the present for three reasons: 1) Any violence would only kill his own tribe members and further divide the lairs. 2) He believes there is still hope for negotiation to reunite the Black Blades. 3) He believes that if he were to attempt negotiations himself, Dringly would kill him. This adventure features: Two maps. Ready for your favorite Virtual Tabletop. A full color pdf. A black and white pdf. One custom monster, a reprint of barghest, all others available in the Monster Manual. Four hours of entertainment involving: roll playing a goblin bard, investigating a murder scene, tracking down a barghest before it strikes again. Applicable to any setting.

Why Go to the Ruinous Palace? 1. Old Gold to be Stolen from Old Places 2. Rumors of Supernatural Fecundity and Ruination. What wizard would not wish to study such? 3. Nearby communities are hemorrhaging Livestock. The Dragon learns to hunt and gather. 4. A forest Unmolested for centuries… could become a fortune in Timber. Ruinous Palace of the Metegorgos is a new adventure from In Search of Games for your standard dungeon fantasy game. It's easily inserted into any campaign, requiring little modification to adapt to any of a number of dungeon fantasy systems (we recommend Lamentations of the Flame Princess). While written for levels 1-3, the adventure works well with parties level 4-6 as well.

The hunt is on! Agents have hired out the infamous Redcaps to raid along the Hruesen River and Baron Botkin wants them brought to justice. A mad run by the goblins left a trail of ruin along the river road but the time to act is now, before the trail goes cold. the evil doers broke off the raid and now lie in hiding somewhere in the Barren Wood. There in the deeps of the forest stands the legendary Slag Heap - an ancient complex of unknown origin and terrifying reputation for years ago the Heap served the Horned God's minions as a bastion against the fey of the Barren Wood. But now all the forest is hostile to outsiders, whether good or ill. The men of the Barren Wood are fierce, independent, and distrustful of outsiders. Facing them is a daunting task in the best of times and now they seem to be protecting one of their own. Discovering the real powers in this region only brings the characters closer to doom as they travel to piles and heaps of slag and detritus that was once a glorious abode and temple to the dark powers before the age of man. Also available for 5E
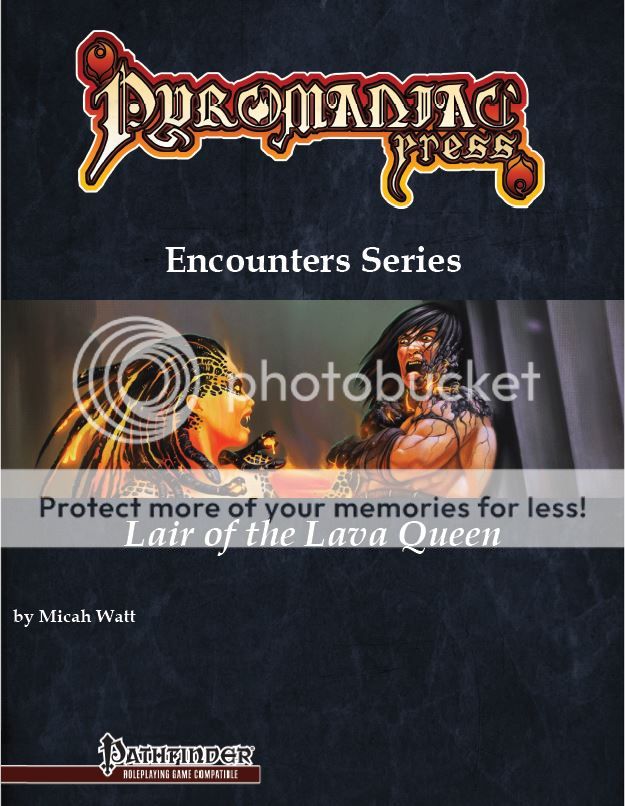
Rumours tell of a secluded cave where a powerful cleansing artifact resides, guarded by a mythical creature that no one has seen and lived to tell the tale. Heat boils forth from this cave, and tortured shrieks echo on the wind. Do you have what it takes to brave the Lair of the Lava Queen?
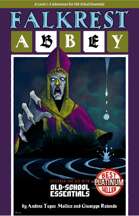
The forlorn Falkrest Abbey in the icy Lune Mountains is where the Queens and Kings of Yore used to be crowned and buried, along with their treasures. According to legends, the Fountain of St. Brynedd still pours its miraculous water somewhere inside. But what caused the fall of the blessed Abbey? Falkrest Abbey is a level 1–3 dungeon adventure for Old-School Essentials. Written by Andrea Tupac Mollica and Giuseppe Rotondo, with original art by Zaira Diana. Content: A 19 room dungeon with exploration, combat, mystery, puzzles and NPCs Encounters and events along the way on the icy Lune Mountains Several hooks and alternate outcomes with possible repercussions on your campaign 3 new monsters 2 new magic items, plus one almighty magic vial of miraculous water Original art by Zaira Diana Map drawn with dungeonscrawl Utility: Treasure & monsters overview sorted by room Interactive hyperlinked map and index Interactive hyperlinked map snippets accompanying room descriptions Printable hand-outs (optional) Extra files: VTT friendly maps without room numbers, monsters, secrets doors etc
/pic572949.jpg)
Stormcrow Company—an unsavory band of adventurers—haven’t been seen or heard from in years. Rumors of their accumulated wealth have spread far and wide, and if they have truly been slain, that treasure is just waiting for adventurers to come and collect it. But is anything ever as easy as it seems? Pgs. 10-28
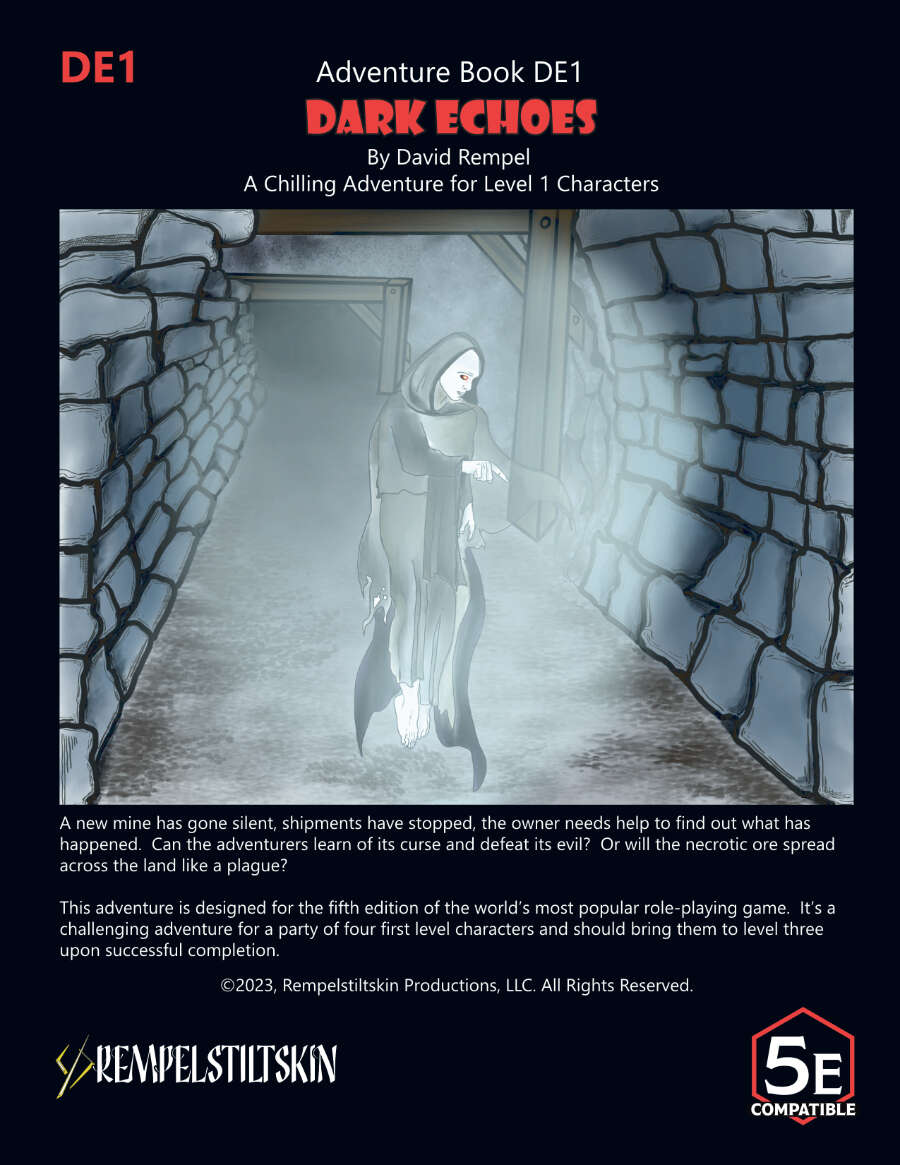
A centuries old evil has been cultivating an environmental disaster deep under the earth, waiting for the time when it will be unleashed on the world. A new mine has been created above and has broken the seal. The owner of the mine has lost contact with their foreman and shipments have stopped, and it’s up to an inexperienced but eager group of adventurers to investigate. This adventure is designed to present a challenge for a group of four veteran players using first level characters. While there are opportunities for roleplay scattered throughout, this adventure is heavy on the exploration and combat pillars of fifth edition. Death is a real and ever-present threat as they investigate the mine and the dangers below. Success and survival should bring them to the third level, and they may have found some treasure well worth the effort. So much so that they may become targets themselves from unscrupulous and more experienced NPCs. Written to be a seed for a larger campaign in any high fantasy setting, the outcome of this adventure could have world-changing consequences. It introduces a new and growing threat that, given enough encouragement, greed, time and apathy, could consume the world and beyond.

After a successful mission for Earl Phenwick you return to receive your accolades. Upon your arrival it is discovered that the earl's child is missing. His daughter was last seen around a mirror of unknown power and an advisor believes that she may have made her way into a different world via the magical portal. Time to put on your hero hats!