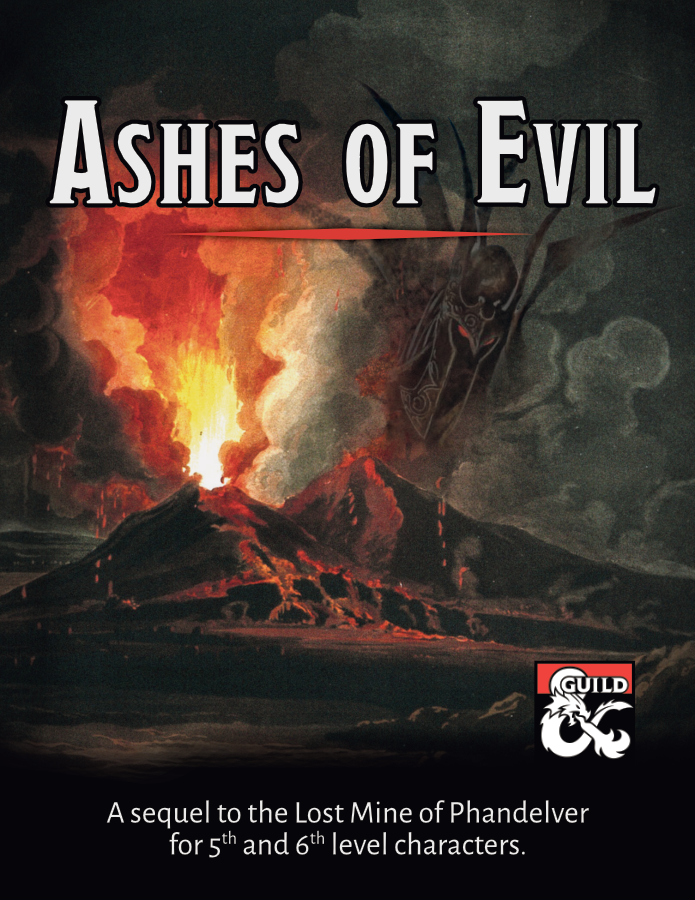
A sequel to the Lost Mine of Phandelver adventure for 5th and 6th level characters. An ancient forgotten evil threatens the Sword Coast once again! Our party of intrepid adventurers returns to Phandalin and Wave Echo Cave for what is at first glance a rescue and exploration mission. Prospectors for the Rockseeker mining concern have disappeared deep inside the flooded caverns that give the cave its name. The peril extends much deeper than mere lost explorers though, as the party stumbles upon an ancient, long-forgotten struggle between good and evil. Inexplicable cultists hide in ambush at every turn. A risky raft ride through treacherous underground waterways leads to an ominous discovery. Ancient ruins tell a story of the terrors of the night and a noble alliance sworn to fight them. A search for a powerful weapon of light leads the party on a mind-blowing, sky-high ascent into the unknown. Then, a whirlwind of danger: A rumbling volcano. Legions of undead. A desperate battle for the survival of the region. This adventure was designed as part of “The Next Adventure” Design Jam at the DMs Guild. It works best for a party that has just completed the Lost Mine of Phandelver adventure, but it can easily be inserted into any campaign. It is designed for a party of four to six 5th or 6th level characters and, based on playtesting, will take an average of about 3 sessions to complete.
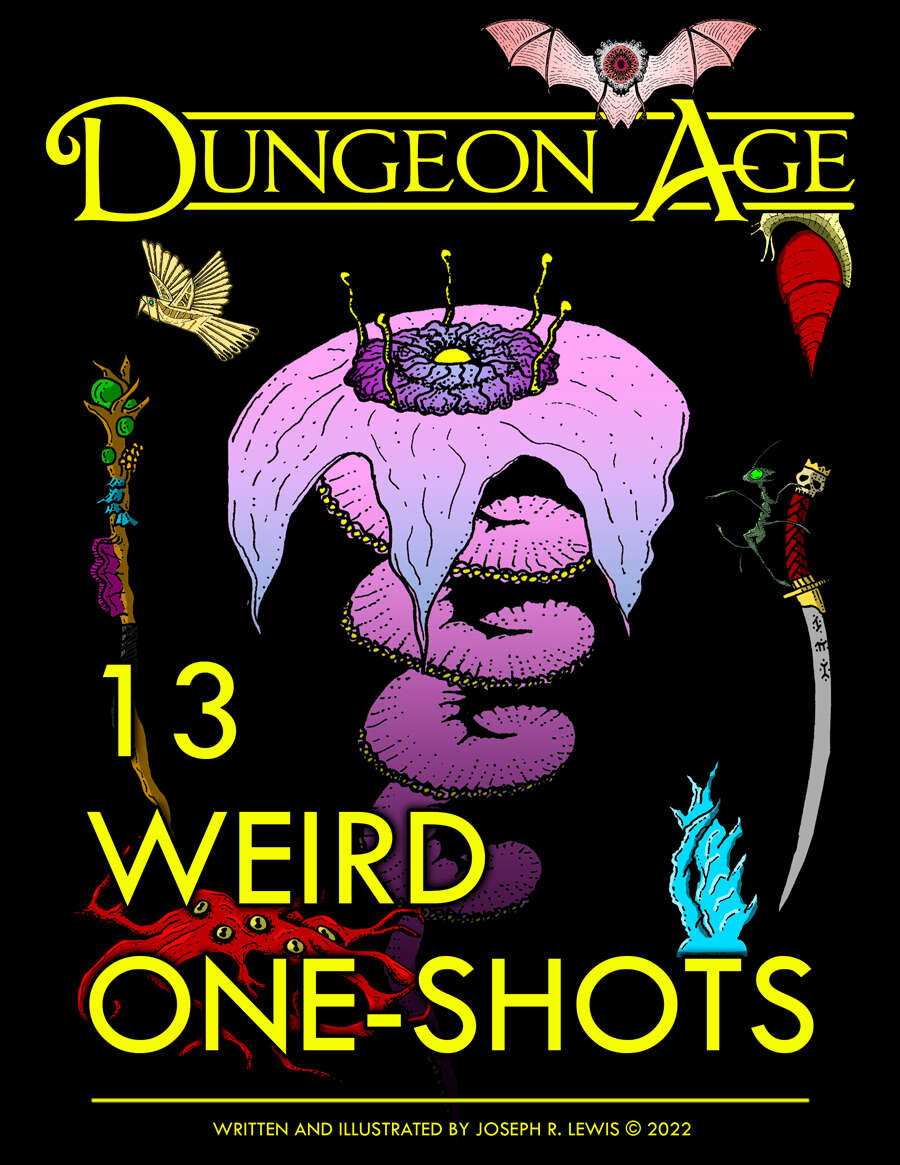
The ancient world of Harth withers beneath its dying sun…but it’s not dead yet. The land is still riddled with villages in danger, cultists in caves, angels gone mad, eldritch horrors making strange deals, raging dragons, bandits in the woods, and cruel monsters lurking in every shadow. These 13 adventures span a wide variety of locations, environments, creatures, and genres. They are meant for use as quick-play sessions or one-shots, or to be dropped into campaigns as side-quests. These are linear dungeons and mini-quests full of interactivity and strangeness, encouraging exploration, risk-taking, and creative combat. ADVENTURE TYPE: One-Shot / Low Level / Combat / Exploration / Village / Wilderness / City / Subterranean / Dungeon Delve DESIGN NOTES These 13 adventures are intended for low-level characters around Level 3 Overall, these adventures tend to be linear dungeon delves in caves or single buildings 93 unique encounter locations 69 original magic items 71 original monsters (with 28 illustrations) 13 maps/diagrams Each adventure runs 2-4 hours in length

Deenus was a necromancer that was put out of business a quarter century ago by a group of adventurers. Despite their success, the delvers were never able to discover the dungeon entrance. Your new benefactor may have information on that…

On Olarune 9th in the 918th year since the founding of the Kingdom, one of the city of Sharn's floating towers fell from the sky, crusing much of the Godsgate District. Now, a band of bestial savages searches Godsgate for the remnants of a broken statue, pulling the PCs into a plot that could destroy Sharn itself. The city of Sharn is one of the wonders of Khorvaire. Its towers seem to touch the sky, rising up more than a mile from the shores of the Dagger River. But it takes more than stone and steel to support the spires of Sharn: the area is suffused with mystical energy drawn from the plane of Syrania, which empowers all forms of flight. Yet with such wondrous inventions come wondrous tragedies, for when the magic of a flying tower fails, it has to land somewhere... Pgs. 18-29
Pursued by wolves and worse, the party must fight a running battle to take refuge at the relative safety of the Bittermoon Inn, a decrepit old inn high in the mountains. But night is falling, can they uncover the secrets of the inn and use them to survive the night? This adventure can be played as a stand alone one-shot, or can be used as a drop-in side quest to almost any campaign. It is suitable for a party of about 5 characters at the First Tier (Levels 1-4). The players must fight a running battle with wolves to reach Bittermoon, then they must discover the secrets of the inn before escaping through a smuggler's tunnel. Finally they must face off against their unseen opponent at Skull Cavern. There are four encounter maps included with this title.

Terrible news indicates that some vestige of the long-dead god Moander might be active in the forests near Elmwood. The Town Council is seeking clever adventurers to brave the perils of the Cormanthor forest to breach a lost wizard’s sanctum in search of a way to protect the town. Four hour adventure. Also contains information about the town of Elmwood. Part of the Elmwood Trilogy.
Abandon hope early and avoid the rush. A rebel leader is locked in a prison from which there is no escape. That's why the rebels called for you. The players are recruited to help rescue a prisoner of the Theocracy. The prison is very unique in that the cells are situated in a wheel formation. The prisoners are forced to push against their cell walls every day until after 1 full year (1 full rotation of the wheel), an opening appears in their cell and they are free to leave. There are many paths to success in this adventure, and it can play out more like a heist rather than a dungeon crawl. Pgs. 24-37
The town of Somber Hill is a quiet settlement in the foothills of a mountain range. A few days travel from the nearest city, the people of Somber Hill are a humble and self-reliant bunch. Unbeknownst to its people, the small town hides a sinister secret, some of the residents of Somber Hill belong to a cult that worships a long dead entity. Known only as The Dark One by their followers, this ancient being once called Old Somber Hill home. Their dark master is entombed in the catacombs beneath the town, and the cult hopes to resurrect their master with a blood sacrifice. The Crypt of Somber Hill is a Setting Neutral adventure and thus can be easily included in any existing story-line with minor alterations and adjustments or outright slotted into any existing campaign setting.
The PCs intervene in an attempted murder and are hired to find out what made a guy go mad. This leads them to search for Yenejg Togan's tower/a strange merchant in the nearby forest, where they discover that bugbears have moved in. After exploring the tower, finding the "merchant", and dealing with the bugbears and the lamia that caused the incident in the first place, they were still unable to get into Yenejg's inner sanctum without a key. The PCs return with the key and figure out how to use it to enter Yenejg's sanctum. They then explore it, dealing mostly with traps, and finally discover the resting place of the treasure Yenejg stole from the town. This adventure begins with a skill-based roof-top chase and can include some complex non-combat interactions with potentially hostile NPCs. It includes some semi-interesting traps as well as some nifty puzzles. No villain to speak of. Fool-hardy adventurers can get themselves killed, but some caution will result in only one extremely hard fight, and even that can be avoided if action is taken quickly. Pgs. 74-107

The Puzzling Tiemple of Flummox Heist is a linear dungeon crawl utilizing word puzzles and riddles written in the English language. Challenge your players and their characters with a brainteasing mix of puzzles, combat, and roleplay in this one-shot adventure for characters of 3rd, 4th, 5th, or 6th level which will delight fans of escape rooms and solve-at-home mystery adventures. Characters travel through a mysterious underground temple packed with nine carefully-crafted original puzzles, each one presented as a beautifully illustrated graphic and all woven carefully into the narrative. By doing so they unknowingly prepare themselves for ritual sacrifice by Flummox Heist, a trickster cleric who lurks at the heart of the temple. This unique adventure also features two exciting combat encounters - each with a story-relevant twist to standard monster mechanics - and a set of interesting and original NPCs to create an immersive story for you and your players. The unique puzzles are all designed to be short, self-contained, and satisfying to solve. There's no need for trial-and-error, no grinding through fiddly codebreaking, and no need to pause your game to look up information. Instead, each puzzle is crafted as a complete short challenge with that rewarding ah-ha! moment when the solution clicks. If the characters need a nudge in the right direction, the adventure includes a full Hints Appendix with a series of escalating clues so you can help them without giving away the solution. Of course, full answers are also provided in a Solutions Appendix. Perhaps you're looking for satisfying puzzles to add to your own adventures and campaign? Although this product is a complete one-shot adventure, each of the rooms can also be used independently, allowing you to use this product as a source of puzzles, enigmas, and conundrums which you can easily drop into your own game. Treat your puzzle-loving players and their characters to an amazing crossover of D&D 5E and escape-room-quality conundrums with The Puzzling Temple of Flummox Heist.

As the story goes, worshipers of Bahamut and worshipers of Gruumsh spent years warring. As the dead piled up, a Bahamut faithful crafted a weapon of devastating power. Most of the inventor’s peers balked at its use, but some felt it was justified. Those few who used the weapon were twisted into mad, dark beings by its corrupting power. The rest of Bahamut’s flock locked them and the weapon away in a dungeon prison. The dungeon and its terrible secret were long forgotten—until a group of rakshasas happened across the ancient tale. Now they seek the weapon for their own designs. Pgs. 132-137

This adventure is the ninth part of the Shackled City Adventure Path that began with "Life's Bazaar" (Dungeon #97) Wherein a group of diverse and talented allies learns the folly of not working together against a common foe.

Today we kick off offerings from Margou Campaign. This scenario takes a group of 3rd level PCs that come upon, with help, an abandoned manor home. Perhaps they will find treasure or maybe death is about to find them!

A temple once devoted to Solonor Thelandira deep in the elvish lands has been taken over by troglodytes during troubled times. Whilst the heroes of the realm were fighting elsewhere, a dark, abyssal evil was summoned into being. Can the characters purge the evil from the once sacred shrine? Will they be devoured by The Glutton?

This exploration adventure is planned to be played by 4 to 5 level 4 characters. The characters, led by old Maddie (who also hides a big secret), will go deep into the swamp and into the caves to retrieve the green heart.

Deep under the ruins of Maure Castle lie the Chambers of Antiquities, vaults designed by ancient wizards to store magic items even they didn't quite understand. A continuation of last year's hit "Maure Castle." This adventure is set under the infamous ruins of Maure Castle, a monolithic edifice of night-black granite built by a powerful family of wizards. The Maures sealed themselves into the dungeons below their castle long ago, and today these dungeons have become one of the most infamous adventuring sites in the land. Although estimates have placed the number of monster-infested and trap-haunted dungeon levels below Maure Castle at 17, there may in fact be even more. This adventure presents one of those dungeon levels in detail. Pgs. 76-101
A deathpriest hierophant of Orcus has turned the lower catacombs of a cemetery into a base for the undead and demonic horde it is gathering. The deathpriest loses control, however, with the arrival of a balor, and its carefully orchestrated forays to snatch victims have turned into wholesale slaughters. The PCs arrive in a nearby town to meet with a merchant who promised to sell them a long-coveted magic item. They are not altogether pleased to arrive to find the aftermath of a brutal attack—and no sign of their item. Pgs. 150-155
The Bloody Maul of Kord is a magic weapon protected by the priests of Kord, who occasionally allow a noteworthy hero to use it when going on a dangerous quest worthy of the storm deity’s blessing. Six months ago, Atrimos of Ardor took the Bloody Maul for a quest to the Caverns of Demise, hoping to end attacks to the realm being launched from the caverns. He never returned. Now, the clerics of Kord hire the PCs to go into the caverns to retrieve the Bloody Maul of Kord—and to find Atrimos, if possible. Pgs. 108-113

The promises of glory and the chance of riches draws you to Blasingdell, a small village near the infamous Stone Tooth. Within the rocky mountain lay the dwarven stronghold Khundrukar and the fabled Forge of Fury, to which a chance encounter provides you with the location of a hither-to unknown entrance. Are you brave enough to explore this mystery? Will it lead you to wealth or to your doom?

A fearsome hound has been seen prowling the mist-soaked moors surrounding Cabell Manor, but what is the foul beast searching for? Is there any truth to the rumors tying the family to an ancient devilish evil, or is it just a local superstition? If the want to solve the mystery our adventurers will need to keep their wits as sharp as their swords. NOTE: The title of this adventure is incorrect in the store. The version you will receive upon purchase and download is titled as this entry suggests.