
The Great Trial is a 5e adventure for characters starting at 7th-level and ending at 10th-level. It's a dungeon consisting in the 3 levels, where the first level is the lowermost one and the last is the uppermost one: First level is composed by mean traps, puzzles and combat; Second level is a labyrinth with a construct Minotaur - the Minotal - and an iron wyvern, brand new creatures; The last and uppermost level is actually a jungle-like demi-place filled with dinosaurs in an open world format. Aenor Gleenwith, a powerful elf wizard, wants to make history alongisde Acererak for his Tomb of Horror and Halaster for his Undermountain. So he created his own dungeon. To test its efficiency, he captures adventurers and puts them in the lowermost level, where they need to work together to survive and leave the dangerous place. At the end, Aenor himself greets the group offering them apologies for the harm caused, to fix all damage caused and also rewarding them for the forced help. This module can be run in any setting, campaign, or as a one-shot. It should take around 10 to 14 hours to complete it since it contains 3 Chapters.
/pic1109405.jpg)
Side-Trek adventure When your PCs gain access to the teleport spell, their whole world changes. That simple spell opens up instantaneous, long-distance travel. No more long overland journeys or dangerous retreats through hostile territory. All it takes is clasped hands and a word from the wizard, and poof! The PCs are where they want to go. Except that it isn’t that simple, because teleport isn’t foolproof. The off-target teleports are a matter of scattering your PCs someplace else on the map and forcing them to get their bearings and make the long overland journey anyway. But this Side Trek focuses on the really intriguing column on the teleport chart: “similar area.”

Lost Tombs, Volume 2 The lich Lyzandred: a madman, an undead archmage, a survivor of the twin cataclysms that destroyed tow great empires. His name invokes fear in the hears of the smallest children, the bravest warriors, and the wisest sages. Like a malicious cat, the lich toys with all who stumble into his maze, tormenting them with strange puzzles and obscure riddles, monsters and demons, weird traps and dangerous magics. All who enter the crypt of Lyzandred find themselves scarred with his rune, proof of their visit -- and their folly. But there is a method to the madness of Lyzandred, a purpose to his twisted games. If you're lucky, you might even live to learn about it. The Lost Tombs series begins with Star Cairns (Volume 1) and concludes with The Doomgrinder (Volume 3). Each adventure is playable separately, or they can be linked to form an epic-length story. TSR 9580

The Legend of the Black Monastery Two centuries have passed since the terrible events associated with the hideous cult known as the Black Brotherhood. Only scholars and story-tellers remember now how the kingdom was nearly laid to waste and the Black Monastery rose to grandeur and fell into haunted ruins. The Brothers first appeared as an order of benevolent priests and humble monks in black robes who followed a creed of kindness to the poor and service to the kingdom. Their rules called for humility and self denial. Other religious orders had no quarrel with their theology or their behavior. Their ranks grew as many commoners and nobles were drawn to the order by its good reputation. The first headquarters for the order was a campsite, located in a forest near the edge of the realm. The Brothers said that their poverty and dedication to service allowed them no resources for more grand accommodations. Members of the Black Brotherhood built chapels in caves or constructed small temples on common land near villages. They said that these rustic shrines allowed them to be near the people they served. Services held by the Brothers at these locations attracted large numbers of common people, who supported the Black Brotherhood with alms. Within 50 years of their first appearance, the Black Brotherhood had a number of larger temples and abbeys around the kingdom. Wealthy patrons endowed them with lands and buildings in order to buy favor and further the work of the Brothers. The lands they gained were slowly expanded as the order’s influence grew. Many merchants willed part of their fortunes to the Black Brotherhood, allowing the order to expand their work even further. The Brothers became bankers, loaning money and becoming partners in trade throughout the kingdom. Within 200 years of their founding, the order was wealthy and influential, with chapters throughout the kingdom and spreading into nearby realms. With their order well-established, the Black Brotherhood received royal permission to build a grand monastery in the hill country north of the kingdom’s center. Their abbot, a cousin of the king, asked for the royal grant of a specific hilltop called the Hill of Mornay. This hill was already crowned by ancient ruins that the monks proposed to clear away. Because it was land not wanted for agriculture, the king was happy to grant the request. He even donated money to build the monastery and encouraged others to contribute. With funds from around the realm, the Brothers completed their new monastery within a decade. It was a grand, sprawling edifice built of black stone and called the Black Monastery. From the very beginning, there were some who said that the Black Brotherhood was not what it seemed. There were always hints of corruption and moral lapses among the Brothers, but no more than any other religious order. There were some who told stories of greed, gluttony and depravity among the monks, but these tales did not weaken the order’s reputation during their early years. All of that changed with the construction of the Black Monastery. Within two decades of the Black Monastery’s completion, locals began to speak of troubling events there. Sometimes, Brothers made strange demands. They began to cheat farmers of their crops. They loaned money at ruinous rates, taking the property of anyone who could not pay. They pressured or even threatened wealthy patrons, extorting money in larger and larger amounts. Everywhere, the Black Brotherhood grew stronger, prouder and more aggressive. And there was more… People began to disappear. The farmers who worked the monastery lands reported that some people who went out at night, or who went off by themselves, did not return. It started with individuals…people without influential families…but soon the terror and loss spread to even to noble households. Some said that the people who disappeared had been taken into the Black Monastery, and the place slowly gained an evil reputation. Tenant farmers began moving away from the region, seeking safety at the loss of their fields. Slowly, even the king began to sense that the night was full of new terrors. Across the kingdom, reports began to come in telling of hauntings and the depredations of monsters. Flocks of dead birds fell from clear skies, onto villages and city streets. Fish died by thousands in their streams. Citizens reported stillborn babies and monstrous births. Crops failed. Fields were full of stunted plants. Crimes of all types grew common as incidents of madness spread everywhere. Word spread that the center of these dark portents was the Black Monastery, where many said the brothers practiced necromancy and human sacrifice. It was feared that the Black Brotherhood no longer worshipped gods of light and had turned to the service of the Dark God. These terrors came to a head when the Black Brotherhood dared to threaten the king himself. Realizing his peril, the king moved to dispossess and disband the Black Brother hood. He ordered their shrines, abbeys and lands seized. He had Brothers arrested for real and imagined crimes. He also ordered investigations into the Black Monastery and the order’s highest ranking members. The Black Brotherhood did not go quietly. Conflict between the order and the crown broke into violence when the Brothers incited their followers to riot across the kingdom. There were disturbances everywhere, including several attempts to assassinate the king by blades and by dark sorcery. It became clear to everyone that the Black Brotherhood was far more than just another religious order. Once knives were drawn, the conflict grew into open war between the crown and the Brothers. The Black Brotherhood had exceeded their grasp. Their followers were crushed in the streets by mounted knights. Brothers were rounded up and arrested. Many of them were executed. Armed supporters of the Black Brotherhood, backed by arcane and divine magic, were defeated and slaughtered. The Brothers were driven back to their final hilltop fortress – the Black Monastery. They were besieged by the king’s army, trapped and waiting for the king’s forces to break in and end the war. The final assault on the Black Monastery ended in victory and disaster. The king’s army took the hilltop, driving the last of the black-robed monks into the monastery itself. The soldiers were met by more than just men. There were monsters and fiends defending the monastery. There was a terrible slaughter on both sides. In many places the dead rose up to fight again. The battle continued from afternoon into night, lit by flames and magical energy. The Black Monastery was never actually taken. The king’s forces drove the last of their foul enemies back inside the monastery gates. Battering rams and war machines were hauled up the hill to crush their way inside. But before the king’s men could take the final stronghold, the Black Brotherhood immolated themselves in magical fire. Green flames roared up from the monastery, engulfing many of the king’s men as well. As survivors watched, the Black Monastery burned away, stones, gates, towers and all. There was a lurid green flare that lit the countryside. There was a scream of torment from a thousand human voices. There was a roar of falling masonry and splitting wood. Smoke and dust obscured the hilltop. The Black Monastery collapsed in upon itself and disappeared. Only ashes drifted down where the great structure had stood. All that was left of the Black Monastery was its foundations and debris-choked dungeons cut into the stones beneath. The war was over. The Black Brotherhood was destroyed. But the Black Monastery was not gone forever. Over nearly two centuries since its destruction, the Black Monastery has returned from time to time to haunt the Hill of Mornay. Impossible as it seems, there have been at least five incidents in which witnesses have reported finding the Hill of Mornay once again crowned with black walls and slate-roofed towers. In every case, the manifestation of this revenant of the Black Monastery has been accompanied by widespread reports of madness, crime and social unrest in the kingdom. Sometimes, the monastery has appeared only for a night. The last two times, the monastery reappeared atop the hill for as long as three months…each appearance longer than the first. There are tales of adventurers daring to enter the Black Monastery. Some went to look for treasure. Others went to battle whatever evil still lived inside. There are stories of lucky and brave explorers who have survived the horrors, returning with riches from the fabled hordes of the Black Brotherhood. It is enough to drive men mad with greed – enough to lure more each time to dare to enter the Black Monastery.

Want to discover the incredible world of Eberron? You won't even need a DM... This adventure is written in gamebook style (think Fighting Fantasy / Lone Wolf) but with 5e mechanics. Narrative entries guide you through the adventure and remove the need for a Dungeon Master. Custom combat sheets run monster tactics during combat, and battle maps for all possible encounters are included in a zip file. This is the pdf version. For the Fantasy Grounds version, click here. The numeric entries are also hyperlinked, so all you need to do is click and the pdf will automatically navigate you to the next entry, removing the need to scroll or enter a page number. The story begins with you, the PC, deep in study in the Morgrave University Library. Then, a mysterious figure slips you a letter and disappears before you can discern their identity. Let the adventure begin...
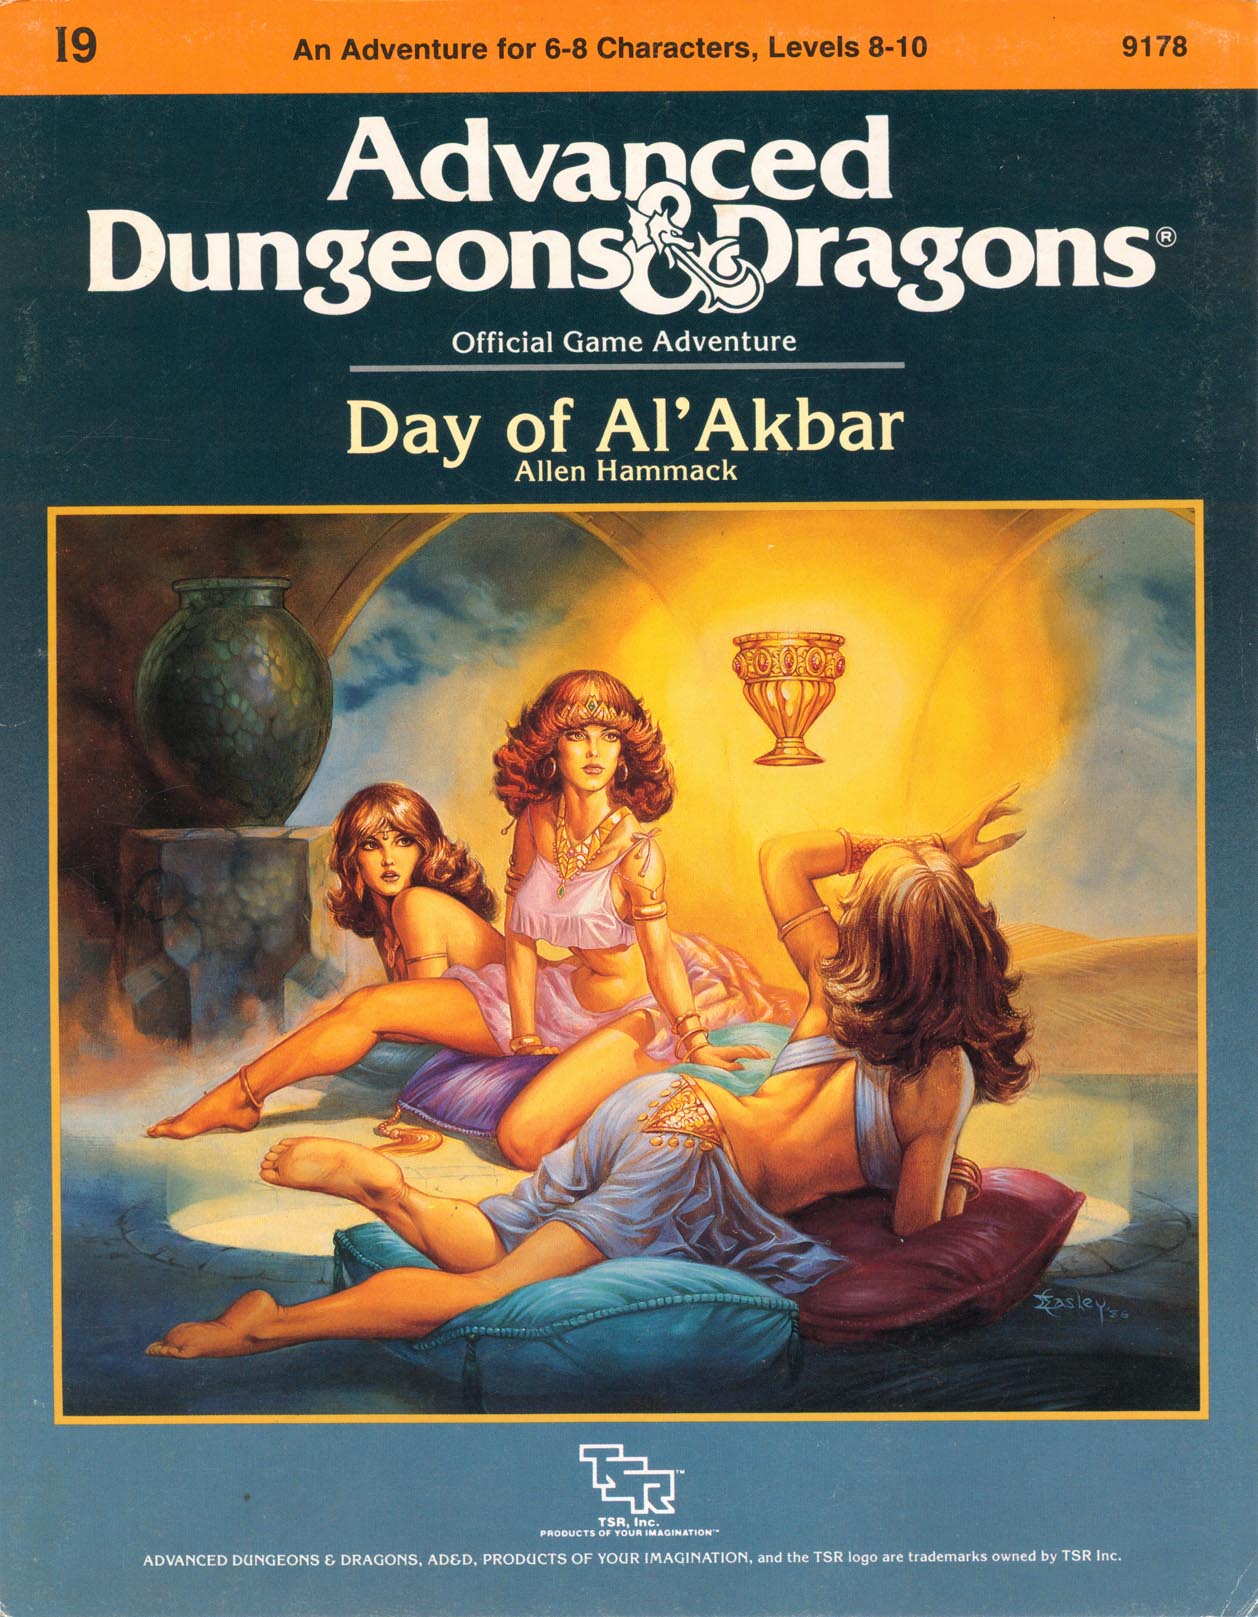
The land of Arir - a once peaceful desert country, dotted with oases, teeming with caravans - fell into the hand of infidels. The ruler, the dearly loved Sultan Amhara, was killed in the battle for the capital city of Khaibar. He left behind one of the greatest treasure stores ever amassed - jewels and coins, more than anyone had ever seen before or since - and in addition, the Cup and Talisman of Al'Akbar. A deadly plague sweeps your land. The holy men say that if only they had the Talisman, they could create cures for this dread disease. Many adventurers have tries and failed to find the Cup and Talisman. Now it is your turn. Find these treasures, and save your people! The journey is exciting, but treacherous. Do not be distracted by exotic sights and sounds, the strange foods. You must avoid being discovered by Al'Farzikh and his brigands, as you infiltrate the palace. Be wary - what is most beautiful may be most deadly, and what seems useless may be priceless. TSR 9178
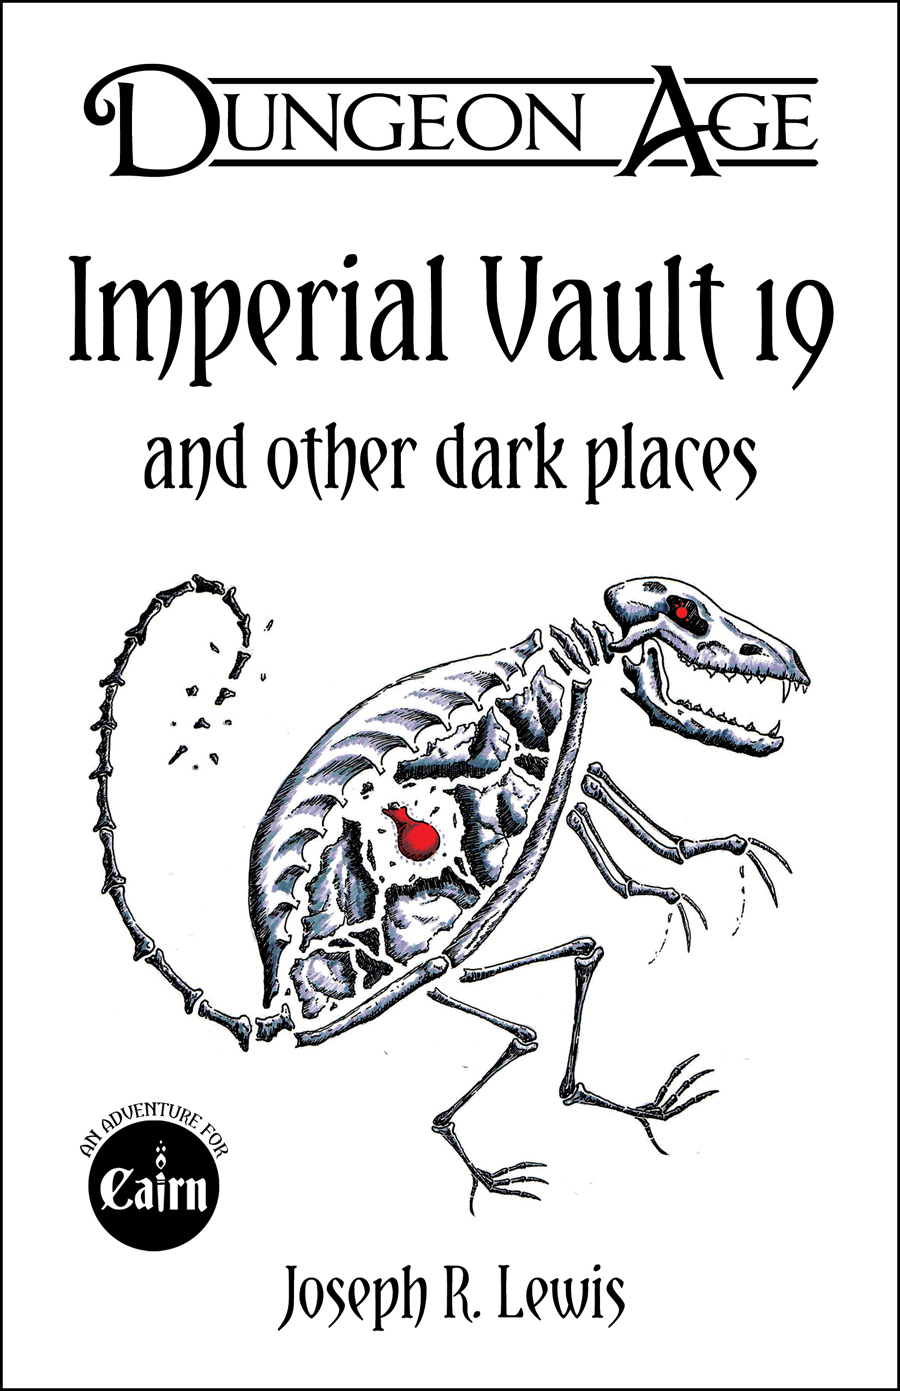
A collection of five one-shot adventures for Cairn! Imperial Vault 19 A grieving widow in the forest begs you to save her baby. A hedge witch has taken the infant down into an old imperial vault where she uses the child’s Chaos tears in alchemical potions. And who knows what old treasures might still be hidden in the vault? Unless it’s not that kind of vault… Barrow of the Blood Baron Face off against vampire bats, vampire thralls, and a vampire noble, as well as a few other creatures that have clawed their way into this once-armored vault. Discover works of art, exotic wines, enchanted clothing, and filthy weapons. Negotiate with the guards and intruders alike, using clever words or whatever stake-like objects are close at hand! Tomb of the Tin Templar Encounter electric jellyfish, tinker gnomes, and the rusted corpse of the noble Sir Tristan, as well as a few other creatures that have drifted into this marvelous mechanical vault. Discover windup toys, clockwork companions, and baffling devices. Negotiate with the guards and intruders alike, using clever words or whatever rusty objects are close at hand! Priory of the Primate Priest Defy root trolls, monkey monks, and a beguiling dryad, as well as a few other creatures that have found their way into this marvelous living vault. Discover magical armor, haunted skulls, and the bonest of the apes' victims. Negotiate with the guards and intruders alike, using clever words or whatever living objects are close at hand! Fane of the Fey Fellmonger Match wits with guild goblins, pixies, and a living skin suit, as well as a few other creatures that have spirited their way into this disturbing leathery vault. Discover arcane clothing, deadly sewing tools, and a fey lord who isn't entire dead yet. Negotiate with the guards and intruders alike, using clever words or whatever sewing objects are close at hand! New PC Background: The Dungeoneer! In addition to some unusual delving gear, select one of 10 unfortunate results of a recent delve-gone-wrong, as well as one of 13 helpful boons or tools from a recent delve-gone-right.

Your chase to wipe out the vampires of Undermountain leads to the Slitherswamp. The master vampire is close at hand! Part Three of the Vampire Hunt trilogy.

Enter the Dwarven Forge world of Mythras with the first part of this new city and miniatures based trilogy, The Hidden Valoria Campaign. Discover the world built to provide tabletop with unique miniature opportunities using Dwarven Forge licensed products. Take on the adventure as newly relocated members of the neighborhood of the Patina Court. Battle gangs, undead, and other threats as you try to make a living inside this ancient and mysterious city. This adventure is formatted to both 1E & 5E gaming rules. Also available in PDF.

Giants have been raiding the lands of men in large bands, with giants of different sorts in these marauding groups. Death and destruction have been laid heavily upon every place these monsters have visited. This has caused great anger in high places, for life and property loss means failure of the vows of noble rulers to protect the life and goods of each and every subject -- and possible lean times for the rulers as well as the ruled. Therefore, a party of the bravest and most powerful adventurers has been assembled and given the charge to punish the miscreant giants. This module contains background information, referee's notes, two level maps, and exploration matrix keys. It provides a complete module for play of ADVANCED DUNGEONS & DRAGONS, and it can be used alone or as the first of a three-part expedition adventure which also employs DUNGEON MODULE G2 (GLACIAL RIFT OF THE FROST GIANT JARL) and DUNGEON MODULE G3 (HALL OF THE FIRE GIANT KING). TSR 9016

Lost within the ruined House Cannith citadel of Whitehearth, an arcane workshop somewhere in the perilous Mournland, is the key to constructing a terrible magic weapon. Agents of the Emerald Claw will stop at nothing to recover the ancient device. As malevolent forces hunt for the artifact, only the most resourceful heroes will reach Whitehearth first and discover the secrets that lie within. "Shadows of the Last War" is a stand-alone adventure for the Dungeons & Dragons game that will immerse your characters in the Eberron campaign setting. Designed to challenge 2nd-level D&D heroes, it pits them against one of Eberron’s most nefarious organizations.

The Creche of Set is a companion adventure made to go along with the events unfolding in Folio #10 (DF3 Forgotten Temple of Tefnut). It contains the information needed to run a side advenute during the events of The Hidden Valoria Campaign. After finding the secret under-passage in the fallen Temple of Tefnut, the party can descend through a stair located between two rooms. Down in the dark they will encounter a fallen tribe of Lizardmen who are now influenced by the mummy Aman-Utep in the halls above. Destroying this tribe, and recovering an artifact they possess, could prove highly valuable to the completion of the Lost Temple adventure. This adventure is formatted to both 1E & 5E gaming rules.
The town of Somber Hill is a quiet settlement in the foothills of a mountain range. A few days travel from the nearest city, the people of Somber Hill are a humble and self-reliant bunch. Unbeknownst to its people, the small town hides a sinister secret, some of the residents of Somber Hill belong to a cult that worships a long dead entity. Known only as The Dark One by their followers, this ancient being once called Old Somber Hill home. Their dark master is entombed in the catacombs beneath the town, and the cult hopes to resurrect their master with a blood sacrifice. The Crypt of Somber Hill is a Setting Neutral adventure and thus can be easily included in any existing story-line with minor alterations and adjustments or outright slotted into any existing campaign setting.

Introductory Adventure that came bundled with some versions of the Holmes Basic version of D&D. Two powerful adventurers, Rogahn the Fearless and Zelligar the Unknown, have apparently deserted the stronghold they once occupied. The PCs have discovered a map which leads to it. First published in 1978, this is a basic dungeon crawl introducing players to many of the dungeoneering tropes. Location descriptions are provided but it is up to the DM to fill in the actual monsters and treasure for each one. TSR 9023

Vault of the Blood Mage is a deadly one-shot dungeon adventure for 4-6 8th level characters. Player Characters find themselves locked in a dungeon room with no memory of how they got there. Inflicted with a magical disease that is slowly turning them into mindless zombies, the dungeoneers have to work quickly to find the antidote and escape the vault before succumbing to the deadly affliction. To do so, the characters must avoid deadly traps, fight unique monsters, and solve fiendish puzzles.

Years ago a Gnome female named Carlota retired from adventuring and built a small tower not far from Dano’s Point. While the illusionist/tinker kept to herself her home was reputed to have a cache of magical items from years on the trail. It has been several years since anyone has seen the diminutive woman and she is believed to be deceased. As you begin your adventuring career you decide that a trip to the tower is in order. If Carlota is alive, perhaps she can give you advice, if she isn’t perhaps you can help yourselves to some of her items.

Barrow of the Culder is the initial adventure in the dangerous land of Provincia. Carrying on from this month’s free adventure, this scenario brings the adventuring party together in the small community of Merrydale. Two PCs will be meeting on the hill outside of town and then move forward to find additional members of the group as well as their first challenge. One PC will have received a job to find a missing minor artifact and have orders to gather any assistance…hence the party forms and has a common goal! After gathering their equipment they will follow a hidden trail to the final resting place of the feared warlord named the Culder.
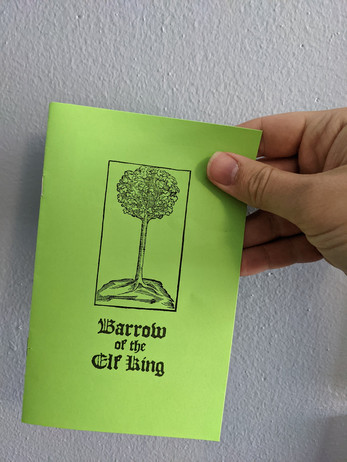
"Barrow of the Elf King" is an evocative and intricate adventure module, specifically tailored for a party of 3-4 level one adventurers using "The Vanilla Game" rule set. This adventure delves into the mystical and eerie depths of an ancient barrow deep within the Old Forest, a place shrouded in darkness and mystery. It offers an experience that combines puzzles, combat, moral choices, and exploration, all set within a hauntingly atmospheric setting. "Deep in the Old Forest, where the trees grow tall and thick, where the sun rarely pierces the canopy, is an earthen mound. No birds sing in this part of the forest, no wind blows. The leaves of the trees seem larger, the canopy thicker. Even at mid-day, it is almost too dark to see" The HTML web version is free.

Some dozens of leagues to the north and west of the STEADING OF THE HILL GIANT CHIEF (Module G1 of this series), amidst the tallest mountain peaks, is the stronghold of Grugnur, Lord of Frost Giants. As frost giants have been amongst those who have been in the reaving bands, the party is to deal with them as the hill giants have been dealt with. Death and destruction are to be meted out to the frost giants in the same measure they gave to the peoples below. This module contains background information, referee's notes, two level maps, and exploration matrix keys. It provides a complete module for play of ADVANCED DUNGEONS & DRAGONS, and it can be used alone or as the second of a three-part expedition adventure which also employs DUNGEON MODULE G1 (STEADING OF THE HILL GIANT CHIEF) and DUNGEON MODULE G3 (HALL OF THE FIRE GIANT KING). TSR 9017

The adventures in Dalentown continue in The Darkness Beneath Dalentown. Workers in the town’s sewers have stumbled upon the long abandoned halls of the dwarves that once settled beneath this region. What they’ve found is a haunted library. What they’ve woken is something far more sinister! The Darkness Beneath Dalentown features hordes of oozes, undead, and demons festering for years in an ancient dwarven mining stronghold. Now, they are slowly working their way to the surface, and the folk of Dalentown are in dire peril!