
A mysterious adventurer stumbles into an inn in the night, looking for an escort to the nearest temple. Before the night is over, he inexplicably disappears, leaving a trail of corruption leading into the nearby woods as packs of twisted forest creatures emerge to plague travellers. Pgs. 83-89

SB16 – Zagzon’s Vault has an upper level (16th) group of PCs discovering an old tomb being discovered by a group of Halfling children. The remains of an evil necromancer lies within but he’s not quite “dead” and neither are his followers that were also entombed with him. Traps, tricks, and hurt lie within this adventure and it is not for the faint of heart!

An omnious encounter with a fortuneteller sends a party of adventurers on a 200-mile journey across the Lands of Intrigue. While traveling throught the towns and terrain (detailed here for the first time) that lie in their path, they hear rumors and obtain clues about their mission. Their ultimate destination is Castle Spulzeer, a once proud stronghold that has become a den of terror. When the heroes enter the haunted keep, they meet a terrifying trio of residents: a madman armed with stolen magical power, a liche whose secret laboratory houses untold horrors and treasure, and a furious ghost bent on revenge. These three ensnare the party in their fight over an ancient weapon. Each will stop at nothing to keep it from the other two. The heroes must choose with whom they will ally - and the wrong choice could lead to their doom. Castle Spulzeer is an adventure complete in itself. However, as a crossover story, it offers every Dungeon Master a choice between two endings. The first leaves the party in the Realms. The second transports the characters to the Demiplane of Dread, where the plot continues in the Ravenloft adventure The Forgotten Terror. For 4 to 6 Characters of Levels 8-12 This conversion guide allows DMs to run the original module with 5th Edition rules. To use this conversion guide you will need a copy of Castle Spulzeer, originally available in hard-copy and now for sale in digital format on the DMs Guild. Visit Classicmodulestoday.com for instructions on creating your own classic module conversions and selling them on the DMs Guild. Castle Spulzeer was originally scheduled for publication by TSR in June 1997. Then, near-bankruptcy caused a total failure of TSR's schedule, resulting in no books being published from February through the very end of July. Some books would be delayed for over a year, and others would disappear altogether, but Castle Spulzeer was relatively lucky: it was just delayed four months, until October 1997. The reason may well have been its theming, and its crossover with the Ravenloft line, which made Castle Spulzeer a great Halloween release. Castle Spulzeer has an even more far-reaching connection: its ending can lead players to the demiplane of Ravenloft and The Forgotten Terror adventure. This was probably intended as a bit of advertising for Domains of Dread (1997), the third edition of Ravenloft which was released in August 1997. In other words: in their last days, TSR was working very hard to cross-market their products, but they didn't live long enough to see the success of the Spulzeer-Intrigue-Dread connection.

Old Olga and Young Yvonne is a four- to six-hour adventure for 1st-4th level characters, designed for Dungeons & Dragons 5th Edition, with a village theme, hags and witches, an abducted child to save, some horror, and mysteries to solve! Willow Creek, a remote farming village, is in trouble: livestock is going missing and reappears gutted in the woods, crops fail and fields blight - and now the bastard child of young Yvonne has gone missing as well. What no one in the village knows: Yvonne is a budding witch secretly feuding with Old Olga, an evil hag in the woods - who now demands a human sacrifice from Yvonne in return for her child. Who can sort out this mess, bring back the innocent child, prevent a murder, and return peace and quiet to Willow Creek? This adventure can also be used as a mini-campaign sandbox. With the branching and inter-connecting scenes, locations, and NPCs it provides, combined with the guidance on how to run a "village adventure", the material provided here on more than 60 pages can easily cover up to eight hours of playtime. Included with this adventure are: + an original custom creature, the young witch + 12 original fleshed out NPCs, including personality traits and roleplaying tips + a toolset for creating villager NPCs quickly + 7 hand-drawn maps of important locations + 4 alternative story rewards (depending on how the adventure resolves)

Nightmares that kill, a mysterious thief that only steals knick-knacks, tales of a huge beast terrorising fisherfolk, an inn with disappearing guests, discoveries of hidden magic portals and rumours of an assassin at large: None of these things are enough to stop the ever-flowing tide of traders and travellers crossing the Bridge of Fallen Men, but its protectors - Cormyr's Purple Dragons - are short on time, and courage... ...will adventurers answer the call?

The Land of Ash and Smoke. Once a hellish landscape of volcanic activity, now a nightmare region that hosts one of the scattered Soulmonger fragments. The fragment’s burgeoning power attracted the attention of the Red Wizards of Thay and, thankfully, adventurers who are willing to risk life and limb to keep the fragment from these vile arcanists. Can you reach the fragment before the Red Wizards make off with it? The hunt is on. Part Two of the Broken Chain Series. A Four-Hour Adventure for 17th-20th Level Characters

Many of the local lords had gathered for a peace moot. A perfect opportunity for the demon-possessed Aeldrith Forkbeard to murder them all in cold blood. The PCs, attending the moot, must now flee for their lives. Harried by a Northlander warband, the party is forced to flee into the dreaded Witchwood. To reach the safety of the Kingdom of Marshes they must traverse the depths of the forest, avoiding Northlander raiders and the strange creatures of the Witchwood. The adventure also takes the PCs into the Feywild, where time runs strangely and memories are fragile. Finally, they must face the chilling Gatekeeper guarding the Feywild portal that allows the PCs to return to the Material Plane. Into the Witchwood is a generic adventure suitable for use in the Moonshae Isles. The adventure includes a map of the area, three new creatures and a new legendary magic item, the Circle of the Forest God.

A blood curdling SCREAM shatters our adventurers rest as they set up camp for the evening. Without warning the forest comes alive and a heroic struggle begins, as our adventurers battle to avoid becoming the forest's latest victims. Take your players deep into a cursed glade on a dark and stormy night to confront an evil Druidess, and a horrifically corrupt tree...

When a Thayan research expedition returns from the Glacier of the White Wyrm with only two survivors that are reduced to whispering about an ancient pyramid under the ice, perhaps it is time to discover just what scares the life out of a nation of necromancers. The events of DDEP2 Mulmaster Undone resulted in terrible geographic upheaval all around the southeastern region of the Moonsea. Massive landslides, earthquakes, tidal waves, and gnashing tornados devastated the land and the city of Mulmaster was nearly scrubbed from the face of Faerun. Fortunately, these events also revealed previously hidden artifacts—trinkets, mostly—from the ancient Netherese all around the city. The Thayans have long held an interest in the port city and wasted no time in assisting in the rebuilding efforts. They simply asked that a blind eye be turned to their archaeological interests, and in return they would continue to spend their own resources (at no expense to the Mulmasterites or even the High Blade) to rebuild the city, bigger and better than before. It wasn’t long before their interests paid off with the discovery of a research laboratory beneath the Glacier of the White Worm, far to the east of Mulmaster and nestled in the mountains. The Thayans sent a sizable expeditionary force but only two acolytes returned. The visiting Zulkir has found this particularly troublesome, and with the assistance of Rastol Shan, the head of the Cloaks, has arranged for a mercenary force to perform a more pointed investigation of the area. In return the Thayan noble has promised significant compensation. Upon arrival at the dig site, the characters are quick to discover that the laboratory hides ancient and palpable evil. The purpose of the facility can be discerned with careful investigation, and the effect of the still-active fragment of the Dark Obelisk has empowered (some may say attracted) servants of the Worm that Walks. Danger and death await, certainly, though the characters always have the option of running away and living to fight another day…

A fiend lurks among the Black Blade goblins. A shapeshifting barghest fashioned by the General of Gehenna to exact revenge on all goblin-kind. It’s aim: to kill as many goblin leaders as possible… A masked goblin approaches the party asking for help. Two tribe leaders are dead. But a rival for chief has control of the crime scene. Will the party discover the barghest among the goblin ranks? Can they stop this imposter before it strikes again? Adventure Overview The adventure’s story is spread over 4 parts and takes approximately 4 hours to play. The adventure begins with a Call to Action scene. Part 1: Goblin Politics. Krill sends his emissaries to implore help from any strong intermediary. The party is asked to investigate the murder of Thrawn in Dringly’s lair. This is Story Objective A. Part 2: The Opposition. Gain entry into Dringly’s lair and investigate the murder of Thrawn. Gather enough evidence to find the killer. This is Story Objective B. Part 3: To The Lair! Now that the players have determined the barghest (Yeep) is to blame, they need to get to Krill’s lair quickly as he is in imminent danger. This is Story Objective C. Part 4: The Barghest.When the players arrive at the lair, they need to get to Krill and expose and defeat the barghest. This is Story Objective D. Adventure Background A barghest named Yeep has begun its onslaught of attacks against the Black Blade goblins. Starting with Chief Gnar, then his second in command Thrawn, the barghest is moving methodically down the line of command. Krill is now chief. But he has some problems: Two leaders of the Black Blades are dead. Who killed them and why? Is he next? Dringly, the next in command, has decided to take his lair for himself, declaring himself Chief of the Black Blades. Who are the Black Blades? The Black Blades are a tribe of goblins in the local area. They are known for dipping their blades in a dark black substance. It is rumored these blades are poisonous. The Black Blades regularly attack passersby on the road to rob them. The Black Blades have two lairs, one run by a chief who leads the whole tribe, and another overseen by a boss lieutenant. The Black Blades have a well-established pecking order which is how Krill stands to become chief. The next in line is Dringly, who has also declared himself chief and wants Krill dead. Krill suspects that there is something suspicious about two leaders being killed within a day of each other, but he has already burned Gnar’s body without any investigation. He needs to investigate the body of Thrawn, but it is in Dringly’s lair. Krill wishes to avoid direct confrontation with Dringly at the present for three reasons: 1) Any violence would only kill his own tribe members and further divide the lairs. 2) He believes there is still hope for negotiation to reunite the Black Blades. 3) He believes that if he were to attempt negotiations himself, Dringly would kill him. This adventure features: Two maps. Ready for your favorite Virtual Tabletop. A full color pdf. A black and white pdf. One custom monster, a reprint of barghest, all others available in the Monster Manual. Four hours of entertainment involving: roll playing a goblin bard, investigating a murder scene, tracking down a barghest before it strikes again. Applicable to any setting.

This exploration adventure is planned to be played by 4-5 level 4 characters. They will venture into the temple of Amaunator to cleanse it of corruption, give rest to its inhabitants and recover a precious lost artifact English and Spanish

The ruined wizard tower in the Marsh of Chelimber may hold a clue to defeating the super-intelligent hill giant, Bad Fruul, and prevent him troubling the town of Parnast. To find the tower, adventurers must overcome the watery magic of the fetid marsh and discover or clear a route to the ruins of a previously lost tower.

Arcane Moon is an introductory adventure inspired by 90s Magical Girl anime: drawing on Magic Knight Rayearth, Cardcaptor Sakura and Sailor Moon it's a story of love, friendship, treason and big villains. Arcane Moon is Magical Girl on Fantasy Land. It has been three months since the Arcane Scouts came together as a team. In that time they have managed to stay one step ahead of The Major Arcana, the personal guard of The Empress. However, unknown to them, one of her generals, The Hermit has infiltrated the city of Shealin and, posing as a merchant, has located two of the five shards needed to forge the Ioun Crystal. Jealous of his success The Priestess and The Hierophant are plotting against him, expecting to prove themselves to the dark mistress. The adventure takes place across two or three in-game days going from the latest fashion show on town to a mysterious tower hidden south of the city. Expect to fight several bad guys just to find out there was a bigger badder guy behind them.

Modrons, Mephits & Mayhem is a Dungeons & Dragons 5E tier 2 adventure for three to five characters of levels 5-8. It is primarily set in a modron-designed research facility that has been abandoned by its creators but retains guardians that are still active. Additionally, two groups have broken into the facility with their own goals in mind; the githyanki and their red dragon cohort are antagonistic and provide the main source of combat in this adventure, while a modron traveling with a few mephits may prove friendly although ultimately troublesome. Inspired by adventure games in which the protagonists explore baroque, esoteric technological fortresses, and seeded throughout with factions that sport competing and often bizarre goals, Modrons, Mephits & Mayhem is sure to test the mettle of any group of players, and will provide endless amusement for Dungeon Masters seeking something different from the typical hack-and-slash dungeon crawl. This 70-page adventure features: *Two wilderness areas, random wilderness encounters, and a massive, interlinking 3-level dungeon filled with bizarre puzzles. *Ancient machinery powered by elemental portals, all of which can be activated, turned off, or manipulated by the player characters and the various factions within the modron facility. *Planar creatures like githzerai and githyanki, modrons, mephits, and elemental guardians, skillfully placed into the High Moor area of the Forgotten Realms setting. *Monsters and NPCs that have detailed (yet easy to run!) personalities and goals that will provide tons of roleplaying opportunities. *Notes and sidebars on running the NPCs with added complexity, or simplifying the NPCs' motives to make the adventure more straightforward. *Tactics notes for every single encounter! *An appendix that features all monster stat blocks, and both tagged (DM) and untagged (Player) versions of the dungeon maps. *Wilderness hex map by Elven Tower Cartography! Three interlinked dungeon levels by Dyson Logos...and one of them is a flying fortress! Cover art by Patrick E. Pullen!

𝐂𝐨𝐫𝐚𝐥 𝐏𝐚𝐥𝐚𝐜𝐞 𝐨𝐟 𝐭𝐡𝐞 𝐌𝐚𝐫𝐢𝐝 𝐓𝐡𝐞 𝐒𝐞𝐜𝐨𝐧𝐝 𝐢𝐧 𝐚 𝐒𝐞𝐫𝐢𝐞𝐬 𝐨𝐟 𝐉𝐞𝐰𝐞𝐥 𝐇𝐞𝐢𝐬𝐭𝐬 𝐚𝐭 𝐭𝐡𝐞 𝐄𝐧𝐝 𝐨𝐟 𝐭𝐡𝐞 𝐌𝐮𝐥𝐭𝐢𝐯𝐞𝐫𝐬𝐞 Wherein our adventurers seek out the Emerald of Aquatic Perfection, reputed to be held within an extraplanar undersea genie basilica. 𝐀 𝐃&𝐃 𝟓𝐄 𝐚𝐝𝐯𝐞𝐧𝐭𝐮𝐫𝐞 𝐟𝐨𝐫 𝟒-𝟕 𝐜𝐡𝐚𝐫𝐚𝐜𝐭𝐞𝐫𝐬 𝐨𝐟 𝟏𝟐𝐭𝐡-𝟏𝟓𝐭𝐡 𝐥𝐞𝐯𝐞𝐥. 𝟒𝟎 𝐩𝐚𝐠𝐞𝐬.

The Candy Isle - home to a confectionary shore, saccharine jungles, and a chocolate volcano, it epitomizes the phrase "sweet but deadly." The PCs must avoid gummy tribesmen and other weird, sugary dangers to retrieve the apotheosis of all sweets, the Confection Perfection!
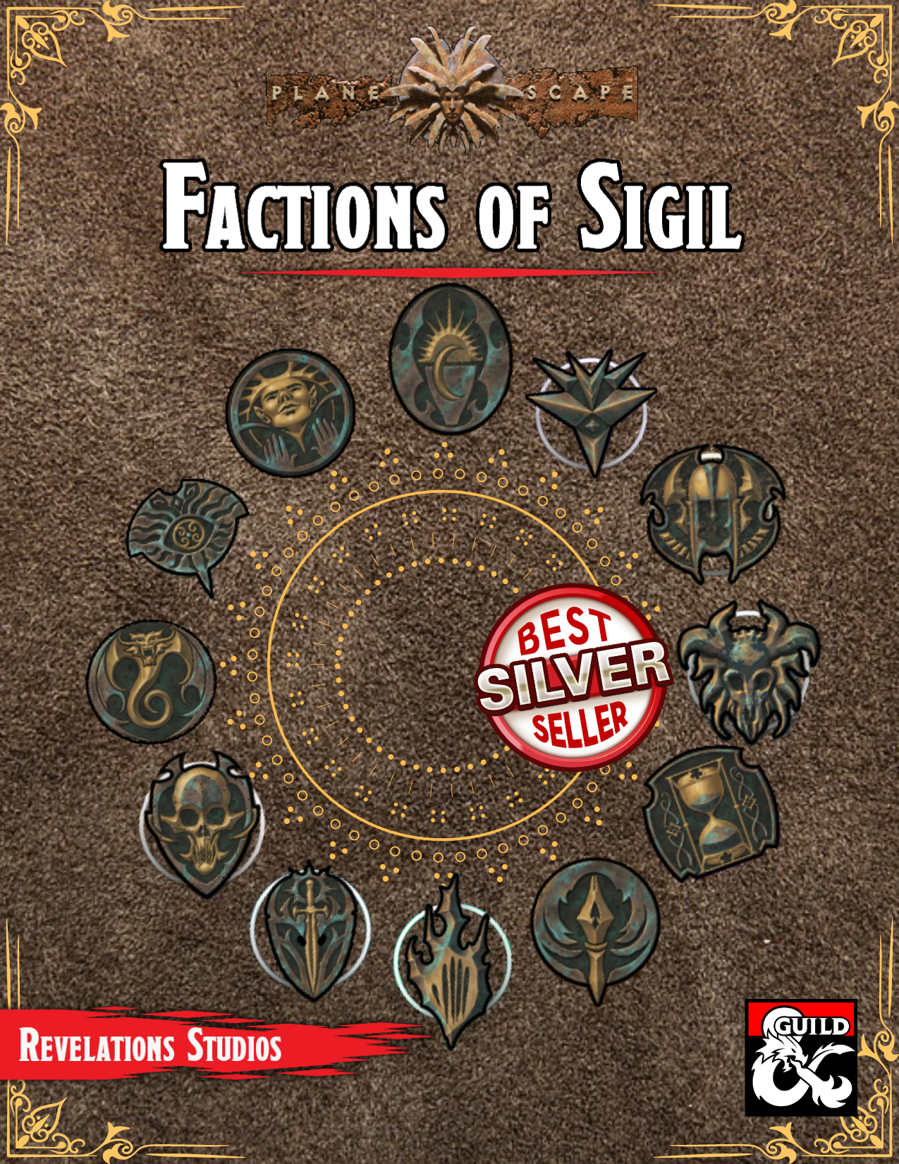
We get it. Factions are an integral part of D&D, but it's not always clear how to use them in your campaigns. Luckily, Factions of Sigil has you covered for each of the twelve main factions found across Sigil and the Outlands! This supplement goes over the various rules and lore around the primary factions found in Sigil and the Outlands, making it easy for any new or veteran DMs to integrate the factions more into the core stories being told, and making them feel more useful for the players that choose to join. This adventure sees the characters ally with the Athar of Sigil to raid the Abbey of the Iron Star and destroy the devils within who are attempting to bring Asmodeus to Sigil.

Elanil Elassidil, an elf bard of no small legacy, has put out a call for trustworthy agents. It is time, it seems, for a quietly hidden piece of elven history to become known to the world. Meira Faerenduil, lost knight of Myth Drannor, has been dis-covered, and must be brought back to civilization. A four-hour adventure for 5th-10th level characters. **NOTE** As of August 30th this adventure no longer grants an Oathbow in Adventurers League play. It has been changed to award a +2 Longbow per the Adventurers League Content Catalog.

The characters, members of the Clifftop Adventurers’ Guild, have been tasked with acquiring the Chains of Mur’taal, an artifact tied to Thelanis, by their guild handler, Lhara. This artifact is the latest in a series that Provost Nigel Faurious has commissioned the Clifftop guild to retrieve for him. The adventure starts when the characters arrive in Rhukaan Draal via Orien caravan. They’re given a chance to explore a small portion of the city before they head to a local bar to meet their contact provided by Lhara. Accompanied by a local guide, they make their way to the Seawall Mountains, where they’ll have to follow clues and their intuition to find the Valley of the Hero, which conceals the artifact that they’ve been hired to obtain. In order to earn the artifact, characters must first pass three tests laid before them by the Story: The Test of Courage, the Challenge of Wisdom, and the Trial of Honor. Once they finish the tests and collect the artifact, the party heads back toward Rhukaan Draal. But there are Marguul forces in the area, and they don’t intend to let the heroes escape with a priceless piece of their folklore…

A tale of dreadful draconic sibling rivalry, this adventure is designed with ease of Dungeon Mastering in mind. Inspired by products such as The Lost Mines of Phandelver and 1991 Easy to Master Introductory Black Box it aims to provide a compelling story which will engage players while making that story easy to tell. It has prompts and advice on how to run each encounter making it ideal for beginning Dungeon Masters or Dungeon Master's ready to move on to the next tier of play.