
The heroes arrive at the eponymous Keep on the Borderlands, a fortress on the edge of civilization built to stave off the chaos and evil of the wilderness. Using it as a home base, a party can make forays into the surrounding wilderness, encountering monster and marauder alike. The centerpiece of the adventure is certainly the CAVES OF CHAOS, a network of tunnels and caverns found in the walls of a nearby but isolated ravine. It is here that hordes of evil humanoids have made their home. Through combat and negotiation, the players can try to explore and map out these caves, perhaps with the aim of accumulating valuable treasure or even cleansing the land of evil creatures. However, even the Caves are not all they seem. Beyond the goblins and kobolds lurk dark horrors: cults dedicated to fiendish chaos and a Minotaur's enchanted labyrinth await the unprepared adventurer. But for the hero who is brave, clever, and fortunate in equal and sufficient measure, great treasures and glory await in the Caves of Chaos that lie beyond the Keep on the Borderlands! TSR 9034

Tomb at the Dragon's Spine is a companion adventure made to go along with the events unfolding during the middle sections of Folio #14 (WS1 Isle of Jade). It contains the information needed to run a side adventure during the Isle of Jade. Many centuries ago, in an age forgotten, the last of the great sea dwarf masons died on the Isle of Jade after helping construct some of the final Corsair structures the world will ever see. Now, his tomb rests on the heights of the Dragon's Back, and evil has crept into the tomb. Only the brave few might now pass the threshold for the treasures that certainly lay within. While crossing the deadly 'Dragon's Spine' of the island's interior, the party encounters a darkness at the heights. Within the ancient stones the tomb of one of the last sea dwarf master masons rests. Has the corruption of the island reached the tomb? Only exploration will reveal the truth, and the treasure. This adventure is formatted to both 1E & 5E gaming rules.

Beneath the jungle-covered ruins of an ancient human temple lies a small outpost of grell that have taken to hunting the nearby area by night. Sangkon Bhet is a fairly typical example of a small grell outpost; the monsters occupy convenient ruins or caverns for a time as they search out new places to move a colony that has over hunted its previous locale. Pgs. 115-120

This adventure concerns a once-proud fortress that fell into the earth in an age long past. Now known as the Sunless Citadel, its echoing, broken halls house malign creatures. Evil has taken root at the citadel's core, which is deep within a subterranean garden of blighted foliage. Here a terrible tree and its dark shepherd plot in darkness.

Disturbing shadows have grown long over the northern reaches of The Land of Song. The fierce people who once fished the chilly fjords and hunted in the evergreen peaks now huddle in their villages. An evil is abroad in the land. The heroes are charged by Jarl Yngvar with traveling to the Valley of the Sleeping Jarls, an old tomb in the hills where dead kings are laid to rest, to discover the source of the malevolence bearing down upon the land and with eradicating it. Who can say what evil lurks amid the towering peaks and shadowed fjords? For decades this malevolent being plotted his vengeance upon Hjalmar’s heirs, for the jarl had gone the way of all mortals. Taking for himself the name Mogens (“powerful”), this evil spirit, now a self-styled dark lord, gathered wicked cronies and servants to itself and came to the Valley of the Sleeping Jarls. There, he has spent nearly two decades corrupting and desecrating the sacred resting place, reshaping the hollowed tombs into a blasphemous temple to his infernal lord.

Hurry! Hurry! Hurry! Step right up, ladies and gentlemen, and behold the greatest circus in the land! Behold the skilled mummers performing at The Stage; you’ll literally feel like you’re part of the play! Thrill to the death-defying acts (and audience) in the two rings under the Big Top! Laugh at the antics of the baleful buffoons, harmful harlequins, and malevolent merrymakers of Clown Alley! Gaze in wonder at the wild beasts of the Menagerie, (just make sure you know which side of the bars you’re on)! All this and more, for the small price of a single admission, to Bitterbark’s Magnificent Circus! The circus is in town! But there’s something not quite right about it. There are rumors of missing children, evil plots, and more. Can you discover the secrets hidden inside Bitterbark’s Magnificent Circus? Intended as a stand-alone adventure, but there are notes on how to include it as part of the Castle of the Mad Archmage mega-dungeon adventure. Published by BRW Games
Launching the Unlock the Vault-series, this first installment sees the party search the royal crypt in the ruins of Wellsing for the fabled Shield of Ralfour - An artifact that, initially unknown to the party, also acts as one of the eight keys to break the seal on Aizendore's Vault of Tragic Treasure.

The desolate, uneven country known to locals as Battlefield Downs is strewn with the scattered remains of the ancient dead. During the last terrible years of the old empire, a series of grinding military engagements played out across the rolling fields of Battlefield Downs. In one battle that was part of a wider, disastrous campaign that contributed heavily to Nerath's downfall, the Empire of Nerath's legions clashed here against ravaging gnoll packs. It is now a haunted place, where only the bravest dare to tread. Pgs. 72-79

Written in celebration of Swords and Wizardry Appreciation Day 2017, Return to Fel’Valashar picks up where Dungeons of Fel’Valashar left off. In this book is a collection of mini dungeon adventures with a small region called Fel’Valashar that they take place within. Each of these adventures is written in such a way that they don’t have any ties to each other or to Fel’Valashar. This means you can easily drop them into your own world with no fuss. Includes: Details of the south-western region of Fel’Valashar. Four mini dungeon adventures. New monsters. New magic items.
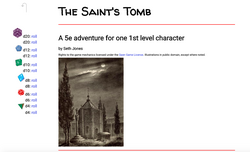
The Saint's Tomb is a single-player gamebook-style adventure that is playable in your browser. You make a 1st level character sheet, roll your own dice (though 2 of each are supplied in-browser), keep up with your inventory, spells, and HP, and click on options as you make decisions. It was written to help new players learn the game, but it should be fun for experienced players too. In the game, you'll investigate a mysterious figure who has a suspicious interest in the tomb of a dead priest. You'll battle the undead, figure out problems and roll the dice to save your city! The Saint's Tomb is free, though you can leave a tip if you're able by clicking "Support this Game". A Spanish translation is available as "La Cripta Sagrada"

The Heroes are relaxing in an inn when they hear a scream, rushing outside they find that a local merchant has been kidnapped! The merchant's wife saw the assailants drag him into an alley, where the heroes give chase. Following the villains through a maze of natural fissures, tunnels, and ancient ruins they encounter a number of monsters, traps, and puzzles. Eventually they make their way to the kidnappers hideout, where they confront the kidnappers in a final climatic battle to rescue the merchant and uncover a criminal gang.

A perfect side-quest adventure for a party based in Phandalin or after completion of Lost Mines of Phandelver. Unravel the malevolent mysteries of Knacker’s Knothole! A party of four to six 5th level characters meet Knacker, the ancient awakened grandfather oak, who was introduced in Volo’s Vetted Vendors. He has a request: one of his cherished death’s heads is missing and he implores the party to find out what happened to it. Although Knacker suspects the people of Phandalin, the party’s investigations ultimately reveal a much more sinister threat. The party must investigate the disappearance while an unseen foe attempts to thwart their efforts with ambushes and misdirection. It is not long before there are more disappearances, and the party must use its ingenuity to prevent open hostilities. This adventure is part of a new series based on Volo’s Vetted Vendors and Elminsters Excellent Establishments. It can be played as the final part in this series, and it is also ideally suited to a party that has just completed Lost Mines of Phandelver. This is a 5-7 hour adventure that will advance the party to 6th level. This full-color 60-page adventure includes: * 29 pages of adventure content. * 2 pages of convenient NPC summaries. * 8 beautiful maps suitable for use with any VTT (separate files are included for all maps, including both high- and low-resolution versions). * Many random tables including adventure hooks, customers at Knacker’s Knothole, rumors, random encounters, chase complications and battle events. These tables can provide inspiration for other adventures and campaigns as well! * 20 pages of monster and NPC stat blocks.

Part Two of the Umbral Aristocracy Trilogy. The treasure hunt has led to the City of the Dead. Beneath that well-manicured park is an ancient crypt where the treasure awaits you!

The PCs answer a call for heroes by the Church of Traladara, asking for help in finding an ancient relic- the Shield of Halav. This is located in a lost temple, and the PCs must locate this temple, and brave its dangers to recover the shield before two competing teams from other churches find it first. Part one involves setting up the adventure, doing research, following clues, and discovering the site of the lost temple. Part two; once the site is known (ruins under a modern town) the heroes must travel there and find the entrance. Part three is braving the lost temple, filled with traps, puzzles, and other dangers, to find the missing shield, and then culminating in a climatic showdown with the completing teams.

Citadel by the Sea is an AD&D gaming module for 4-8 characters, each of 1st to 3rd level. The fewer the characters available, the higher their levels should be. Characters should be well equipped, with at least one magical weapon apiece, but do not need any particular game experience. It is recommended that at least one ranger character and one elf character be members of the adventuring party, and that no player character be a half-orc. The Dungeon Master should read the entire module carefully before running this adventure; the events are laid out in the approximate order in which characters would normally encounter them, and the text builds the adventure as one reads through it.

On the night of the rare Witch Moon, a binding spell placed over the mighty devil Tchernabog finally breaks. Will the characters be able to survive the night of boiling hellfire, furious undead, and diabolical mayhem Tchernabog orchestrates from atop Devil's Peak? Night on Devil's Peak is an apocalyptic, events-based survival adventure for 6th-level characters. It takes about 5-6 hours to complete and includes: -The awakening of a CR 24 devil, mighty Tchernabog! -A powerful holy relic the characters can wield in battle -Two diabolical new monsters: Tchernabog and giant flaming skeletons -Combat cards for each monster, PC, and special treasure -Gorgeous digital maps (with and without grid) for virtual table tops
A deadly encounter for a party of level 7-10s. Brave the crypt in an attempt to save Lord Eldark's son. This challenging dungeon is adaptable and easy to run in any existing campaign. It has some very tough encounters and is available for free on DM guild!

A strangely delivered advertisement has led you to a sage named Demetrios. He needs a rare component to complete a desperately needed potion. The journey to retrieve it will take you through a large, unexplored swamp to a ruined keep, the former headquarters of a vile cult that once claimed the lives of many innocent youths. You cautiously accept the mission... To solve the mysteries of "Baltron's Beacon," the characters must excel in handling wilderness, building ruins, traps, puzzles, and new monsters. This adventure, originally designed for tournament use, is now available for your own campaign. TSR 9152
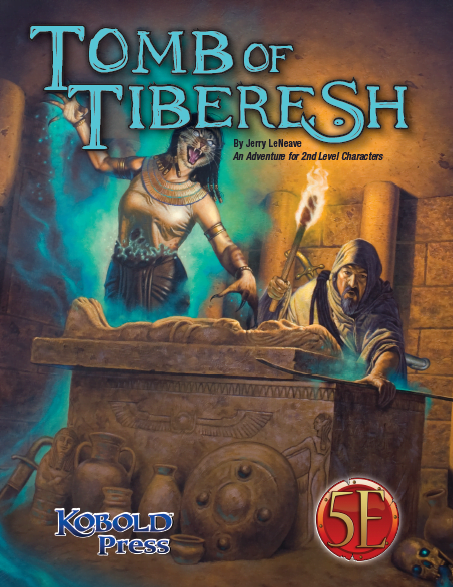
Just outside Per-Bastet, in the kingdom of Nuria Natal, lie the newly discovered remains of Anu-Asir, a city once believed to exist only in myth. The ruins of Anu-Asir lie submerged under accumulations of sand, floodwater, and tall tales. It is now a hub of activity for those seeking to uncover its secrets— and profit from them. Droves of the curious, hopeful, greedy, and eccentric congregate around the unearthed city. And just outside Anu-Asir, across the River Nuria, lies the most recently surfaced relic: the Pyramid of Tiberesh. Dare you explore its deadly mysteries?

*THIS IS A D&D NEXT/5E PLAYTEST ADVENTURE* Imani, a Turmishan wizard and former adventurer, seeks the aid of heroes to infiltrate Dretchroyaster’s lair and recover the Diamond Staff of Chomylla—the key to powerful magic and wisdom locked away for thousands of years. In addition to his own sagely interest in the lore of lost Uvaeren, Imani recognizes the dangers of such powerful magic falling into evil hands. The dracolich has secured the staff in his lair’s cen- tral chamber, using ancient wards of protection that can be bypassed only by four artifact-idols once belong- ing to a cult of Bhaal. Each group of adventurers enters the dungeon through a different section of the dun- geon—a forgotten temple of Bhaal, a vast underground lake, a troglodyte village, or Dretchroyaster’s vaults. Dretchroyaster’s lair is no simple set of caverns and ancient ruins. It sits atop a source of great power and energy, which the dracolich and his Cult of the Dragon allies hope to use to unlock the secrets of the staff. Only by undertaking a unified assault against Dretchroyas- ter’s lair can the adventurers hope to recover the Diamond Staff and survive the dracolich’s fury. The adventurers must make their way through the lair and recover the Bhaalite idols that will help unlock the Diamond Staff, all the while dealing with the lair’s creatures and avoiding the dracolich as he pur- sues intruders. Entering the Chamber of the Diamond Staff, the heroes must overcome its magical wards and claim the staff before being slain by the dracolich and his servants.