
The renegade magic-user Bargle is wanted, dead or alive. Rumor holds that he dwells in the bowels of a nearby abandoned keep, performing all sorts of foul sorcery. Only the truly brave, or perilously foolish, would dare to challenge Bargle in his own domain. Expanded dungeon of the BECMI red box sample dungeon.

An interesting and atypical adventure in its writing style. For one the module contains insightful "When things go Wrong" sections and DM guidance for sticking close enough to the rails for the story and fun's sake. Lots of DM hints about how to handle PCs' choices. Overall the story is fine too - a traditional hook, a mystery, some twists. There's a tower, a surprise pocket-dimension context, and a dungeon. It's mirror of life trapping, isn't it? Well, yes and no. People go in, and they don't come out. Nor can you talk with anyone inside. Somehow, that's not quite the way you remember those mirrors work. This Skarda fellow showed up a few years ago with a band of raiders, and no one in the land has been safe since then. Whole villages have disappeared into this Skarda's mirror. Your band is approached by relatives of one of the victims?and adventurer like yourselves. You have to get into that mirror of whatever-it-is, find this man, and get him out in one piece. The reward is more that adequate. Only problem is, no one out here can tell you what to expect once you get in? or even how to get there. TSR 9188

This adventure takes place in the Moonsea of Faerûn. The players have been brought to Melvaunt to search for the missing scions of the city's great families. To the north, in Thar the orc tribes converge on the ruined fortress of Xul-Jarak, flocking to the banner of a charismatic warlord. There, he intends to sacrifice the scions of the great families of Melvaunt in a bloodritual to Gruumsh. The players will escape Melvaunt, search along the wilderness of Thar for the Fortress of Xul-Jarak, and then explore the dungeons of the ruined fortress and hopefully rescue the scions before they are sacrificed. There also is a Web Enhancement by Eric Cagle on the archives of wizards of the coast's website designed to scale the adventure to level 8. For example, it replaces the Owlbear with a Tyrannosaurus. This is an easy to scale adventure with much of the player's difficulty coming from intelligently avoiding problems, choosing how to approach each floor in the most tactical way, and quickly adjusting when something goes wrong. The adventure has sidebars including common orc battle cries (In Orc!), ready to use orc names, weather and random encounter table in Thar, a description of what happens if the party fails or partially succeeds, and suggested minis for each of the encounters. There is even an extended description of the bloodspear ritual, an event the party is not meant to encounter in a normal run. The appendix is detailed for all the humanoid characters including the scions and their equipment, the named villains, and variety of unnamed orcs the party will encounter. The fortress also offers an opportunity to introduce the players to the Underdark and the Zhentil Keep. There is a passage to the Underdark the players can accidentally explore, and return to later. Emissaries from Zhentil Keep have come to watch the ritual and have their own motivations. These npcs provide an opportunity for exposition and role playing at a point which otherwise might be combat heavy, acting as a valve for the first floor - helping or hurting the party with subtle magic should the difficulty be off.

Elanil Elassidil, an elf bard of no small legacy, has put out a call for trustworthy agents. It is time, it seems, for a quietly hidden piece of elven history to become known to the world. Meira Faerenduil, lost knight of Myth Drannor, has been dis-covered, and must be brought back to civilization. A four-hour adventure for 5th-10th level characters. **NOTE** As of August 30th this adventure no longer grants an Oathbow in Adventurers League play. It has been changed to award a +2 Longbow per the Adventurers League Content Catalog.

For the past several days, dozens of strong earthquakes have rocked the coastal area surrounding the underground Temple of Poseidon. Since the first quake, there have been a growing number of reports of strange events and macabre occurrences throughout the area. Several families near the temple have abandoned their farms and refused to return. They claim to have been terrorized by inhuman specters who prowled about their farms late at night. One of the farmers says he found a farm animal crucified and eviscerated in a ritualistic fashion on his front porch. Following the first tremors, all communications with the Temple of Poseidon, seemingly the center of the troubled area, were cut off. Messengers dispatched to the temple to request guidance from the Holy Oracle located there have not returned. Now the darkness has spread to this town. Unnatural births have occurred. Strange cries can be heard in the night, and there is a cowl around the moon. Magical divining has proven useless in naming the dark forces that invade. Many of the townspeople have already abandoned their homes and those who remain have but one recourse left: They have sent out a cry for hardened adventurers, experienced in dispatching evil. They must travel to the temple to discover the fate of the men there, and, if possible, elicit their help in destroying the growing heinous power. Pgs. 31-46

In “Rescue at Rivenroar,” the player characters must brave the depths of ancient catacombs in search of prisoners taken from the town of Brindol in a midnight raid. The hobgoblins, bandits that style themselves after an invading horde from long ago, have taken refuge in a dungeon under a ruined mountain fortress, and the PCs must clear them out to find the captive townsfolk and the treasures taken from Brindol. “Rescue at Rivenroar” also marks the first step in a great journey - the Scales of War Adventure Path, which spans 30 levels and put the PCs at the crux of events that shapes the world for centuries to come. While the scope of this adventure isn’t as grand, it represents the seed from which an epic tale will surely grow. Pgs. 4-45

Fort Akor has come under attack by a dragon, but when the PCs seek out the beast in the surrounding jungle they discover the dragon may be the least of the fort’s troubles. The Pcs travel to Fort Akor, where they learn that the fort has been under attack by a dragon (which is really a tyrannosaur). Prince Henri asks the PCs to slay the dragon attacking his fort before it causes further damage. If the PCs investigate the fort before setting out after the tyrannosaur, they may discover the hidden corpse of its hatchling. They may also discover the truth behind the fort's dark history. Tracking the "dragon" to its lair and slaying it for Prince Henri forces the characters into conflict with a faction of the centaurs living in the jungle, who disposed the hatchlings corpse at the fort. Discoveruing the truth of the prince's conflict with the jungle natives might lead to an alliance. Pgs. 16-41
The Demesne of Rangers is at war with the Horde of the Black Blood – an alliance of rampaging tribes of goblinkin. It is the heart of winter and the forest sleeps uneasily under a white veil. This is a time to huddle before the fire, not be out in the cold fighting a war but the heroes have no choice but to infiltrate the occupied territory in order to find and destroy the dreaded Goatskull Helm. Hope for victory hinges on the success of this quest and the call goes out for heroes to gather. The Goatskull Helm is an adventure module compatible with the Fifth Edition. This 35-page adventure is designed for a party of 1st level characters and will see them through to the 3rd level. This adventure is set in a fantasy medieval world with the mythological flavour of Ancient Greece. However, it can be easily adapted to any other medieval fantasy setting. This adventure includes entries for familiar monsters that are modified to better fit the setting as well as five new monsters and new equipment and magical items.
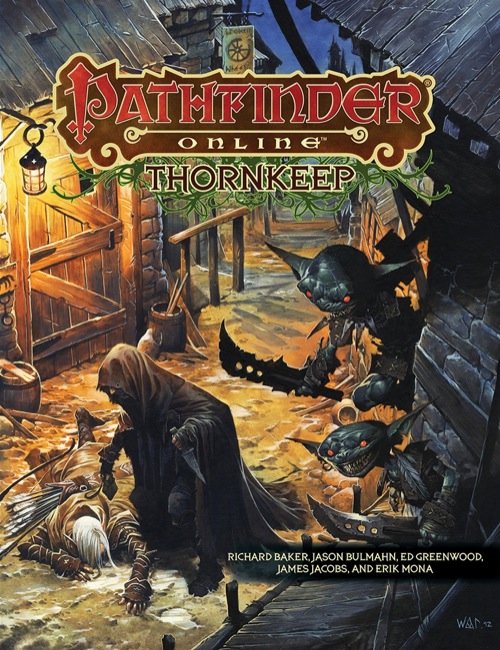
Uncover a world of adventure and claim your fortune in Pathfinder Online: Thornkeep! This detailed sourcebook contains everything a GM needs to run adventures in and around the dastardly town of Thornkeep, as well as several deadly dungeon levels and a sneak peek at the upcoming massively multiplayer online game Pathfinder Online.

"A Triangle in Shadows" is an umbral vampire lair suitable for a party of four 15th-level characters. Magic weapons are highly advised. This adventure can be completed in one session. The City Fallen into Shadow is the domain of the fiendish umbral vampires, and they are rarely found outside it. But one named Caragorn has fled the city after coming between the lovers Philadon and Zenobia. Philadon and Caragor, however, are secretly meeting at Caragorn's tower behind Zenobia's back. Zenobia suspects them of collusion, and is seeking out the two male umbral vampires to get revenge.
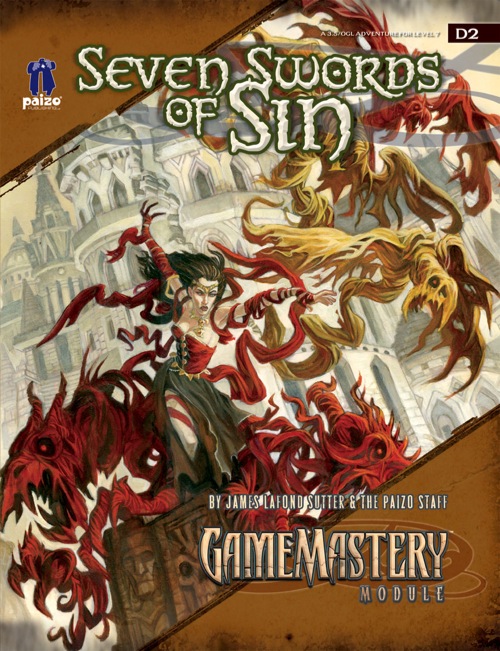
Long hidden away in remote vaults and guarded by powerful wards, the ancient Seven Swords of Sin have been stolen and brought together again for a terrible cause. Seven Swords of Sin is a lethal adventure that pits players against a vile enchantress, Tirana, in a trap-laden and monster-guarded dungeon. Only the brave (and perhaps foolish) can survive Tirana's lair and rescue the fabled Seven Swords of Sin from her heinous plot to unlock their deadly powers.
The Fate of Faerûn Lies in Shadowy Darkness! Daggerdale is reeling from a sudden series of murderous drow raids. As a grave threat to the entire surface world develops in the war-torn dark elf city of Maerimydra, intrepid heroes must discover its source and destroy it, if they can.

Folks have been vanishing from the Stink, a disease-filled rubbish quarter of Sunhill. City officials recruit the heroes to investigate the disappearances, putting the PCs on the trail of fiendish Locathahs, followers of Incabulos, with ill plans for the surface world. Dungeon adventure in a sewer.

The dungeon is essentially a large puzzle built around the premise of time travel. Many PC interactions are a direct result of the party dealing with the actions of their past or future selves. This adventure is designed for a fifth level party, to be played in a single session. It features a large full color map, artwork, NPC roleplaying tips, and two new magic items. Julinda the gnome mage has always been a bit off. She is a chronomancer who has become obsessed with achieving the reliable and reproducible technology of time travel, in the interest of returning to select parts of history and influencing their outcome to her pleasing; perhaps to avert a war, or to head off the enslavement of her people, or prevent the death of a loved one. Those who know her were aware of her ambitions, and now worry that they are coming to fruition, as she hasn't been seen in several months. And so, they have implored the PCs to seek her out...
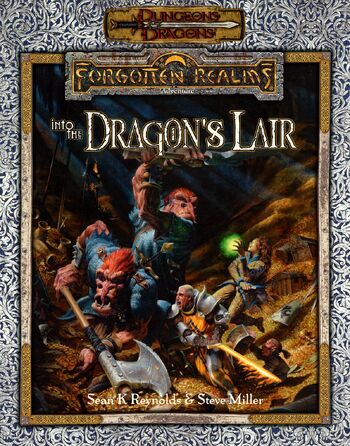
Into the Dragon's Lair takes place in the Forgotten Realms setting, and takes place after the novels The High Road and The Death of a Dragon by Troy Denning. The nation of Cormyr tries to rebuild after the death of King Azoun IV, and seeks the treasure hoard of a dragon to fund these efforts and keep the kingdom from falling into chaos. The player characters must find this treasure before all the other seekers.
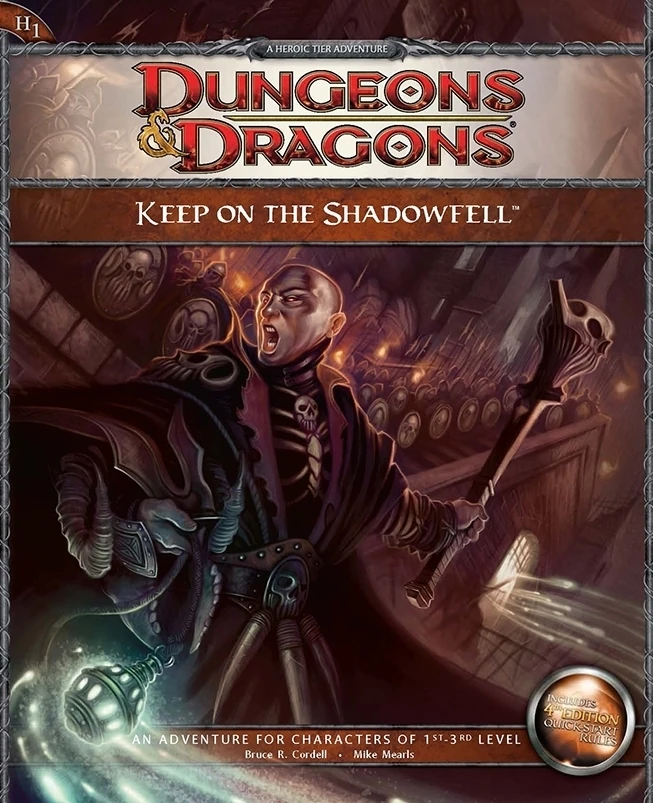
Darkness looms near Winterhaven! Kobold brigands have grown ever bolder in their attacks, marauding the once peaceful town, and a known explorer has been missing ever since their departure to the excavation site of a dragon burial site. When the party investigates, they will discover that the kobold's leader, Irontooth, bears a tattoo of a ram-headed demon. This is a troubling portent, for the townsfolk will report that this can only mean the dread god Orcus, master of death, has an active cult in that ruined keep! It is up to the party to enter the Keep on the Shadowfell and put a stop to the cult's fell machinations before it threatens all the realm. There they will fight the evil priest Kalarel, Scion of Orcus and seal off the vile portal to the dark realms he is master of. Should the heroes seize victory, glory and treasure are sure to be theirs. But first they must endure the challenges of that dreaded KEEP ON THE SHADOWFELL!

The ancient ruined city of Tamoacha is familiar to a select few scholars and fortune seekers, who know of it but not always exactly where it is. Even more secluded, lying somewhere within or beneath the ruins, is a hidden shrine said to be dedicated to Zotzilaha, the vampire god of the underworld. Adventurers who catch wind of the place are likely to find its lure irresistible. Remake of the AD&D module by the same name.

The legendary spellcaster Emirikol the Chaotic has turned the region into a wild magic zone, a place where all magic goes awry. The only way to put things back to normal is to retrieve the source of the problem deep inside the Ooze Chambers of Emirikol! This adventure is for 4th level characters and can be run on its own or as part 3 of the Litany of Arrows adventure path. This adventure contains, 2 pages of new magic items, 8 new monsters and NPCs, a full write-up of Bwimb II, the Paraelemental Princess of Ooze, an entity referred to in many D&D products but never fully fleshed out and stats for the 3rd edition iconic heroes Regdar and Mialee, who play a major role in this adventure. It's got over 10 pieces of original art, full color maps, tagged and untagged, and a special handout for the player who obtains the Ooze Fist of Emirikol. This adventure builds on the story begun in the platinum-selling Castle of Corellon and the follow-up, Warpath of Gruumsh.

Important: The adventure is 1e but it has monster conversion notes for D&D 4th edition The town of Highport, once a human community overlooking Wooly Bay from its perch on the northern coast of the Pomarj, fell prey to hordes of humanoids swarming out of the jungle-covered hills surrounding the settlement. Though the orcs, goblins, kobolds, ogres, and gnolls razed much of the place in their ferocious rampages, the smoldering ruins they left behind soon became a new kind of community, a place of trade between the humanoid “locals” and the unsavory human traders who have no compunction about doing business with them. Slaves are a commodity in ready supply in Highport’s market, since many pirates raid up and down the coast of the bay, putting fishing villages to the torch and filling their holds with captured refugees. Slavery has become a thriving business in the town, and rumors abound of a cartel of Slave Lords who run things from behind the scenes, filling their coffers in secret from the buying and selling of human chattel. The trade has become so prolific that the good folk to the north have grown tired of these depredations and decided to fight back. Forces of righteousness and honor have recently descended upon Highport, some openly and others in secret, in various attempts to destroy the machinations of the Slave Lords and abolish the abominable enterprise that has taken far too many loved ones from home and hearth. One such doughty servant of goodness is Mikaro Valasteen, a cleric of Trithereon. Mikaro slipped unnoticed past the crumbling walls of Highport with a single mission: to rescue and transport as many slaves to their freedom as possible. Mikaro and a handful of faithful assistants located a number of escaped slaves—as well as rescued a few more not sufficiently restrained and guarded—and shepherded them through the gates and beyond the reach of their humanoid tormentors, returning them to their lands and homes. This covert freedom brigade enjoyed remarkable success early on, since the servants of the Slave Lords were often lax in their vigilance and sloppy in their efforts to prevent loss of the “merchandise.” After one too many shipments never made its destination, the humanoids stepped up their security and the normal channels of escape from Highport closed to Mikaro and his team. He cannot risk exposure by smuggling the freed slaves through the gates as merchandise any longer, since shipments of goods are now regularly stopped and checked. No longer able to free the slaves in that manner, Mikaro began hiding his charges in an abandoned villa in a particularly rundown part of the town. Although they are safe for the moment, their numbers have grown unmanageable, and the priest fears it is only a matter of time before someone slips up and brings slavers to their doorstep. Ever more desperate to find a new means of escape from Highport, Mikaro has started work on a plan that is both daring and dangerous. He intends to use a series of old sewers coupled with natural caverns running beneath the town as an escape route to the sea beyond the walls. But he needs someone to clear out the creatures and pitfalls he knows lie within. Pgs. 2-27

This heist adventure that takes place almost entirely at Fort Bones. It is split into five scenes: Karrnathi Opening. The characters meet Vedim ir’Durna, a noble from the region who is willing to help the player characters infiltrate the Fort. Guild Handler Lhara introduces their prize: a necromantic artifact called the Queen of Night, tied to the plane of Mabar. Valenar Gambit. Whether by wit or stealth, the characters find their way inside the walls of Fort Bones. They might use the incoming Valenar attack as a distraction, find a secret entrance, or plant themselves on a visiting dignitary’s staff. Castling. Safely inside, the characters must figure out when the artifact is unguarded, and find their way into the castle’s inner sanctum. Check. The characters must navigate their way past a magical vault door, then descend into the crypts. The Queen of Night is guarded by a terrifying construct. Endgame. With the artifact in their hands, will the characters be able to escape with their lives?