
Deep in the wooded wilderness, the village of Grimmsgate is an outpost town on a seldom-traveled trail, right at the edge of nowhere. The village’s half-ruined temple of Law, dilapidated inn, drunken blacksmith, exiled trader and a few fur-trappers are enough to keep the bloody-minded denizens of the dark forest at bay, but nobody really expects the village to still be there in another ten years. The woods have become too dangerous for the trappers who once caught animals for fur, and merchants no longer travel the poorly-maintained road. What great evil and what fabulous treasures are to be found in these lands? A brave band of adventurers might make their fortunes here. Or perhaps they might never return… Grimmsgate is an introductory adventure for the Swords & Wizardry tabletop roleplaying game. The Swords & Wizardry rules are needed to play this adventure.

Tortles of the Purple Sage - Part 2 completes a D&D Expert Set wilderness adventure which began in DUNGEON issue #6. Through the gate stones, into the unknown. This adventure takes place in the Known World of the D&D game, as outlined throughout the D&D game rule books and modules. The DM may find it useful to consult the Companion and Masters Sets, as well as most of the X-series of Expert Set modules. The DM may find it useful to consult the Companion and Masters sets, as well as most of the X-series of Expert Set modules. Expert Set module X9, The Savage Coast, would be especially helpful, as Tortles of the Purple Sage should easily serve to continue that module's direction and plot line, adding previously undescribed areas to the Known World. The DM may also place the areas and events of this adventure within an existing campaign setting, as long as the geographical areas of the campaign match those set forth here. Pgs. 8-25
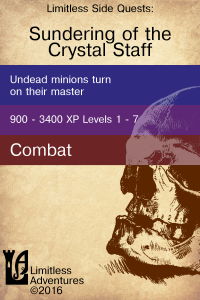
Undead minions turn on their master - When the necromancer's staff is broken, a party of undead become self aware. Play as undead and choose to side with your former master, or the paladin order assaulting his tower. Published by Limitless Adventures.
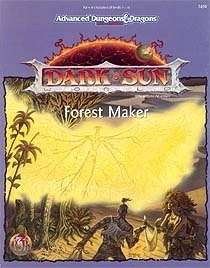
Most adventurers know better than to listen to rumors. But when the rumors speak of a magical forest blooming deep in the burning stretch of the Alluvial Sand Wastes, even the most battle-hardened gladiator takes notice. A mysterious summons has gone out to the humans and demihumans of the Tyr region, luring them to the new forest and promising Athas' salvation. Now your characters have heard the call - but will they heed the Forest Maker, or seek to destroy her? Designed for 4 to 6 characters of 11th to 13th level, Forest Maker brings player characters from the sun-baked streets of Tyr to the walled fortress of Altaruk and beyond. Forest Maker is a stand-alone adventure.

In the kingdom of Minoxia, the dragon Oxitorus rules the people with a disease his breath causes. A rebel approaches you and implores you to investigate a lead he has on a cure. The travel through Minoxia's swamp will be difficult, and you can't trust anyone, as the tyrant's spy network has roots everywhere. What will become of you, even if you succeed?

During a summer drought, Mulmaster is threatened by a series of arson attacks. As the populace riots, accusations fly blaming Thayans, residents of the ghettos, rowdy sailors, the refugees from Phlan and dozens of others. Can you solve the mystery before the city burns?

This module is designed for characters who have made their way through the Freeport Trilogy. Characters new to Freeport are at disadvantadge, however. Hell in Freeport sends the characters to the depths of the Hell as pawns of an undead duke. When they discover the truth of their mission, they must race against a sinister clock to save two cities. Act 1 kicks off with a battle against a cornugon on the Freeport docks. The characters are hailed as heroes for defeating the fiend, and are summoned to the Church of Retribution to help in the battle against Hell. Tee old inquisitor who greets them is actually Jalie Squarefoot, an infernal lich who took this form to search for the perfect cat's-paw. Squarefoot wants to take the souls of Freetown, a city in Hell, but must first get around a contract poin: he can't take the city until the Tyre tower clock-now stopped- strikes midnight. He sends the party to Devil's Cry, an inslan off the coast of Freeport, with instructions to close the gate to Hell hidden inside. In truth, he knows the party will be transported straight to the Third Circle when they try. Inside Devil's Cry the party finds the remnants of a great battle fought between an invading devil's army and the Church of Retribution, and battle their way past undead defenders until they reach the gate itself and unwittingly trigger it. Act 2 begins with the party in a twin of the complex they explored in Devil's Cry, but now they are deep in Hell. They fight their way back to the cavern entrance, only to find that they are not on the Prime anymore. When they voyage back their homeport, they instead find themselves in Freetown, a city of scaped slaves in a dark mirror image of Freeport. Once in Freetown, they make the acquaintance of the city's mayor Wycleffe-a servant of Jalie Squarefoot-who persuades them to go on a quest to Tyre to restart the tower clock. They travel the Styx to the Eight Circle and fight their way into a long-buried vity, and then into the tower clock itself. They restart the clock and begin the trip home, but are waylaid by devils and taken prisioner. Act 3 opens with the party naked and in chains in the infernal prison called the Forge. They learn that Jalie Squarefoot and Wycleffe have duped them, and that the supposed rebels of Freetown are actually its protectors. The characters must escape or win their freedom in the gladiator pits before the tower clock they restarted destroys both Freetown and their home city of Freeport. They battle back to Freetown, taking revenge on their captors in the process, and capture the city from Wycleffe with the help of the rebels. Finally it falls to the PCs to enter the tower clock and stop it and Jalie Squarefoot before the fiend's plan can come to fruition. After being tricked and manipulated throughout the adventure, the party finally has their revenge on the duke and his minions.

Finding missing people is a job any adventurers for hire get used to. But when the missing person turns out to be the recently deceased wife of a prominent merchant's son, and when there is the small matter of a major jewelry theft to deal with as well, then you've got an adventure that is nothing other than normal.... Find the Lady is an adventure for the D&D and AD&D game systems. It is designed for a party of 1st - 3rd level characters, with secondary skills generated according to the article in this issue. This scenario was not designed with any set number of characters or mix of professions and levels in mind, and could equally well be run as a group or solo adventure. It can be played as a one-off adventure or as part of the Pelinore or Zhalindor campaigns, and notes are included on placing the adventure in either world. GM2 Find the Lady Pgs. 15-46

An adventure in Hyperborea designed for from four to six characters of 6th through 8th level In the far reaches of Hyperborea’s Crab Archipelago lies a small, mountainous island known as Crystal Point. Passing sailors recently have witnessed a crimson glow in Crystal Point’s waters and beams of russet light shining up from its steep cliffs. Too, unusually frequent lightning storms in the area have torn the sky in blinding flashes, shattering the air with their awesome sound. The seedy wharf taverns of Khromarium and elsewhere buzz with these strange tales—some even speculate that Crystal Point may hold the lost treasure of Atlantis! The Lost Treasure of Atlantis takes players into an action-packed realm of adventure: the mythical world of Hyperborea, a sword-and-sorcery campaign setting inspired by the fantastic fiction of Robert E. Howard, H.P. Lovecraft, Clark Ashton Smith, and others. This adventure is designed for Astonishing Swordsmen & Sorcerers of Hyperborea™ (AS&SH™), a role-playing game descended from the original 1974 fantasy wargame and miniatures campaign rules as conceived by E. Gary Gygax and Dave Arneson. Therefore, AS&SH is compatible with most traditional fantasy role-playing games (c. 1974 to 1999) and their modern simulacra, such as OSRIC™ and Swords & Wizardry™.
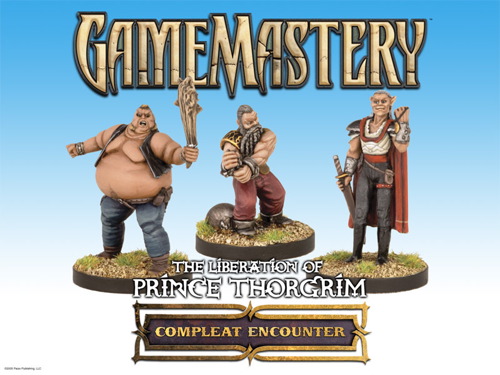
Prince Thorgrim rots in jail, wrongly accused by the corrupt sheriff and his cruel gaoler. Whispered rumors speak that those in his keep are tortured and sometimes murdered. Only the truly brave or fantastically foolish would try to storm the jail and free the prince. A Compleat Encounter, scalable to any level, featuring the shackled dwarven prince, the elven sheriff, and his foul gaoler. CURRENTLY UNAVAILABLE FROM THE PUBLISHER!

The Assassin's Knot is a sequel to The Secret of Bone Hill, picking up on themes from that module and shifts them to a new locale. The player characters must solve the mystery of who killed the Baron of Restenford, with evidence pointing to somebody from the town of Garrotten. The scenario describes the town and its castle. The Assassin's Knot module is different from most of its contemporaries in that it contained no dungeon or dungeon-like area. The longer the players take to find the murderer, the more unfortunate events occur in the village. The village, Garrotten, is reputed to be the place to go to have someone killed. The entire village shuts down when the Baron of Restenford is found dead, mutilated beyond the possibility of magical restoration. Three small clues are all the player characters have to unravel the mystery. TSR 9057

Synopsis: Goblin Bathwater, a magical drug, has taken hold in a sleepy coastal town at the edge of the Empire. As the characters investigate the origin of the drug, they uncover an international criminal conspiracy, wild and ancient magic, and a threat to reality itself. Contents: This beautifully made, 54-page adventure offers: A fully fleshed out, setting-agnostic starter area, brimming with colourful NPCs and hooks for adventure. Balanced encounters to bring characters to level 2; then some more devious encounters on their way to level 3. Three mini-dungeons built on the design philosophy of the "5 room dungeon method" Multiple big, cinematic set-piece boss encounters what will make your players feel epic. A facetted intrigue, which does not immediately suggest a simple, ready-made solution but invites the players to come up with their own, personal approach. Why pick this adventure? Hey, my name is Marius. This is my first time publishing on the DMs Guild but I wouldn't call myself a newcomer. I started playing Pathfinder 1e back in 2014. When I took over as our group's DM in 2019, we swapped over to 5e. We have run many, many modules and adventures since. Currently I play three games a week. In short: You could say I'm hooked. I created The Goblin Bathwater Incident as the ideal adventure for in-between your big modules, but it isn't a simple little adventure. With a playtime of about 30 hours, it still manages to hit that sweet-spot, where it establishes context, makes you grow fond of NPCs, and makes those big bossfight wins so much sweeter, all without taking more than a few sessions. The Goblin Bathwater Incident is different from many of the 1st tier adventures in that it pits the characters against traps and monsters, but also asks difficult, open-ended ethical questions, where a simple strategy of "apply sword to head of bad guy" will not cut it.
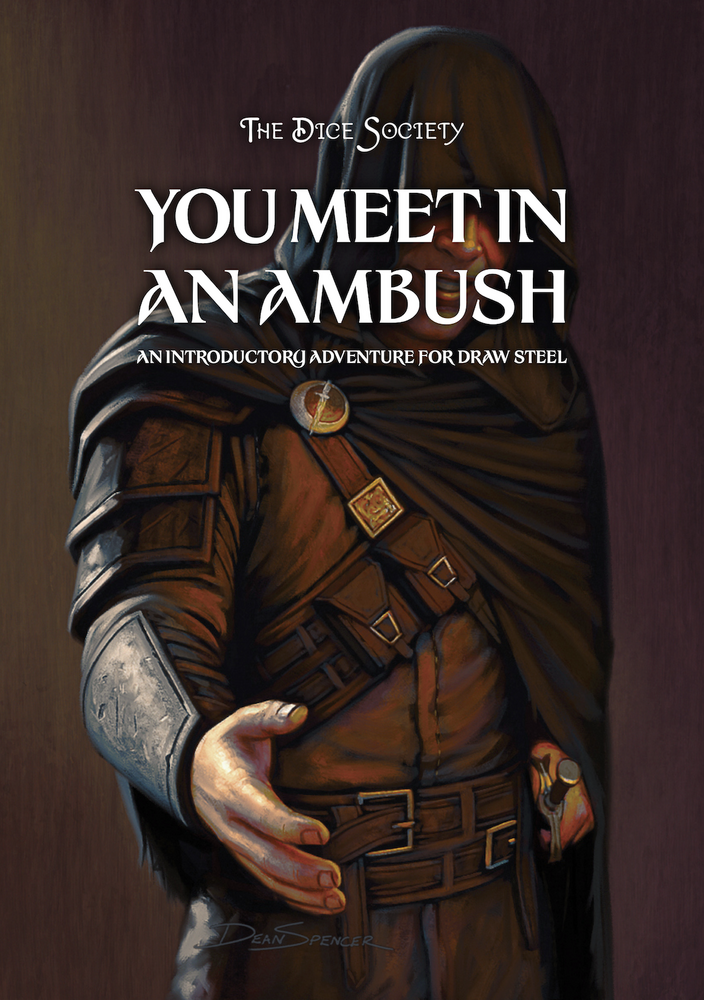
This one-shot takes about 3 to 4 hours to complete and is optimized for four to six 1st-level heroes. It works as a gentle introduction to new Draw Steel players, demonstrating the main mechanics that make up the game one at a time. The characters are locally famous heroes who were recruited by Basil, a mutual acquaintance, former Courser operative, and current tavern keeper. An old friend of his needs help on some Courser business, so the heroes must meet on the Red Boar tavern and wait further instructions. What they don't know is that the Coursers have been compromised; their leadership is now controlled by Ajax the Invincible! Under Ajax's command, the Coursers's main function has become to get rid of any obstacles to the tyrant overlord's imminent invasion of Blackbottom. The heroes' "mission" is actually just one of several ambushes taking place in the city to kill those who pose a threat to Ajax's rule.

When huge stones fall out of the night sky, A deadly curse settles over Gravencross. Help the village exorcise the Demon Stones. “The sun had set an hour ago, and the rain lashed down and the wind howled on the dark moor. A storm this late in the season was unusual, but this one seemed different. The clouds were more menacing, tinged with anger, the rain colder and more biting than usual. Skerrill had to find the lost calf and get him back to the farm before his father came back from the city on business. He’d been looking for two hours now, and he was right in the middle of the moor when the storm hit. He knew he should have turned back as soon as darkness fell, but then he was never the brightest boy in the valley. If only he had remembered to lock the farm gate. The calf was now likely dead anyway having stumbled among the boulders and rocks, panicking in the dark, and then fallen in a floodwater stream and drowned. Either way, he was in more trouble than he could imagine. Suddenly, a bright flash of white light and a roaring peal of thunder were preceded by an explosion as a huge object fell from the sky and impacted the ground of the moor no more than a stone’s throw from him. Dirt, mud, water, and debris erupted from the impact site, flying high into the air and then covering the moor for hundreds of feet all around. Skerrill was knocked to the ground instantly and covered in the fallout from the blast. His ears rang and his head spun, but he staggered to his feet in a daze. He stumbled to where the blast had happened only moments before, and in a depression in the ground lay a huge stone glowing orange as if hot. Skerrill passed out. Two more thunderous explosions crashed in the distance.”
A cleric has tirelessly tended to the medical needs of his fellow villagers for decades. There have been occasional cases of madness among his charges over the years, enough to cause rumors, but now there is an outbreak, including people known for years to be quite sane. Can you discover the source of these terrible troubles and return the village to normal life?

An exclusive party at an illustrious antiquities museum. A missing benefactor and host who turns up dead. A missing mummy, the crown jewel of a new exhibit, and a hardboiled detective trying to make sense of it all. And a party of adventurers caught right in the middle! Welcome to the Lucaryen Museum of Antiquities, enjoy your visit. We recommend for your safety not to wander the halls at night; some of our exhibits have a habit of coming alive and attacking the unwary. Not to mention other guests who may have something damming to hide, and a loose set of morals. Don’t worry - I’m sure you’ll be fine! In this pulp thriller mystery one-shot, your players will be thrust into the role of Occult Detectives, investigating the murder of the museum’s namesake and searching the premises by night to uncover clues and the whereabouts of a missing mummy. Inspired by films such as Night at the Museum, The Mummy, and classic ‘Whodunnit’ murder mystery tales, your players are sure to have a killer time! Featuring: 15 pages of content, comprising 4-8 hours of play A full-scale, two story museum for your players to explore Shady NPC suspects and unlikely allies, complete with unique stat blocks Myriad potential encounters and one epic final Boss Fight, with 46 unique creatures from the Monster Manual, Volo’s Guide to Monsters, and Mordenkainen’s Tome of Foes Helpful tips for newer DMs

Part 1 of an Expert-level quest into a hostile wilderness. This adventure takes place in the Known World of the D&D game, as outlined throughout the D&D game rule books and modules. The DM may find it useful to consult the Companion and Masters Sets, as well as most of the X-series of Expert Set modules. D&D Expert Set module X9, The Savage Coast, would be especially helpful, as Tortles of the Purple Sage could easily serve and continue that module's direction and plot like, adding a previously undescribed area (the Great Northway) to the Known World. The DM may also place the areas and events of this adventure within an existing campaign setting, as long as the geographical areas of the campaign match those set forth here. Pgs. 40-62
A plague has struck Waen Fawr, leaving hundreds dead, the city lawless and in crisis. The plague seems to drive those affected to violent, manic behaviour and the city militia have their hands full. Smoke shrouds the city as buildings burn, bandits and looters roam the streets amid the chaos. This adventure comes with tiles to create a city map as the players explore. Tables of rumours and random encounters are provided, as well as detailed location-based encounters. Pgs. 28-48

This adventure works best after going through the original trilogy (Death, Terror, and Madness in Freeport). After exposing the madness and corruption of the previous Sea Lord, a succession crisis is upon Freeport. There are no heirs to the seat of power, leading the Captains' Council to overturn the Law of Succession. But opening up succession plunges the city into chaos as various factions vy for the title. The PCs will need to survive riots and secret plots to make sure the right man (or woman) ends up with the job.

*THIS IS A D&D NEXT/5E PLAYTEST ADVENTURE* Imani, a Turmishan wizard and former adventurer, seeks the aid of heroes to infiltrate Dretchroyaster’s lair and recover the Diamond Staff of Chomylla—the key to powerful magic and wisdom locked away for thousands of years. In addition to his own sagely interest in the lore of lost Uvaeren, Imani recognizes the dangers of such powerful magic falling into evil hands. The dracolich has secured the staff in his lair’s cen- tral chamber, using ancient wards of protection that can be bypassed only by four artifact-idols once belong- ing to a cult of Bhaal. Each group of adventurers enters the dungeon through a different section of the dun- geon—a forgotten temple of Bhaal, a vast underground lake, a troglodyte village, or Dretchroyaster’s vaults. Dretchroyaster’s lair is no simple set of caverns and ancient ruins. It sits atop a source of great power and energy, which the dracolich and his Cult of the Dragon allies hope to use to unlock the secrets of the staff. Only by undertaking a unified assault against Dretchroyas- ter’s lair can the adventurers hope to recover the Diamond Staff and survive the dracolich’s fury. The adventurers must make their way through the lair and recover the Bhaalite idols that will help unlock the Diamond Staff, all the while dealing with the lair’s creatures and avoiding the dracolich as he pur- sues intruders. Entering the Chamber of the Diamond Staff, the heroes must overcome its magical wards and claim the staff before being slain by the dracolich and his servants.