
Inside this full-color, 124-page anthology you’ll find four best-selling Adventurer’s League quests for level 1-10 characters set in the hobgoblin fortress of Glip Dak. Also included are instructions on how to weave these adventures into an ongoing story arc as part of your campaign. Tier 1 (Level 1-4): Glip Dak (CCC_GLIP-01-01) The Kroth Magg hobgoblins run the trade city of Glip Dak in the Troll Hills of Thar. From there they have taken control of the trade routes along the northern Moonsea. A young noble has been captured for refusing to pay their tariffs and his house looks to hire adventurers to rescue him. Beneath Glip Dak (CCC_GLIP-01-02) A series of unusual heists has both the thieves’ guild and city guard scrambling to uncover the culprits before the burglaries destabilize the thriving trade within the city, threatening the budding kingdom the Kroth Magg have fought and died to forge. Citadel of Vlaakith (CCC_GLIP-01-03) The adventurers are tasked with rescuing a group of heroes who vanished in the pearlescent fortress that manifested on the border between the Kroth Magg kingdom and the Varkonin empire in the Steppes of Thar. Tier 2 (Level 5-10): Blue Scales (CCC_GLIP-02-01) A behir has been hired to destroy the herds of aurochs necessary to feed the hobgoblin city of Glip Dak. Patrols and scouts continue to go missing, forcing the hobgoblins to hire mercenaries to track this behir as they recall their troops to the capital to maintain order as food riots break out.

The characters, members of the Clifftop Adventurers’ Guild, have been tasked with acquiring the Chains of Mur’taal, an artifact tied to Thelanis, by their guild handler, Lhara. This artifact is the latest in a series that Provost Nigel Faurious has commissioned the Clifftop guild to retrieve for him. The adventure starts when the characters arrive in Rhukaan Draal via Orien caravan. They’re given a chance to explore a small portion of the city before they head to a local bar to meet their contact provided by Lhara. Accompanied by a local guide, they make their way to the Seawall Mountains, where they’ll have to follow clues and their intuition to find the Valley of the Hero, which conceals the artifact that they’ve been hired to obtain. In order to earn the artifact, characters must first pass three tests laid before them by the Story: The Test of Courage, the Challenge of Wisdom, and the Trial of Honor. Once they finish the tests and collect the artifact, the party heads back toward Rhukaan Draal. But there are Marguul forces in the area, and they don’t intend to let the heroes escape with a priceless piece of their folklore…

A curse is upon the land. In the old barrow long forgotten a forgotten general awaits trying to confront death, and until heroes can guide his way, the land suffers. Grave of the Heartless takes the adventurers to an unusual dungeon bordering the realm of the dead, and here a heart beats. Dare our heroes step into the darkness, where one step too far can lead them to face Death. Grave of the Heartless is a low-level OSR adventure suited for Labyrinth Lord and other oldschool retro clones. The adventure was originally written for the Danish Living Campaign The Hinterlands, and it is for the first time presented in English. The adventure introduces the players to a different tradition of adventures, and it one with a focus on exploration and encountering the unknown. The adventure includes new magical items and new monsters to challenge your players. Grave of the Heartless can be played as a sequel to Tomb of the Dragon's Heart and The Flooded Temple.

In this scenario, the adventurers pass through magical portals into a series of interlinked chambers. The characters are encouraged by a young scholarly mage to voyage into the Sea of Pastures, to explore a mysterious island connected with a number of recent shipwrecks and disappearances. The island is grassy and windblasted, but eventually the characters discover a stone door leading into a subterranean complex. There, they discover 18 rooms linked by secret passages and magical portals. Most of these rooms have been ransacked by a variety of other survivors, human and monstrous. These survivors are likewise trapped within the labyrinth and are either eking out a miserable existence there or else desperately searching for a means of escape. Also within the building are a number of extraplanar creatures, collectively known as gingwatzim, who can shift between various forms: an energy form (glowing ball of light), an inanimate form (usually a magical weapon), and an animate form (an animal or monster). Eventually the characters may find the exit, and are once again deposited on the dreary islands to await rescue. TSR 9110

You are Erystelle of Dorneryll, famed elfin champion and magic-user. After years of adventuring, you have come home to the Emerlas - the hauntingly beautiful elfin woodland at the tip of Canolbarth forest. A place of legends and of peace. The journey has been long, but soon the winding forest track will bring you to Dorneryll, the majestic oak tree home of your childhood. Ahead, you glimpse a plume of smoke curling lazily into the sky. Dorneyll is close, and your mind floods with thoughts of home. Suddenly, your reverie is shattered! The thin plume of smoke is gone, an in its place a column of red flame leaps high among the trees. Dorneryll is under attack! Gripping your lance, you urge your mount into a gallop. Starbow surges forward; your war dogs close on her heels... Blade of Vengeance is an adventure for one player and one dungeon master, featuring a lone elf against the forces of evil. Can you save the Emerlas from destruction? The answer waits inside. TSR 9108

High in the Stonecrown Mountains, a new source of dark magic stirs, wakes, and spreads its wings to shroud the land in shadows. The Warlock of the Stonecrowns, an awnshegh regent who is as evil as he is powerful, is draining other regents' sources of magical power, choking their ability to cast the most powerful form of magic of all - realm magic! If that isn't enough, the Warlock threatens to close the only pass connecting the trade-kingdom of Cariele to the rest of Anuire. An army of orogs and ogres is gathering to the Warlock's banner: Are your heroes equal to the challenge of the twisted magic of the Warlock of the Stonecrowns? This open-ended, "adjustable" BIRTHRIGHT adventure is suitable for use with either mid-level (4-6) or high-level (7-10) player characters. TSR 3110

The search for a missing paladin takes the PCs deep into the heart of a frontier torn apart by cult wars—and face to face with an ancient evil. The paladin Jaryd set out to find and destroy the Hand of Naarash. He was never heard from again. Now the PCs must retrace Jaryn’s steps across the harsh wilderness and determine what has become of the noble warrior. Pgs. 29-59
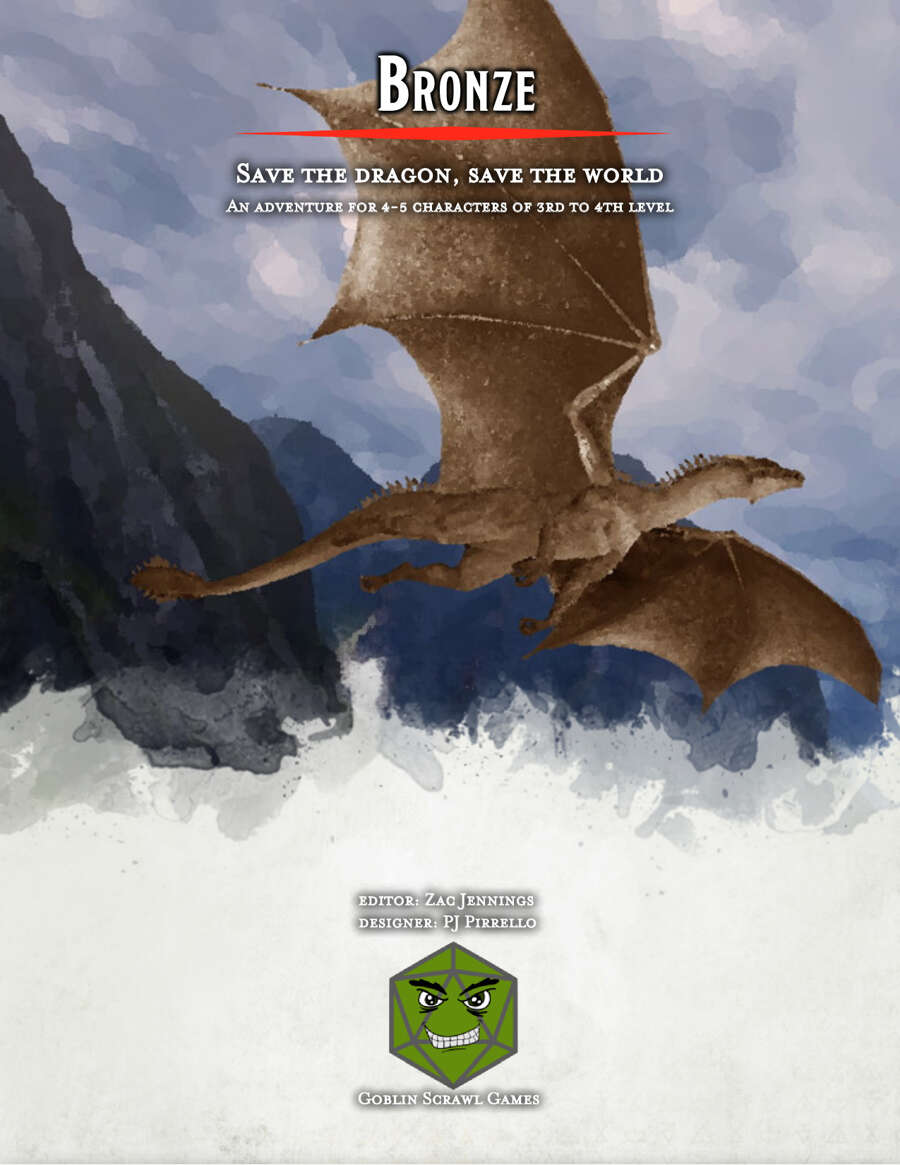
The idyllic town of Evershade is about to get a lot less peaceful. Nestled in a small valley near the border of two kingdoms, Evershade is a small but prosperous town. But ranchers have been finding their livestock slaughtered, with no idea what's behind it. What begins as a simple mission to scare off a predator, turns into a race across hills and mountains to prevent agents of evil from destroying a future force for good. Includes A adventure for 4-5 characters of 3rd to 4th level A regional map of the areas surrounding the town of Evershade Descriptions of the town of Evershade and several of the notable NPCs that live there A map of the dragon's lair on a cliff near the sea Stat blocks for all monsters Unnumbered map suitable for use in your favorite VTT Published by Goblin Scrawl Games

Content in English / Contenido en Español Mini Hex is Hex Crawl that can be played in one session, its ideal to show your players what a hex crawl is about. It may serve simple purposes as finding some rare flowers in the forest, the location of a ritual in the city or the cave with the treasure in the hills. This module contains: 3 scenarios. 18 combat encounters for levels 4, 7 and 11 characters. 30 obstacles encounter of varying difficulty. More than 100 traps variations. Aids for easy setup. Area and battle maps. A couple of interesting mechanics to make your game feel fresh. Mini Hex es Hex Crawl que se puede jugar en una sesión, es ideal para mostrar a tus jugadores de qué se trata un rastreo hexadecimal. Puede tener propósitos simples como encontrar algunas flores raras en el bosque, la ubicación de un ritual en la ciudad o la cueva con el tesoro en las colinas. Este módulo contiene: 3 escenarios. 18 encuentros de combate para personajes de nivel 4, 7 y 11. 30 obstáculos ambientales de diversa dificultad. Más de 100 variaciones de trampas. Ayudas para prepara rápido y fácil una partida. Área y mapas de batalla. Un par de mecánicas interesantes para que tu juego se sienta fresco.

In part one of the Randal Morn Trilogy, "The Sword of the Dales," the legendary leader of Daggerdale, Randal Morn, was captured by unknown assailants as he sought to regain the great weapon for which that adventure was named. A stalwart band of enthusiastic heroes was recruited to ride to his aid, yet all they recovered was the Sword itself and a message: "Seek me in Spiderhaunt Wood." In the second part of the trilogy, "The Secret of Spiderhaunt," those same adventurers found Randal and freed him briefly, yet he was almost as quickly torn from their grasp by an agent of the evil Zhentarim, seeking to end the threat of Randal Morn's return to power. In this final episode, the heroes must follow the kidnapper's trail and rescue Randal Morn again before the Zhentarim finish interrogating him and the axe falls upon his neck. Armed with the Sword of the Dales and aided by a powerful spirit that lives within the weapon, the heroes must march into the heart of Zhent-occupied Dagger Falls, free Randal Morn, and save the city from utter destruction. The job is dangerous - perhaps more than the heroes can handle - yet those who would live in songs and legends cannot concern themselves with living to a ripe old age! This is the final part of a trilogy of modules that began with "The Sword of the Dales" and "The Secret of Spiderhaunt." TSR 9488

The Golden Dragon, conceived as a skyfaring warship, now serves as a symbol of peace among the Five Nations. Even before the luxurious airship embarks on its maiden voyage, nefarious pirates, thieves, and saboteurs conspire to defame, steal, or destroy it. Resourceful adventurers are needed to protect the ship and its passengers, but can they uncover the secret enemy lurking in their midst? "Voyage of The Golden Dragon" is a stand-alone adventure for the Dungeons & Dragons game that immerses your characters in the Eberron campaign setting. Designed to challenge 7th-level characters, it takes heroes on a perilous journey from Sharn to Stormreach and also serves as a launching pad for adventures the world over.

Trapped in the dungeons of the Slave Lords! The hardy adventurers must find a way out, with only their wits and courage to help them. But can they do it before everything is destroyed by the dreaded Earth Dragon? This module contains a challenging scenario for experienced players, the tournament scoring system, and nine fully-equipped playtested characters. Also included are large-scale referee maps, playing aids, notes, and background information. A4 is a complete adventure in itself, but can also be used in conjunction with A1 (SLAVE PITS OF THE UNDERCITY), A2 (SECRET OF THE SLAVERS' STOCKADE), and A3 (ASSAULT ON THE AERIE OF THE SLAVE LORDS). TSR 9042

The Cult & the Tribe Lizards and Goblins and Demons, Oh My! DUNGEON MODULE T1: THE CULT & THE TRIBE Goblins weilding magical blue fire are attacking the peaceful lizardfolk in the swamps near Timbertown. They've come to the humans for help, and Baron Ferrand needs heroes to head into the swamp and find out what's happening. As if that wasn't enough, demons are roaming the countryside, summoned by cultists of the Fraternity of Tharos, one of whom is secretly an important person in the town. Can you help the lizardfolk and keep the town safe?

Are you ready for some HACK 'N' SLASH action? Do you yearn to unveil the hidden mysteries of the DWARVES? Are you thirsty for some UNEXPECTED encounters? The long lost Dwarven Kindgom of Gleodemar holds a relic of the past, Svarogs's Anvil, a magical artifact that can boost weapon production. The Heroes are sent to reclaim it, but the ancient fort is not empty and the new denizens have settled for good and do not seem keen on sharing any treasures. Will the Heroes manage to overtake them in a direct (and bloody) confrontation, or will the try to slip through the shadows to reach their goal? Maybe they will be captured and the "cavalry" will have to save them? In this adventure anything goes and it takes only one mistake to unravel the Heroes' careful plans and make them prisoners of the Keep. In this slightly challenging 5e hack 'n' slash adventure for 4th level PCs you will find: - a detailed story behind the Dwarven Kingdom of Gleodemar - a powerful dwarven artifact - a back-up NPC party, in case the heroes require a "deus ex machina" intervention - an optional ethical dilemma, to spice things up - both DM and player-safe maps - 3 boss monsters that can be used as future antagonists - non-stop action and suspense until the last minute of this 3-act mad rash and if all of that still does not sound fun, there's ALSO a race against time before the curtain falls. Download away! (and don't forget to share your feedback, we'd love to hear it!)

Some games aren't played for fun. A friendly little gambling game - with the most bizarre players and rules! Pgs. 24-32

A Four to Six Hour Adventure for 11th-16th Level Characters in Dungeons and Dragons 5E The Adult Green Dragon Valturnax has attacked the nearby village of Hartsvale, threatening to destroy them completely if they do not submit to his rule by nightfall. To save the town, adventurers must ascend the mountain by climbing through the caves housing the dragon’s minions and face him in his lair – and they need to do so before the sun sets. This adventure is meant to be quite challenging. Enemies know the adventurers are coming and have had time to prepare, and they do so intelligently. This adventure draws some inspiration from Tucker's kobolds. As an added bonus, this adventure is available completely for free.

Seer has learned of an attempt to intimidate Gralm, an ettin, and his followers into joining Bad Fruul’s army. Hsing comes forth to communicate that she wants you to see if you can find some way to either insure Gralm remains neutral, or to encourage the creature to challenge Bad Fruul to single combat in the hopes that he might wrest control of the hill giant’s forces and turn them back from Parnast.
The hobgoblins were not the only forces that remained after Kalarel was slain. Before the Keep’s portal was fully sealed, evil spirits from the Shadowfell escaped into the Nentir Vale. They were drawn to Kalarel’s own dark soul, which remained in the mortal world thanks to a spirit-orb the priest had created to prevent him from moving on after death. The presence of these malignant spirits caught the attention of a frost witch called the Rime Mistress and her followers—unaligned territorial beasts—who rose up to defend their domain. The Rime Mistress knows that the spirits present a greater threat than the hobgoblins do, so she and Prang, the Iron Gauntlet leader, have agreed to an uneasy truce. Thus, the hobgoblins and the creatures of the Cairngorm Peaks are united in their struggle against Kalarel’s spirit army.

In the ruins of Kiris Dahn, a human town, lies a 'Slaying Stone'. The stone is said to have the power to kill any foe, though the stone is consumed in the process. The party will venture into the ruins which are the home to an assortment of goblins, hobgoblins, and kobolds. However, a mercenary band of orcs have been hired (by a benefactor who is not met in the module) to search the ruins for the Stone, and the party must find it first. The party must use caution and stealth to move through the town without alerting the denizens or the mercenaries while searching strategic points around the abandoned town to find the Stone. Eventually, the party should find the stone under the protection of an indifferent Brass Dragon.

The beginning adventure to the Dragonlance, War of the Lance series of adventures, upon which the Dragonlance novels are based. The companions meet in the Inn of the Last Home to discover a barbarian couple with a mysterious staff. The PCs journey to discover the staff's history which leads them to a ruined temple to the Forgotten Gods. Includes a full map of Xak Tsaroth and overland maps, some color. Art by Jeff Easley. TSR 9130